Tuesday Tutorial: Fat Quarter Baby Dress & Quilt
If you’re looking for a special gift to sew for a new baby you may like this tutorial for a simple baby quilt and dress made from fat quarters!
I love Fat Quarters. I discovered them a couple of years ago. I think I love them for the same reason that I love pattern paper… getting a little bit of lots of different prints in one package just makes me happy 🙂
I have been buying more fat quarters than yardage lately, which is economical yet sometimes doesn’t give me enough fabric to complete a project so I have to get a bit “creative” with the use of them. Which by the way, has lead to some of my favorite projects. (and why most of my sewing patterns can be made using fat quarters).

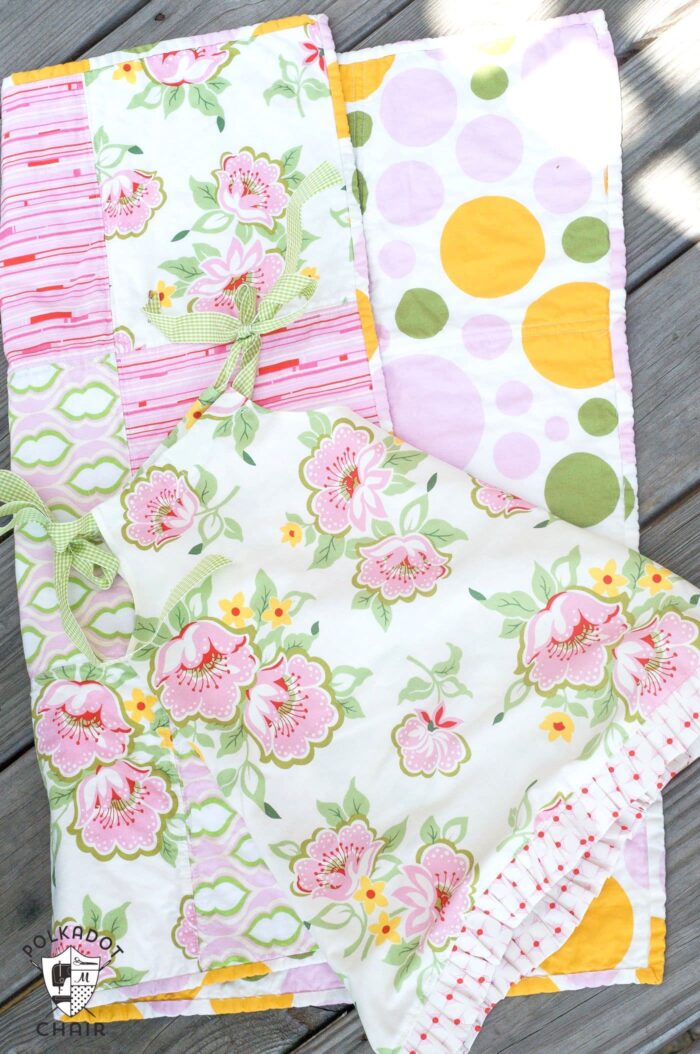
This little baby gift is made from 6 fat quarters and 1 yard of fabric (for the backing). It’s a little pillowcase dress & stroller size quilt (it’s small about 30×30 finished). There are enough scraps left from the fat quarters that you could decorate a couple of burp cloths to match if you like, or maybe make a little matching hair bow?
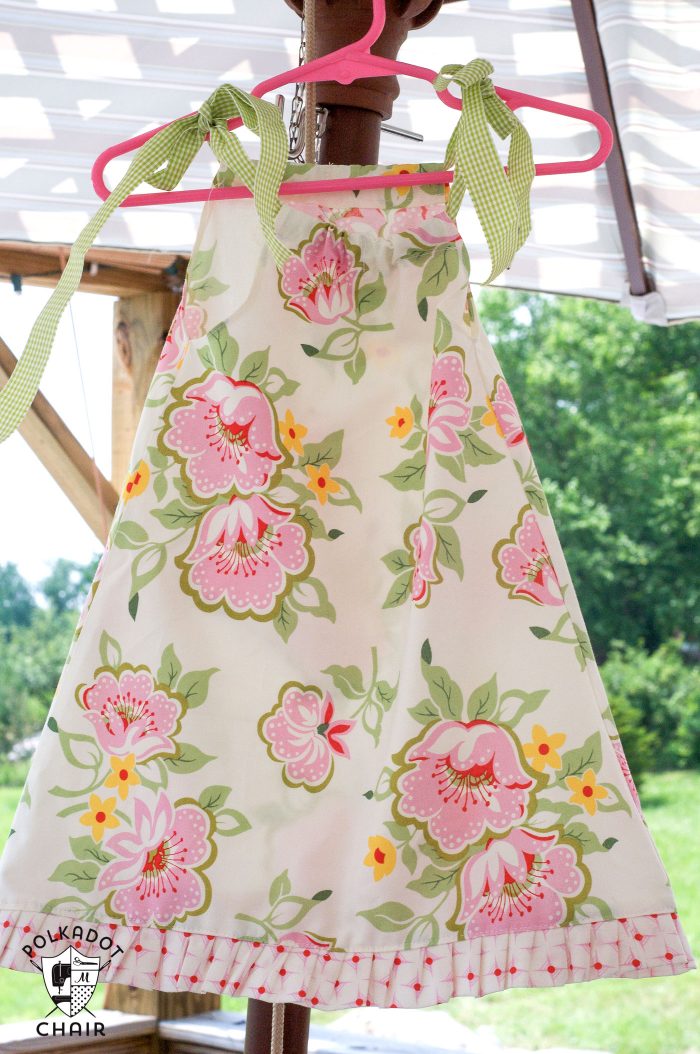
I wanted to make a baby pillowcase dress, I’ve seen them around a lot and figured I could just “google it” and a bunch of tutorials would show up… … but after googling I could not find one… so I thought I’d just give it a try based on an dress made from an ACTUAL pillowcase that I did for my daughter. (she is 9… this one is for a baby though).
My guess is this is sized about 6 months. (based on garment sizing charts, I don’t know a 6 month old to try it on).
I really like the way it came out… but I want to do a few things differently next time.. so I think I’ll do a little series here this summer on pillowcase dresses… this one being the first. If you have one on your blog or know of a good link, send it too me, I’ll do a “summary” post at the end and link up everyone’s dress along with the ones that I made!! (I’m sure there are a bunch of pillowcase dress tutorials in cyberspace, I just didn’t find them).
Ok to start you need:
2 fat quarters for the dress front & back
1 fat quarter for the ruffle
2 yards of ribbon

Cut each fat quarter to 18″x18″. Find the center of the fat quarter and mark it. Measure out 4 ” from each side of the center and place another mark. Using a straight edge draw a line from the bottom corner of each side to the marks you made. Cut off the fabric. You will have a trapezoid shape that is 18″ at the bottom and 8″ at the top. Do this for both the front and the back pieces.

Place an embroidery hoop over the top corner of the dress. You will be measuring in about 1″ and down about 5″. Trace the curve. Cut. Do this for both the front and the back pieces.

Cut 4 strips each 3″ wide x 22″ long from another fat quarter. Fold in half lengthwise and gather with either a gathering foot on your machine or by running a basting stitch along the entire raw edge.
Sew the dress front and back together at side seams. Serge or zigzag the seam. Press open.
Pin the ruffle to the bottom of the dress with raw edges together. Stitch to attach.

Press seam towards dress, and top stitch right above ruffle.

Turn under under arm seams 1/8″, turn under again 1/4″. Stitch to hem. Turn under top of dress 1/4″ and stitch. Press.

Turn under top edge of dress another 1″ and press. Stitch in place to make a casing for your ribbon.

Feed ribbon through the front and back pieces. Since ribbon poses a chocking hazard for babies, stitch through dress and ribbon in the center of the dress front and back. This will make it so the baby can’t pull the ribbon off the dress and choke on it. (although since this dress has a tie around the neck, I would not lay a baby down while wearing it).
To make the fat quarter stroller quilt you will need:
3 Fat Quarters
1 yard of fabric for binding & backing
Batting
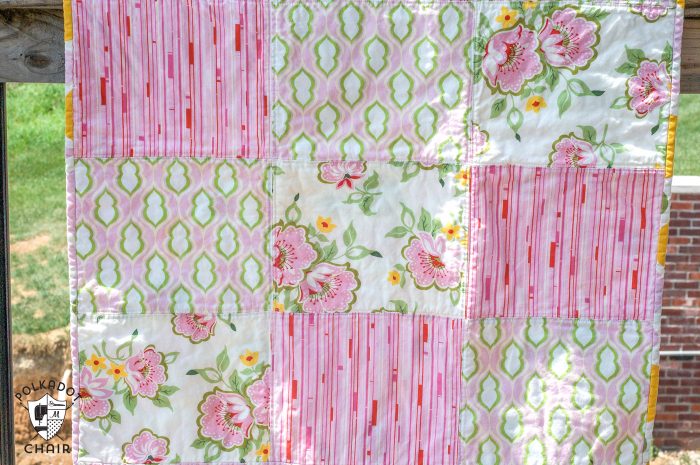
Originally I wanted to make the blocks each 9″x 11″ (a fat quarter cut in 4 pieces) however I realized that some of them were not a true 18″x22″ and the selvage edges were getting in the way. So I ended up cutting them each 8″x10″. You will get 4 blocks from each fat quarter.
Cut your 1 yard piece to 32″ x 34″. Use the extra from the long (selvage) side as your binding. Cut it to 2″ long, you will need 130″ total.
To make the 1st row, sew 3 blocks together along the 8″ sides, in the order Fabric A, Fabric B, Fabric C
Sew 2nd row of 3 blocks togther in the order, B, C, A
the 3rd row C, A, B
the 4th row A, B, C
Press seams to one side, press the seams on the odd rows to the right and the even rows to the left.
If you want the quilt to be bigger just use more fat quarters and keep repeating the same pattern.
Sew rows 1, 2, 3 & 4 together. Press seams.

Make your quilt “sandwich” and quilt.
I quilted mine with a walking foot. I stitched 1/4″ on each side of each seam. (tried to show a close up of it here).
Bind as desired.
Now to go make that matching baby hair bow…
linking up
