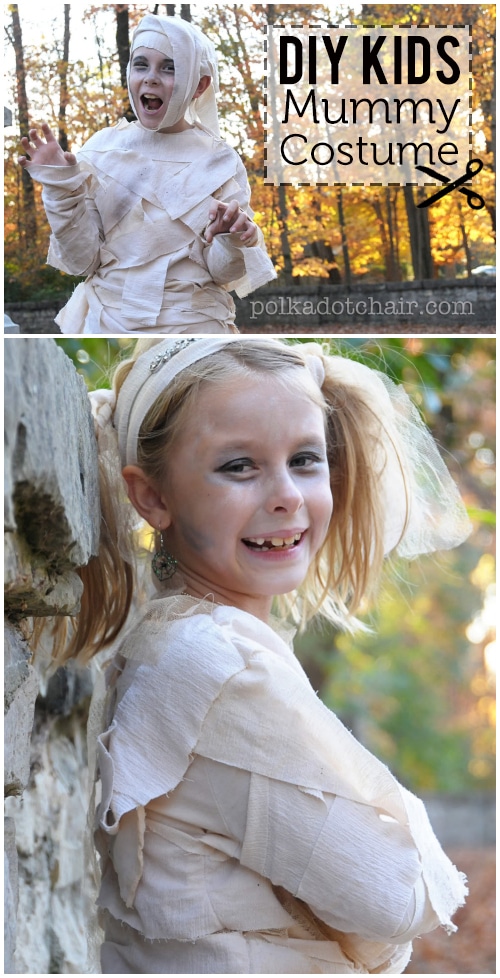
How to Make a Kids Mummy Costume

Are you looking for cute Halloween Costumes for kids that you can make yourself? Then you may love this tutorial that will teach you how to make a kid mummy costume. It’s a unique Halloween costume for either boys or girls! It’s so easy to make; you can even adapt it to a no-sew costume if you like. If you like this project, you may also like this Cape Sewing Tutorial.
Ever since I had twins, I’ve been trying to get them to “match” for Halloween! I love making family-matching Halloween Costumes. We’ve done Pebbles & BamBam, Winnie the Pooh & Piglet, the Incredible’s, Prince & Princess, and 50’s costumes.
The older they get, the harder it gets to “convince” them to match. I love the “classics” when it comes to Halloween costumes, mummies, vampires, ghosts, etc.
I think you can get some great inspiration from those types of easy costumes. Then, use a little creativity to add a twist to make the costume more personal. That’s what we did; we took the idea for a simple mummy costume and turned it into the best mummy costume!
How to Make a Mummy Costume

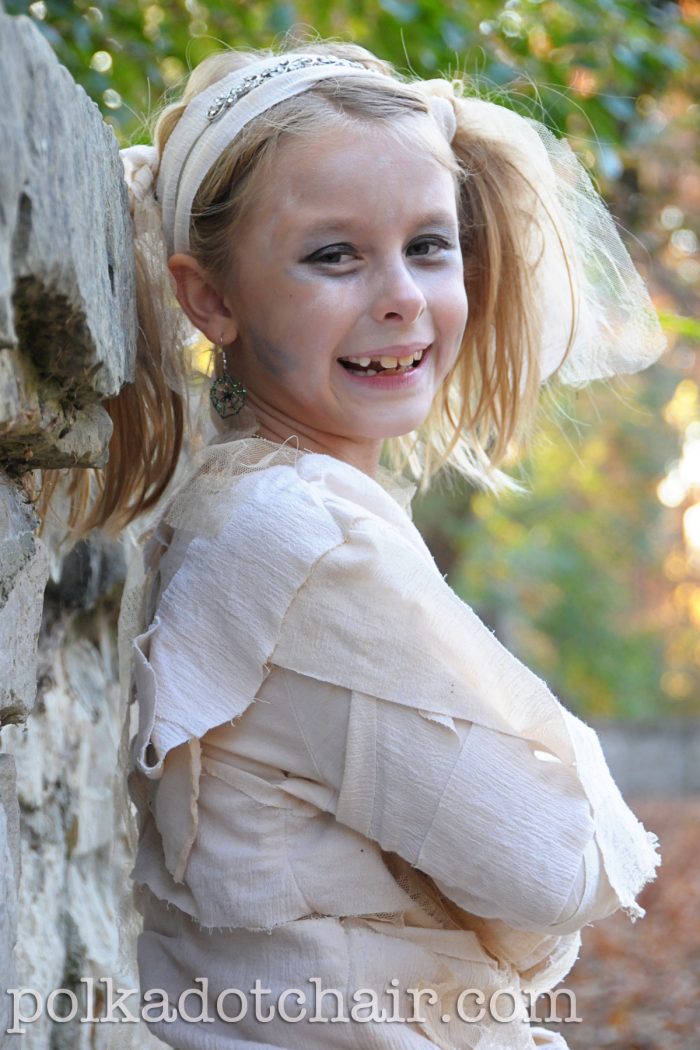
Last year, my son wanted to be a Mummy, and after some “coaxing,” my daughter and I agreed that there WAS such a thing as a Mummy Princess (note the tiara on her head).
It turns out the mummy princess costume is the cutest DIY mummy costume. Especially with the added sparkly tiara!
Thus, the DIY Halloween Mummy Costumes, a Prince & a Princess costumes were born.
I’ve adapted these to be boy mummy costumes and girl mummy costumes, but obviously, you can make them however you like based on your kid’s wishes!
Supplies for DIY Kids Mummy Costume
- White Long Sleeved T-Shirts
- Gray sweatpants – turn them inside out and use the lining – it’s white (if you can find white sweatpants, get those, but I could not find white)
- Tea for dyeing
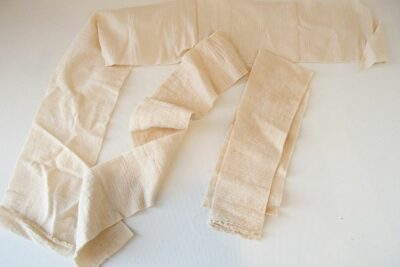
- White Cotton Fabric about one yd per costume for the mummy wrappings (not including skirt- you need 1/2 yd for that). I used a lightweight stretch cotton fabric from Joann’s fabric stores that had a slight crinkle texture. I love the textured cotton since when it’s dyed it looks like gauze bandages. You could also try a simple white rib knit fabric. Don’t bother with cheesecloth- it’s too thin and hard to work with. You could use Muslin- don’t use any polyester fabrics (they won’t hold the dye).
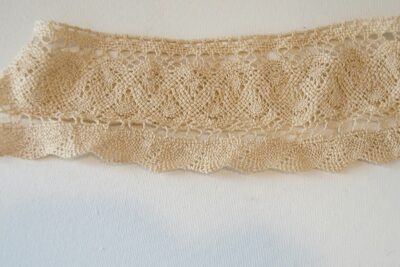
- Cotton Lace
- Off-White Tulle – you can make a headdress as well or ponytail ties with this as well.
- Elastic
- Needle & Thread
- Sewing Machine (if you are making the skirt. For the costume with pants, you do not need a sewing machine; you can do it all by hand and even use hot glue if you do not want to sew at all).
Mummy Costume DIY Tutorial

DIY Mummy Costume for Kids
supplies
- 2-3 Yards Cotton Lace For girl's costume, choose a variety of laces for more interest.
- 2-3 Yards Cotton Gauze Fabric Make sure it's cotton and can be dyed. I purchased a cotton knit fabric that looked like it was wrinkled up at my local big box sewing store. You want something with texture that won't fray.
- 1 Yard Tulle For Skirt
- 1 Knit T-Shirt 1 for each costume
- 1 Pair Sweatpants White, or turn a gray pair inside out
- 1 Yard 1" wide Elastic For Skirt
- 1 Spool Heavy Duty Thread
- 1 Lrg Package Black Tea for dyeing. This is an entire package of tea, not one tea bag.
Instructions
Dye the Fabric
- The first thing you need to do is Tea Dye everything that is white. Don’t bother dyeing tulle; the dye will not stick to it. Dye all of your t-shirts, sweatpants, fabric and lace.

- To do this dump a whole box of tea bags into a plastic tub with hot water. Dunk all of your pieces and leave to sit for several hours. Then rinse with cold water and line dry.
How to Make the Mummy Shirts
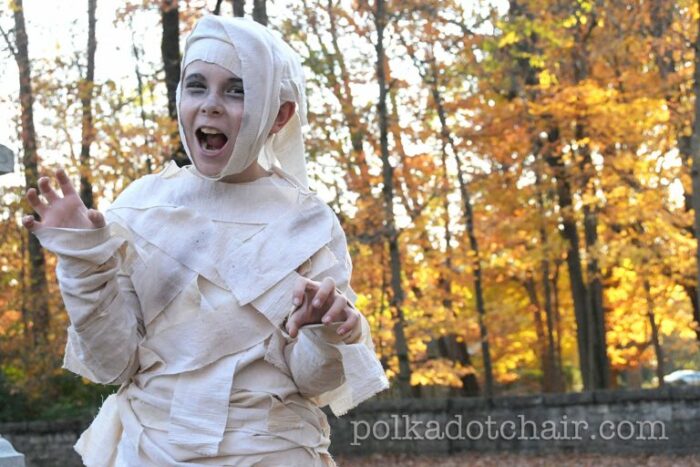
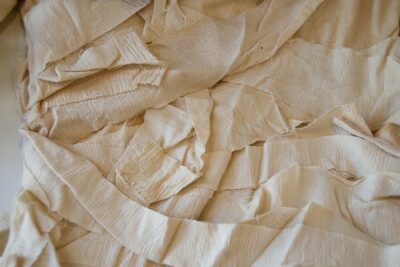
- After your fabric has dried, start cutting up your yardage into strips. Vary your strips from 2″ – 4″. Just RANDOM widths, don’t think about it too much just chop it up. These will be the mummy bandages.
- Lay the strips out on your store-bought shirt.
- Start laying out your strips of fabric on top of your t-shirt. Again in just random crazy patterns. Lay one strip at a time and pin it in place.
- Make sure to wrap some of the strips around from the front of the shirt to the back. The crazier and sloppier it looks the better. It’s a Mummy after all!
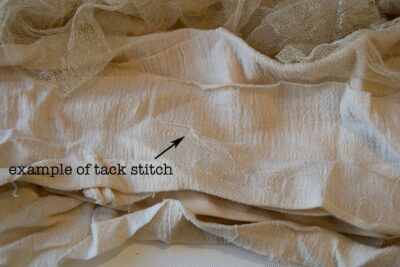
- Stitch down the pieces.
- To do this, use the cream thread and a tack stitch- add a tack stitch everywhere you have a pin. You can also use a safety pin for this step. but I don't recommend it since you will end up with a lot of safety pins on the inside of your costume.
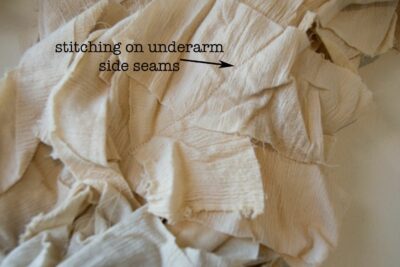
- For extra reinforcement- Stitch with your machine ON TOP of the strips/t-shirt. Making sure you are catching all the layers (this will keep the strips from falling down when the kids walk around).
- If you don’t have a sewing machine, run a line of close together hand stitches up along the side seams of the shirts.
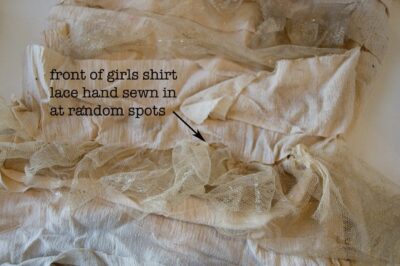
- Optional: For the girls’ mummy t-shirt- gather up some lace or tulle and hand stitch it into the t-shirt in a few spots.

How to Make Mummy Pants
- Using the gray sweatpants turned inside out (so that the white is showing if you found white sweatpants you don’t need to do that) you are going to do almost the same thing as you did to the shirt, with a couple of exceptions.
- First- if there is elastic in the pants cuff, cut it out.
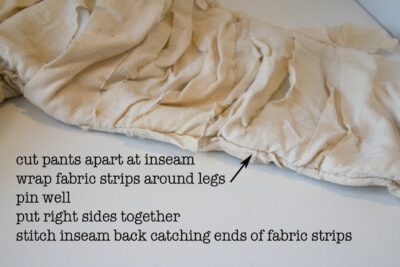
- Next- cut the inseam of the pants, so they will open up.
- Now start laying down the strips of fabric- at the legs start at the cut seam (the inseam) and wrap it around front to back and end in the inseam- pin it place.
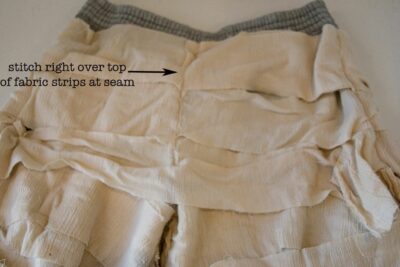
- For the top of the pants- just lay the strips over the pants- Then you are going to stitch right on top of the pants at the top- in the front and in the back.
- After all of the strips are laid out on the pants- sew the inseam closed. You’ll have the right sides (in this case the right side is the side with the strips on it) together. This will catch the ends of the strips into the seam.
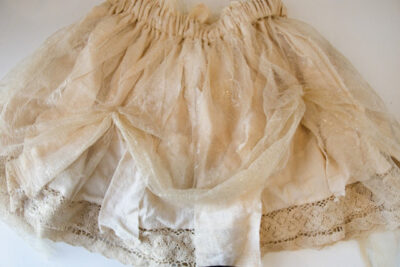
To Make a Mummy Skirt
- For the skirt, you’ll need a basic skirt tutorial to start. You can use this one of mine (to find the skirt tutorial type (simple summer skirt) into the search box on this blog.
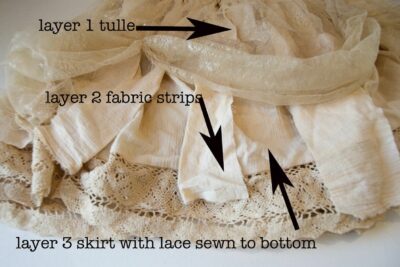
- You will have 3 layers of fabric on your skirt.
- The top (layer 1) will be Tulle.
- Layer 2 will be strips of fabric (that you cut in step 1). These should be smaller strips to keep the skirt short.
- Layer 3 will be the skirt (made from the same fabric that you cut the strips from).
- Make a Fabric “Sandwich” for your Skirt.
- Just make your skirt “sandwich” Stitch all the layers together, fold over the top about 1″ and make a casing then insert elastic cut to the right size.
- I hand stitched some “pickups” into the tulle skirt, just so you could see the underneath.
Notes
A few of you asked about the location where we took our photos:
In my Sister-in-Law’s backyard is a beautiful park that the residents in the area like to frequent. There are stone walls that were built during the 1800s, old iron gates & cobblestone walkways. It’s beautiful.
For the last few years, we have gone trick or treating in her neighborhood- it’s fun and old and gives you that very old-fashioned, spooky, but fun feel that you want on Halloween day. Last year, my niece snapped these photos of my kids trick or treating. She’s an excellent photographer, and I could not be happier with how the photos turned out.
More DIY Halloween Costume Tutorials
No-Sew Alice in Wonderland Costume DIY
How to make a Harry Potter Quidditch Costume
DIY Ariel Mermaid Halloween Costume Tutorial
Easy Skeleton Costume for Teens
Here are a few More Creative Kid’s Costume Ideas from some of my Favorite Bloggers:
DIY Dice Costume – Sugar Bee Crafts
DIY Tutu and Cupcake Costume – Sew What Alicia
Ninja Turtle Costume – The Scrap Shoppe
Sharkboy and Lavagirl – Houseful of Handmade
Golden Snitch – Suburban Wife
DIY Bee Costume – Cutesy Crafts
Maui Costume – See Lindsay