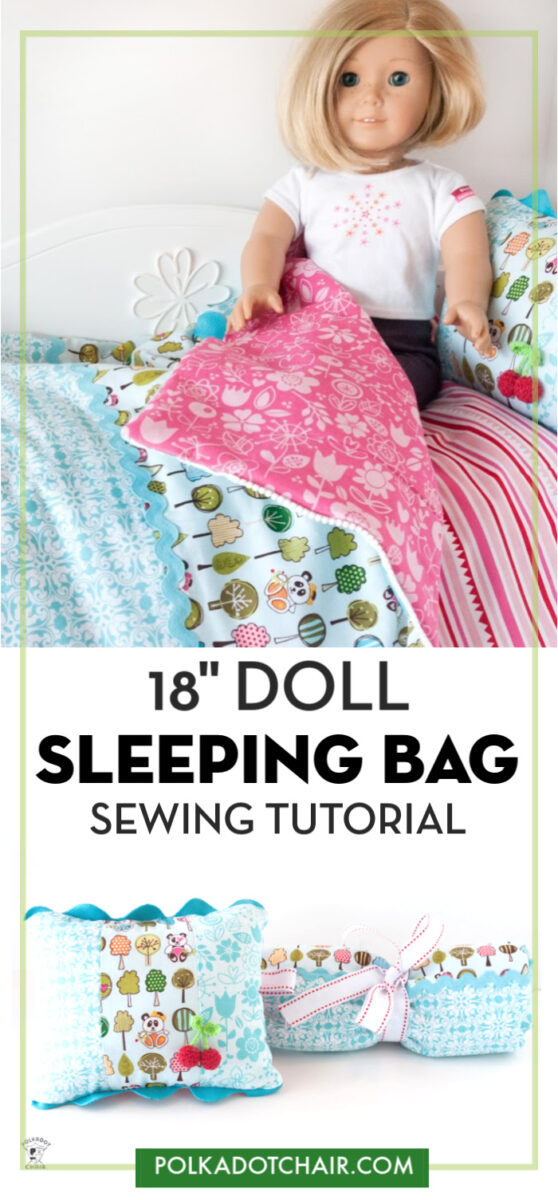
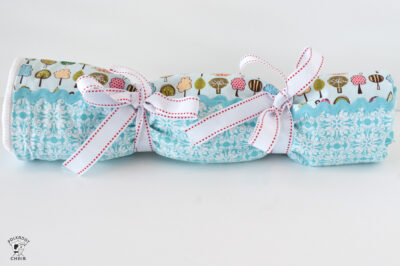
Step By Step Guide: Sewing A 18″ Doll Sleeping Bag With Pattern Included

Create a cozy and adorable sleeping bag for your child’s 18 dolls with this easy-to-follow sewing pattern. Perfect for sleepovers and imaginative playtime!
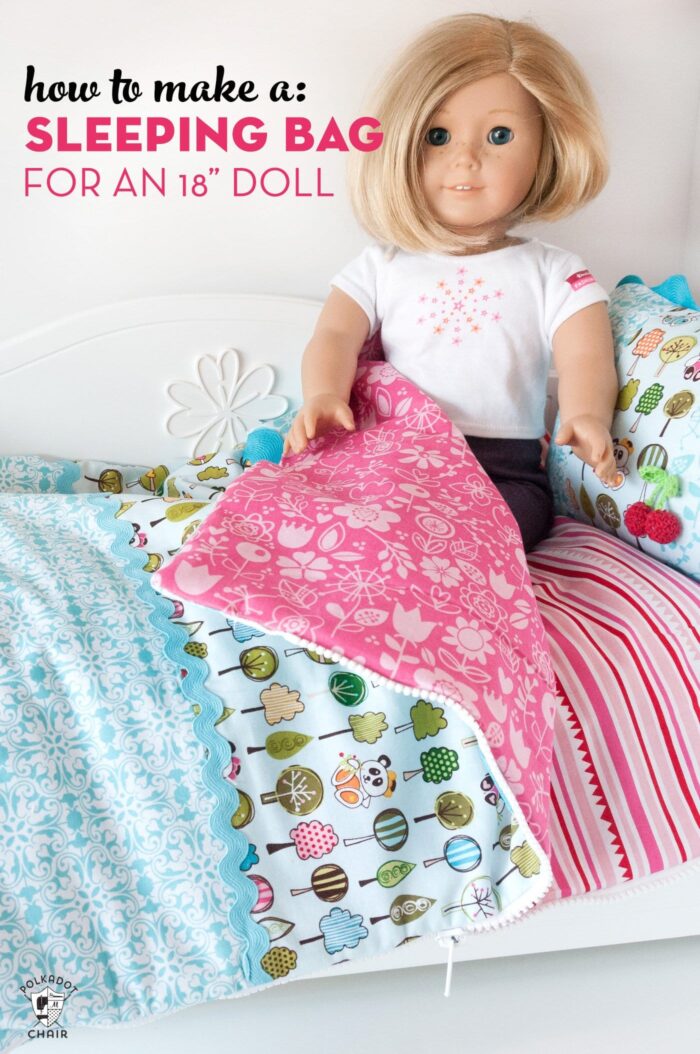
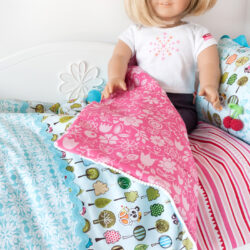
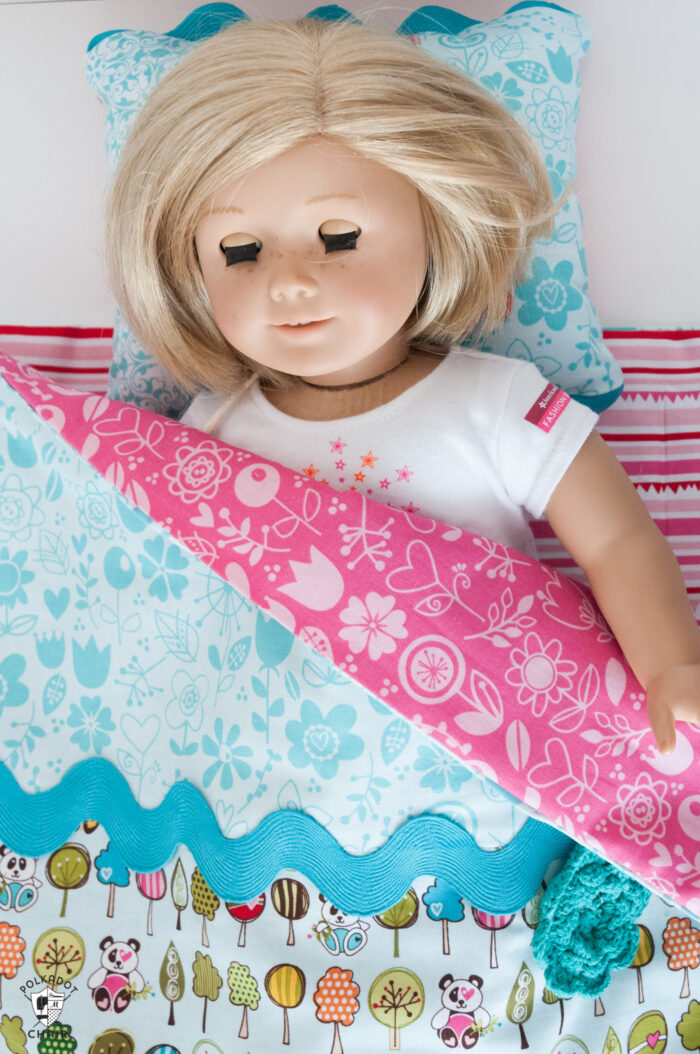
Today, I’m going to show you how to make this fun and easy sleeping bag for an American Girl doll (or any other 18″ doll)! Just a note: this doll sleeping bag sewing pattern has a zipper in it!! But do NOT be afraid!! Zippers are NOT SCARY! Just go slow, and you will be fine.
My girls loved playing with American Girl Dolls when they were younger. They had a few different dolls and enjoyed dressing them up and taking them with them on adventures. They loved reading the books that went along with the dolls just as much as the dolls themselves, which made me a fan.
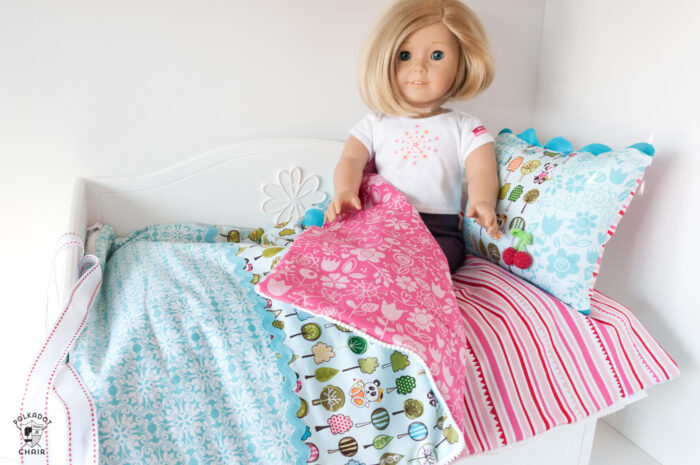
This project is so cute and would make the perfect Christmas or Birthday gift! They would be so cute to take to a sleepover. We used polyester batting to make the bag feel like real sleeping bags!
I’m excited to share a fun project from the archives with you. This sewing tutorial for a sleeping bag sized for an 18″ doll dates back to 2012, if you can believe that. It’s been cleaned up, improved, and is “all-around” more user-friendly! Enjoy!
Sewing Pattern for a Sleeping Bag for an 18″ Doll
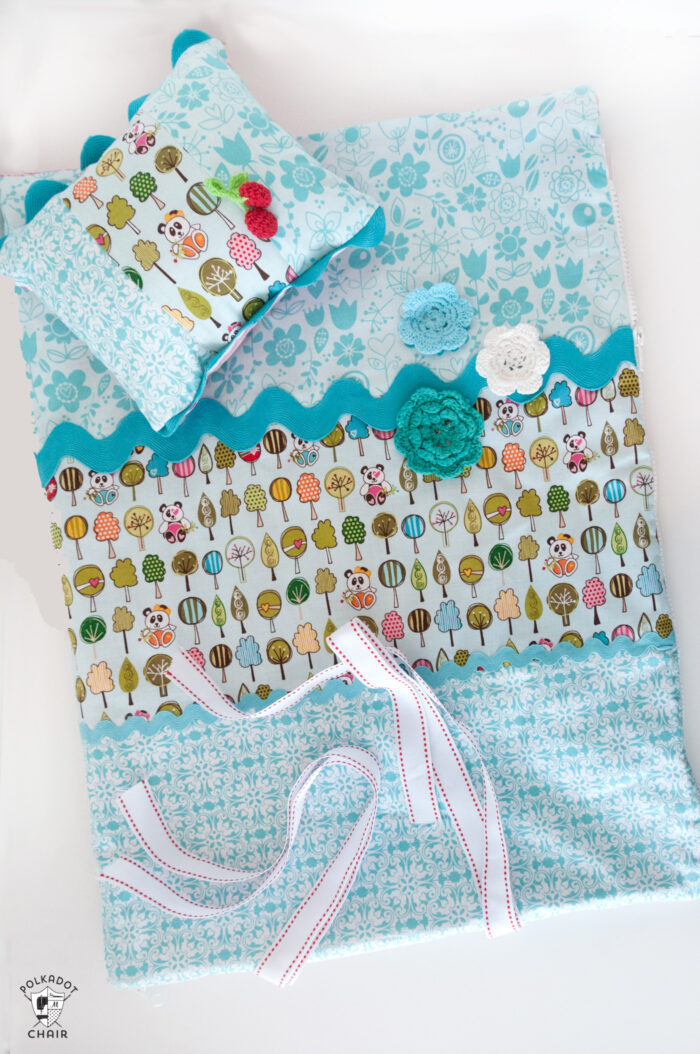
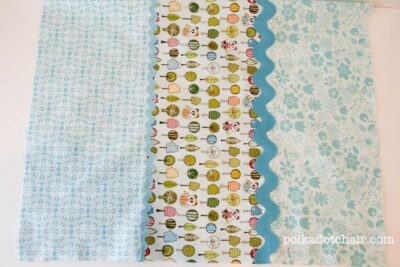
Here’s what you need to make this doll sleeping bag tutorial: All fabric shown is from the Sunny Happy Skies Fabric Line by Riley Blake. This line is now a few years old, and I do not believe it is still for sale.
Supplies and Cutting Directions for the Sleeping Bag and Matching Pillow
- 3 pieces of fabric 8″ x 36″ for the outside of the sleeping bag.
- 2 pieces of fabric 18.5″ x 23″ for the bag lining.
- 36″ separating zipper- you could use a parka zipper- the zipper MUST separate; it’s very important .
- Quilt Batting- I recommend something fluffy (you can use 2 layers if you want to make the inside extra fluffy). You can also use cotton batting, but it will be more quilt-like and less sleeping bag-like.
- 1 yd jumbo Ric Rack.
- 1 yd medium Ric Rack.
- 2 pieces of ribbon 36″ each.
- If desired, embellishments for the sleeping bag, I used crocheted flowers.
- Thread.
- Supplies For the pillow:
- 3 strips of fabric 3.5″ x 8″ (for pillow front)
- 1 piece of fabric 8″ x 9″ (for pillow back)
- 2 pieces jumbo rick rack cut to 9″ wide stuffing
Note: as this project features ribbon, it is not intended for small children.
Instructions
18″ Doll Sleeping Bag Pattern
Equipment
supplies
- 3 pieces of fabric 8″ x 36″ for the outside of the sleeping bag
- 2 pieces of fabric 18.5″ x 23″ for the bag lining
- 1 zipper 36" separating zipper- you could use a parka zipper- the zipper MUST separate; it's very important
- 1 piece Quilt Batting- I recommend something fluffy you can use 2 layers if you want to make the inside extra fluffy. You can also use cotton batting, but it will be more quilt-like and less sleeping bag-like.
- 1 yd jumbo Ric Rack
- 1 yd medium Ric Rack
- 2 pieces of ribbon 36″ each
Supplies For the pillow:
- 3 strips Fabric 3.5" x 8" for pillow front
- 1 piece Fabric 8" x 9" for pillow back
- 2 pieces Jumbo rick rack cut to 9" wide
- 1 package Polyester batting
Instructions
- All seams are 1/4″
Step One: Create the Sleeping Bag Outside
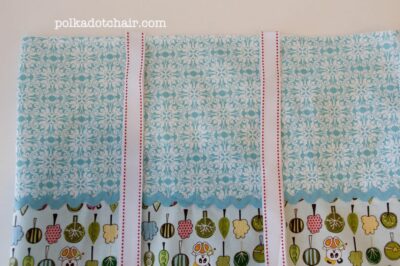
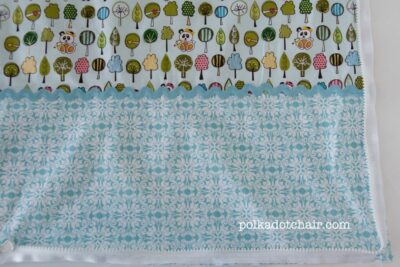
- Stitch the 3, 3″ x 36″ strips of fabric together along the 36″ sides. Press seams either open or to one side. It does not matter which way you press.
- If desired, apply jumbo and medium rick rack to the sleeping bag front over the top of the seams between the strips. You can stitch down the center of the ric rack or iron it on using fusible seam tape. Since this project may take a lot of wear and tear, I recommend stitching it in place. The ric rack is optional. Add it only if you like it.

Step Two: Add the Ribbon Ties to the Sleeping Bag
- Fold the two 36" pieces of ribbon in half lengthwise and stitch to the bottom of the sleeping bag on what will be the back. Think of the sleeping bag as a book; it will open, one side will be the front and the other the back. When folded up and zipped the sleeping bag will be approx 18" x 23".Finish all raw edges of the ribbon with Fray check.

- Stitch the first piece of ribbon 6″ in from the outside edge of the sleeping bag. Stitch the 2nd piece of ribbon 6″ away from the first piece.
Step Three: Add the Zipper
- Separate your zipper- Mark the wrong side of the zipper with a marking pen (sometimes, it’s easy to mix up the right and wrong sides of the zipper).

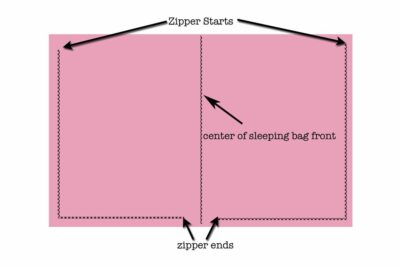
- Pin one side of the zipper to one half of the sleeping bag- starting 1″ in from the center bottom of the bag and wrapping around to the top of the sleeping bag.
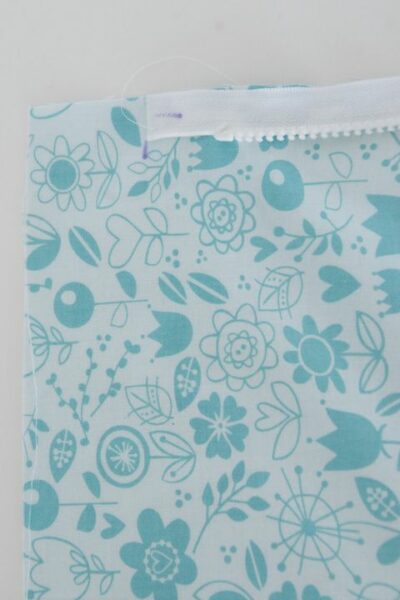
- You will pin the zipper upside down (so that the right side of the zipper faces the right side of the fabric) with the teeth of the zipper facing IN. (see photo)
- To get the zipper to go around the corner- clip a “V” into the zipper tape where it meets the corner of the sleeping bag. The zipper will reach within 1″-2″ of the top of the sleeping bag. It does not need to go all the way to the top.
- Now, pin the other part of the zipper to the other half of the sleeping bag so that the zippers mirror each other.
- Using your zipper foot, stitch the zipper to the sleeping bag’s front. It is helpful to “move” the zipper pull as you sew so it does not get in the way of your zipper foot.
- TIP: TEST your zipper before you proceed. Ensure you have it installed correctly before moving on to the next step.
Step Four: Create the Bag Lining
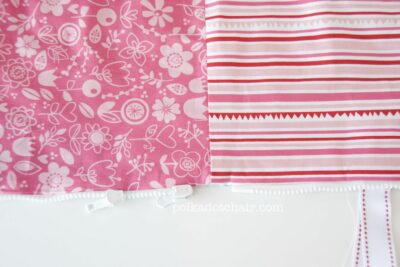
- Sew the two 18.5″ x 23″ pieces of fabric together along the 23″ seams to form the bag lining. Press the seam open.
Step Five: Add the Batting
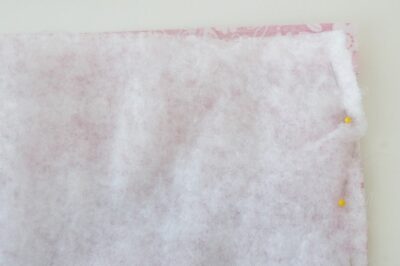
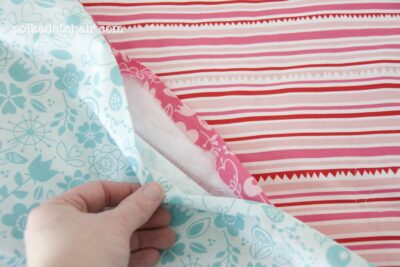
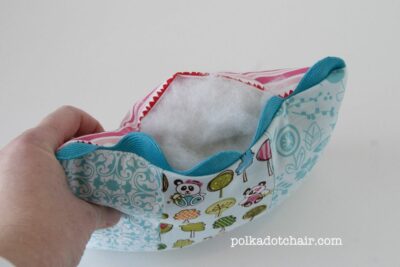
- Place the sewn bag lining piece right sides together with bag’s outside piece. Cut a piece of batting to the size of your bag. Place this on the wrong side of the bag lining piece.
- You will have a "sandwich" with batting at the top, then bag lining and bag front. Remember bag lining and bag front are right sides together.
Step Six: Sew Sleeping Bag Front & Lining Pieces Together
- Start stitching at one top corner of the sleeping bag, and stitch all the way around, leaving a 3-4″ opening on the top of the bag to turn it right side out. Make sure you don’t catch your ribbon pieces in the seams.
- Stitch along the line you JUST made to attach your zipper- this will ensure the zipper is placed correctly in the bag.
- Note: you are still sewing with your zipper foot. Clip corners and turn right side out.
- It should look like this, with an opening like this at the top:
- And the base of the zipper should look like this:
- Hand stitch opening in the top of the sleeping bag closed.
- If desired: To finish the sleeping bag, hand stitch on crocheted flowers to the front.
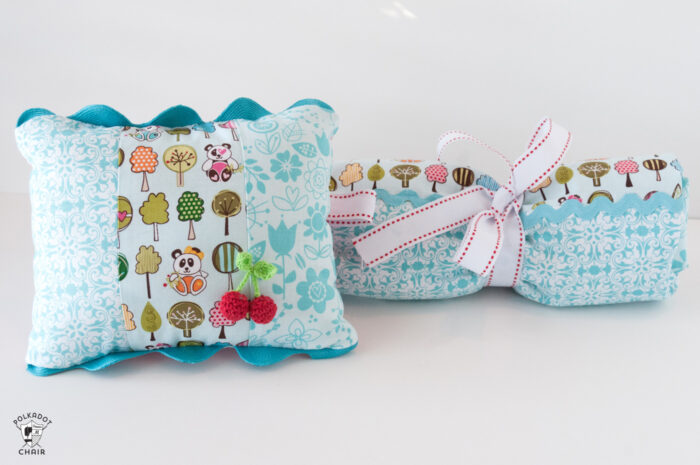
How to Make a Matching Pillow
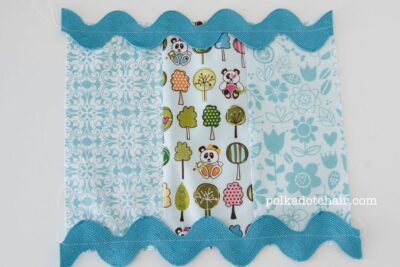
- To make the pillow, stitch the three 3.5″x 8″ pieces of fabric together along the 8″ sides. Press seams open
- Stitch 2 pieces of rick rack, each 9″ long, to the top and bottom of the pillow piece. Stitch right down the center of the rick rack.
- >Place right sides together and stitch 8″ x 9″ piece of fabric to pillow front. Leave a 2″ opening to turn the pillow right side out. Stuff pillow and hand stitch opening closed.
More Doll Sewing Patterns That You May Like:
Wonderland Mini Quilt Pattern (Doll Sized)
Doll Twirly Skirt Sewing Pattern
Apron Sewing Tutorial for an 18″ Doll
Doll Carrier and Backpack Tutorial