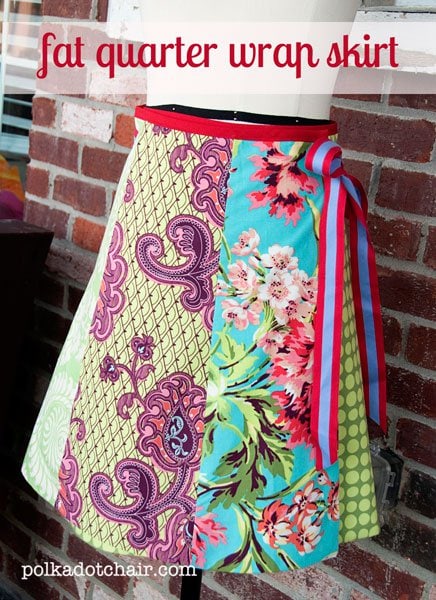
How to make a Wrap Skirt; a Fat Quarter Fabric Project
We hope that you enjoy this Wrap Skirt Tutorial and use it to create fun skirt using a variety of your favorite fabrics. You can make it almost entirely from Fat Quarters!
This skirt tutorial was created as a part of the Skirting the Issue series at Simple Simon & Co.
When Liz from Simple Simon & Co. told me about the Skirting the Issue project she mentioned that there was a need for skirts for older girls.
Since most of my previous skirt tutorials have been for little girls, I challenged myself to try to make a skirt for an older girl.
Note: I’ve added at the bottom of the post suggestions for changing the size of the skirt for an adult.
I came up with this wrap skirt because I thought it would be flexible and adjust easily to fit a variety of girls (since it’s a wrap). This skirt is for about a size 12-14 girl, or about a Woman’s size 2-4. However, it’s a wrap skirt and not meant to be an exact size since the width can easily be adjusted when worn.
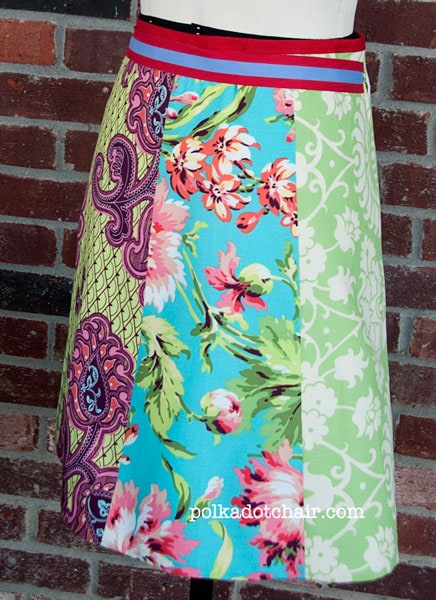
The skirt is made from 4 Fat Quarters and some lining yardage. Have fun mixing and matching them the prints of fabric to create something that is entirely your own!
Wrap Skirt Sewing Pattern:
Skirt Size: Girls 12-14 or Women’s 2-4
Skirt Supplies:
4 Fat Quarters for the skirt
4 Fat Quarters or 1 yard fabric for the lining
1 package double wide bias tape
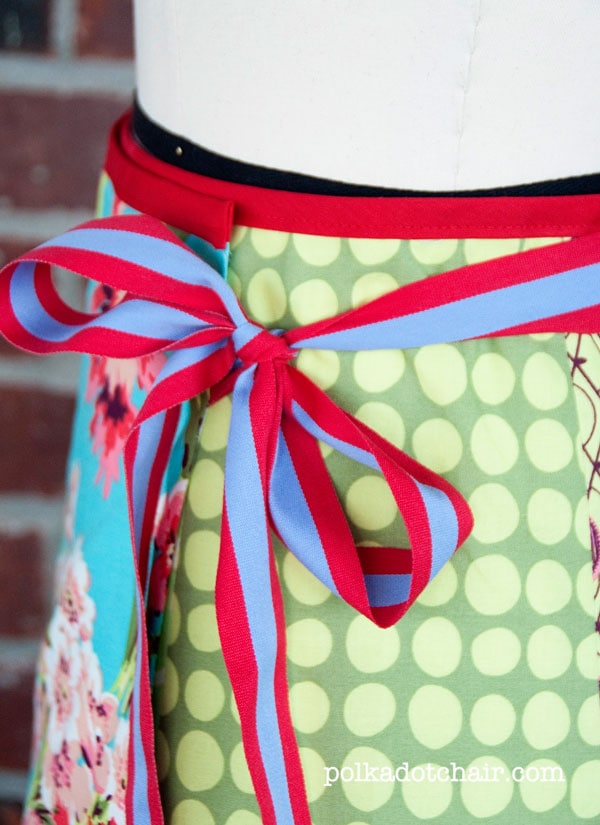
2 yards wide ribbon
Step One: Cut your Fabric
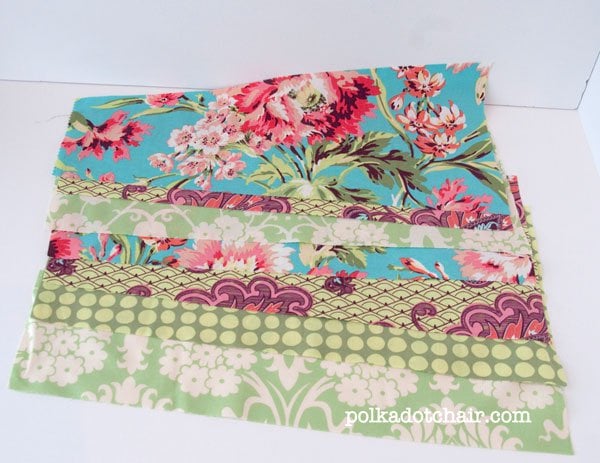
Cut each fat quarter into 2 pieces each 9″ wide by 20″ tall. Before you cut, double check and ensure that you can cut 2 pieces out of one fat quarter of fabric.
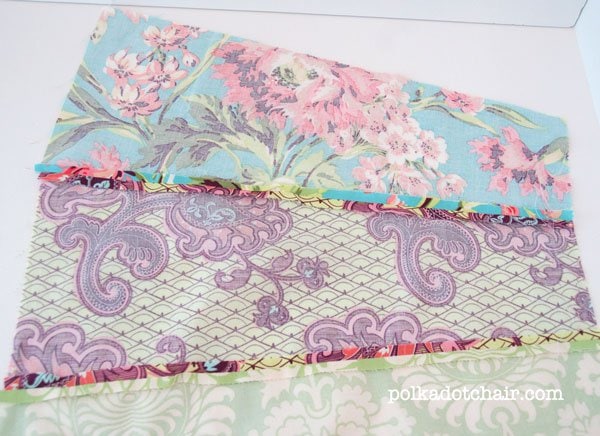
Measure in 2″ from each upper corner of one of the 9″ sides of the piece, and place a mark at each 2″ spot.
Draw a diagonal line from the 2″ mark on your piece to the bottom corner (on the other 9″ side). Cut along the diagonal line. Repeat on the other side. When you are done you will have a trapezoid shaped piece that is 9″ across the bottom by 5″ across the top and 20″ tall.
Do this for all 4 fat quarters, at the end you should have 8 pieces.
Using one cut piece as a guide, cut 8 lining pieces from your lining fabric then set lining pieces aside.
Step Two: Assemble the Skirt
Stitch 2 skirt pieces together along the long sides and press the seams open. Repeat until you’ve sewn all 8 pieces together.
Step Three: Sew the Skirt Lining
Repeat the skirt construction step using the fabric lining pieces.
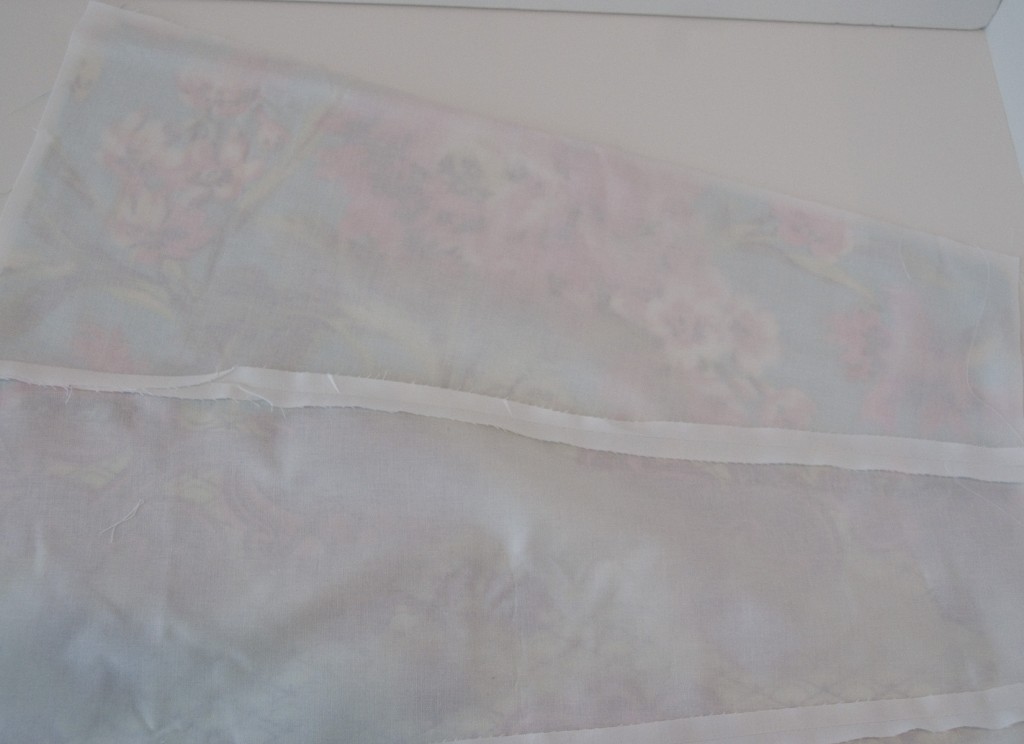
Place skirt lining and skirt, right sides together. Stitch along the two side seams and bottom seam. Press seams open and then turn skirt right side out.
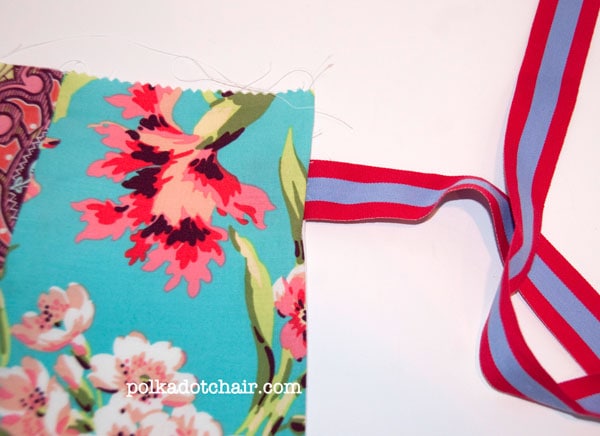
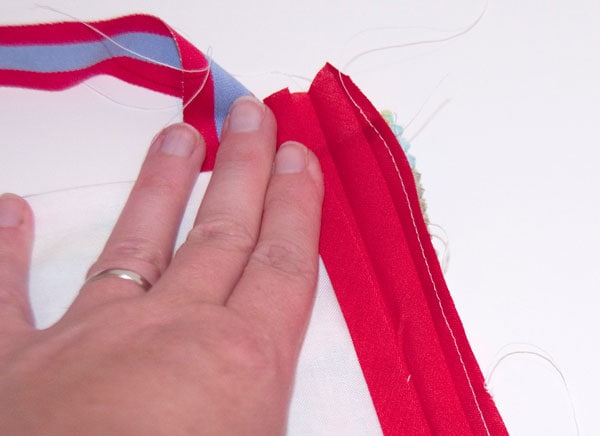
Step Four: Add the Ribbon Straps
Cut your ribbon into 2 pieces, 24″ and 48″. Unpick about 2″ down on your skirt side seams at the top and insert the ribbon piece in and then stitch the opening closed. The 24″ piece of ribbon will be stitched to the right most panel (the one that will show on the front) and the 48″ ribbon will be stitched on the left most panel.
Baste the top seam of the skirt, close to the edge.
Step Five: Finish the Top Edge of the Skirt
To finish the top edge of the skirt, attach double fold bias tape. To attach, fold the bias tape open and stitch the raw edge of the bias tape to the raw edge of the skirt.
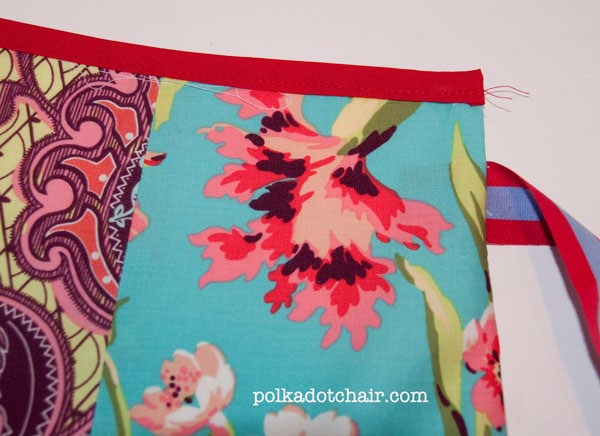
Fold bias tape over and top stitch in place.
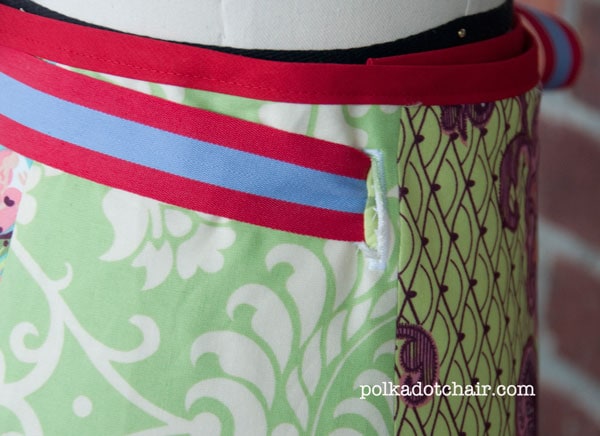
To finish, stitch a buttonhole close to the seam between the 2nd and 3rd skirt panels so that you can feed the strap around the back of the skirt.
Press well and you’re done!
Sizing Suggestions:
Note: these are only suggestions. I”ve not made the skirt in a larger size. If you wish to make this skirt larger you can do one of two things:
- If you only wish to make it slightly larger you can increase the number of panels. Instead of 8, you could do 9 or 10. Since it’s a wrap skirt it will just fold over itself until it fits.
- If you wish to make the skirt much larger- I would suggest only using each fat quarter once (or buy 2 of the same if you want to repeat fabrics) and increasing the rectangle size from 9″x 20″ to 12″ x 20″- still using the 2″ mark on each corner to create your trapezoid.
- If you wish to make the skirt longer- use yardage NOT fat quarters.