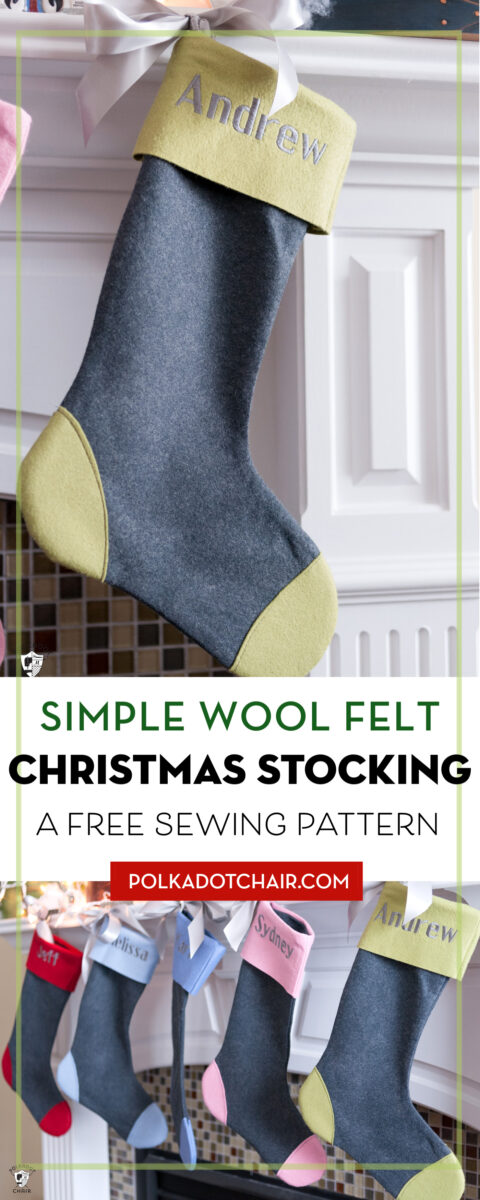
Wool Christmas Stocking Free Pattern & Tutorial

Today, I’m going to share with you how to make simple and modern Christmas Stockings with this free Wool Felt Christmas Stocking Pattern.
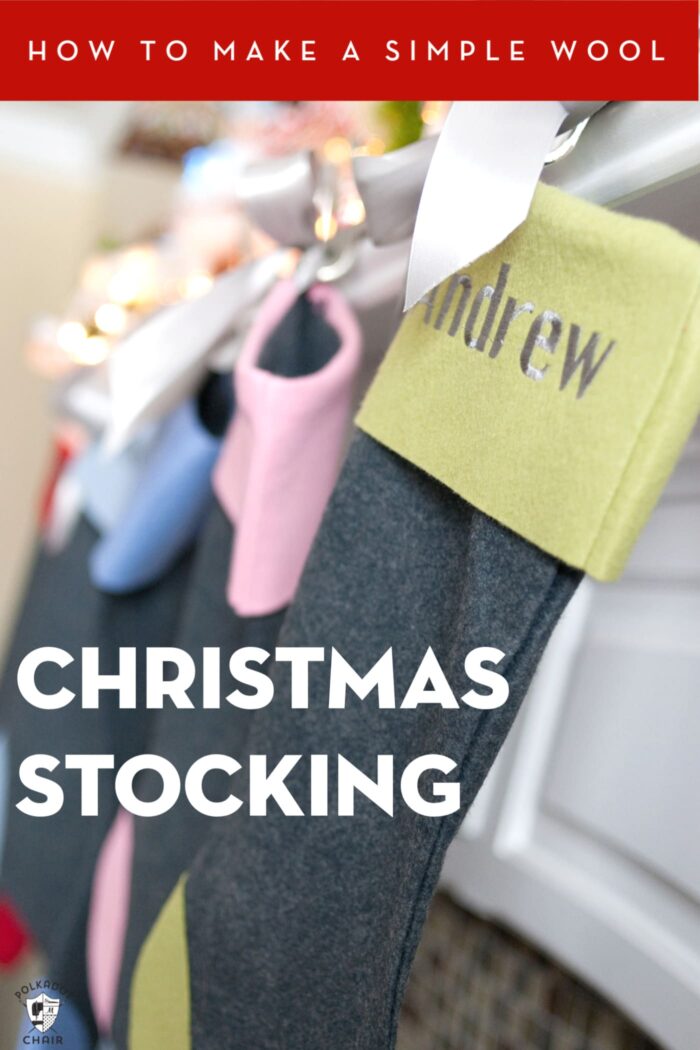
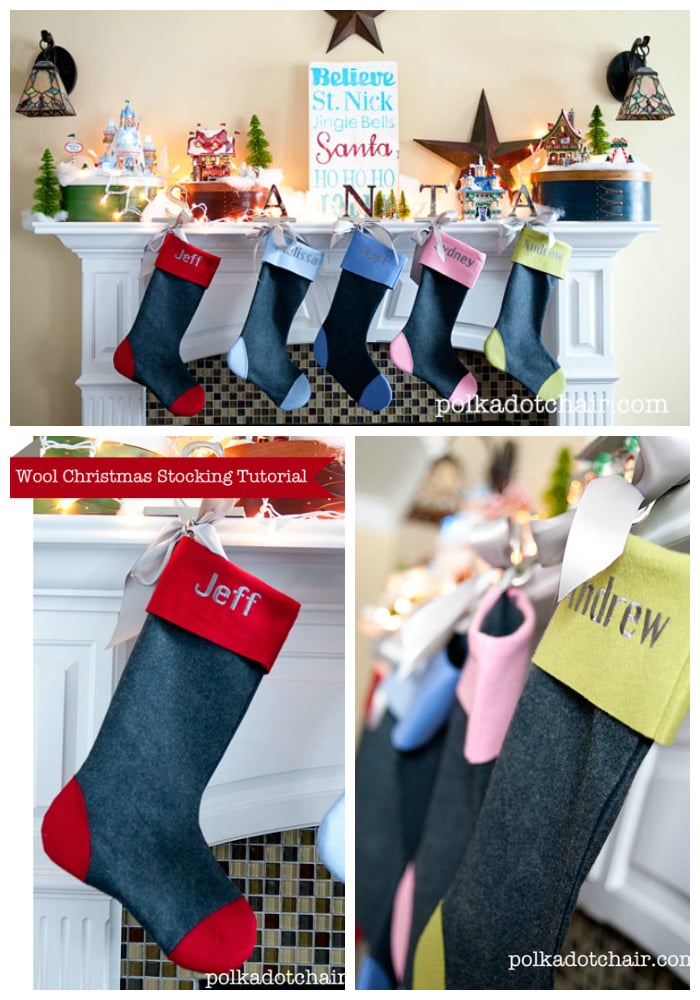
Several years ago, I made a set of Christmas stockings for my family. When planning the stockings’ design, I knew that I wanted something simple and modern. My intention was to design stockings that would stand the test of time.
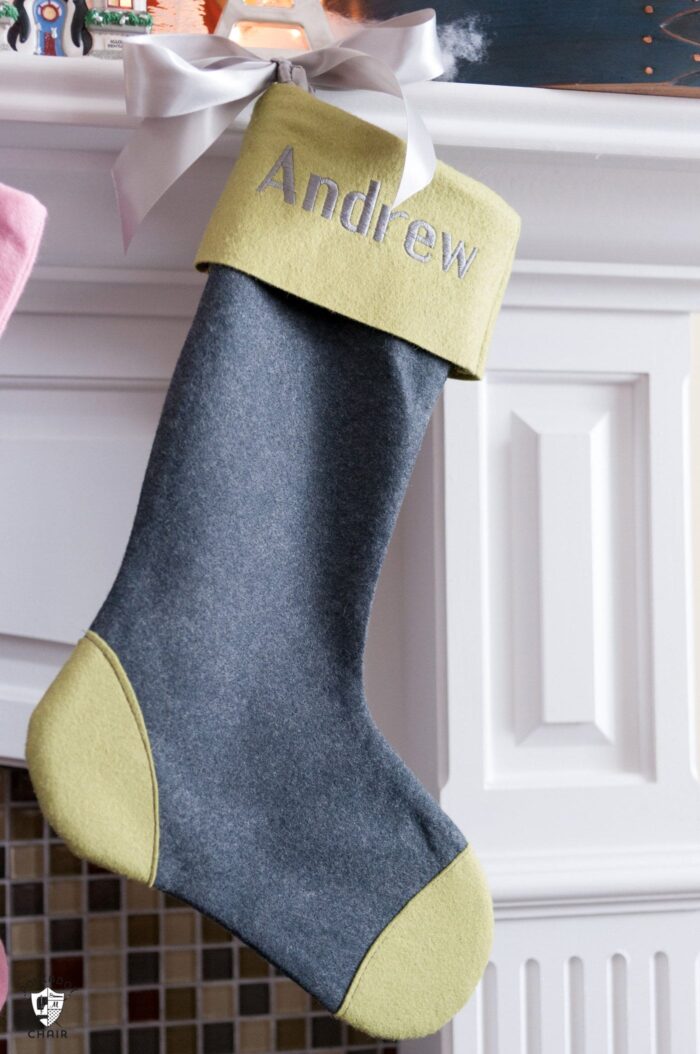
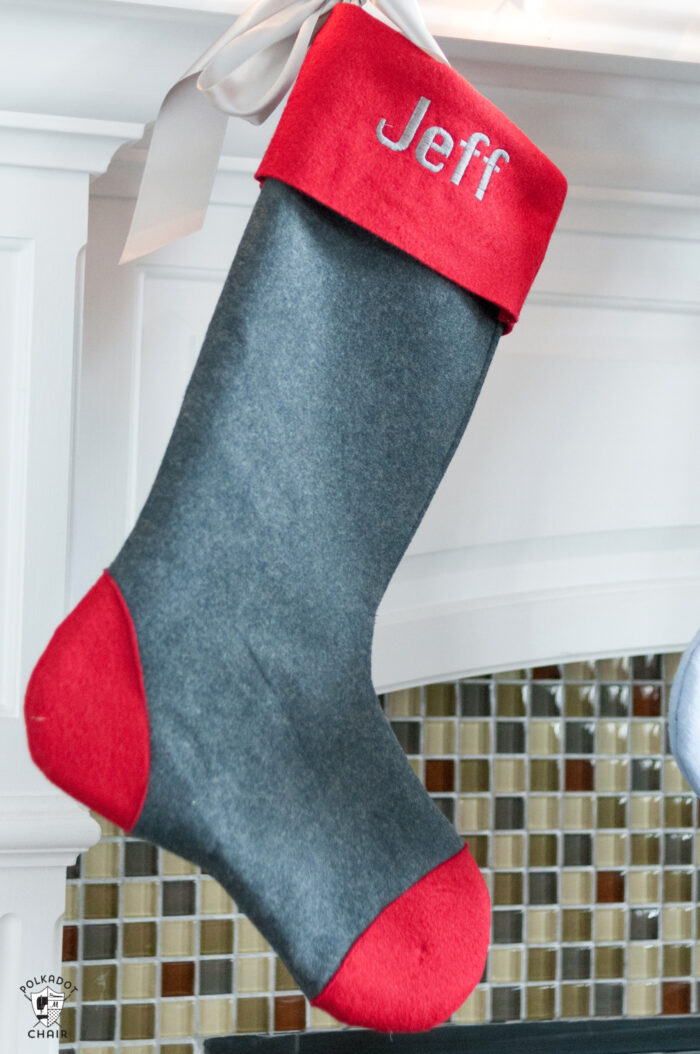
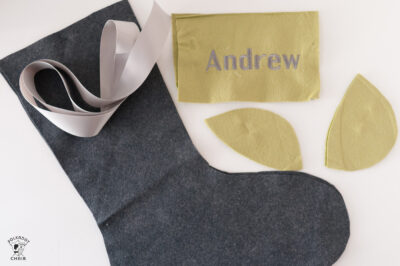
These stockings are made from Wool Felt and feature two different colors of felt. I chose to make the body of my Christmas stockings out of gray wool felt and to accent those stockings with a brighter color.

Each family member’s stocking has a different accent color. I love that this individualizes the stockings.
If you would like to make a set of Christmas stockings like these, here’s how.
Wool Felt Christmas Stocking Pattern
Supplies for Stockings
- 36″ Wide Wool Felt – 1/2 Yard Per Stocking
- For the Cuffs and Toe Accents:
- 1/4″ yard per Stocking.
- Additional Supplies:
- 1 yard of 2″ wide satin ribbon for each stocking.
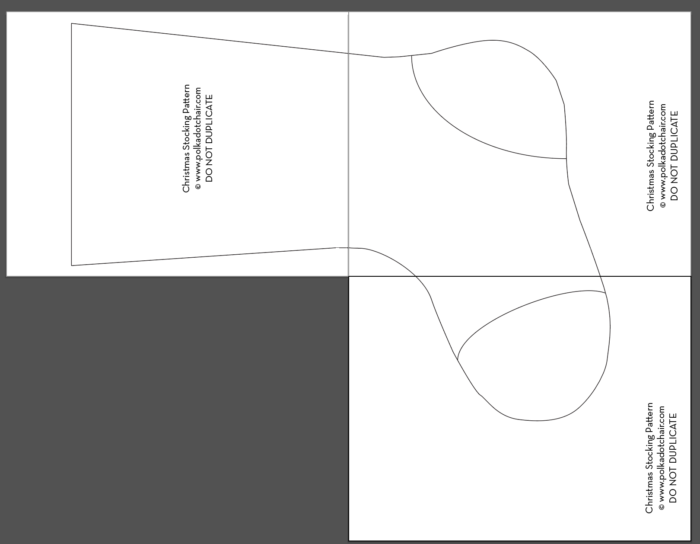
- Stocking Pattern Piece – have it emailed to use using the form below. The photo is different, but the stocking is the same.
You can also trace an existing stocking. If you do that, you may need to adjust the fabric yardage requirements.
How to Get the Pattern Piece
Just fill out this form, and we will send you the pattern piece; you will still need the instructions on this page to finish your stocking.
Preparation Steps
Print out and assemble the pattern piece. When it’s taped together, it should look like this:
Note that depending on your printer’s margins, the lines will not go all the way to the edge of the paper. Do NOT cut your paper. Just tape it together and use a pencil to connect the lines that did not print.
Optional Step: Embroidery
Embroider the name onto the cuff of the stocking. If you don’t have an embroidery machine, you could applique them or use a Cricut machine and Iron-On Vinyl.
Instructions

Wool Christmas Stocking Pattern
Equipment
supplies
- 1/2 Yard 36″ Wide Wool Felt – ½ Yard Per Stocking
- 1/4 Yard For the Cuffs and Toe Accents: ¼″ yard per Stocking.
Additional Supplies:
- 1 yard 2″ wide satin ribbon for each stocking.
- Stocking Pattern Piece. Fill out the form on this page to get the stocking pattern piece. You will still need the directions on this site to finish the project.
Instructions
- All seam allowances are 1/4″
Cut Out Stocking Pieces
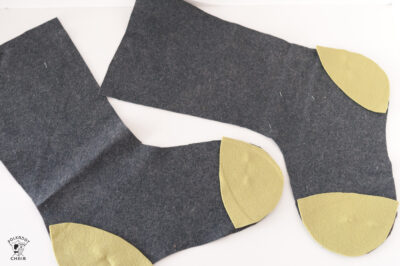
- From Christmas stocking material, cut two pieces one for the front and one for the back of the stocking.Since wool felt is double-sided you don’t need to worry about the layout of the stocking on the felt. Just place the pattern pieces on the fabric yardage so that you get the most out of your fabric.

- From the 2nd color of Felt Cut:2 toes and 2 heels from the pattern.For the cuff, cut 2 pieces each 5″ tall x 8″ wide.
Attach the heel and toe pieces.
- Pin and stitch the toe and heel pieces to each stocking. Make sure that you sew them to the right side of each piece. The stockings pieces need to be mirror images of each other so that you can sew them together.
- I used grey thread since it would show, you can also use thread to match the accent color of your stockings.
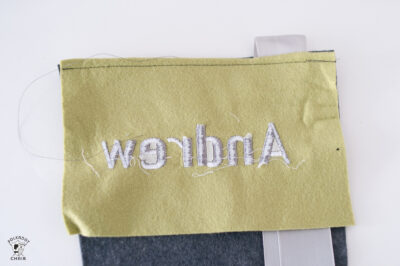
Attach the Cuff to the Stocking Piece
- Next, pin the right side of the stocking cuff to the WRONG side of each stocking at the top. If you embroidered or added names to your tocking, make sure that you’ve got the stocking facing the way that you want to (i.e. does the toe point to the left or the right, it’s your preference just make sure they are all the same).
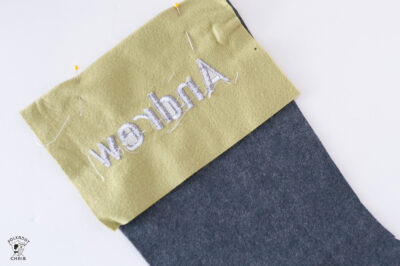
Add the Ribbon
- On the stocking front piece, fold your 1 yd of ribbon in half. Stitch the top seam of the cuff/stocking making sure to catch the ribbon as you sew.
- I recommend finishing the cut ends of the ribbon with fray check.
Sew Stocking Front and Back.
- Next, sew the stocking front and back together, starting and stopping at the seam between the cuff and the stocking (don’t sew the side seams of the cuff yet).

- Reinforce the Stitching on the Stocking Clip “v” shapes into all of the curves of the seam on the stocking seam allowance. This will allow for a nice curve when the stocking is turned right side out.
- Stitch AGAIN on the same seam around the stocking. This is done to reinforce the stocking as the wool has a tendency to let the stitches unpick easily.
- Turn the stocking right side out.

Finishing.
- Fold the cuffs up. Pin the right sides of the cuffs together and stitch. Make sure you backstitch. Fold the cuff down. Press the stocking using a pressing cloth to prevent iron shine.
- Clip strings and you’re done!
More Christmas Sewing Projects:
20+ Christmas Stocking Patterns
More than 25 Cute Things to Sew for Christmas
Merry & Bright Christmas Stocking Pattern
Modern Christmas Tree Improv Quilt Block Tutorial
Note: This post has been updated from a previous version. It has been improved with extra instructions and more photos. The post date above may not reflect the original posting date.
Prev. Published 11/13


One Comment