Simple Patchwork Color Blocked Baby Quilt Tutorial
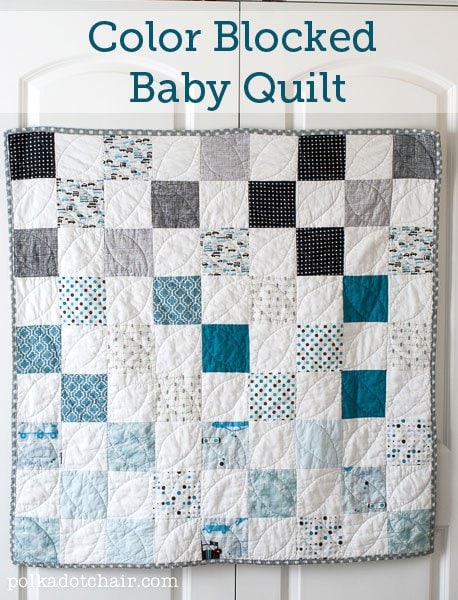
Today I’m going to share with you a Color-Blocked Patchwork Baby Quilt Tutorial. It’s a very simple design, no need for a pattern. The blocks are arranged in color order with the darkest at the top going down to the lightest at the bottom. If you like this pattern you may also like this Sawtooth Star Baby Quilt Tutorial.
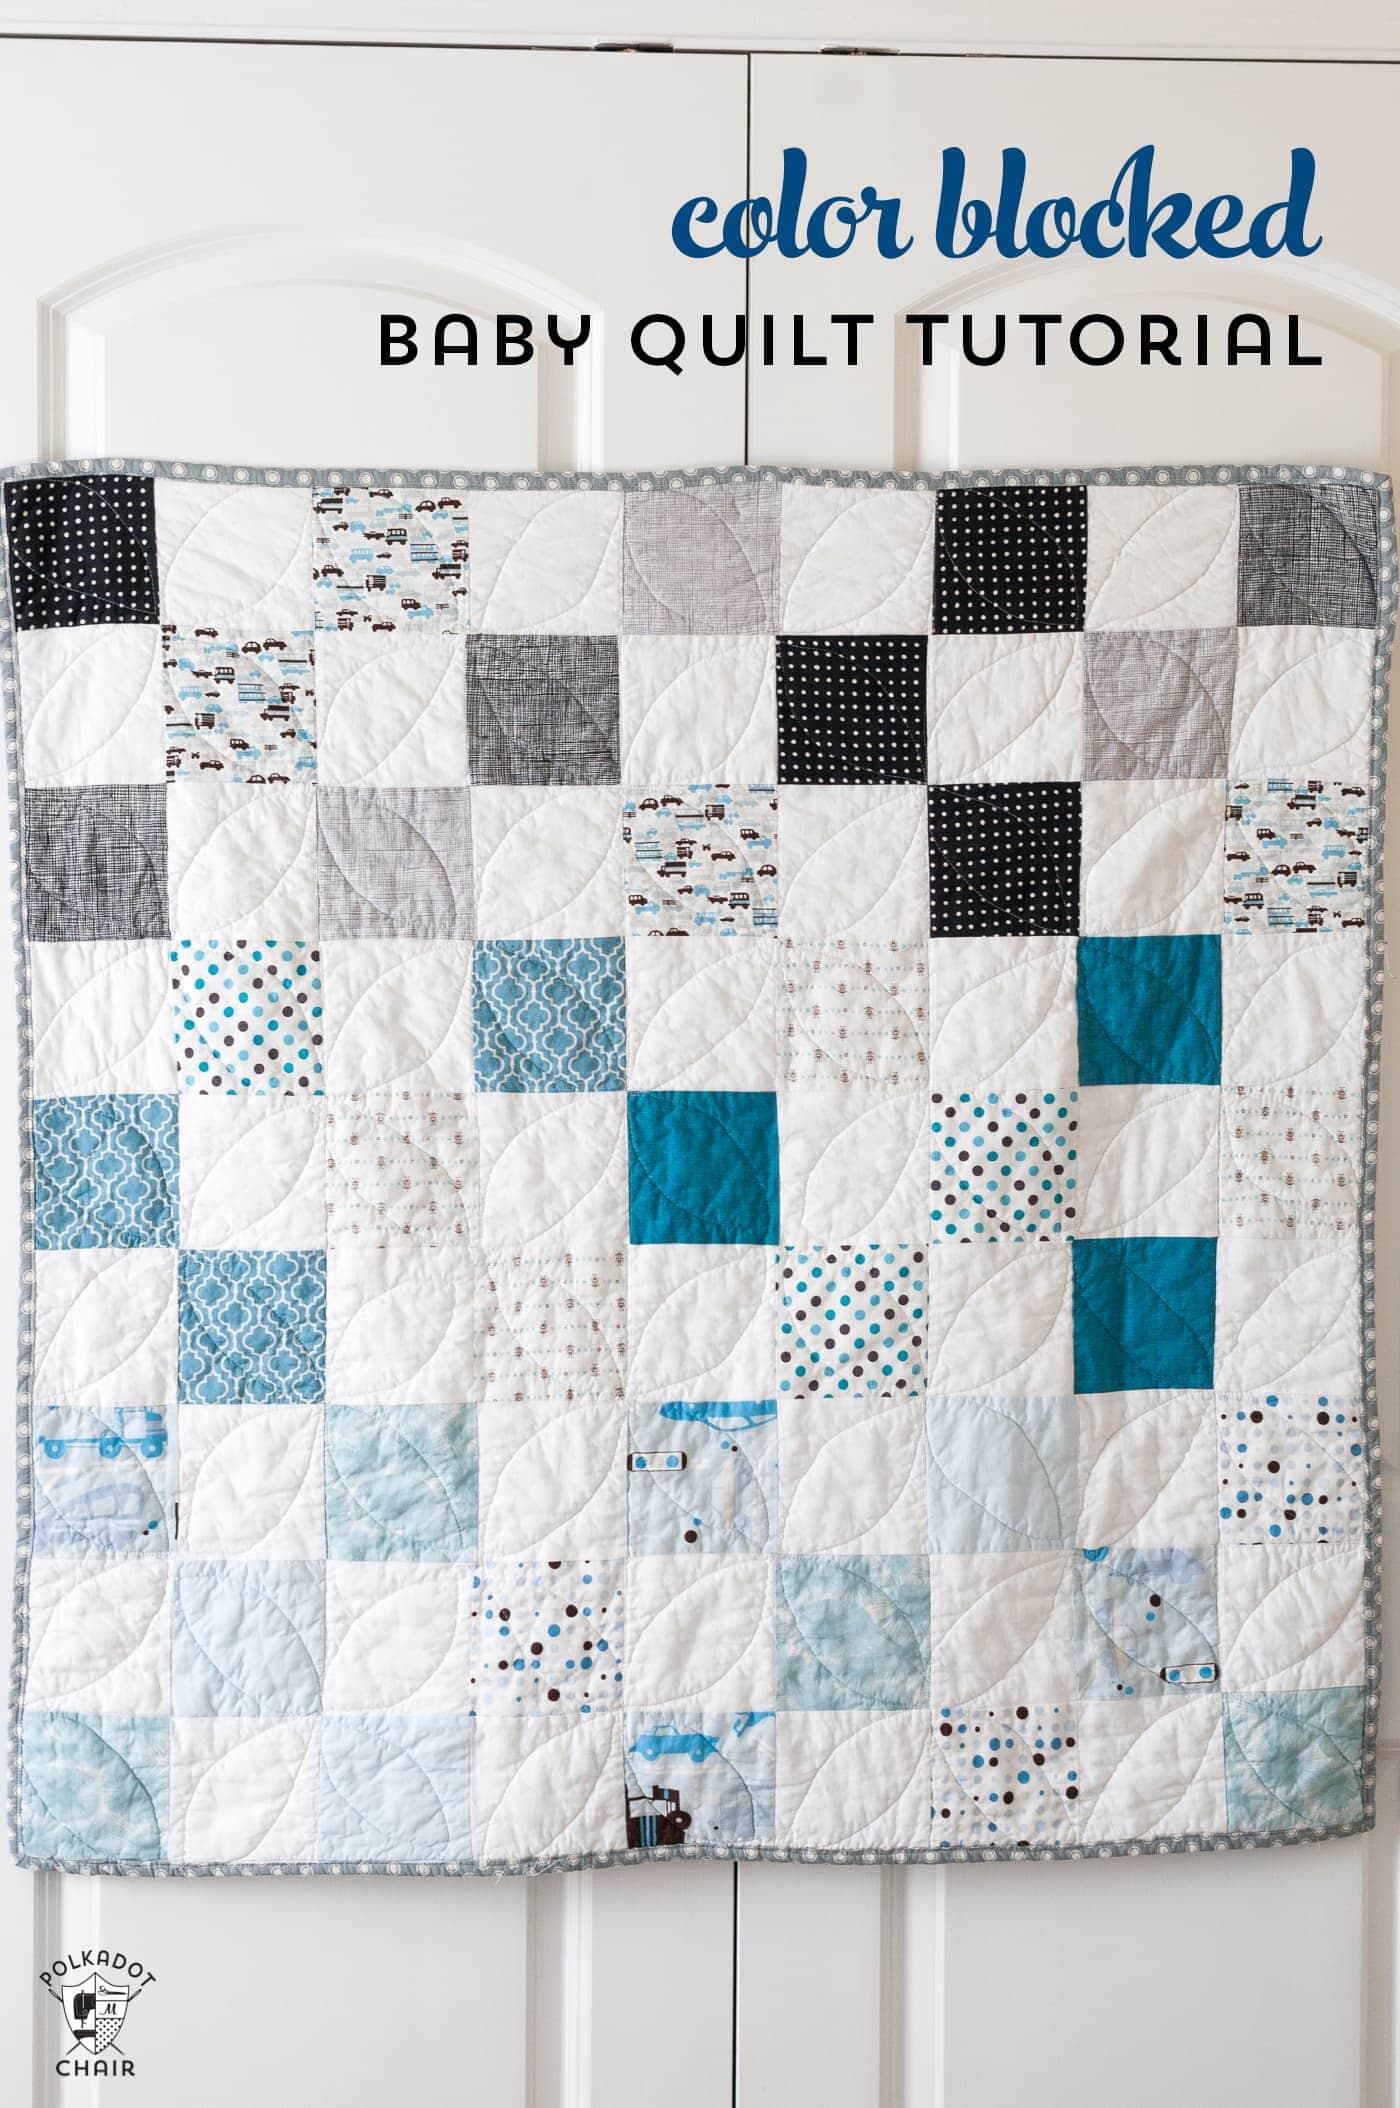
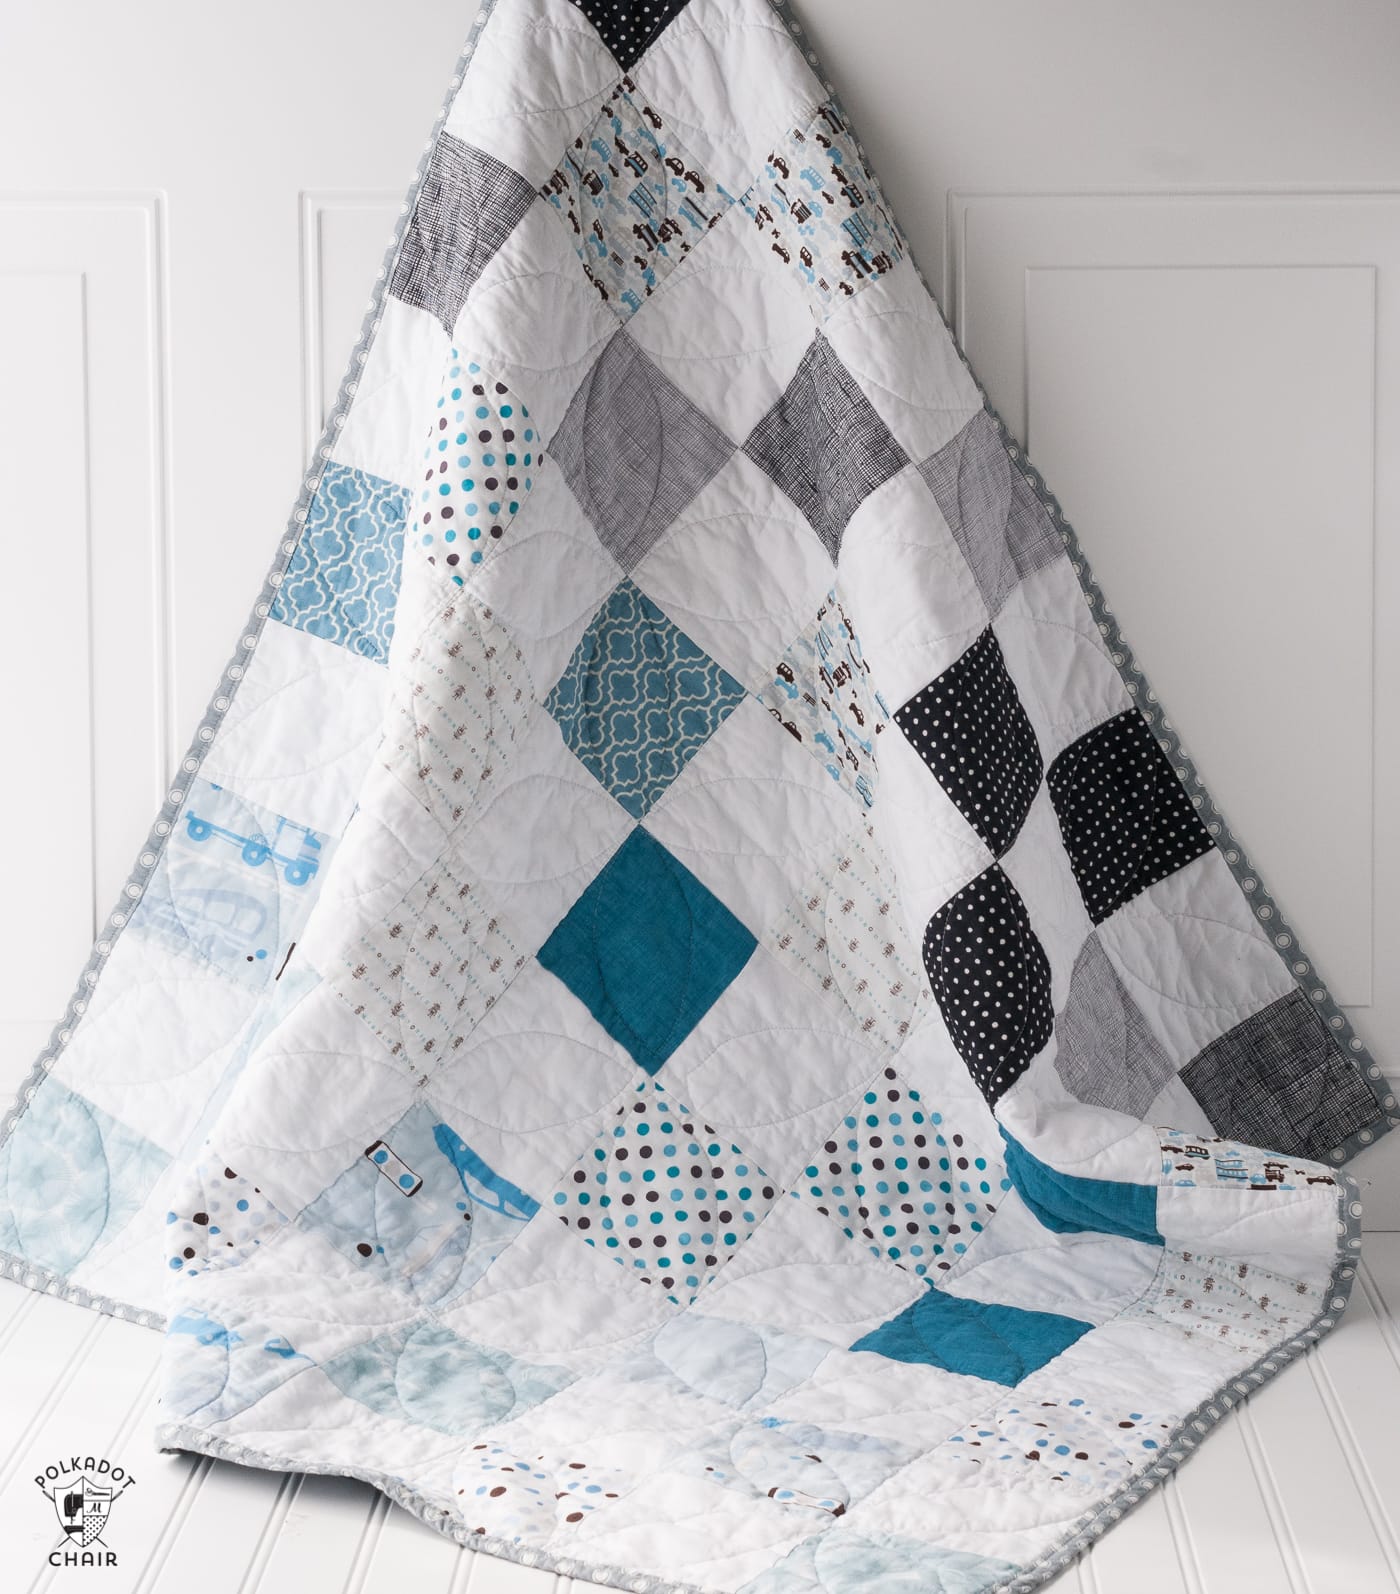
If you’re looking for an easy baby quilt that you can make, I think that you’ll like today’s tutorial. I made this quilt for a friend of mine who recently had a baby boy.
All of the fabrics I used in the quilt were from a custom-created fat quarter pack that I purchased. This quilt would be a great one to use up some of your fabric stash. Just pull a selection of fabrics in light, medium, and dark blues. It also looks great with a pop of black.

Simple Patchwork Baby Quilt Tutorial
Supplies
To make this quilt you’ll need:
- Fat Quarters of various prints in. You can get twelve 5” x 5” squares per fat quarter and this quilt takes 41 5” x 5” square prints (this does not include the white squares). You want to pick fat quarters in varying light and dark colors to get the “ombre” effect.
- 40 pre-cut 5” x 5” white squares.
- 1 1/2 yards fabric for the backing
- Batting 1/2 yard binding
Cutting Directions
Cut 41 squares from your various prints. Arrange by color value. Darkest, Mid, Light Colors.
As you sew, keep your darkest colors in rows 1,2 then gradually lighten as you work down the rows.
Assembly Instructions
- Odd-Numbered Rows start and end with a print.
- Even-numbered rows start and end with a white square. There are 9 rows.
- For odd-numbered rows, sew nine 5” x 5” squares together alternating print and white starting and ending with a print. Do this for rows 1, 3, 5, 7, 9. Press seams to the right.
- For even-numbered rows, sew nine 5” x 5” squares together, alternating white and print. Starting and ending with a white block. Do this for rows 2, 4, 6, 8. Press seams to the left.
- Assemble rows.
Finishing
Quilt and bind as desired! I quilted mine using the Dogwood quilting pattern The backing is flannel (my favorite for a baby quilt). It’s bound using 2 1/2” wide strips.