DIY Stenciled Wood Magnets
Today I’m going to show you how to use Reverse Stenciling to create a set of wood magnets. These painted wood magnets are made using images that are cut out from vinyl with a Cricut machine. They are so fast to make and would be wonderful gifts!
I’m always looking for quick-fix projects that I can create with my Cricut Machine. I love all of the creative images in the Cricut Design space and love to find new ways to use them.
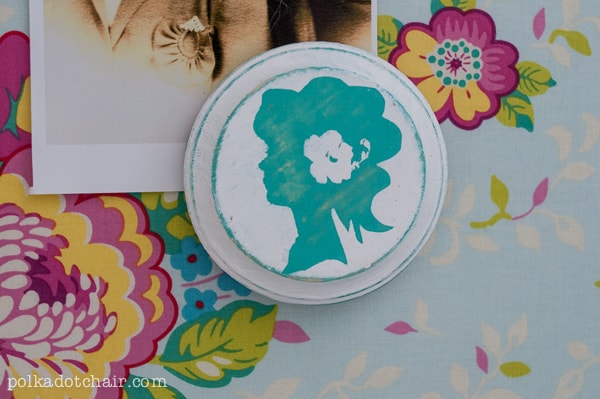
I did use my Cricut to cut out the image for these magnets; however, the images in this post are not from Cricut Design space but are from Rhonna Designs. You can easily find similar ones online if you don’t want to use the Rhonna Designs images.
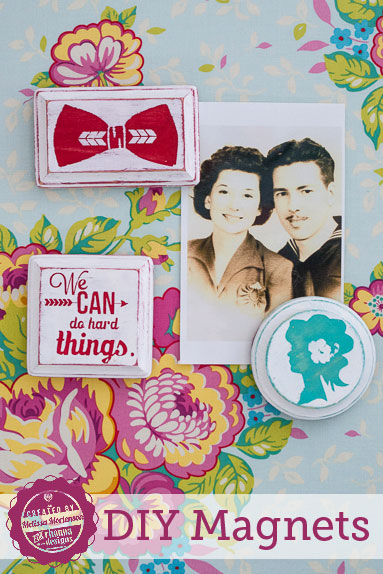
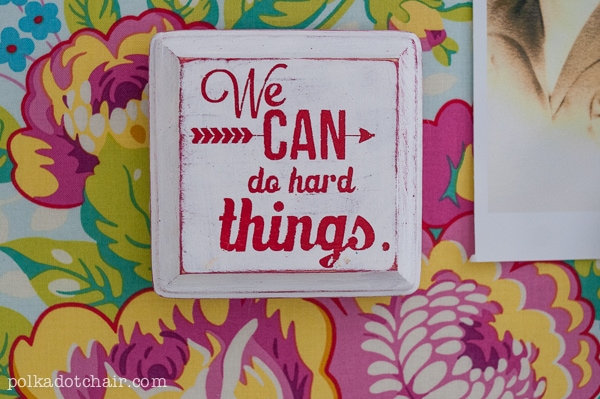
When my daughter was headed off to college, we tried to think of some clever DIY decorations to create for her dorm room. I decided that a fun set of magnets with inspirational sayings would be a fun addition to her room.
Supplies
- Wood Disks
- Acrylic Paint
- Vinyl (any color, you’re only using it as a stencil)
- E6000 Glue
- Magnets
- Images for Stencils (mine are from Rhonna Designs). You can also find a lot of cute images in Cricut Design Space
- A Cricut Machine
- Scrapbook Paper
- Sandpaper
- Modge Podge
How to Reverse Stencil With Vinyl
Step One: Cut Out Image
Choose which image you’d like to put on your magnet. Measure the flat area of your wood disk and cut out the image from non-permanent vinyl.
Step Two: Paint
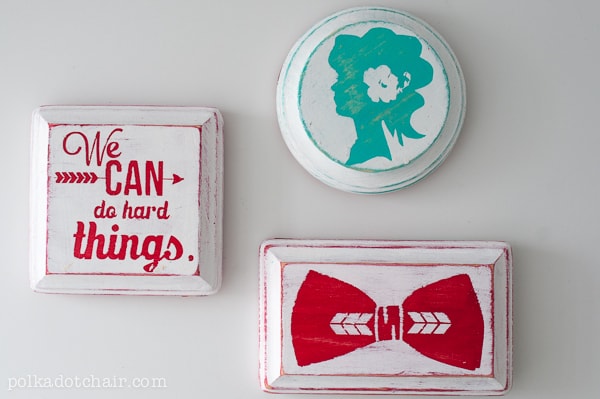
Paint the wood disk the color you’d like your final image to be. For example, I painted the wood red first on the bow tie magnet.
Step Three: Apply Vinyl
Apply the vinyl image to the front of the painted wood disk. Make sure that the disk has dried entirely first.
Step Four: Paint
Apply a thin layer of paint over the vinyl sticker in the same color as your background (the first color you painted). This will give you a cleaner result since this will fill in any gaps in the vinyl.
After the paint is dry, paint the entire magnet with your next color of paint (white in the bow tie magnet example).
You will need 2-3 coats of paint.
Step Five: Remove Vinyl
After the paint is dried, remove the vinyl. You may need to use a Cricut tool or Exacto knife to get all the pieces off. Lightly sand the wood disk to reveal some of the under-paint colors.
Finishing
To finish, cut a piece of scrapbook paper the same size as the back of the magnet. Using Modge Podge, adhere it to the back of the magnet. Apply a thin layer of Modge Podge to the front and back of the wood disk.
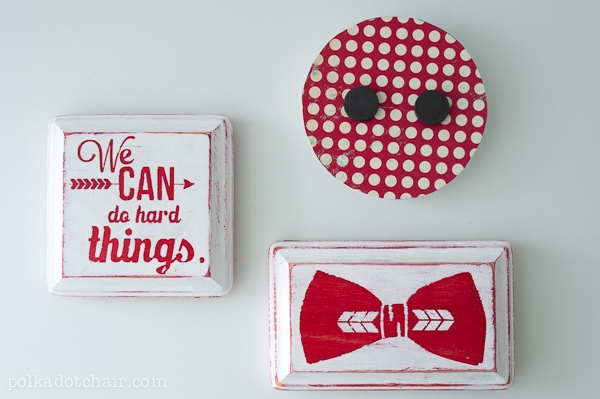
I then mod podged some scrapbook paper to the backs of the wood disks, glued on some magnets (use a strong glue like E6000) and applied a thin layer of modge podge to the front of the painted wood also.
Adhere two disk magnets to the back of the magnet using E6000 glue or a hot glue gun.
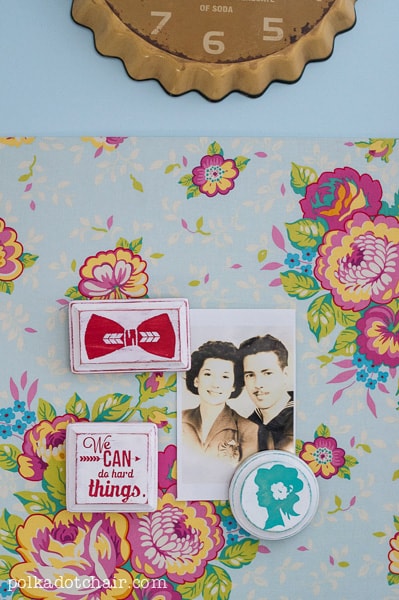
They are perfect hanging on the metal pinboards in my craft room! I’m going to be sad to give them away when the time comes!
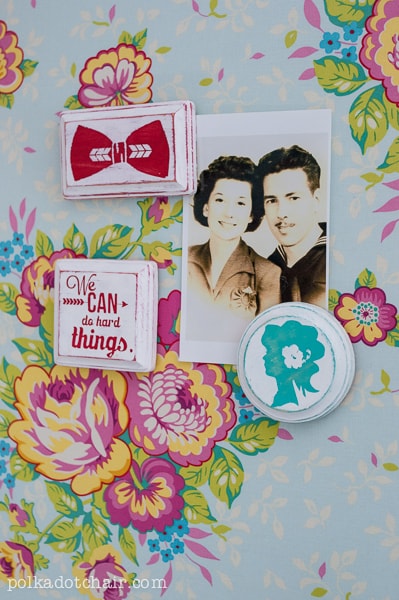
That’s a photo of my Grandparents engagement. My Grandpa was in the Navy, aren’t they good looking?


One Comment