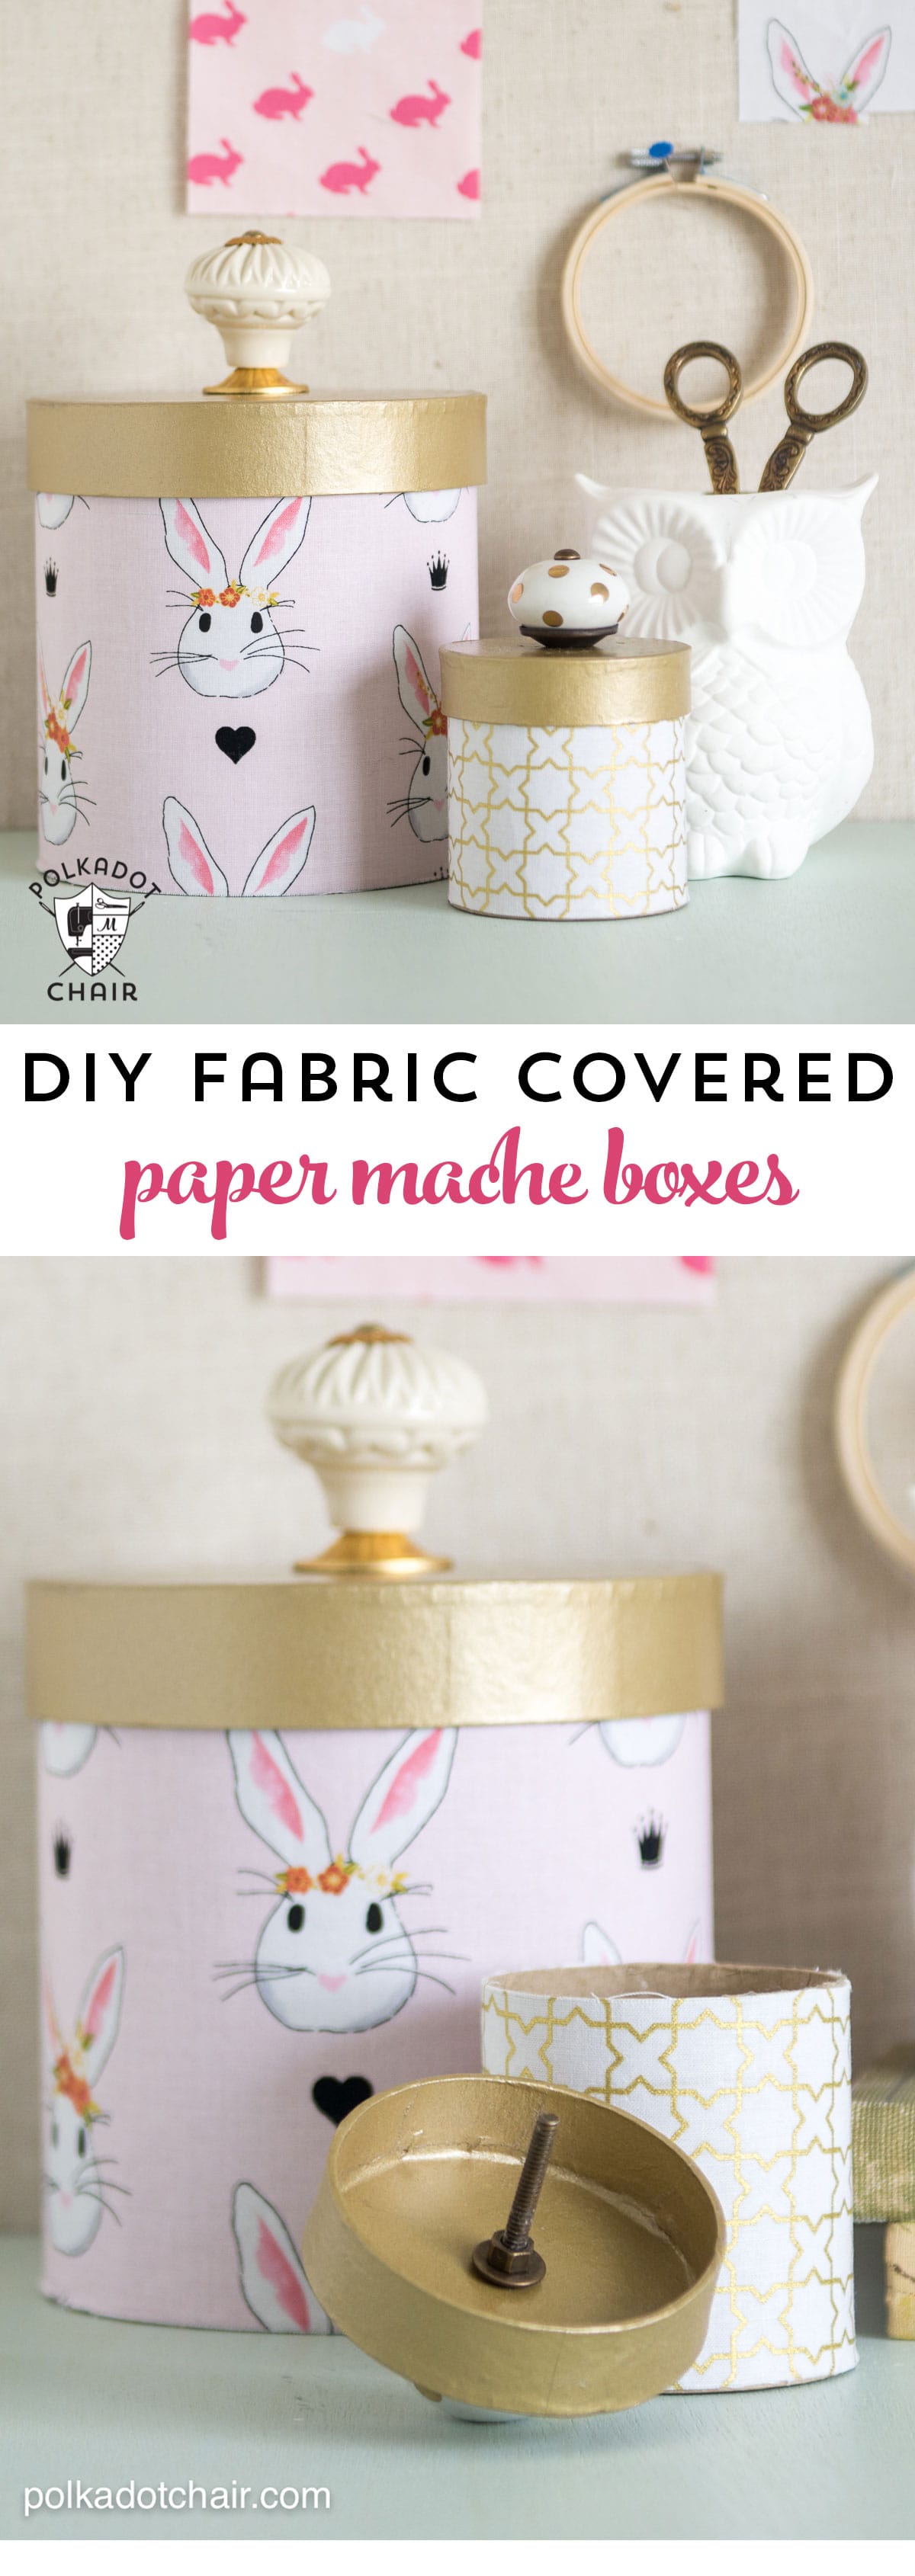
How to Cover Paper Mache Boxes with Fabric
Learn how to cover paper mache boxes with fabric with our simple tutorial. It’s a great way to use some of your favorite fabric and gain cute storage containers at the same time. If you like this project you may also like this Padded Storage Bin Sewing Pattern.
While I getting close to the end of my prep for the Spring Quilt market, I knew that I needed a few “little” projects to scatter around the booth. I was running out of ideas for sewn projects and wanted to show off some of the prints in the Wonderland fabric collection.
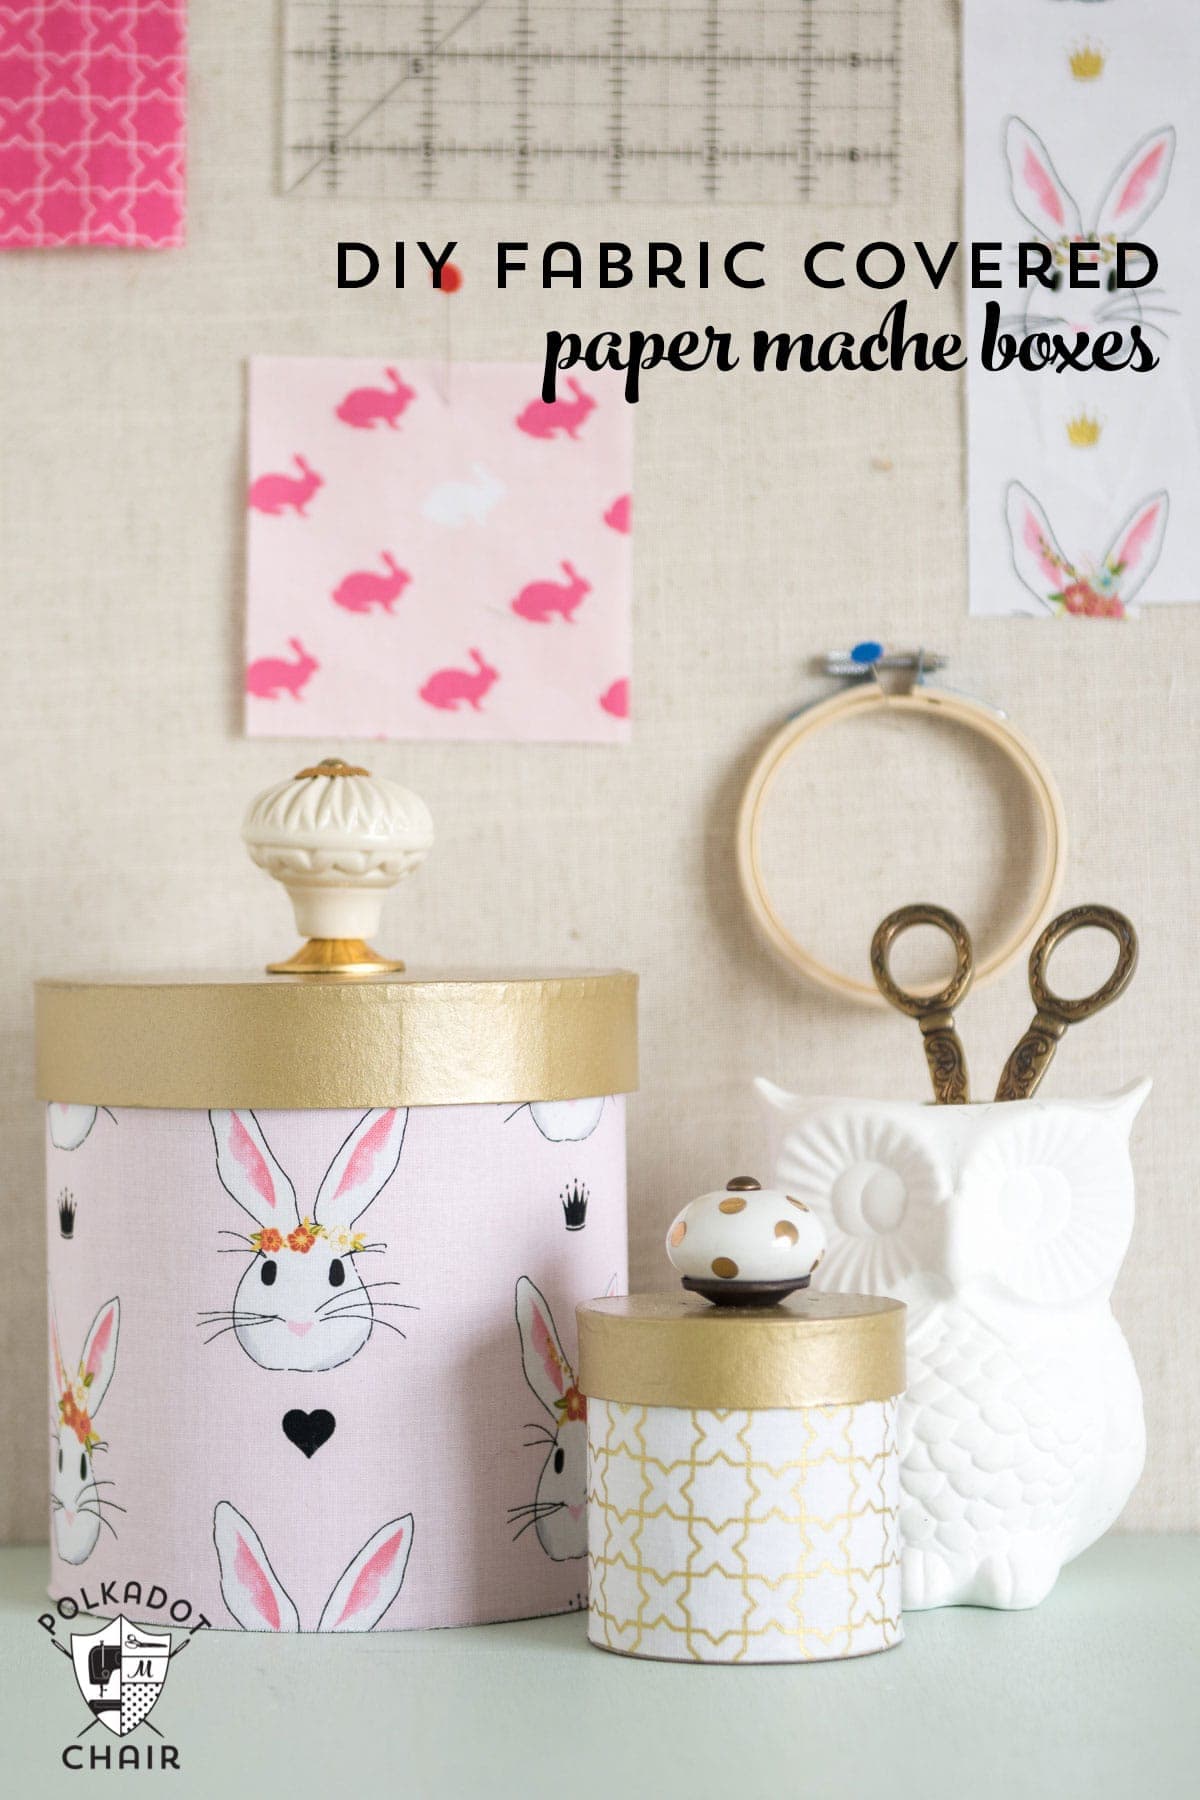
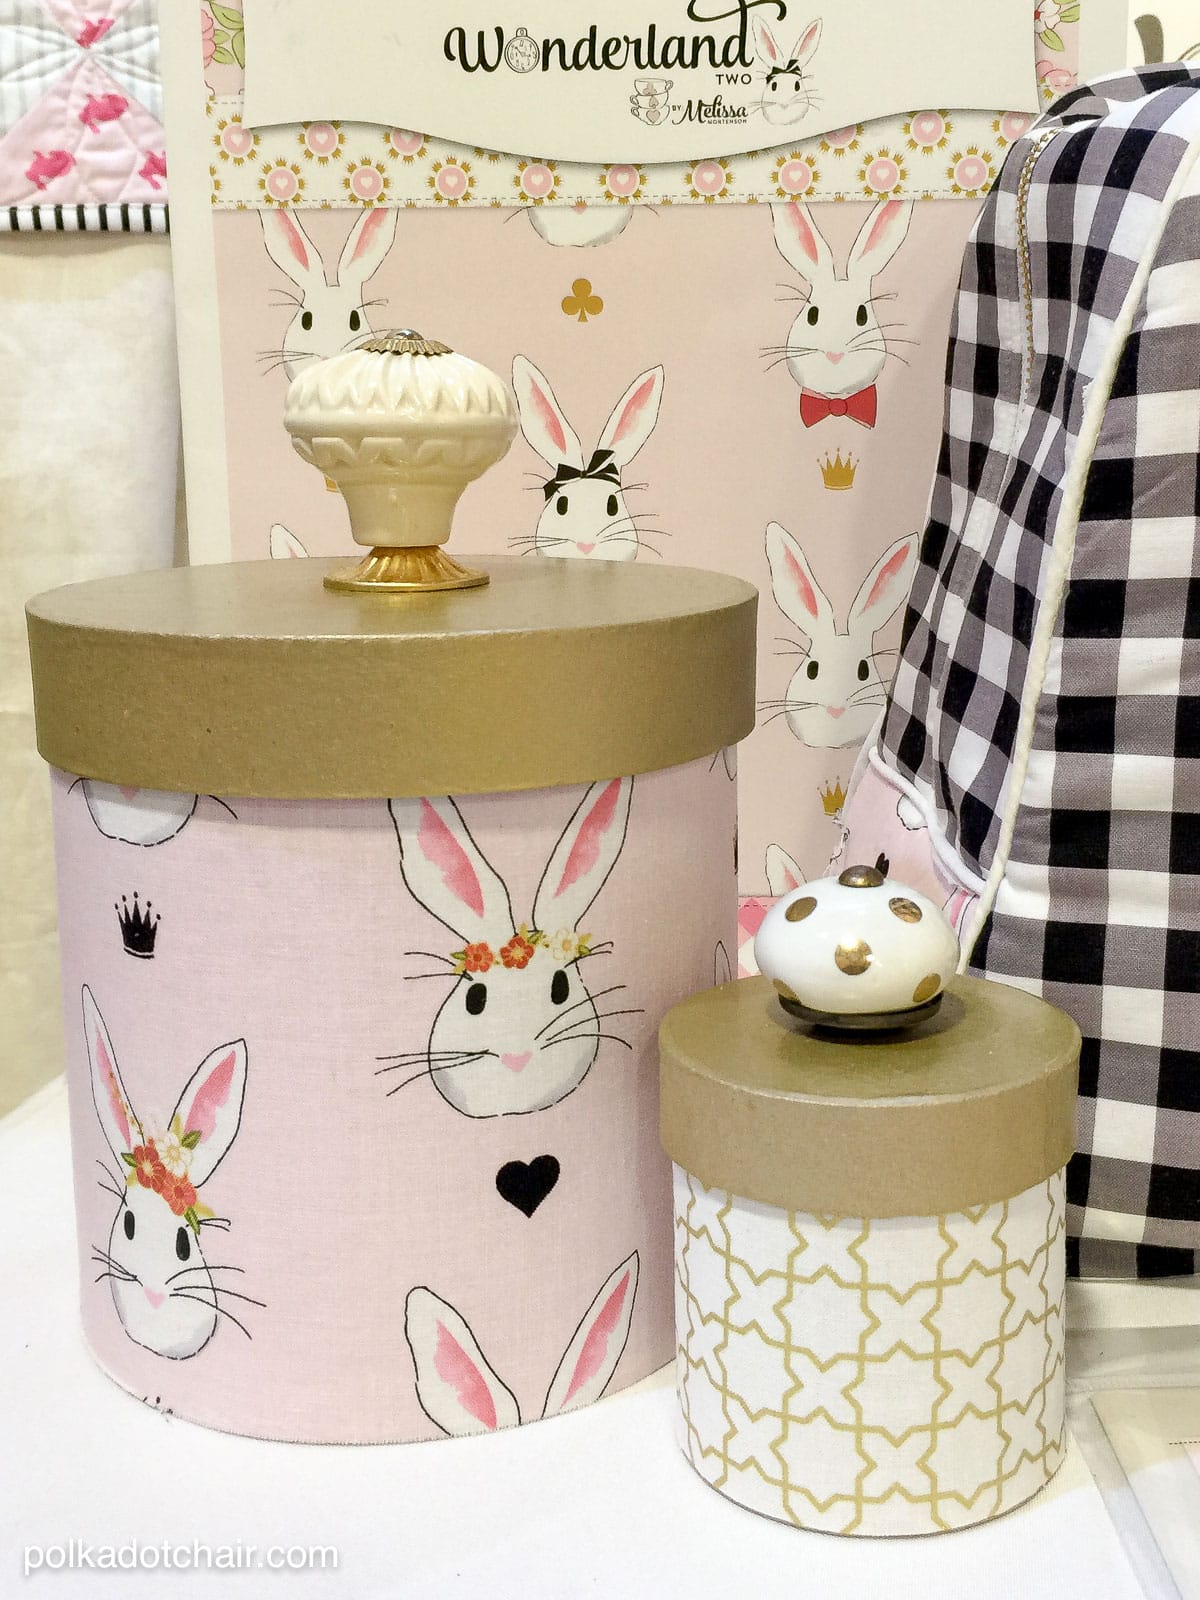
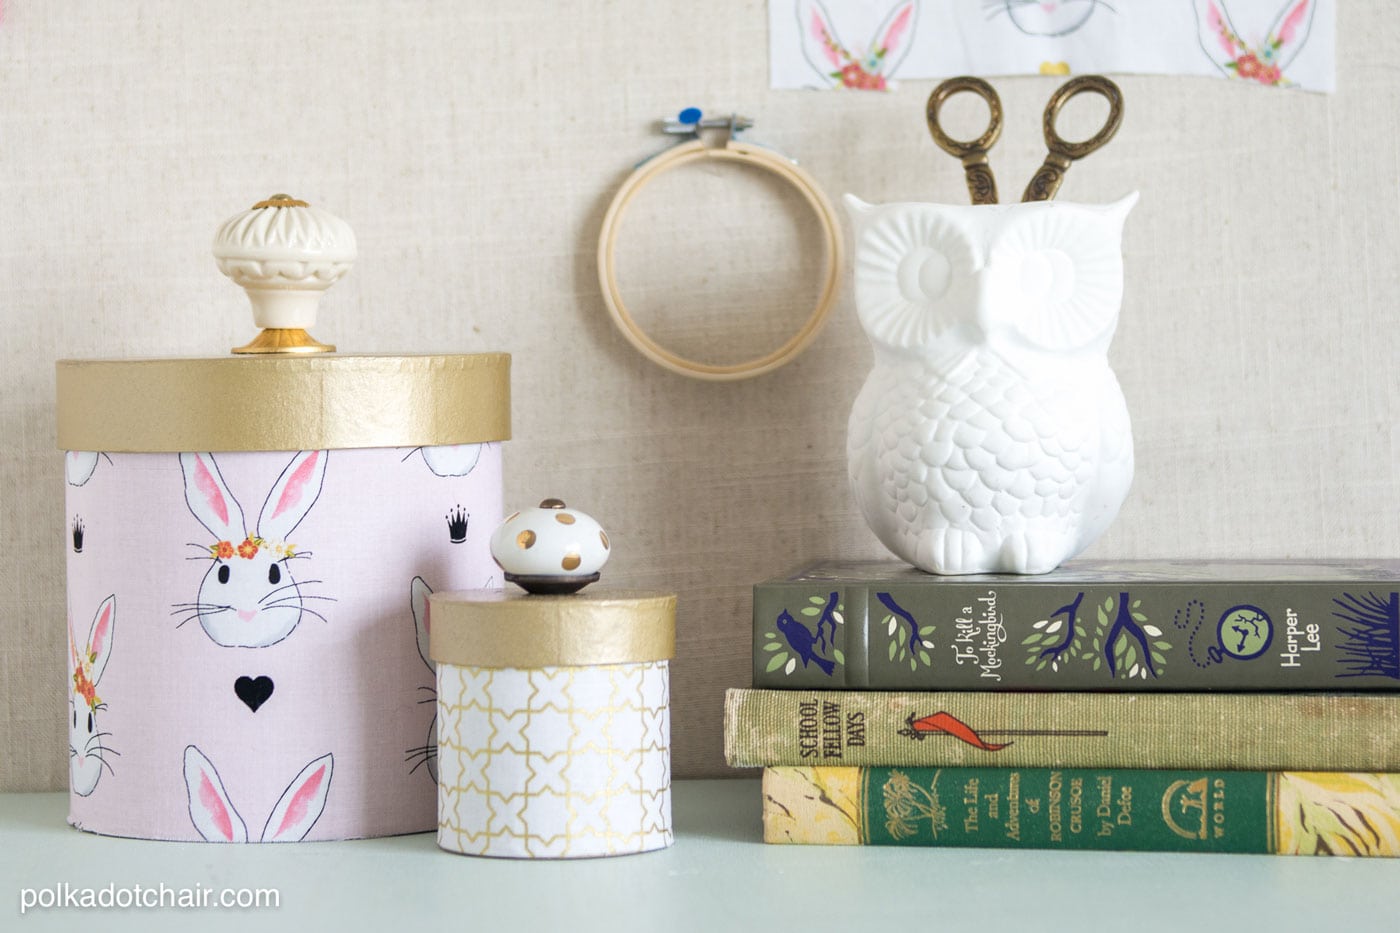
I had the idea to cover some paper mache boxes with fabric and spray paint the lids. I ended up making 5 boxes, two of those boxes I decorated with fancy knobs to give them a bit more of a unique look.
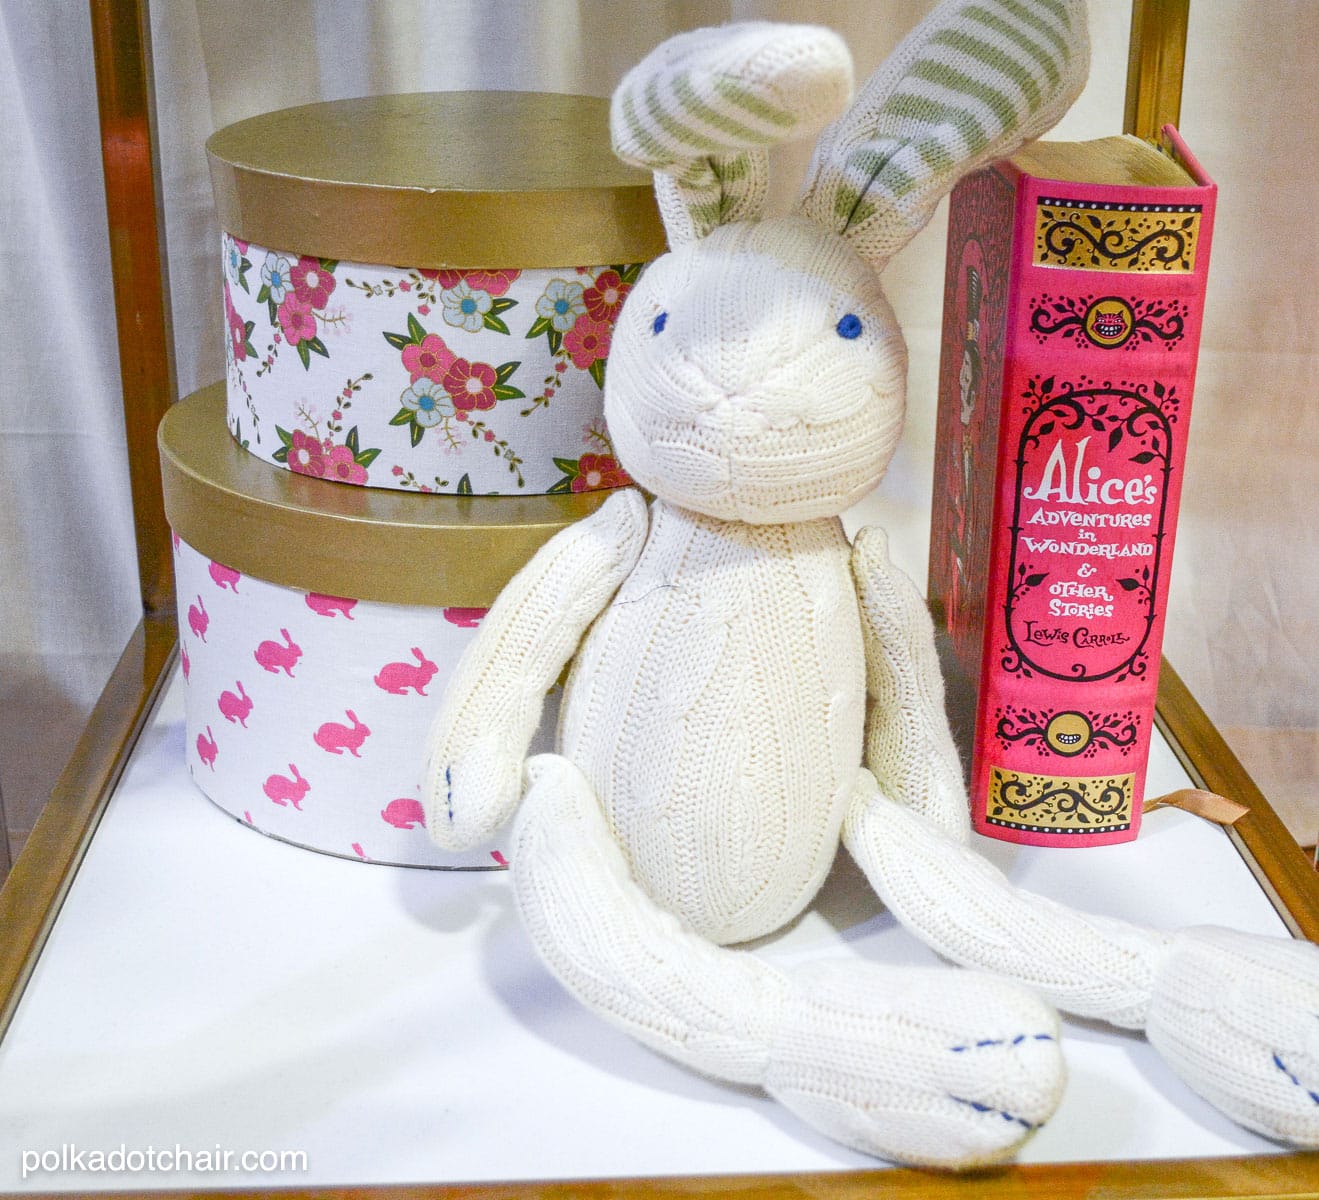
I left two of the boxes with my bunny-obsessed niece in Utah and brought the rest home to use for storage in my sewing room. They were quickly confiscated by my 15-year-old daughter, so I guess I need to make another set to keep for myself.
About the Tutorial
This project is very easy and you can complete it in one afternoon. It’s a great “quick fix DIY” project that will give you that “hey I accomplished something today” feeling (and don’t we all love that feeling).
Want to make some yourself? Here’s what you’ll need.
Fabric Covered Box Supplies
Fabric, the fabric in the photo is from my Wonderland line from Riley Blake Fabrics
Thermoweb Peel’n Stick Fabric Fuse Sheets – the number of sheets you need will depend on the size of your boxes.
Decorative Knobs
Instructions
Step one:
Begin by cutting your fabric fuse sheet to the same size as your box. You will need to use more than one sheet for the larger boxes.
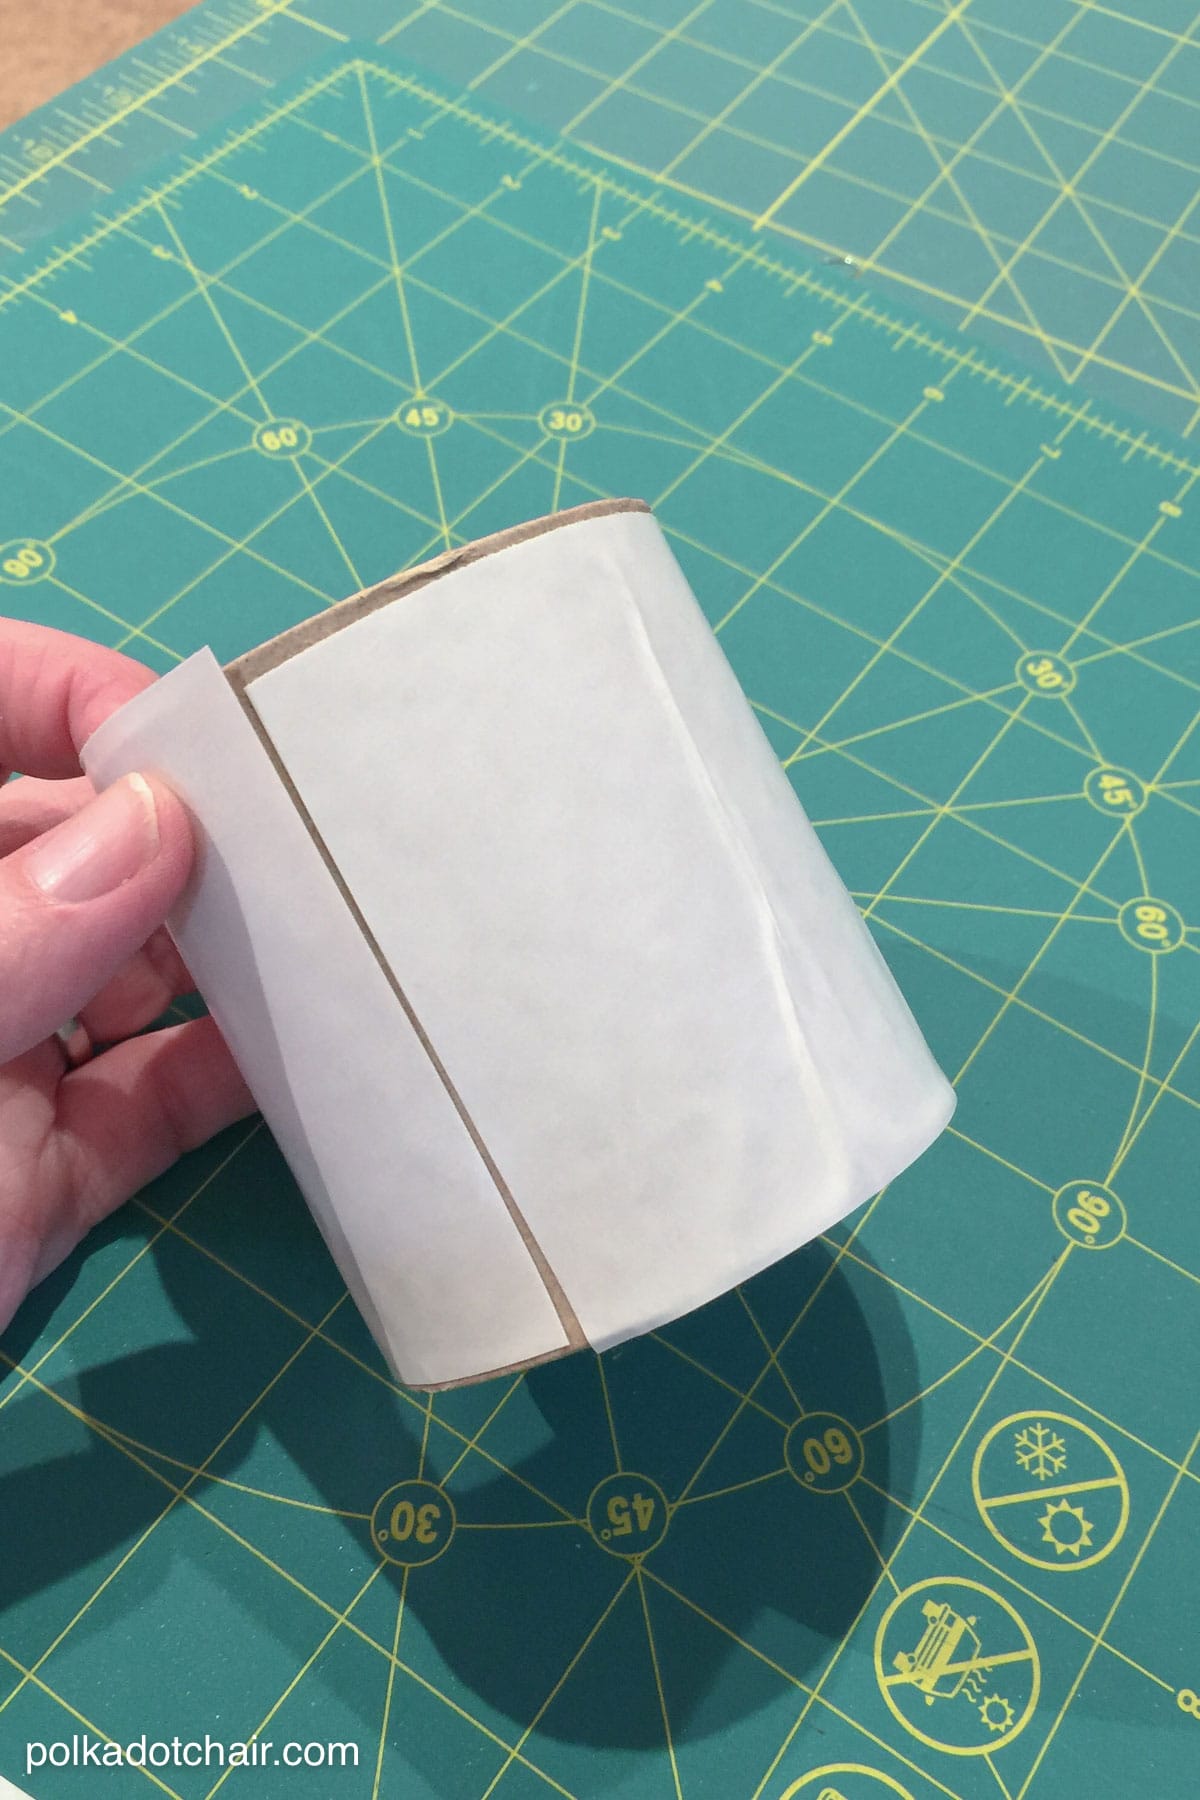
Peel the backing off one side of the sheet and apply them to the box.
Cut your fabric to the same height as your box. It should be an inch or so longer than the circumference of your box.
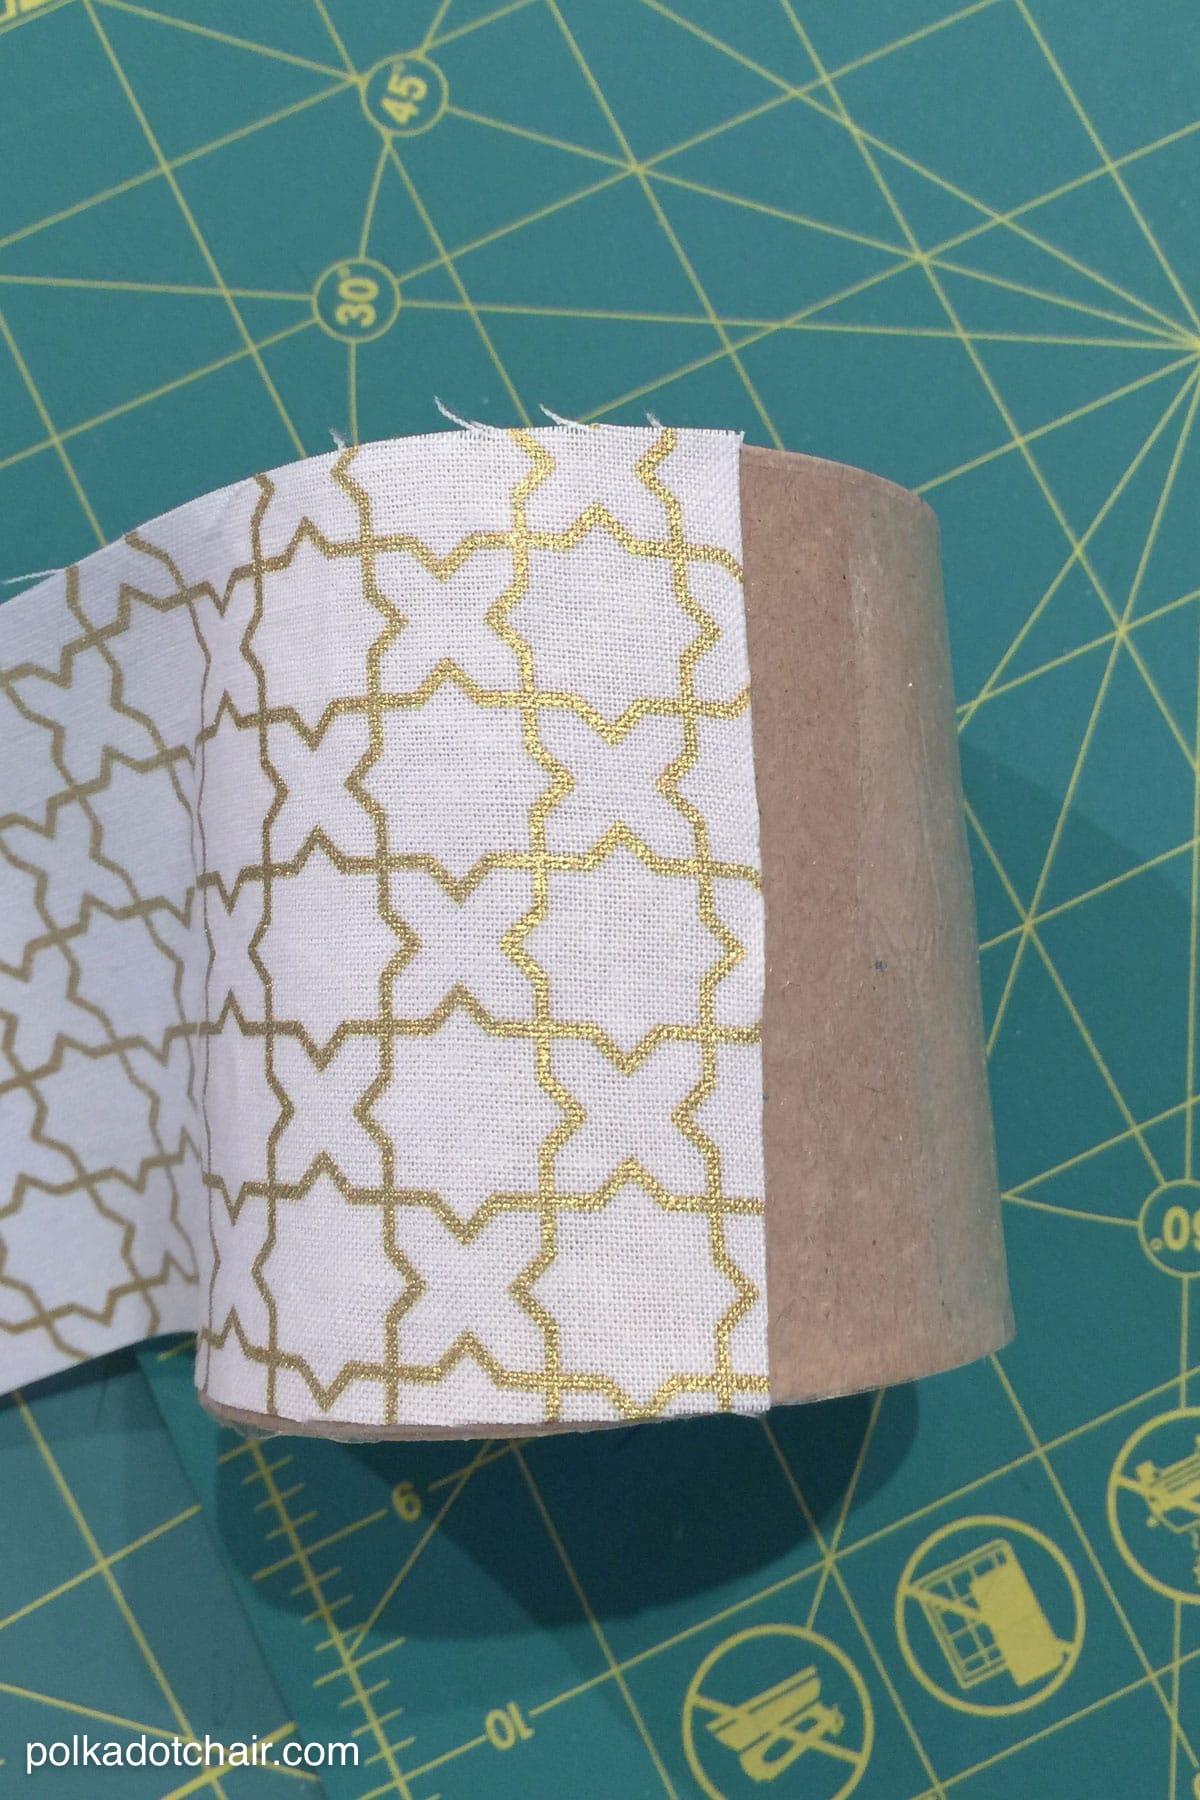
Peel off the backing from the adhesive and roll it onto your piece of fabric.
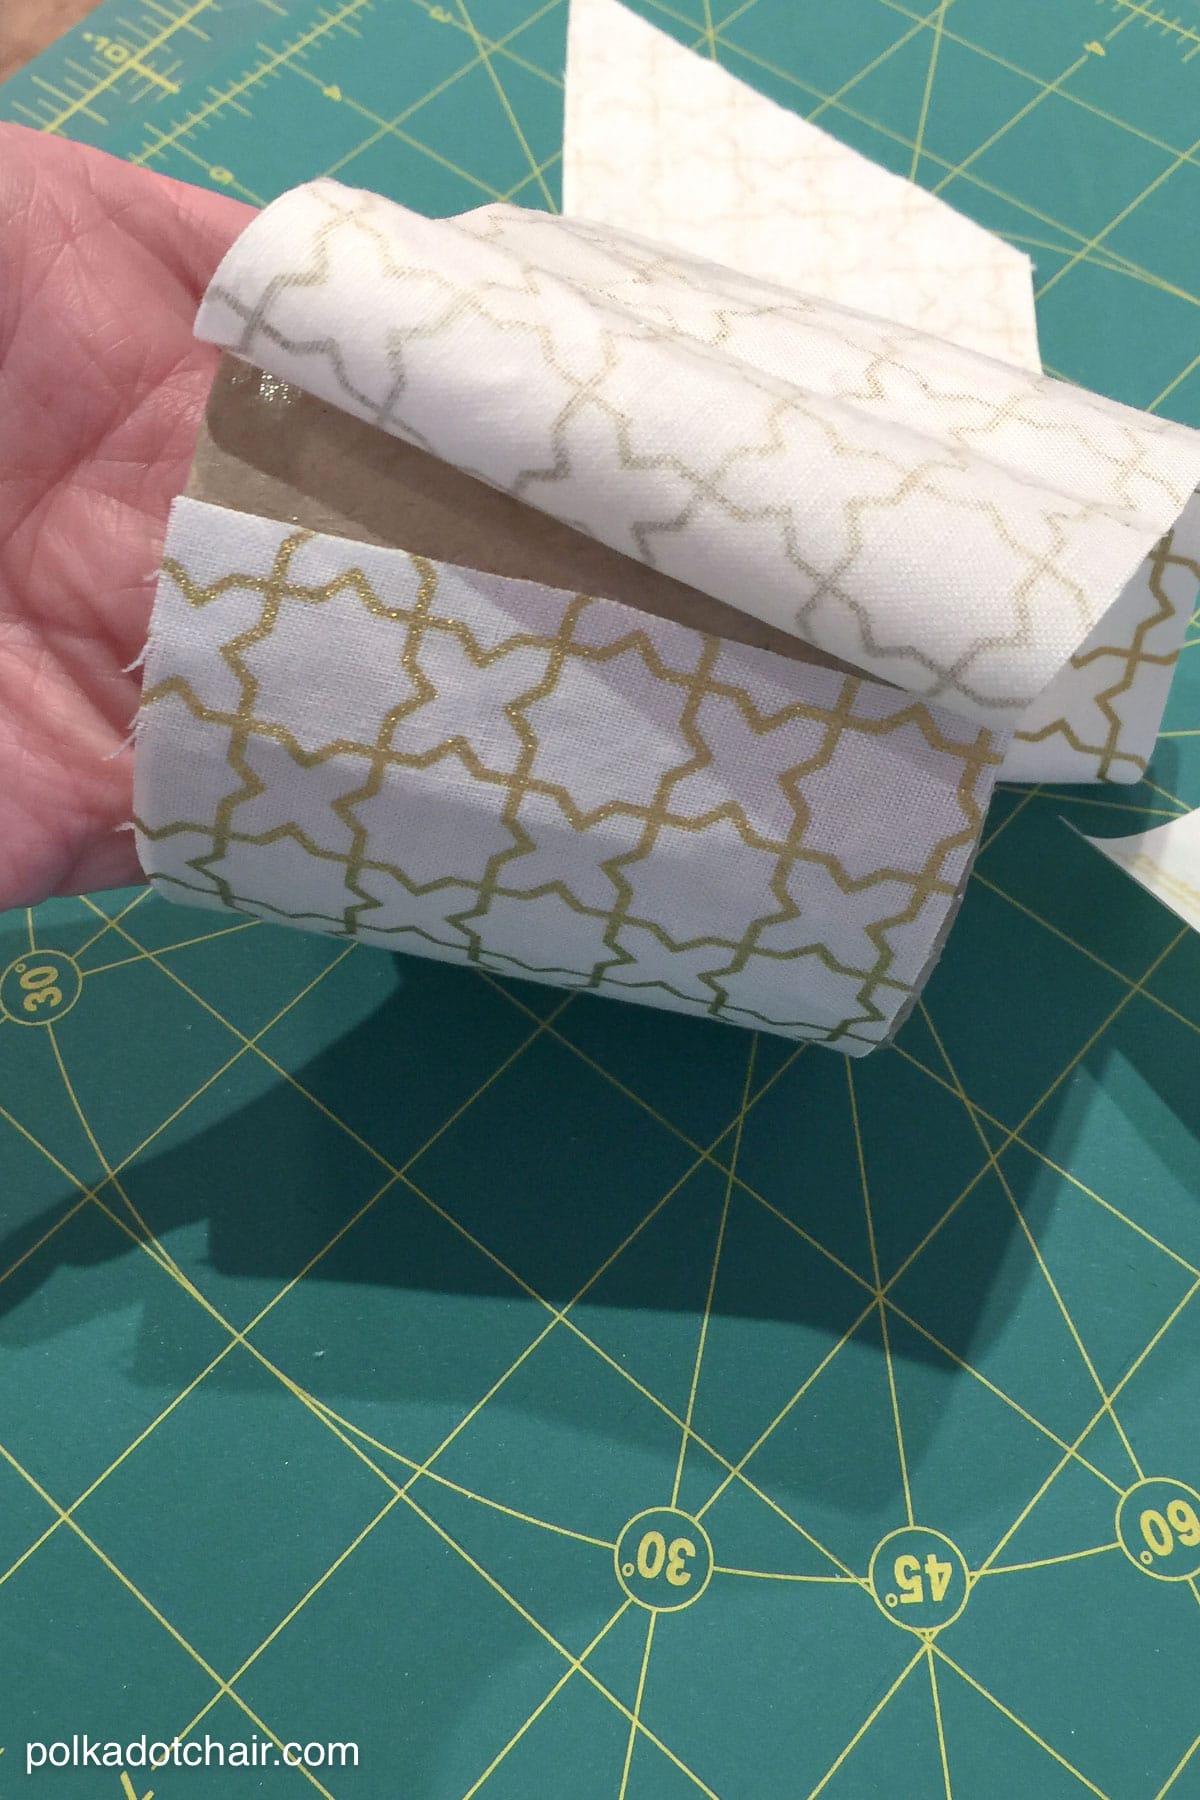
When you get back to where you started, trim the fabric flush. You will see a small seam but the adhesive will keep the fabric from fraying. If you want to you can hot glue a piece of ribbon over the seam to hide it.
Finishing
To finish your box, spray paint the lid. I used gold, but you can use any color you’d like.
Finally, punch a hole in the center of the lid and attach your decorative knob. If the screw on your knob is too long you can trim it to size.
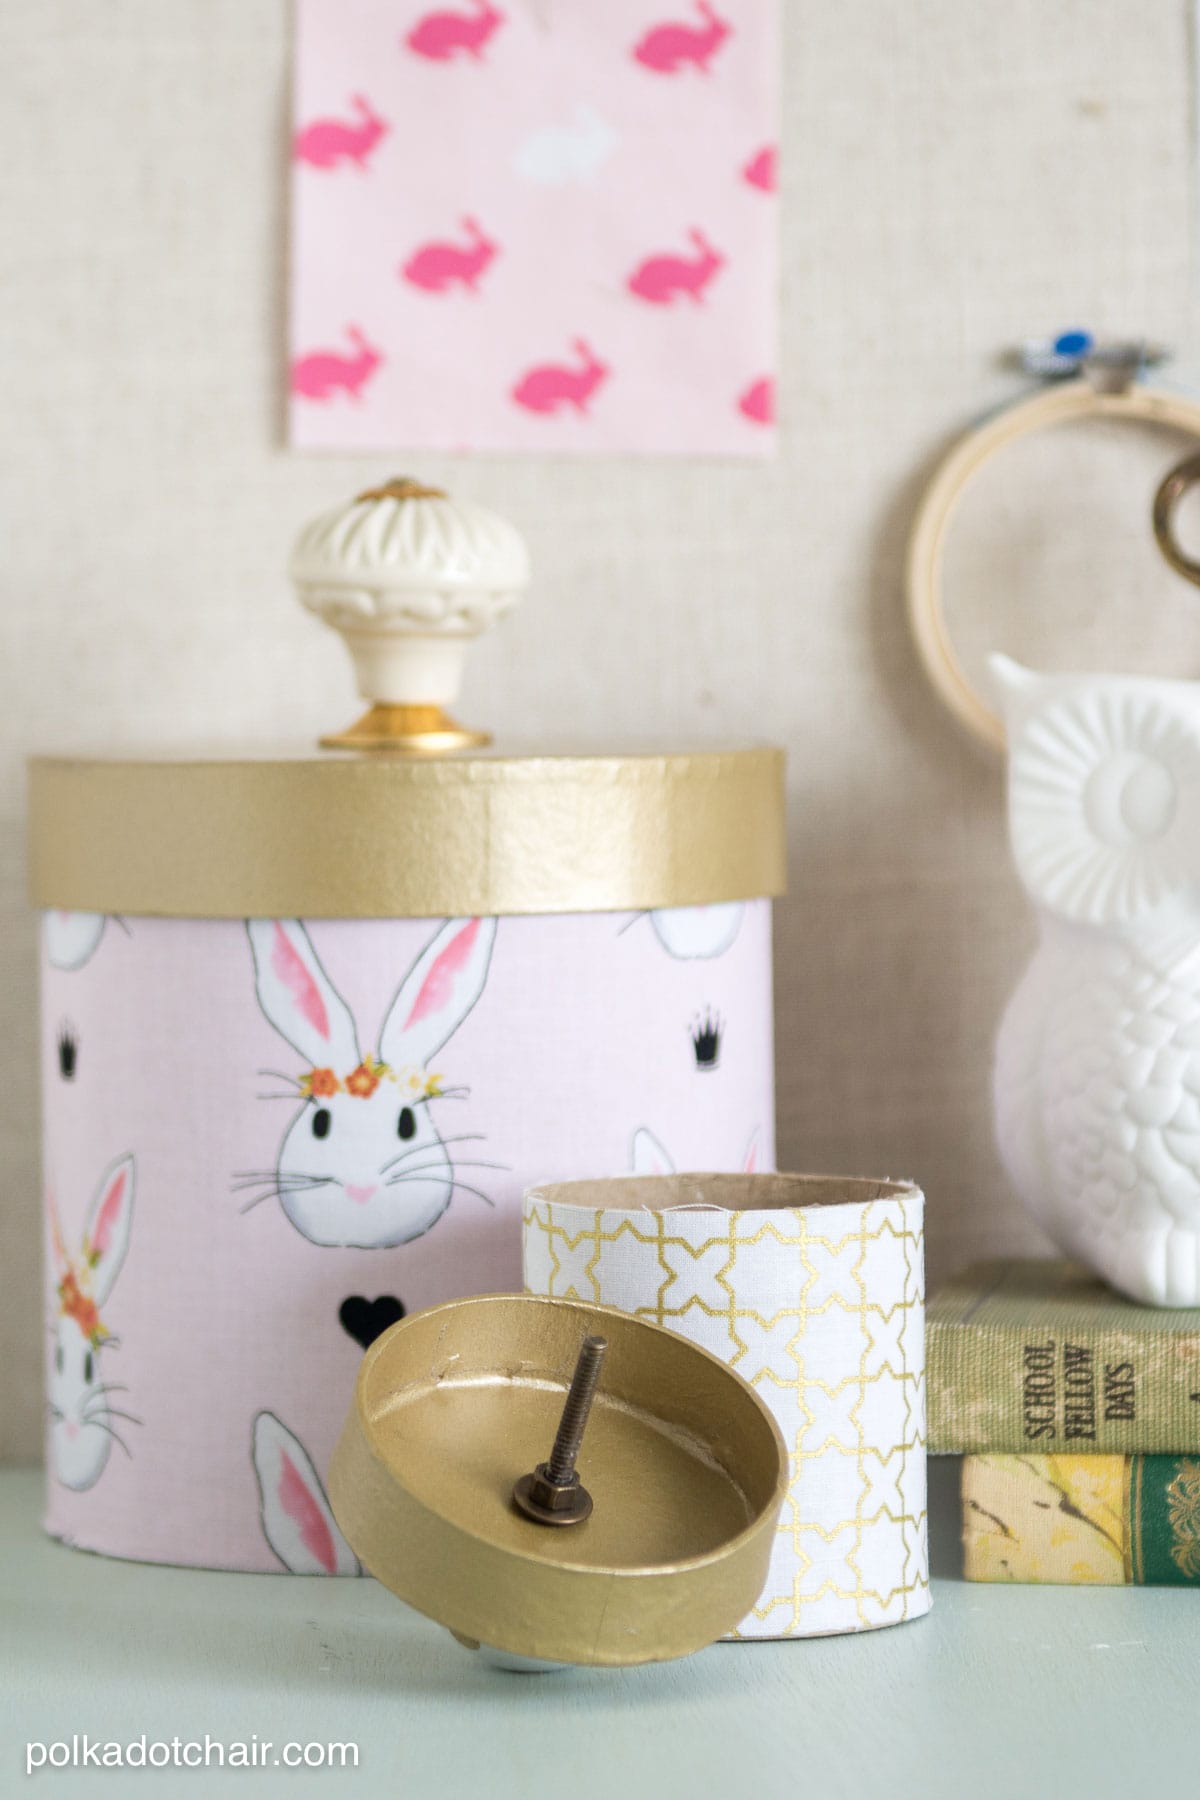
That’s it! An easy DIY that you can finish in an afternoon!
I’m planning to make a set for Halloween and Christmas, I think they’d make cute Holiday displays.
You May Also Like:
These are super cute. What a fun idea!
HI! These are really cute! Have you tried to do different shaped boxes?
Very creative! I found your page as I was looking for ways to paint paper mache boxes for my bridesmaids.
What kind of gold spray paint did you use?