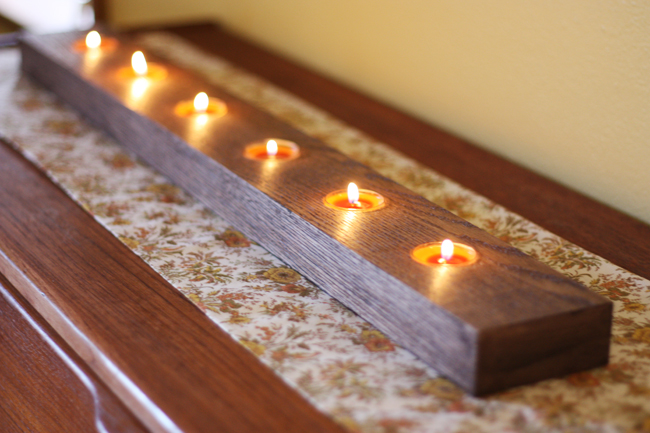
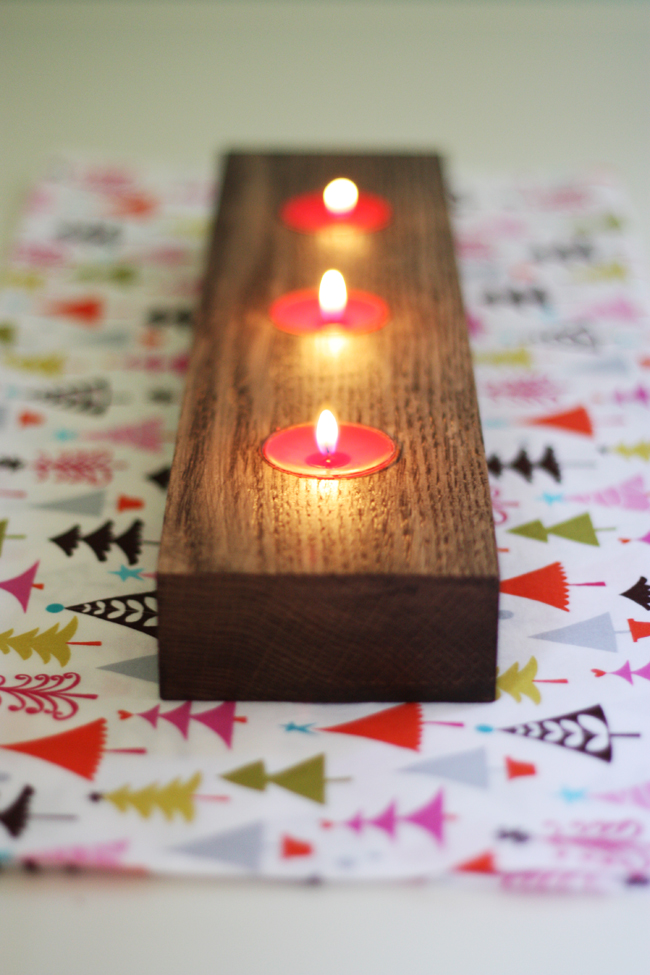
Modern Tealight Holder Tutorial
Here’s a fun woodworking project that you could definitely accomplish on your own (or for more fun, make it a project with your hubby)! Turn a simple wood board into a Modern Tea Light Holder.

I’m sure a lot of you already know her though!! Her blog is fantastic! Wonderful, wonderful projects! With lots of great sewing TUTORIALS! Please stop over there and tell her “hi” for me!
Thank you Melissa for having me over today! I was so happy she asked me to come to visit, and I thought I’d share an idea that’s a little something different than what I usually do.
We’re at the point where I can keep a candle around and it won’t get eaten or destroyed, and I wanted something to put on my dining room table for Thanksgiving this year.

All you need are a few basic tools and a few supplies:
Tea Light Holder Supplies
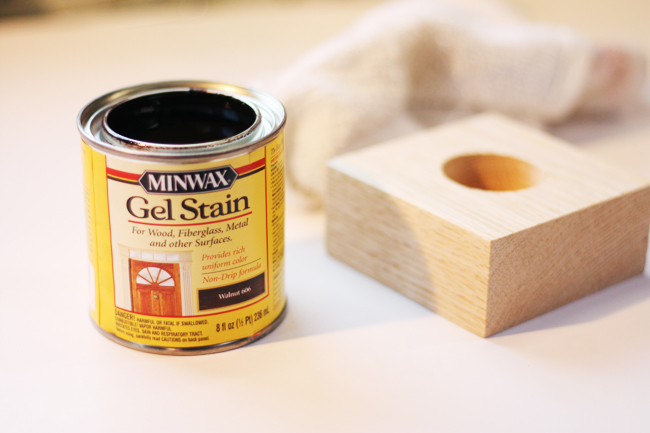
- 2×4 piece of quality lumber (I used oak from my local home improvement store)
- Power drill
- 220 grit sand paper
- 1.5″ spade bit
- Stain
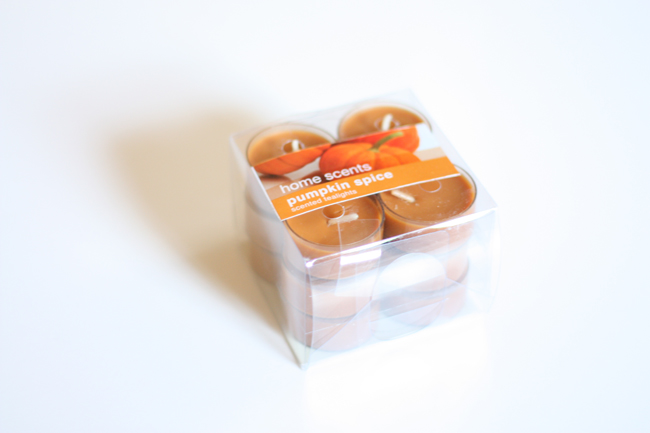
- Tea lights

Construction Steps
Cut your lumber to the length you desire. I know a lot of home improvement stores can cut lengths of lumber for no charge, so just ask. Or you could use your own chop saw or borrow neighbors.
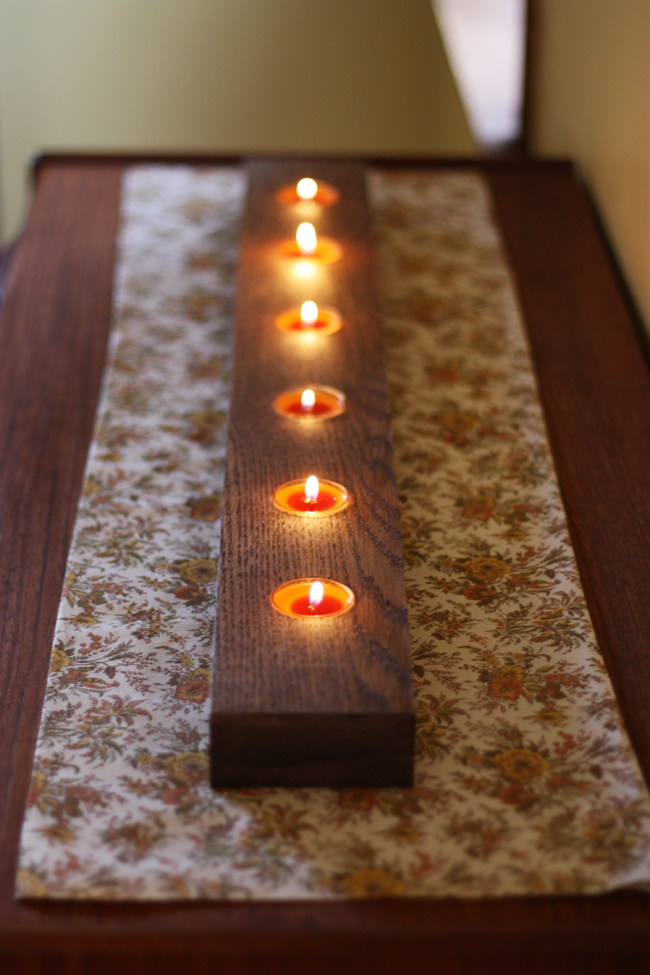
I cut mine to different lengths because I wanted to make some as gifts. The long version is 30″ long, the medium is 15″, and the single square one is 3.5″ square (yes, I should mention that even though lumber says it’s 4″ wide, it really means that it’s about 3.5″ wide – so just keep that in mind).
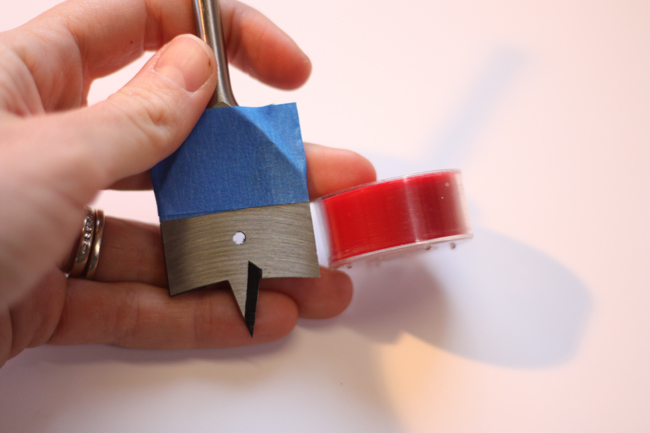
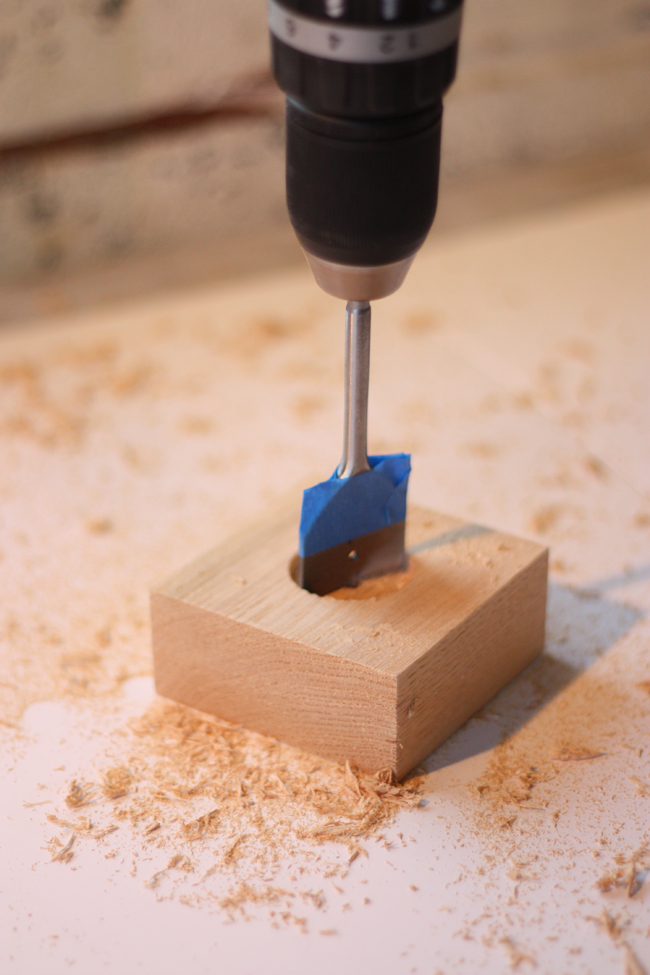
Drill tea light holes. Mark your spade bit depth. Using a piece of blue painter’s tape. Mark on the bit how deep you want the drill bit to go, that way when you’re drilling, you’ll drill until the tape is level with the wood. This will make all your holes the same depth.
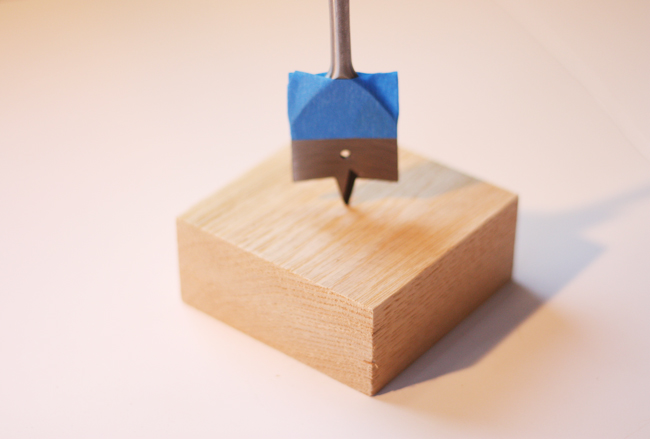
Mark with a pencil where you want your holes to be. I actually just ‘eye-balled’ all my markings and went for it, but I think you take the length of the piece and divide it by one more than the # of holes you’d like.
Remember to measure twice and drill once! Now with your spade bit attached to your drill, drill the holes.

3. Lightly sand down any rough areas with 200 grit sandpaper and wipe off any sawdust.
4. Stain using manufacturer’s instructions. I used a Gel Stain and wiped it off fairly quickly so the stain didn’t penetrate the wood too much. I wanted to be able to see the grain of the wood still.
Let dry, pop in your tea lights, and enjoy! Don’t worry if the depth of the holes varies a little, I ended up putting a little folded piece of paper underneath some of the tea lights to make them level with the wood, just do what works for you!
That’s all! I think it would look beautiful with any color tea lights and even the white tea lights for a non-seasonal look.
ps. Just thought I should add to make sure to keep small children away from burning candles and matches and never leave a burning candle unattended, but you already knew that. 🙂
*edited to add: Hi, Melissa here! I got a few emails asking about the candles burning down into the wood and posing a possible hazard. I don’t know if this would be a problem, but I would just make sure that you don’t leave the candles unattended and extinguish them before they burn too low, better safe than sorry!