In January we went to Utah for a fun but quick visit. My son was packing his own carry on bag (soo nice they can all do this themselves now) and I noticed that he had thrown a bunch of legos in the bottom of the bag.
I gave him a ziploc bag to keep his legos in, then thought about how many ziplocs we’ve gone though in the past year for the sole purpose of toting legos. I thought I’d try to make him a more permanent solution.
So I gathered a zipper, a clear shower curtain & some fun foam and made him a little pouch to carry his legos.
I will say, that sewing on the fun foam was NOT as easy as it seemed in my mind. But I did find a little trick that made it a bit easier.
To make the pouch you will need:
1 clear shower curtain liner (or you can use vinyl from the craft store, but the shower curtain is cheaper)
A zipper
Some fun foam sheets- If you can buy pre cut letters that would be easier but make sure they are not self adhesive so they won’t ruin your machine.
Zipper (any size is fine)
scrap paper
To begin:
Cut 2 pieces of clear shower curtain to the size you want. Make them the width of your zipper by whatever length you want. Mine are 8″ wide by 10″ tall.
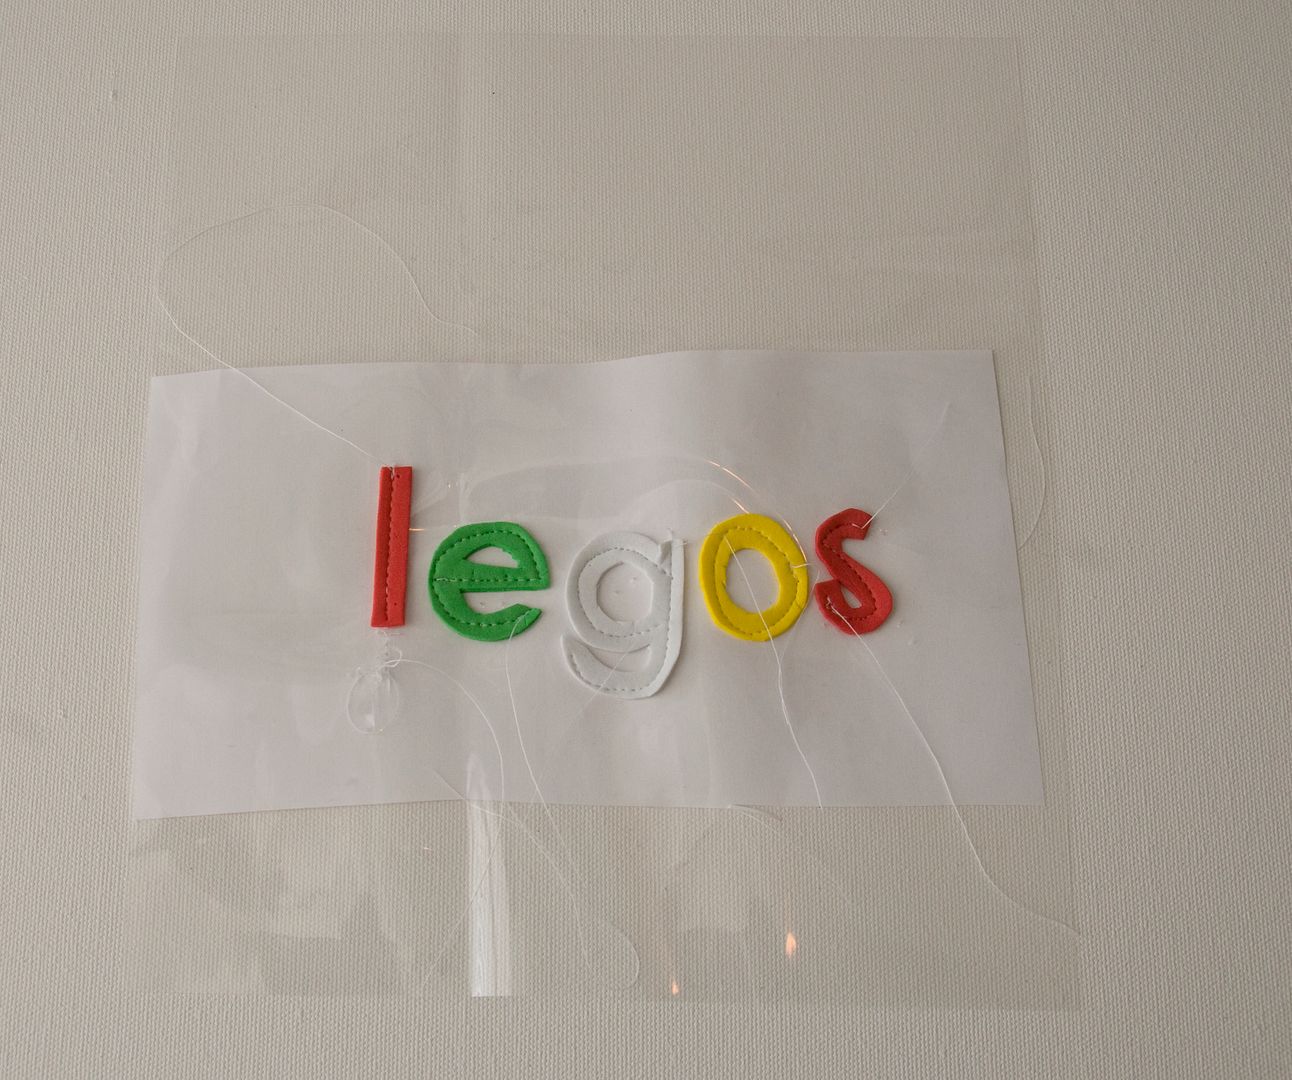
Print out “legos”. I used the font Century Gothic Bold.
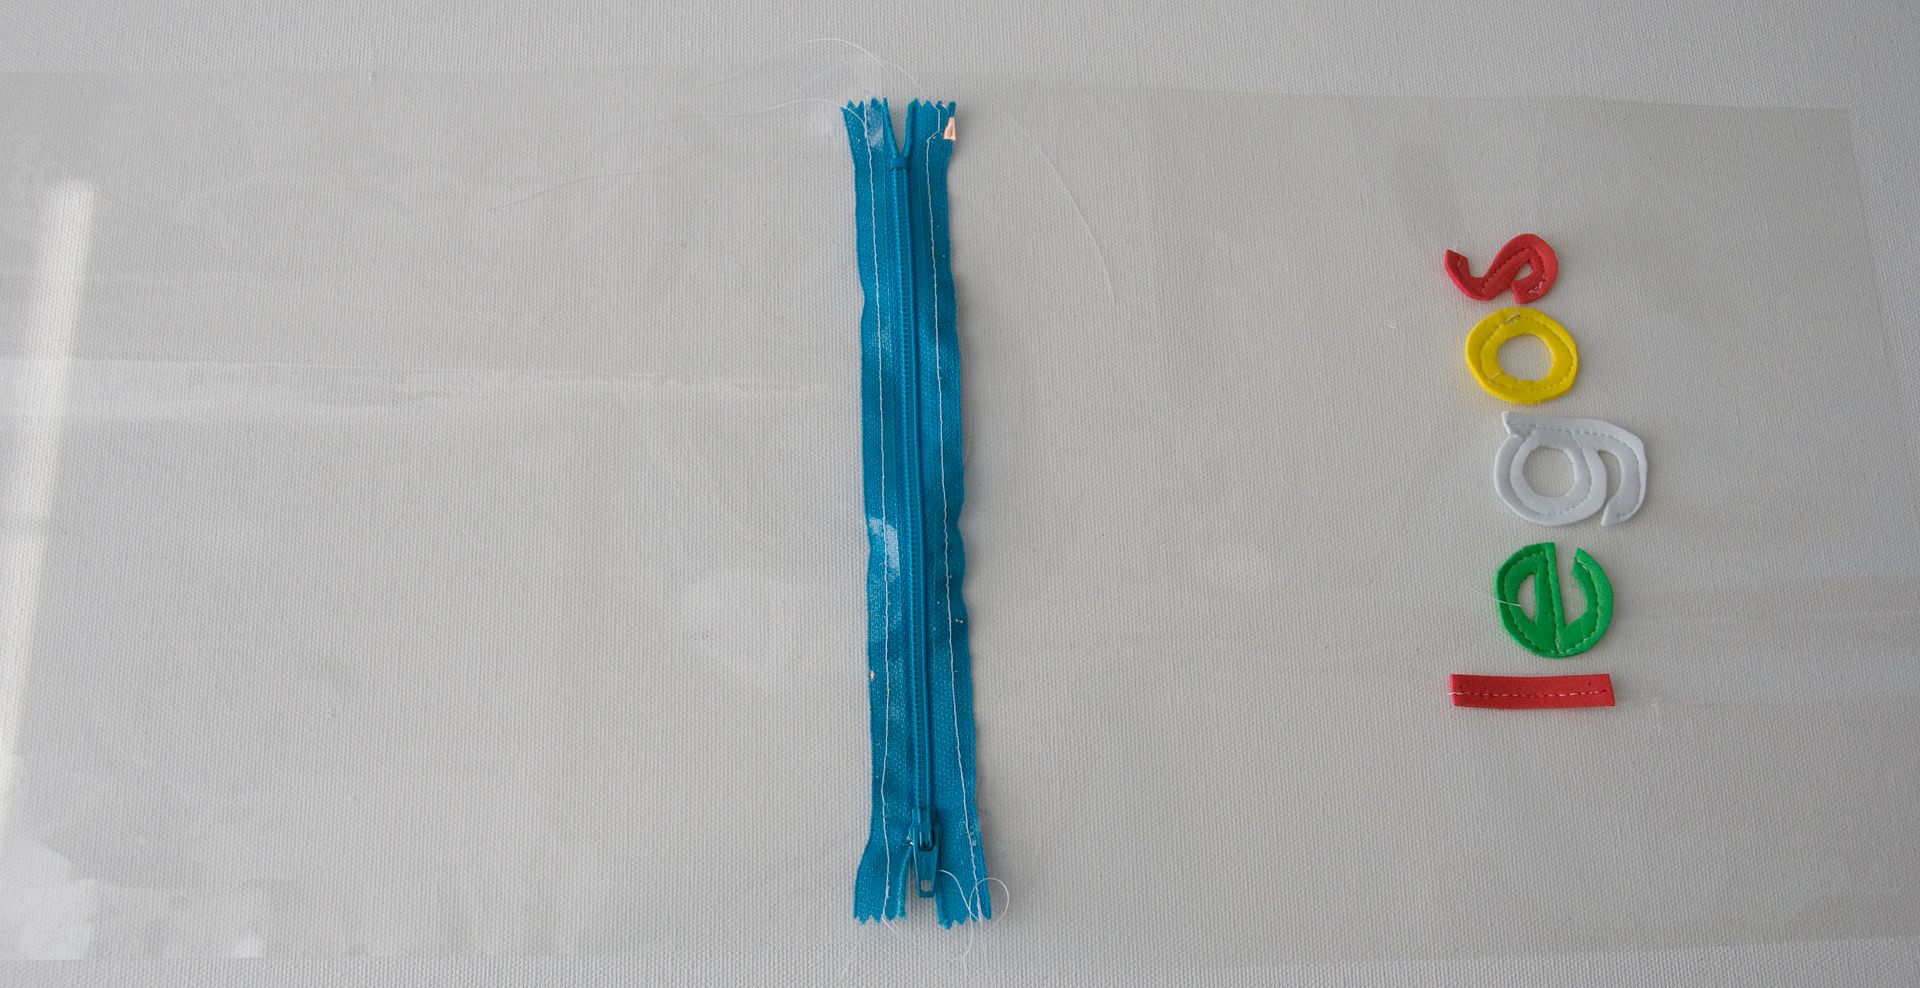
Trace the letters onto you fun foam and cut out.
Put the letters onto one of your shower curtain pieces. Lay a piece of paper behind the vinyl piece (the side that faces your bobbin) and sew them on. You will need to use a teflon foot on top. Go slowly. You can’t unpick otherwise you will have holes in your pouch. I found it easier to turn the paper than the letters. As you can see.. it’s not easy and mine are FAR from perfect. But I was still happy with the result.
Pull off the paper from the back of the letters after you have sewn them.
Place your zipper at the top of the 2 pieces of vinyl. Stitch the wrong side of the vinyl to the right side of your zipper.
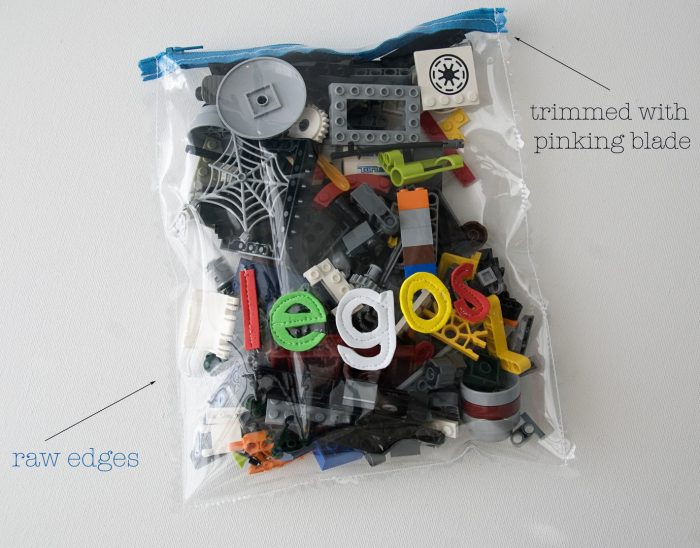
Sew the sides and bottom of the pouch together, wrong sides together. (there is no need to hide the seams as the vinyl will not fray). To do this you will need to place strips of scratch paper behind the pouch as the vinyl will catch on the feed dogs on your machine. Just remove the paper after you are done stitching.
To finish, use your pinking rotary blade or pinking shears and trim the seam allowance so that it is even on all 3 sides.
Clip the strings and you are done!
If you like the idea of sewing with a shower curtain you can check out the tutorial for my zippy wet pouchthat I made last year…