Seasonal Safari Row Along; Row 2
Welcome to Row 2 of our Seasonal Safari row along. If you’d like to see all of the posts in this series as of today, you can CLICK HERE.
We have made it to the last row in our row along! Which is row 2. I saved it for last simply because it builds on some of the skills we learned in previous weeks (like making half square triangles). If you’re joining us just this week. Let me “sum up”
- This Row along is offered for free and is posted across many blog posts over a 3 month period, it began in September 2017.
- This is the last of the rows.
- We are not going in order by numerical row, we are going in order by the difficulty of the rows.
- This is row 2 of 6 rows.
- To see all of the rows posted AS OF TODAY you can click here.
- We will talk about finishing in an upcoming blog post.
- This is not the last post
- The fabrics used are from my Safari Party line with Riley Blake Designs.
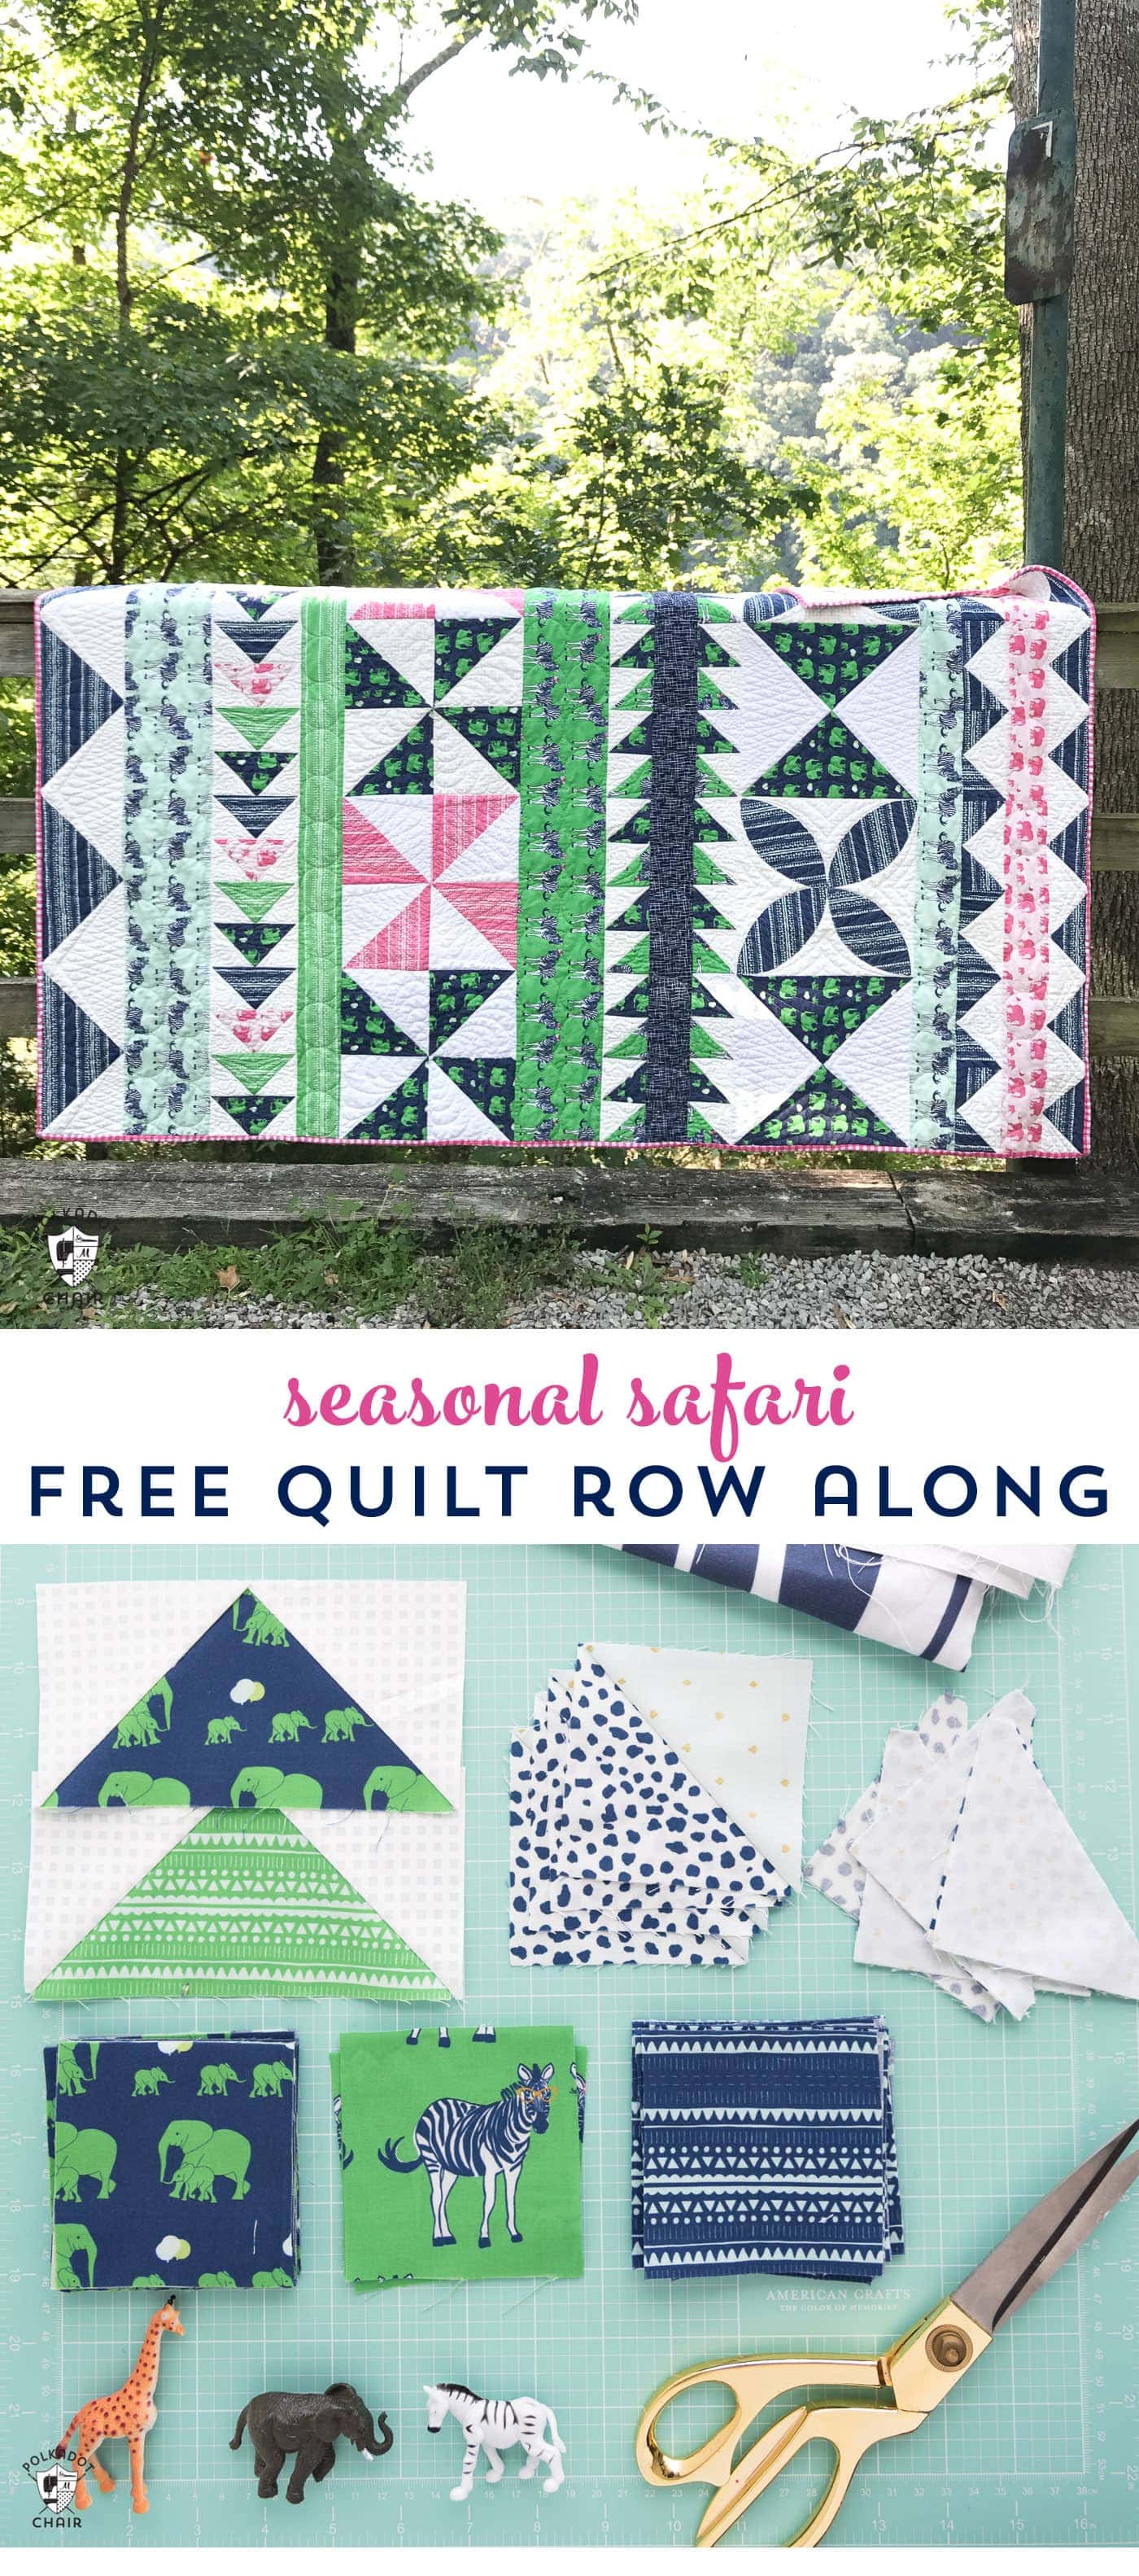
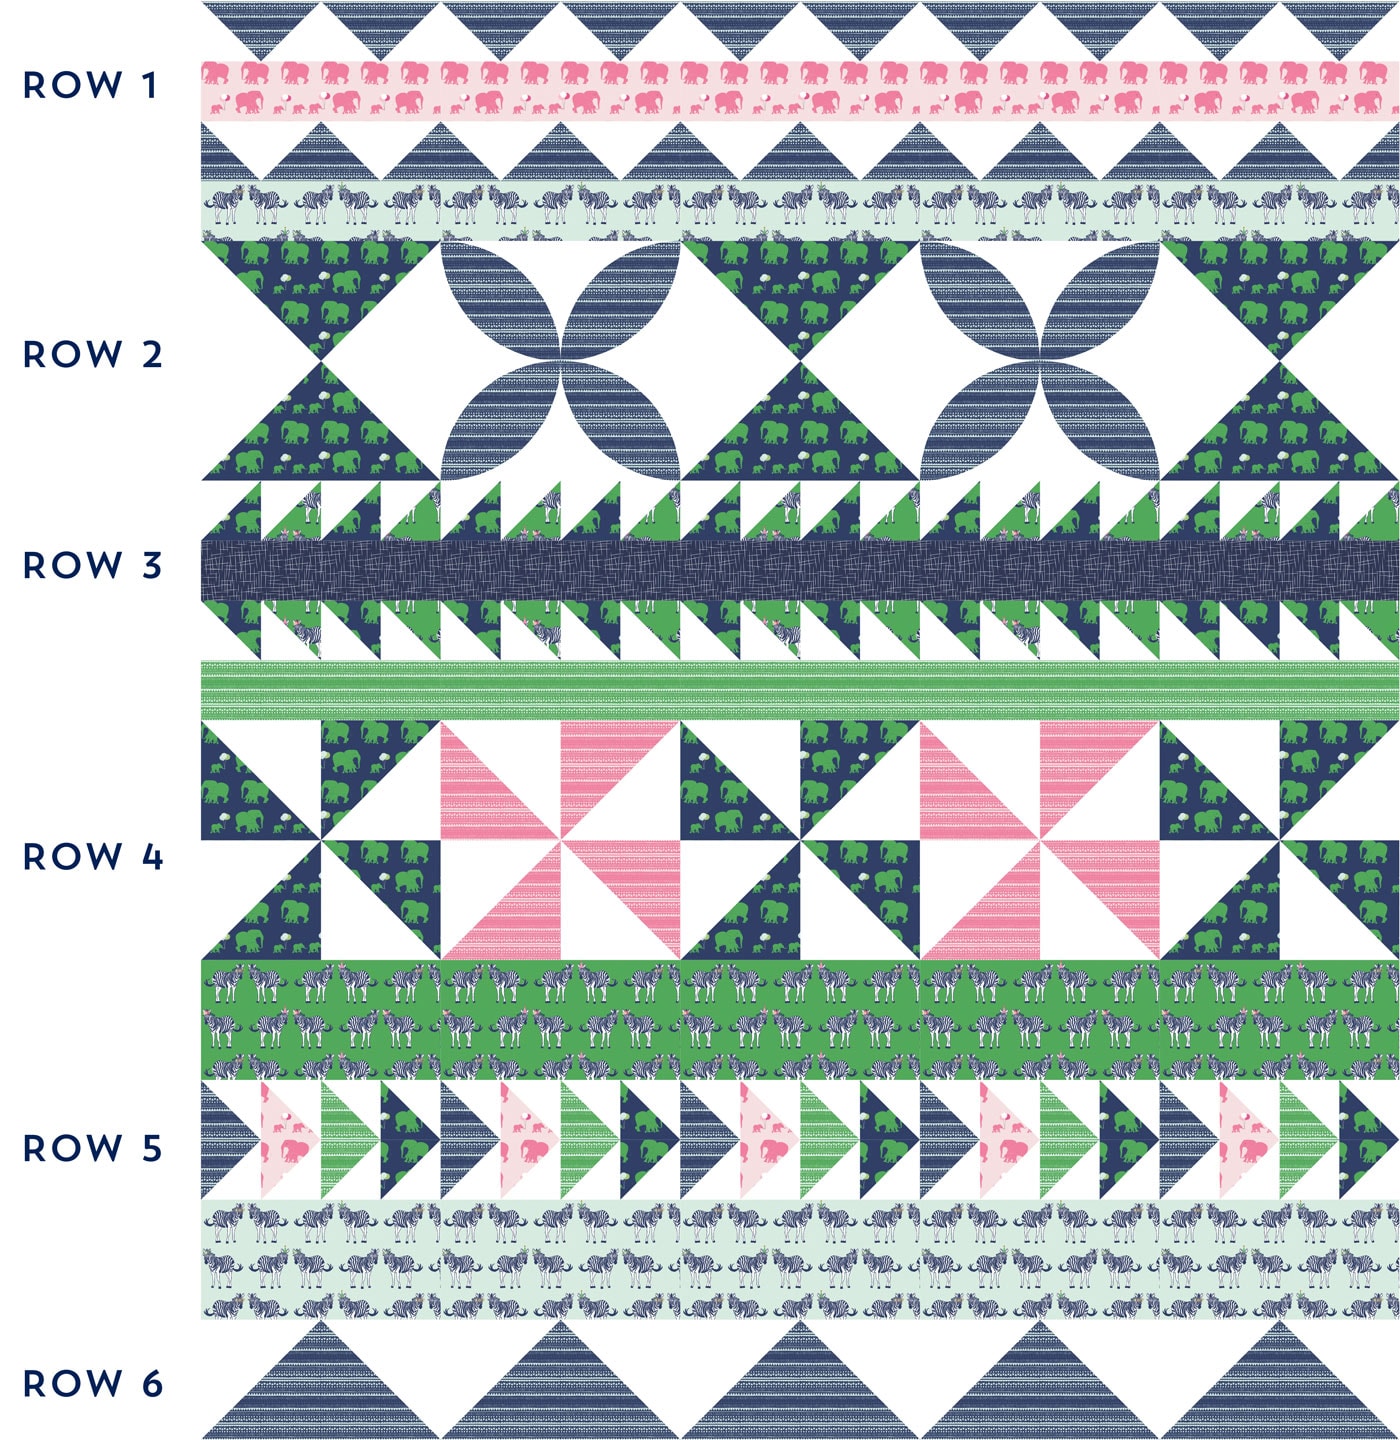
Row 2 of the quilt consists of two different block types. If you want, you can simplify it and only make one block type, it’s up to you. The blocks in the row are pieced Quarter Square Triangle blocks and appliqued Joesphs Coat blocks. The appliqued blocks are raw edge appliqued with a fusbile web. If you would like to hand applique them you can, I just can’t tell you how to do that, since I don’t know how myself! LOL!
Cutting Directions:
From White Fabric Cut:
2 pieces 13 1/2″ x 13 1/2″
2 pieces 12 1/2″ x 12 1/2″
From Navy Elephant Fabric Cut:
2 pieces 13 1/2″ x 13 1/2″
Do not cut the Navy Geometric Fabric yet.
In addition to your regular quilting supplies, you will need a package of Heat n Bond lite for the applique blocks.
First Create your Quarter Square Triangle Blocks
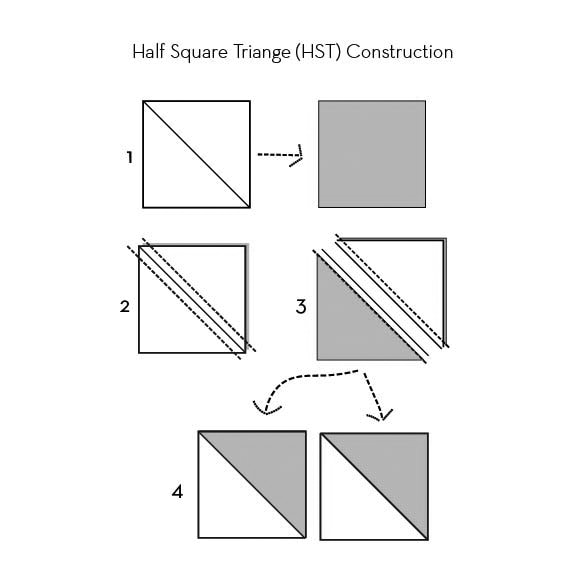
Begin by creating Half Square Triangles from the navy fabric (A), and your background fabric (B).
To do this, layer one 13 1/2″ square of fabric B on top of one 13 1/2″ square of fabric A, right sides facing. Draw a diagonal line down the center of one piece and stitch 1/4″ on each side of the line. Cut pieces apart, press seam to the dark side.
Repeat with other 13 1/2″ squares. You should now have 4 Half Square Triangles.
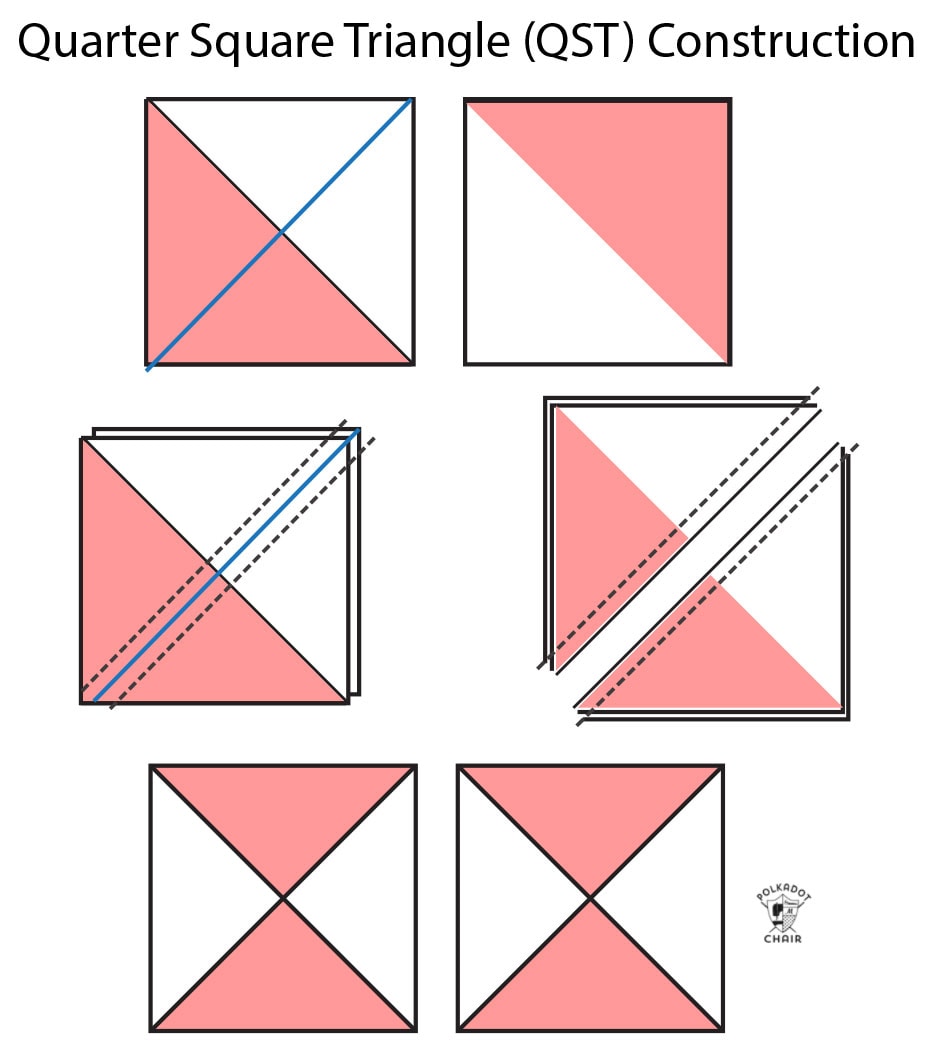
Now you are going to take those 4 Half Square Triangle pieces and create Quarter Square Triangles.
Layer two Half Square Triangles on top of each other so that the diagonal seams are “nesting” into each other and the two pieces with print A are not on the same side.
Draw a line down the center of one of the HST pieces going in the opposite direction of the existing sewn line. Stitch 1/4″ on each side of the line. Cut apart and press.
Trim down to a 12 1/2″ x 12 1/2″. Make sure it remains “square” as you trim. If you need help with trimming, check out this post on Quilt Block Construction Tips.
Using this method you will end up with one extra block. Save it and make a matching pillow!
Next, create your Joseph’s Coat Blocks
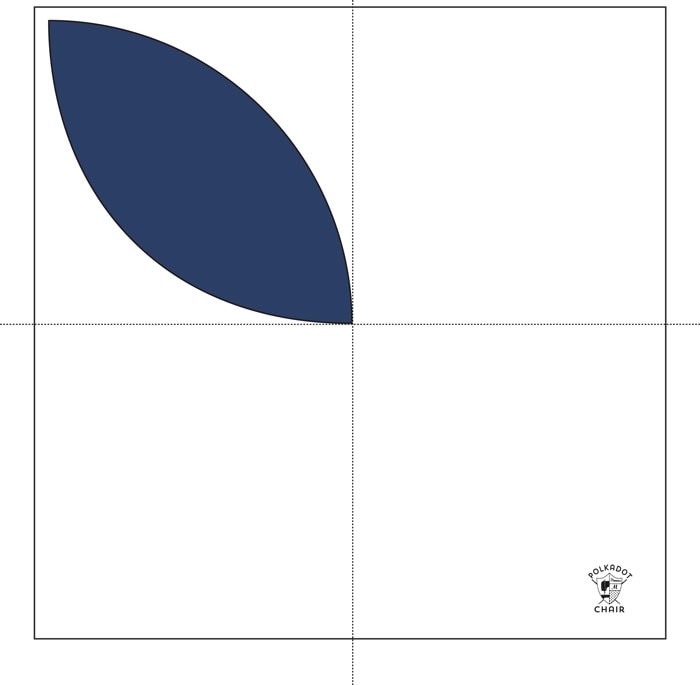
Trace the template for the curve onto a piece of heat n bond lite. You can download it by CLICKING here.
Cut the pattern out loosely and press it onto the wrong side of your navy geometric fabric. Cut out precisely.
Repeat until you have cut out 8 pieces.
Note: if your fabric is directional you’ll want to take note of how the shapes are laying on the fabric. If you don’t care which way the fabric faces, don’t worry. If you do, I recommend cutting your shape from clear template plastic so you can double check how the pattern lays on the block. I have also noted the grain line on the block. If you line this mark up with the grain of your fabric, then your fabric will be facing the right direction on the block.
Fold one of your 12 1/2″ white squares in half, and in half again. Press so that you can see the center marks of the block (the dashed lines on the diagram above represent the folds in the fabric).
Peel off the paper from the back of the shape and apply it to the block as shown. Make sure it’s running exactly diagonal across the block and in a quadrant. The tip of the piece should be in the center of the block. Remember you will stitch around this block and need to leave a 1/4″ seam allowance around all of the sides.
Press it in place. Repeat until you have 4 shapes on your block. Repeat for the other block.
On your machine, using a simple applique stitch, stitch around the perimeter of the shape.
Next, stitch your row together alternating Quarter Square Triangle blocks and Josephs Coat blocks. Press seams to one side. Note: I put my quarter square triangle blocks facing a different direction than in the diagram. Place them however you’d like.
Whew! That’s it, you now have instructions for all of the rows in your quilt. Next time we will chat about assembling the rows!

