DIY Keychain Chapstick Holder Tutorial
These cute little keychain chapstick holders make great gifts since they are so useful and easy to stitch up! They would make great teacher appreciation gifts or simple gifts for your friends and neighbors. Amy of Ameroonie Designs is here with us sharing a free lanyard chapstick holder tutorial.
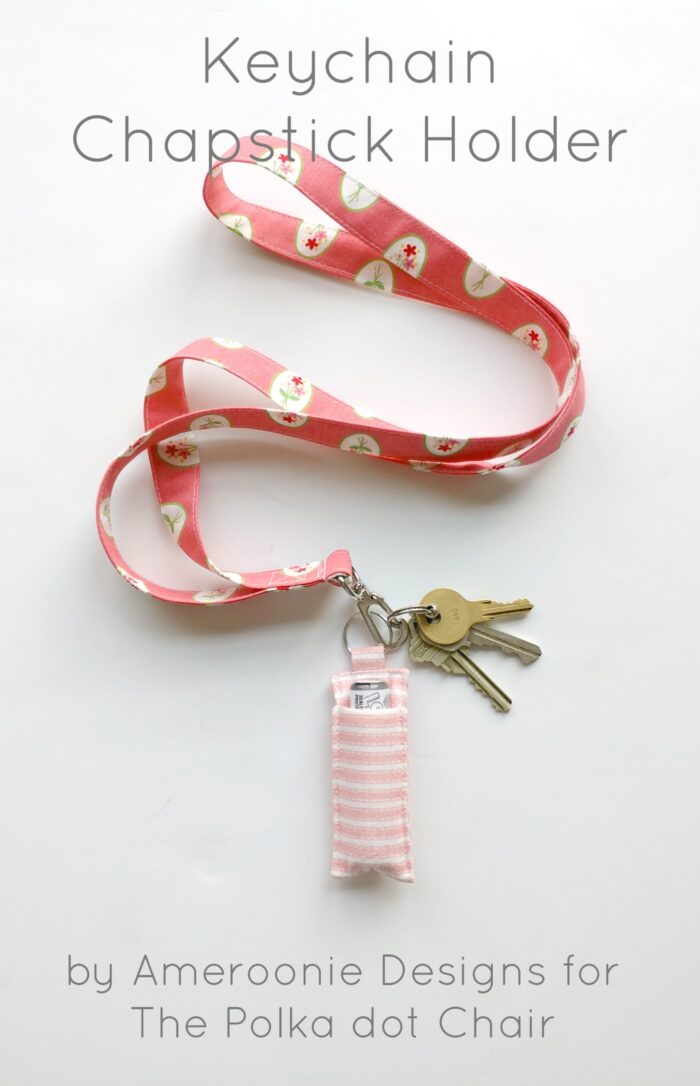
With kids heading back to school and the terrible dry winter months coming, I decided it was time to make my family some new chapstick holders. These are so fun to make, sew up quickly, and only use a few scraps so they are easy on the budget. And, they help my kids keep better track of their chapstick, which is definitely an added bonus!!
Keychain Chapstick Holder Sewing Pattern
supplies
- 1 3/4″ or 1″ split ring.
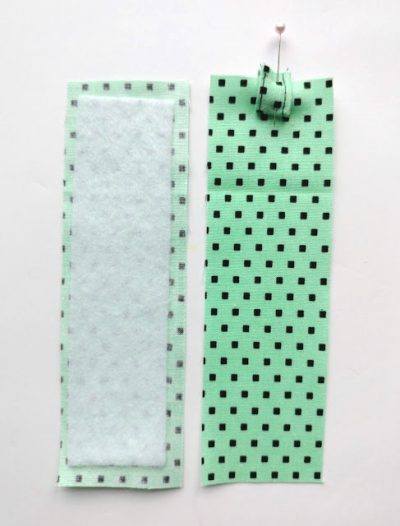
- 2 pieces fabric 6 1/8″ X 1 7/8″
- 1 piece fabric 1 1/2″ X 2″
- 1 piece fusible fleece 5 1/2″ X 1 1/2″
Instructions
Mak the tab for the split ring
- Fold your 1 1/2″ X 2″ piece in half to create a 1 1/2″ X 1″ piece.
- Open up your fold and bring the raw edges into the center crease, press.
- Fold the piece on the first crease line again, keeping the raw edges in the center, press.
- Edge stitch along both sides of your tab.
Construct the Chapstick Holder
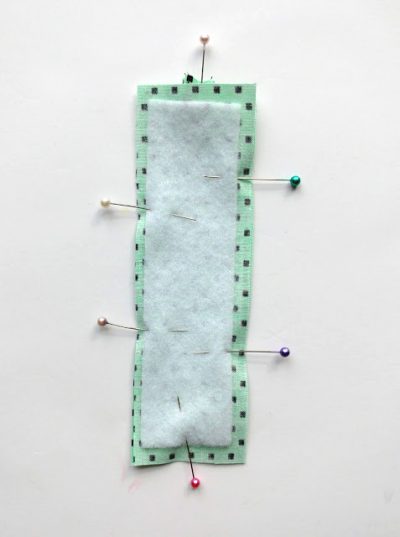
- Fuse the fleece on the wrong side of one of the large body pieces, following manufacturer instructions. Fold the tab for the split ring in half and center it on one short end of the other main body piece.

- The raw edges should be lined up with, or just past the edge of the fabric. (I like to have a bit more fabric in the seam allowance on this piece since it is what holds the chapstick on the keychain, if it’s easier for you to center it, just line it up with the edge.) The fold should be laying on the fabric.

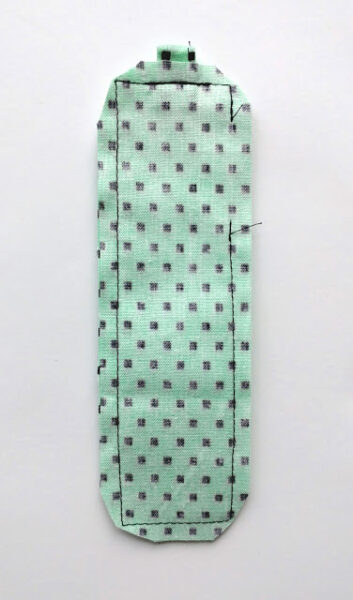
- Place the two main fabric pieces right sides together and pin around the whole thing. It may be helpful at this point to mark with different colored or style pins where you will be leaving an opening for turning. I recommend leaving part of the long side closest to the tab open. You can see where I leave the opening in the next picture.

- Stitch around all 4 sides of the chapstick holder. Backstitch where you begin and end. I also like to back stitch over the tab piece a couple of times to reinforce this seam- it is what will get all of the stress from use!
- Clip the 4 corners, turn right side out and press.
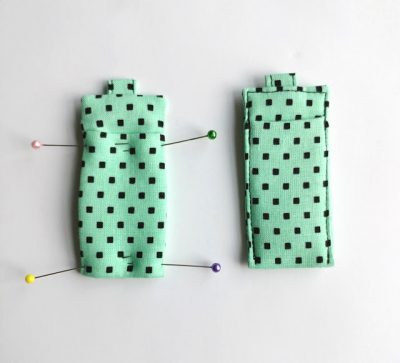
How to Create the Pocket:
- Make sure the seams where you turned the holder right side out are lined up evenly and pressed well. Mark 3″ from the side with the tab (I usually use pins for this) and fold up the other side so your holder is now 3″ long- minus the tab.
- I prefer to have the fleece toward the inside of the pocket you are creating so I place my holder piece fleece side up when marking the 3″.
- Pin around the holder and sew. I start at the bottom, where the fold is, make sure to backstitch. When I reach the top of the folded over piece, I backstitch again to reinforce the pocket. Go around the top and back down the other side- again backstitch where the pocket begins as well as when you finish stitching.

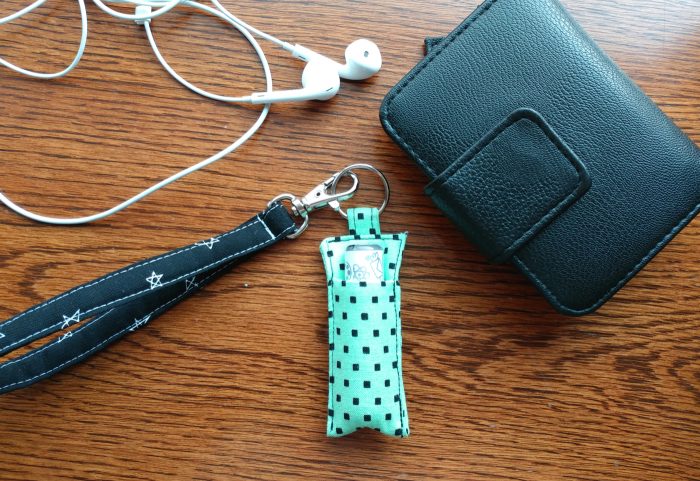
- All that is left is to add your split ring to the tab and your chapstick! See? Super easy!!
Notes

All that is left is to add your split ring to the tab and your chapstick! See? Super easy!!
I like to create wrist straps for lots of my pouches so they are handy to carry and also so they don’t get lost in my purse. If you would like to see my wrist strap tutorial you can find one here.
Uses for the Chapstick Holders
I attach them to backpacks, lanyards, or just add a wrist strap to make it much easier to find in my purse!
Once you see how little fabric these use, and how fast they are to make- you’ll be making lots and lots of them. They make great back to school gifts, stocking stuffers and fun add-ons to teacher gifts or birthday presents! I love having a stash of them to pull out when I need just a little something to give away!
I hope you have fun making these!
xoxo,
Amy
About the Maker:

Hi! My name is Amy Chappell and I blog over at Ameroonie Designs. I currently live in Utah with my husband and 6 kids. I love being a mom but needed an outlet that would give me something to do that stayed done, enter sewing and creating. Love the satisfaction of taking fabric and ideas and making something new. I also love that blogging has given me a way to meet new people and find a community of amazing people who love fabric and sewing as much as I do.
xoxo,
Amy
Ameroonie Designs
www.amerooniedesigns.blogspot.com
Other Cute Projects by Ameroonie Designs:
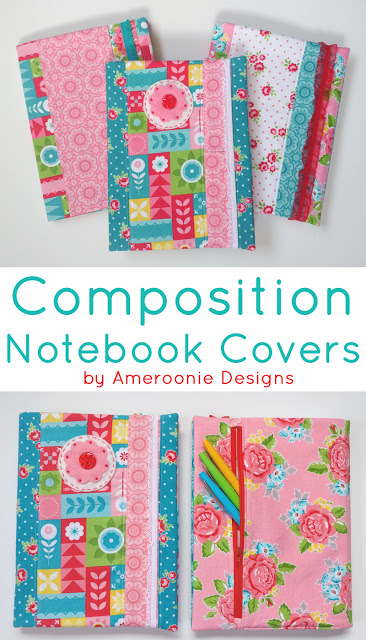
Composition Notebook Cover Pattern
Have you ever made these without the fusible fleece?
Love it! I’m doing it right now and I think there is a part missing. Following the instructions, there is no part where I make the lipstick pocket. Can you please look at it? 😁
It’s in the last step. Just make sure you read to the end of the tutorial.
I was following links on the ‘net and came across this tutorial… it occurs to me that it might be a good idea to size up slightly and make a pouch to hold your mini-hand sanitizer that clips onto your purse or hold-all. I know the only hand sanitizer I bought that had a carabiner clip, broke and was leaking everywhere (what a waste!) so I’m looking at other ways to hold the little bottles…