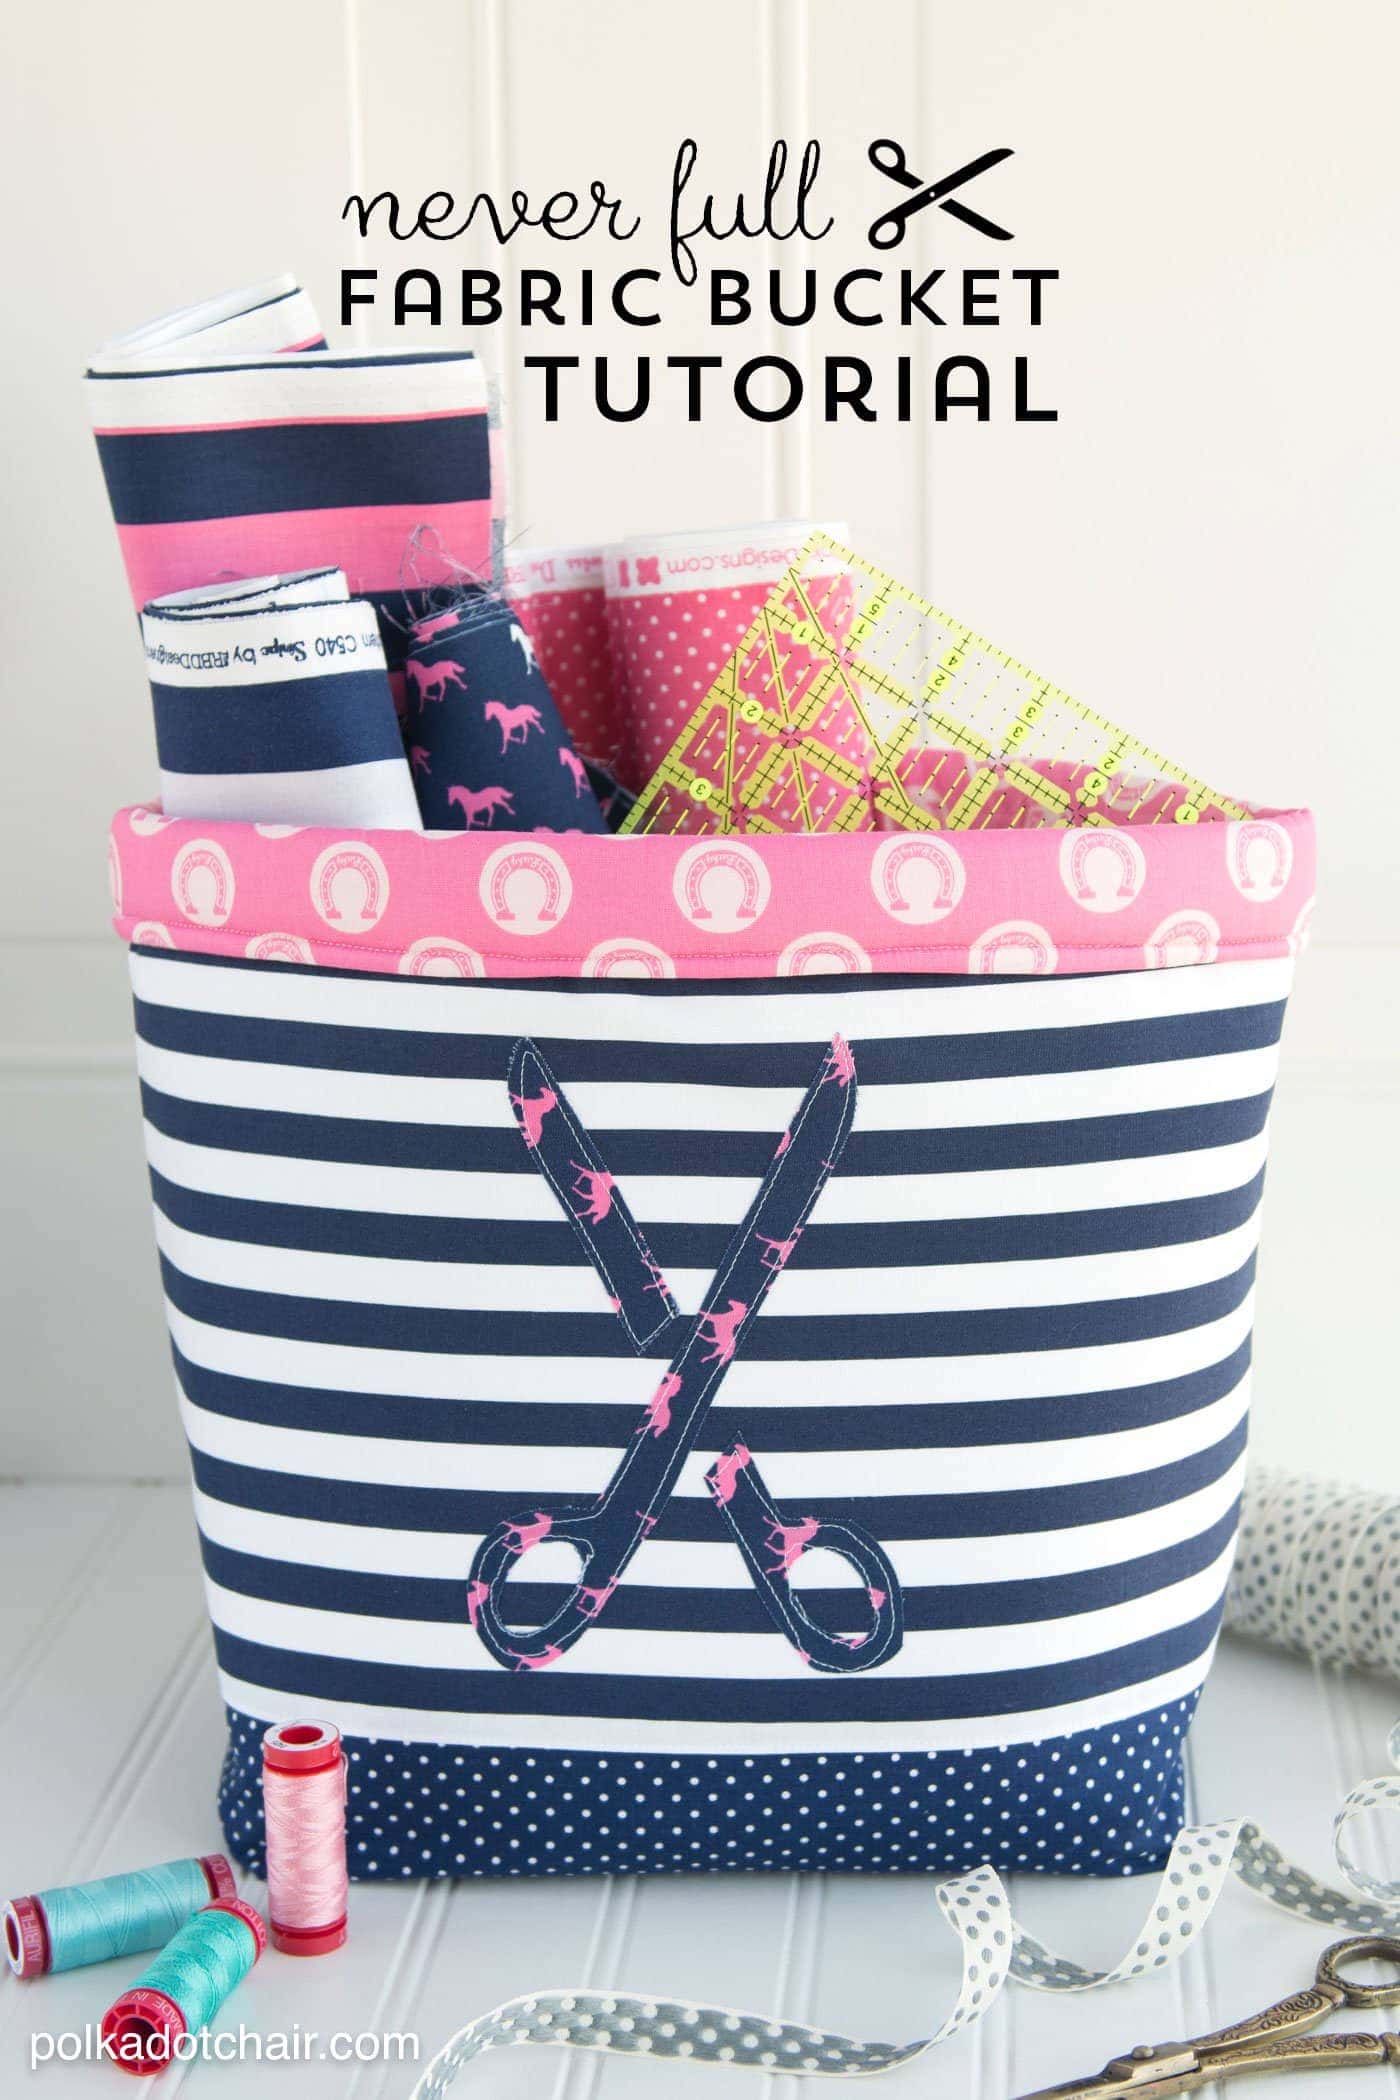
DIY Personalized Tote Bag
*A big thanks to Jo-Ann and Cricut for sending me the supplies to make today’s project! All opinions and hair brained ideas are 100% mine.. this post contains affiliate links**
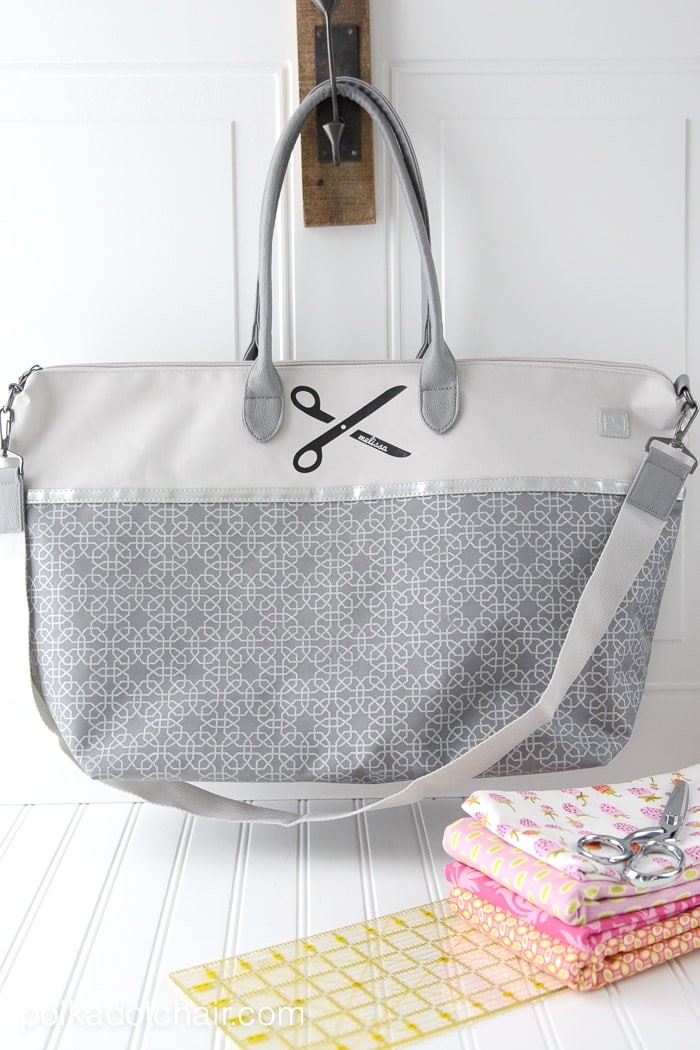
I seem to pop into Jo-Ann’s once every couple of weeks. I always think that I have enough of what I need for a project then realize I’m missing something silly like a zipper or a button. I’m guessing that I’m not the only one that does stuff like that, lucky for me I have a store close by. Have you noticed those cute new totes that they have at the register now? I mean I always loved the printed bags they had before but these new ones are just “totes adorbs” (forgive the pun *wink*)….
I’ve been wanting a sewing tote bag for a while now. I had it on my “list” to make one but you know how those good ol’ “to do” lists go…. Instead that this tote would be a great bag to tote around my sewing supplies with me. I can fit most of what I need inside and throw it over my shoulder when my hands are full.
On my last run to Jo-Ann’s I picked up a roll of Cricut Iron on Vinyl and decided to put it to use this month. I’m still participating in the Cricut Design Star Challenge and have one more project left to go (I’ll post it next week, I’m crazy excited about it) but I thought that this would make a super cute bonus project for this design period.
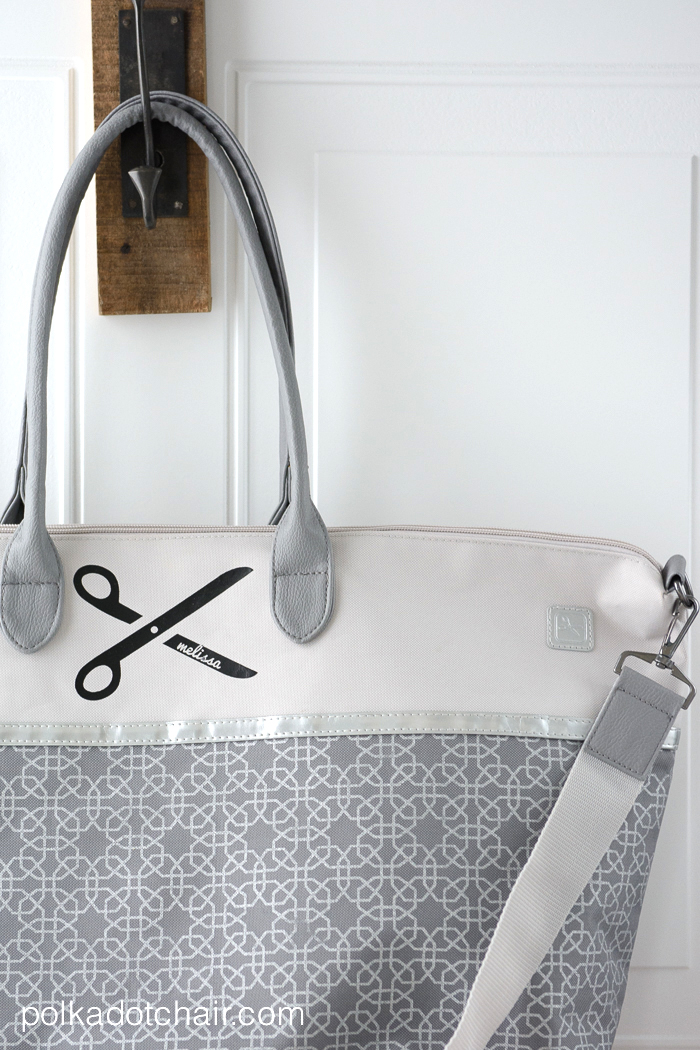
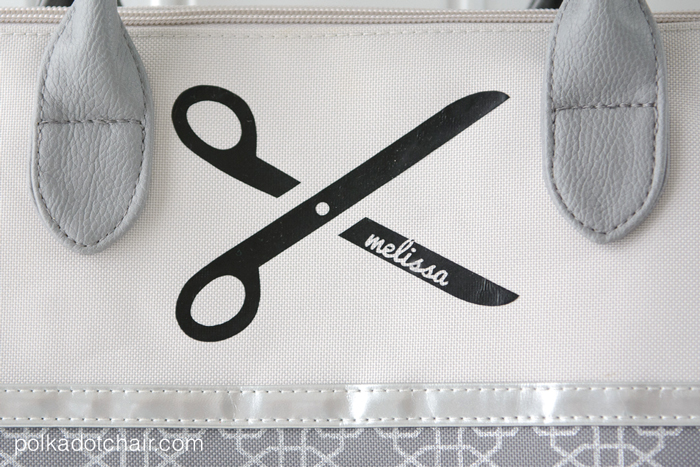
So I decided to personalize the tote, but instead of just putting my name or monogram on it, I thought it would be fun to do something a bit different. So I made a little “scissors monogram” for myself.
Here’s how I personalized the tote… You’ll need:
-A Tote Bag from Jo-Ann Stores (it’s $9.99 with a $30 purchase)
-Scissors Image & Pacifico Font
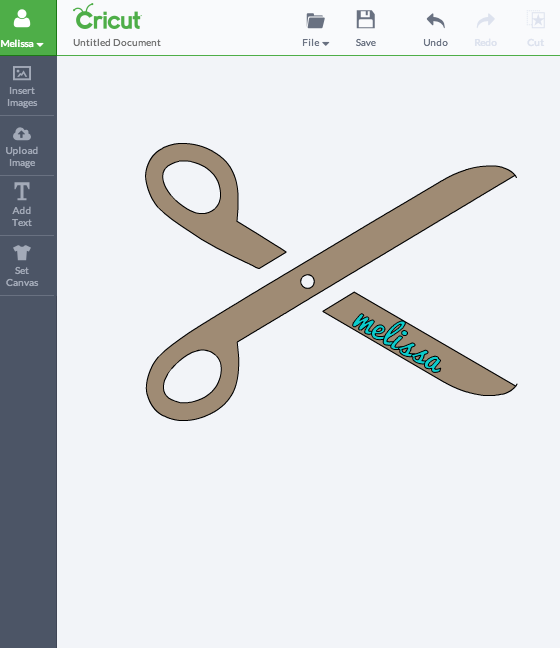
I imported my scissors SVG file into the Cricut Design space. (I made my own scissor, but you can find them online or in the design space). I then typed my name with the Pacifico font and clicked “weld” to attach all of the letters to each other. Next I placed the name over the scissors and got the position just right and selected both items and clicked “attach” so they would cut together.
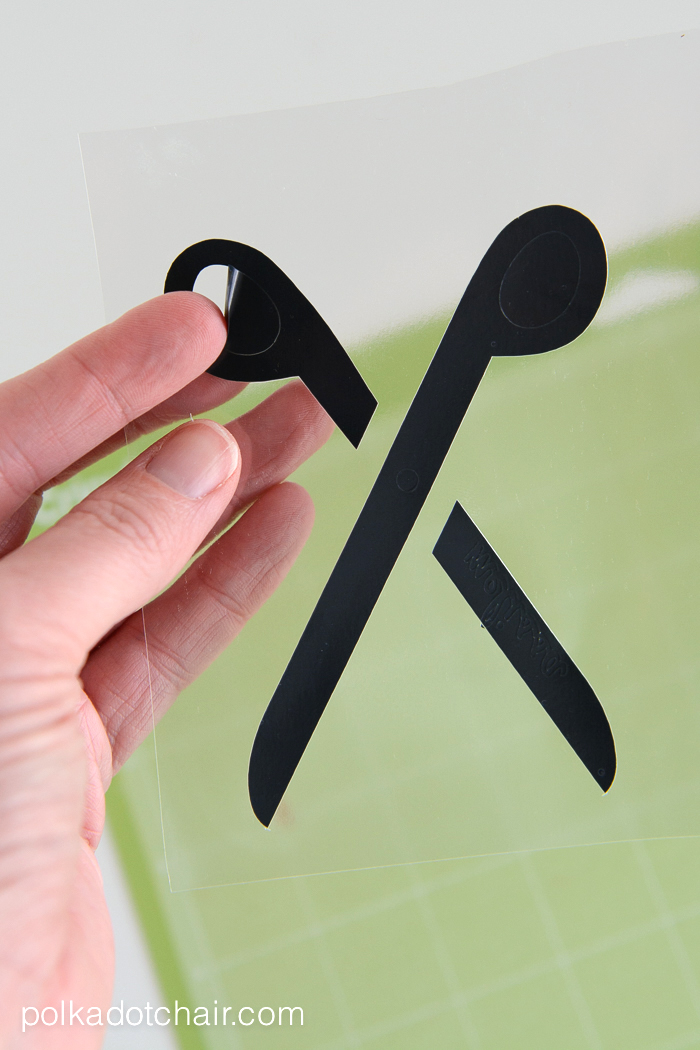
I cut it out of the iron on vinyl and peeled off the extra to reveal the shape underneath.
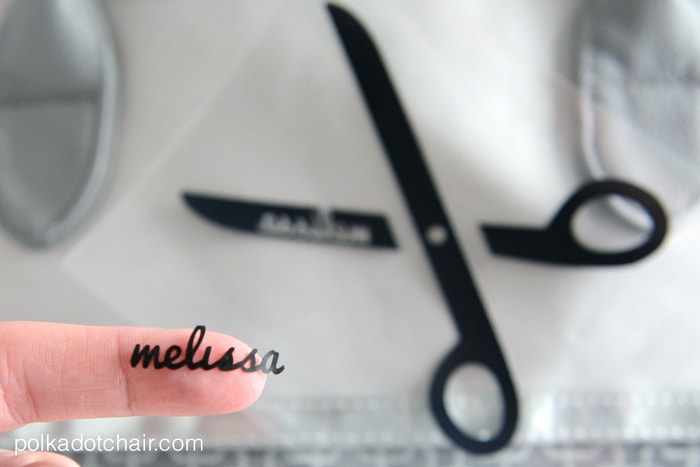
I pulled my name out to leave the negative of it for the monogram… it cut out so nice and was so cute and tiny, too bad I didn’t have a use for it!
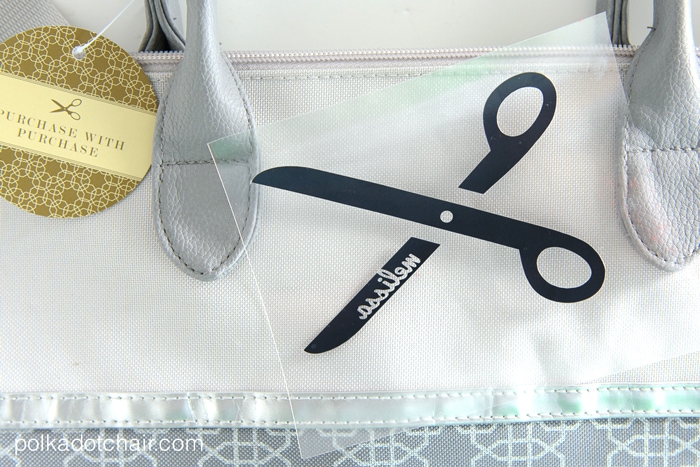
The last thing I did was position the cut out iron onto the bag and iron in place. I used the tip of my iron so that I would not damage the bag handles or trim at all. I also went over the iron on afterwards with a pressing cloth just to be sure it was stuck down well.
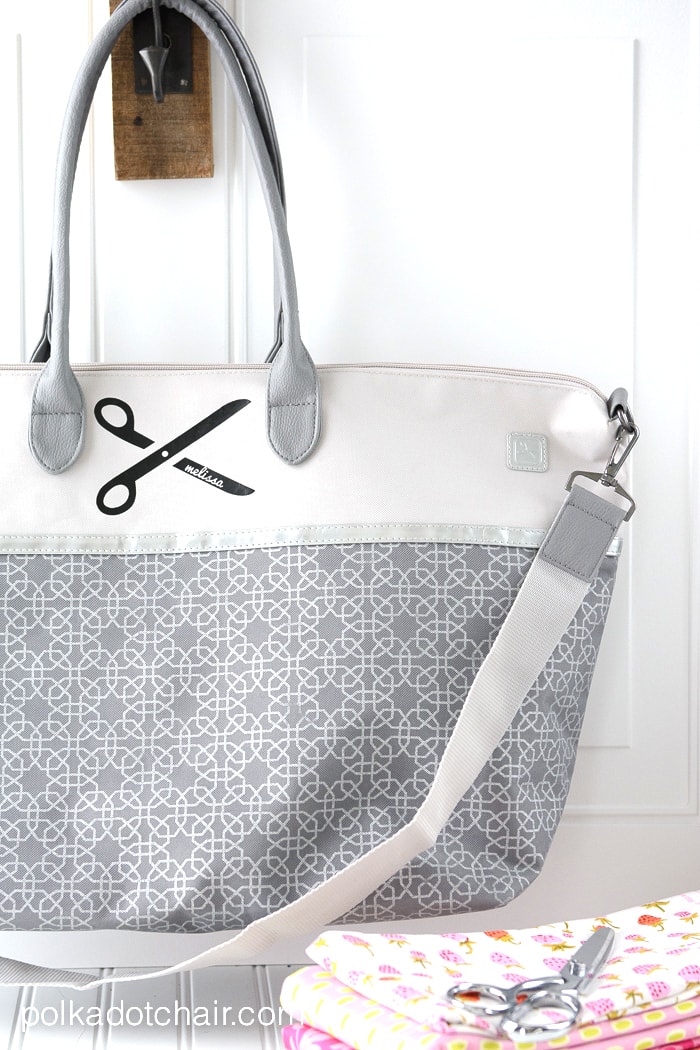
That’s it! I think this wold be a really cute Holiday gift for someone .. You could fill it full of sewing supplies, fabric notions, books etc!! Or fill it full of fun “pampering” items and give it to your favorite teacher!