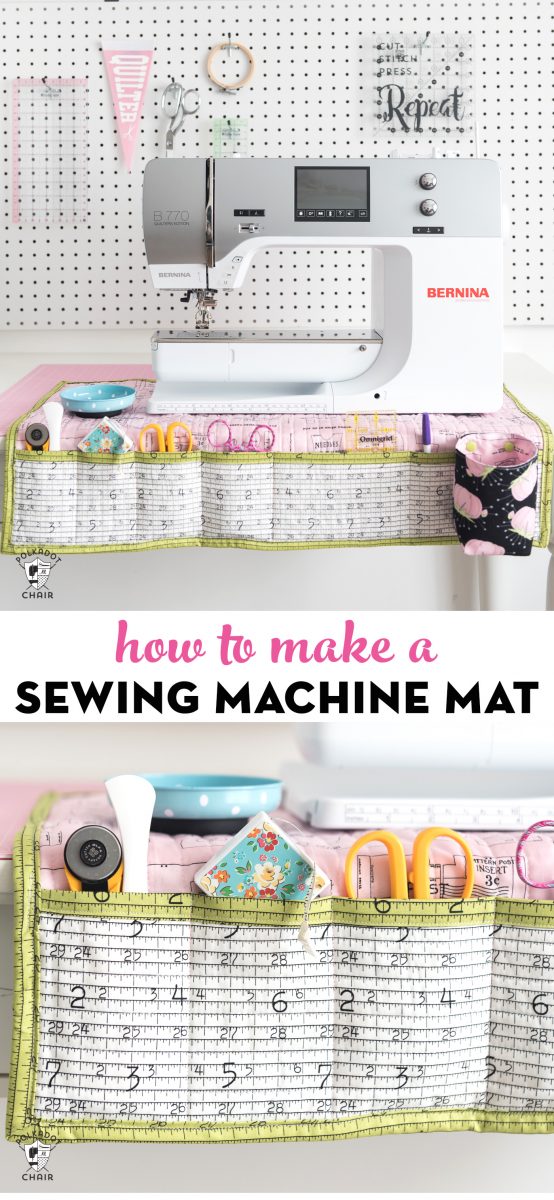
Stay Organized with this DIY Roll Up Sewing Machine Mat
Learn how to make a custom quilted sewing machine mat! This handy mat sits under your sewing machine and contains pockets to hold all of your notions. Our free sewing pattern even includes instructions to convert this sewing machine mat into a roll-up sewing tool organizer!
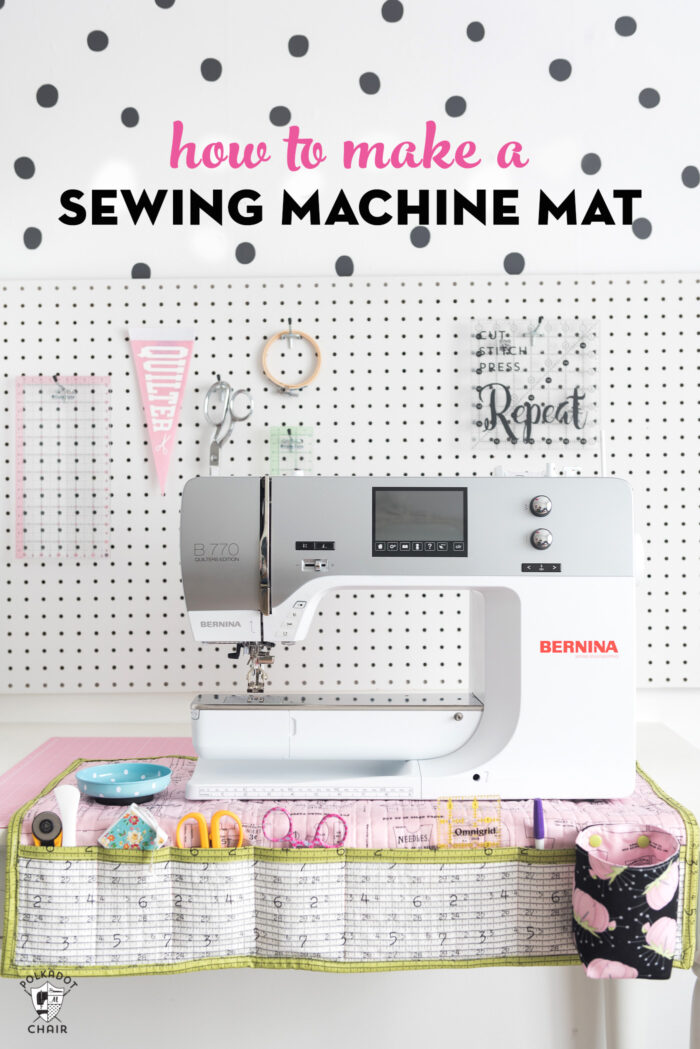
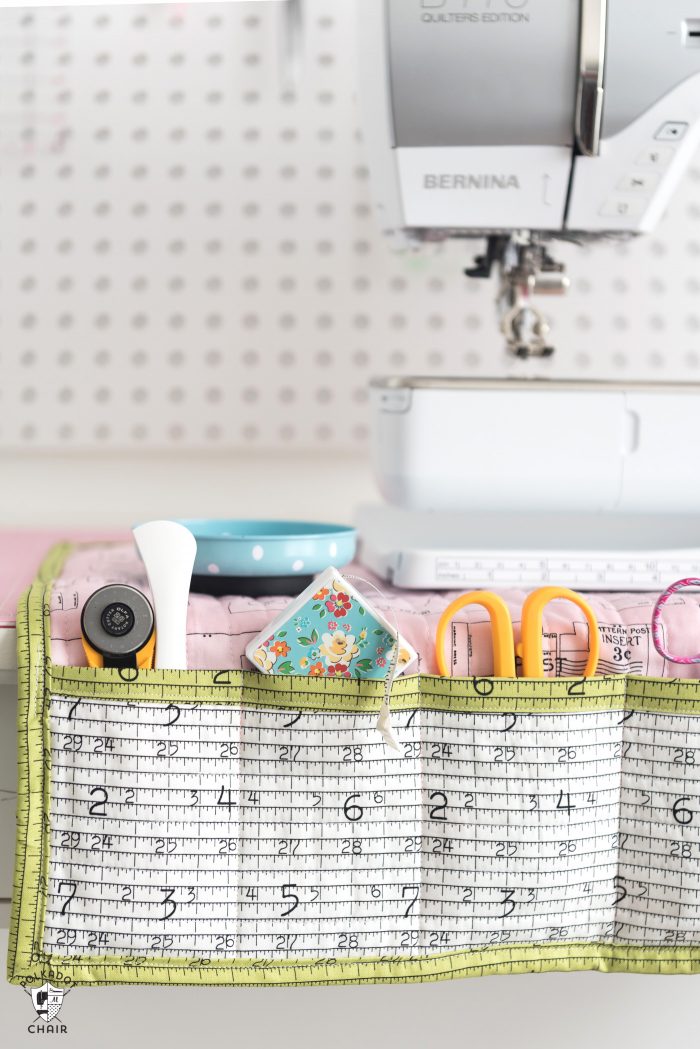
I am the worst at staying organized when I sew. I joke that sewing is more an exercise in “where did I put my scissors?” than in actually creating something. All joking aside, I designed this sewing machine mat to go under my machine to keep all my most used tools close by. It even rolls up so you can take it when you travel!
I’ve seen sewing machine pad organizers floating around online for a while now. I kept meaning to make one and never did. Finally, this month, I decided that I’d had enough of losing my scissors, unpickers, and marking pens and designed myself a mat.
About the Sewing Machine Mat
This mat is pretty big, so it fits my large sewing machine. You can easily size it down to the width of your machine if you’d like. It’s just a big rectangle, so you can customize it easily.
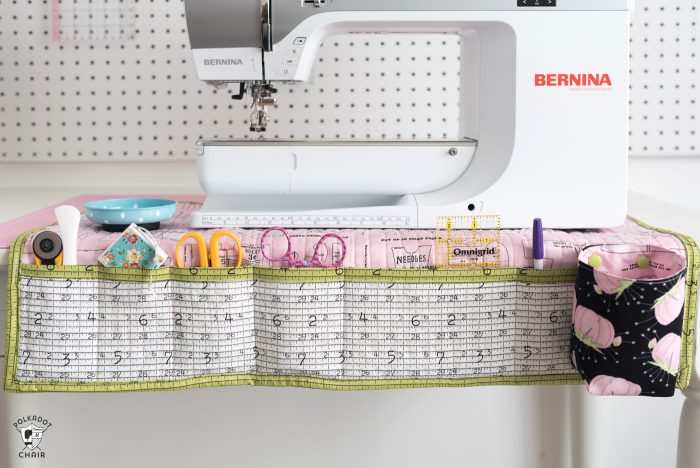
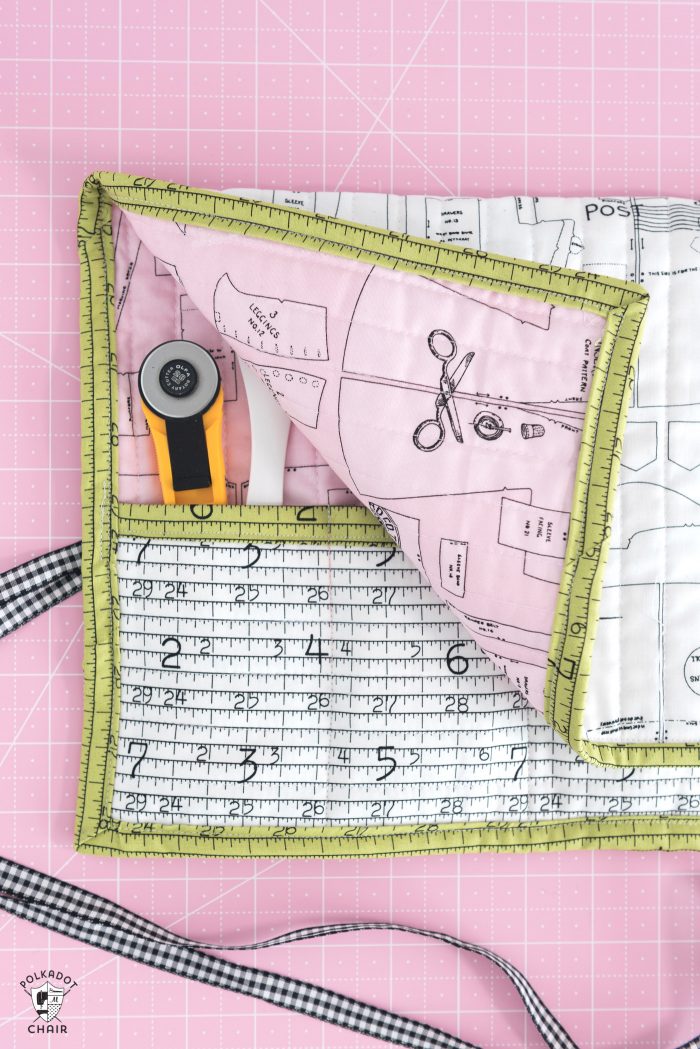
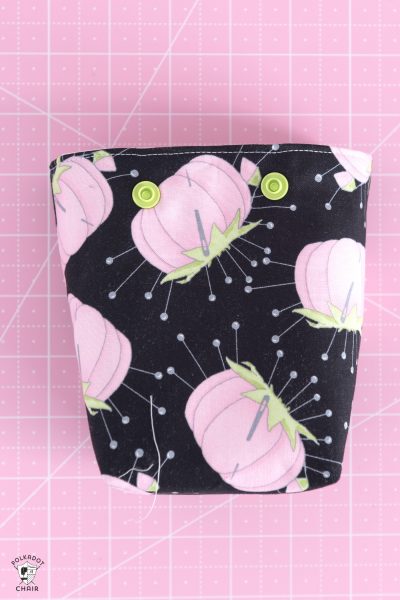
I added a fun little thread catcher to the side using snaps. You can snap it on and off if you roll up the mat to use as a tool caddy when you travel. You could also add a pin cushion if you’d like. I elected not to since I love using my magnetic pin bowls.
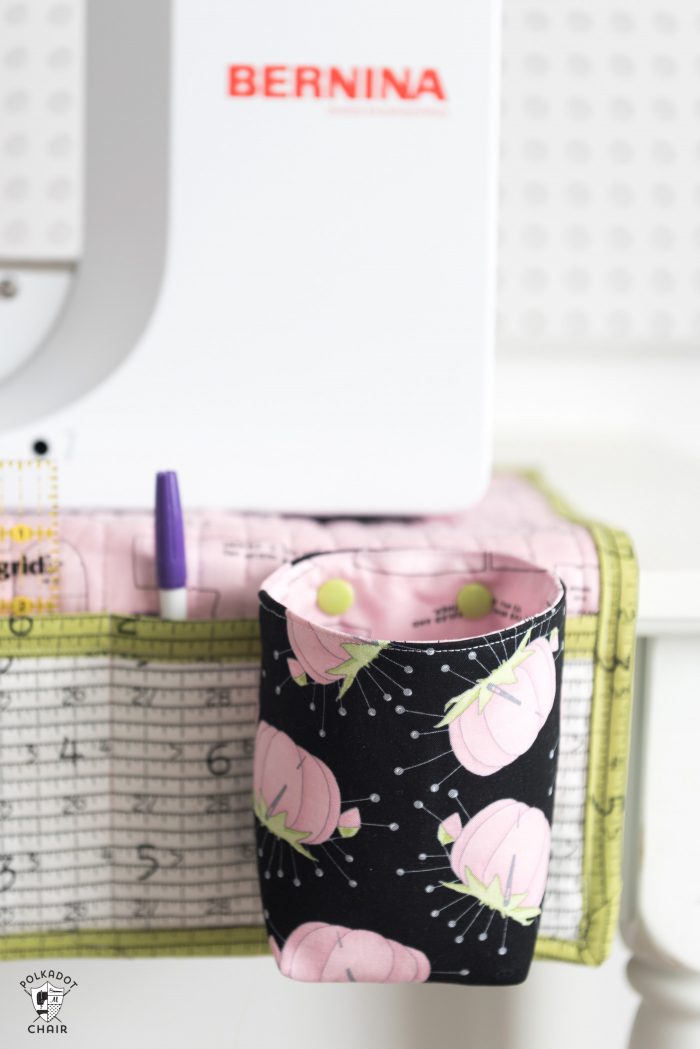
The thread catcher is attached to the right side of the mat; if you’re left-handed, you can very easily attach it to the left side instead. It’s totally up to you; look at this pattern as a jumping-off point for customization!
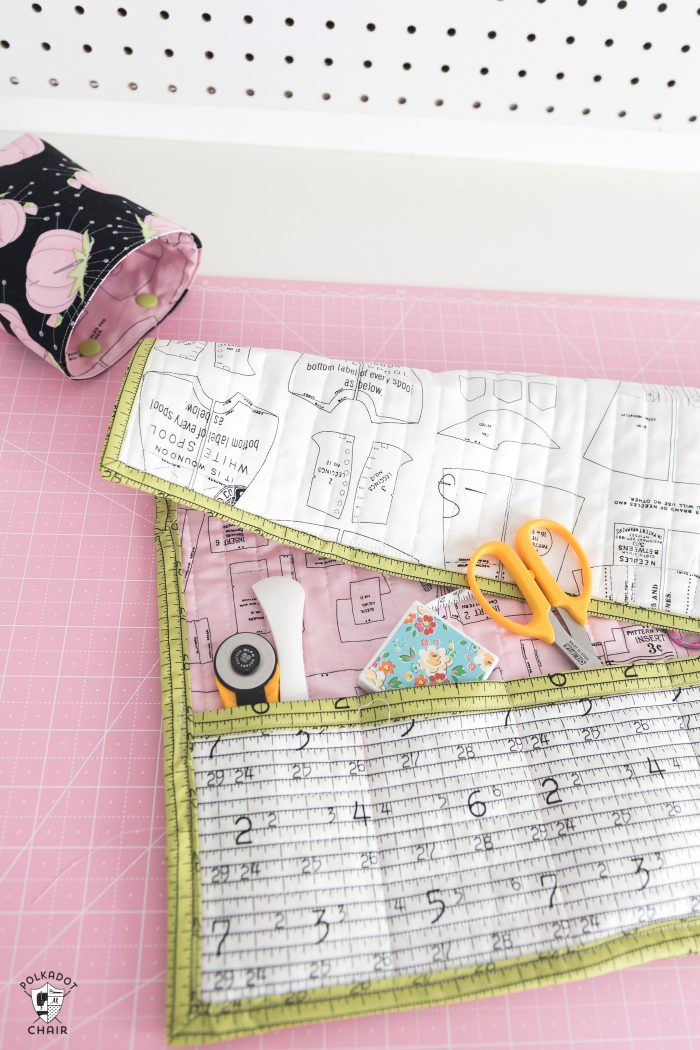
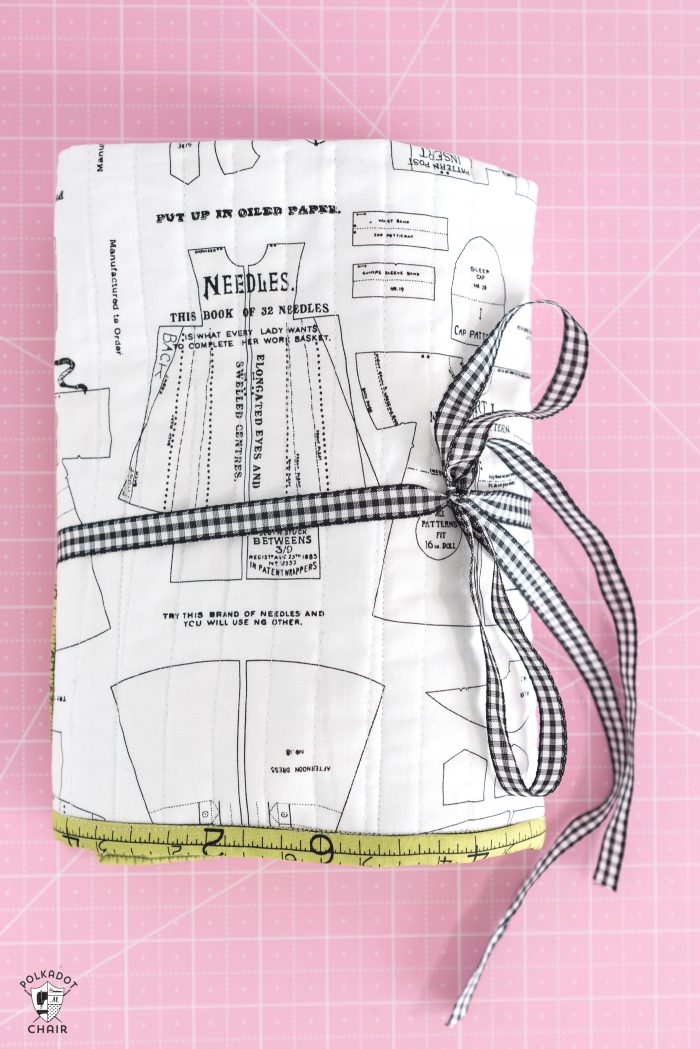
I also added a bit of ribbon to the binding of the mat so that it could be rolled up and used for travel. You can place your notions in the pockets, fold them over the top, roll them up, and take them with you when you leave.
The fabric for the sewing machine mat is from the Paper Doll collection by J Wecker Frisch. She’s one of Riley Blake’s newest designers, although she’s been designing for a while now. I have to say, I adore her style. She has a Halloween line coming out next year that I’m already salivating over!
Are you ready to make a sewing machine mat?
Roll-Up Sewing Machine Mat Pattern
Size 18″ x 28″
Supplies:
The fabric is PaperDoll by Riley Blake Designs
Fabric:
1/2 Yard for Mat Top
1/2 Yard for Mat Bottom (or back)
1/4 Yard for Pocket
1/4 Yard for Pocket Lining
1/2 Yard for Binding
1 Fat Quarter for Thread Catcher Outside (or 1/4 yard of fabric)
1 Fat Quarter for Thread Catcher Lining (or 1/4 yard of fabric)
Other Supplies:
100% cotton batting (or your preferred quilt batting). You’ll need two pieces, one 18″ x 28″ and one 5″ x 28″.
1 yard of Ribbon
1/4 Yard Shape Flex Interfacing
1″ Wide Bias Tape Tool – I have a “multi-sized” pack that I used; I’ve linked it here.
Walking Foot for Sewing Machine
Instructions
Roll Up Sewing Machine Mat
Equipment
- Walking foot for Sewing Machine
supplies
Fabric:
- ½ Yard Fabric for Mat Top
- ½ Yard Fabric for Mat Bottom
- ¼ Yard Fabric for Pocket
- ¼ Yard Fabric for Pocket Lining
- ½ Yard Fabric for Binding
- 1 Fat Quarter Fabric for Thread Catcher Outside or ¼ yard of fabric
Other Supplies:
- 1 piece 100% cotton batting or your preferred quilt batting. You’ll need 2 pieces one 18″ x 28″ and one 5″ x 28″.
- 1 yard of Ribbon
- 4 snaps KAM Snaps
- ¼ Yard Shape Flex Interfacing
Instructions
Cutting:
- For Sewing Mat: From Mat Top Fabric Cut: 1 piece 18″ x 28″From Mat Bottom Fabric Cut: 1 piece 19″ x 29″ (Okay, I know I told you to buy ½ yard of fabric, which is 18″ wide. However, if you have a larger piece of fabric or your fabric is cut a bit bigger, make the bottom piece of fabric slightly larger since it’s easier to line up when you’re quilting the layers. If you have an 18″ wide piece of fabric, you will be fine!)From Batting Cut: 1 Piece 18″ x 28″ 1 Piece 5″ x 28″From Pocket Fabric Cut: 1 Piece 5″ x 28″From Pocket Lining Fabric Cut: 1 Piece 5″ x 28″From Binding Fabric Cut: 1 Piece 2″ x WOF (width of fabric) 3 Pieces 2 ½″ x WOF
- For Thread Catcher:
- From Thread Catcher Fabric Cut: 2 pieces each 7″ x 7″From Thread Catcher Lining Fabric Cut: 2 pieces each 7″ x 7″From Shape Flex Interfacing Cut: 2 pieces each 7″ x 7″
Step One: Quilting
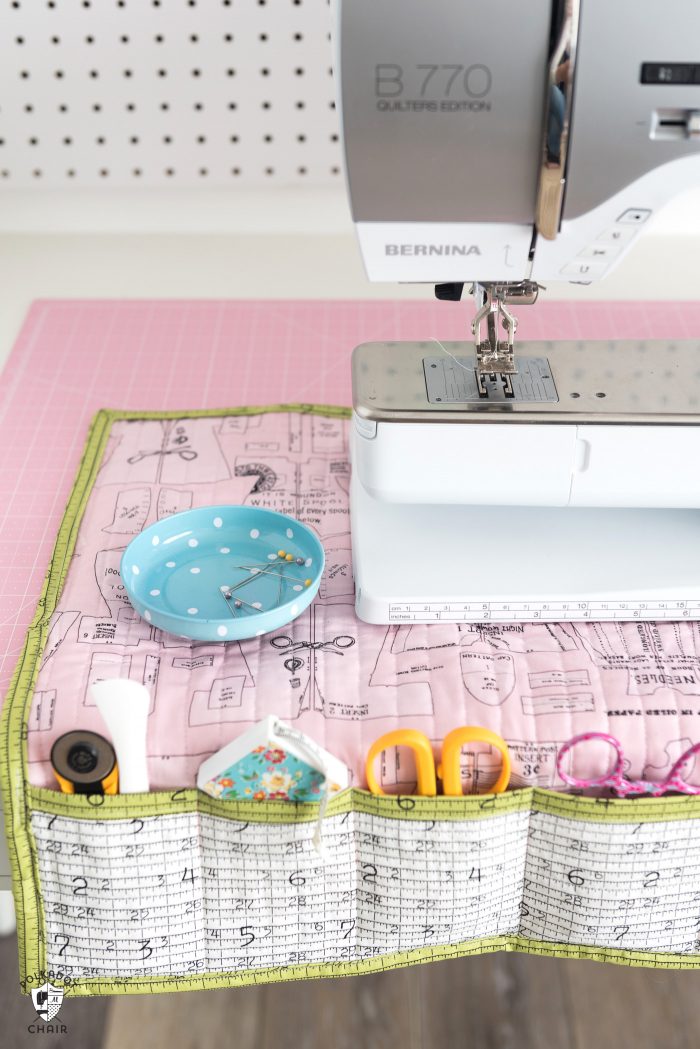
- Layer your sewing machine mat bottom, top, and batting pieces together so that you have a “sandwich” with the sewing machine mat fabrics on the outside (with the right sides facing out) and the batting in the center.
- Quilt straight lines every ½″ – 1″ along the mat. You’ll want to use a walking foot on your sewing machine for this part. You’ll also want to use a few safety pin or basting spray to keep the layers in place as you sew. If you do not want to quilt your mat, you don’t have to. Just use fusible fleece instead and skip the quilting.
- Repeat for the pocket pieces.
Step Two: Pocket
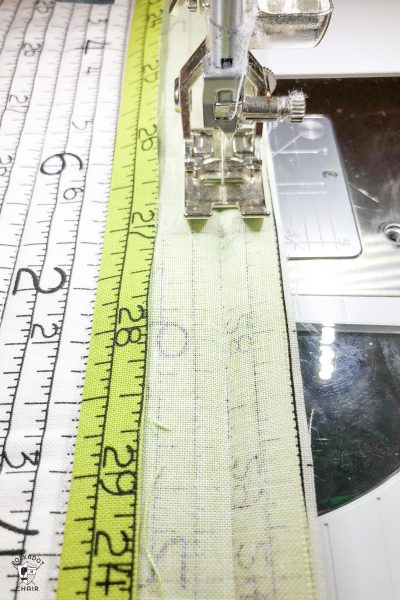
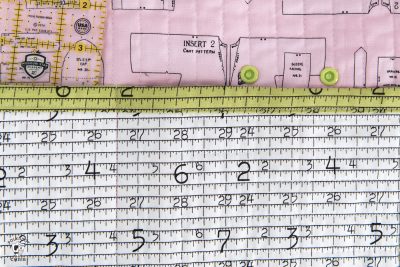
- Run your 2″ wide piece of binding through your bias tape maker (note we are not using fabric cut on the bias).
- Place the created tape on top of the top of your pocket piece, right sides facing, and raw edges even. You’ll need to unfold the tape to do this.

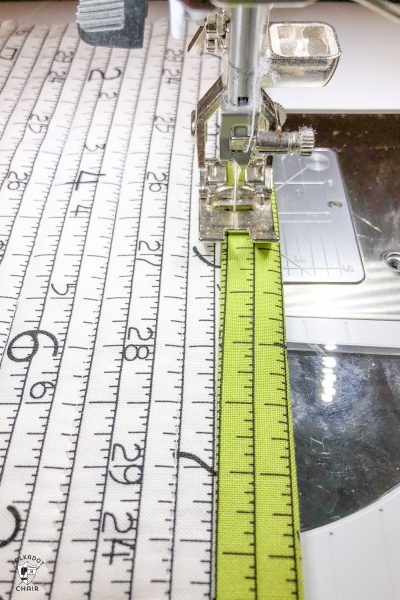
- Stitch the tape to the top of the pocket, just inside of the first fold.
- Flip the tape over to the wrong side of the pocket and press in place. Secure with binding clips. On the right side of the pocket, stitch tape in place close to the edge, making sure you’re catching the tape on the back as you sew. (If you miss a spot, just use a touch of glue to hold it down).
- Place the sewn pocket piece on top of the sewing mat piece, right sides both facing up. Pin in place.

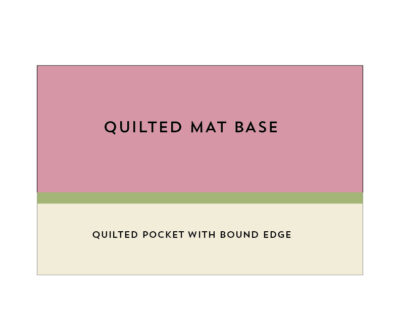
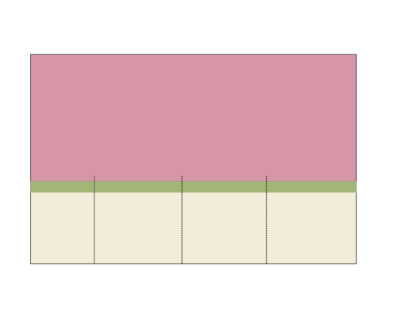
Step Three: Dividing the Pocket
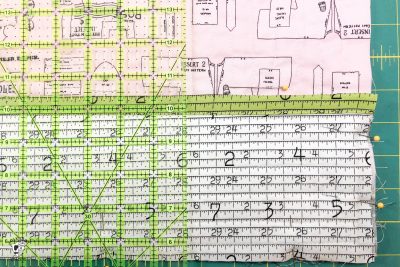
- Using a ruler, place markings where you’d like the dividers in the pocket to be. I make 2 7″ wide pockets and 4 3 ½″ wide pockets.
- Stitch the pocket divisions in place. Make sure you backstitch at the top of each division.

Step Four: Binding
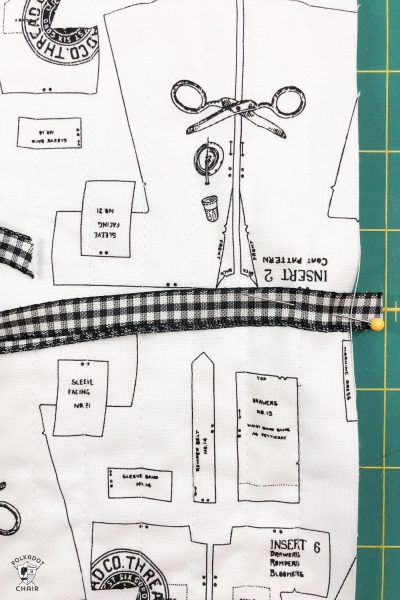
- Before you bind your sewing machine mat, you’ll need to attach a bit of ribbon to it (if you want it to roll up).
- Fold your ribbon piece in half and pin it to the wrong side of the mat at the exact location at the top of the pocket. Stitch in place.
- Bind the mat using your preferred quilt binding method abd the 2 1/2" x WOF binding piece.
- As you bind, be careful not to catch the ribbon in the binding.
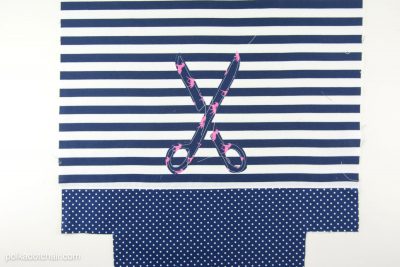
Step Five: Thread Catcher
- Apply the Shape Flex interfacing to the wrong side of the thread catcher outside pieces.
- On the thread catcher outside and thread catcher lining pieces, cut a 1 ½″ x 1 ½″ square from the bottom two corners. (note: the photos are from a previous project; the assembly is exactly the same, the fabric pieces are just a different size)
- Place the two thread catcher outside pieces, right sides facing, and stitch down the 2 side seams and the bottom seam with a ½″ seam allowance.
- Pinch the bottom “squares” so that they are flush on the edges, and stitch along the edge.
- Repeat with the thread catcher lining pieces.
- Turn the catcher outside piece right side out.
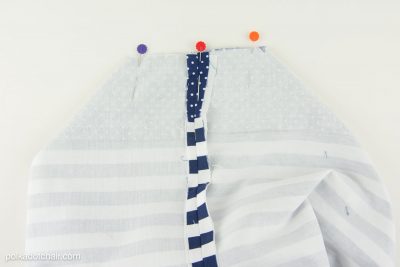
- Slip the catcher lining piece over the outside piece so that the right sides are facing and the raw edges are even.
- Secure with pins or clips
- Stitch ½″ down from the top edge, leaving a 4″ opening on one side.
- Turn right side out through the opening in the top.
Step Six: Finishing
- Press well. Topstitch along the top of the catcher; catch the opening as you sew.
- Add two KAM snaps to the back of the thread catcher 2″ apart from each other.
- Add the other halves of the two KAM snaps to the sewing mat in your desired location also 2″ apart.
More Organization Projects and Tutorials: