Hello Sunshine Mini Quilt Pattern
There aren’t many many things as wonderful as a warm day after a cold winter! Sarah Ashford captures the bright and cheery feeling of a warm summer day with this free Hello Sunshine Mini Quilt Tutorial.
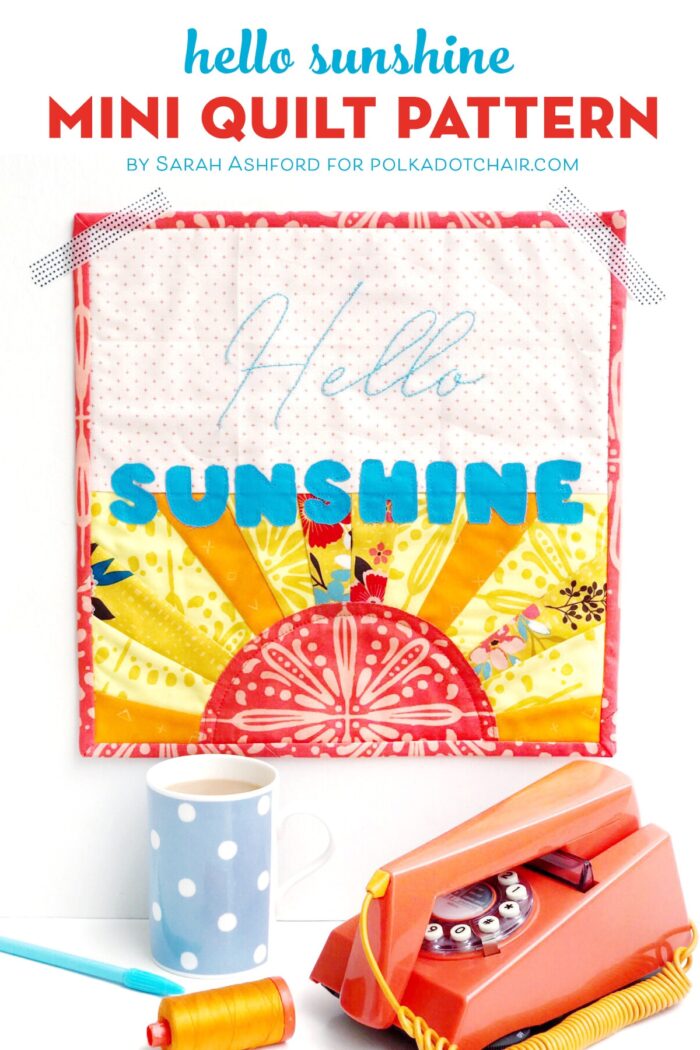
Finally, after what seems like a very long winter, the sun is making an appearance, and I can’t tell you how happy it makes me to wake up to blue skies and sunshine streaming through my bedroom window. It really does put everyone in a much better mood when the sun shines, and everything seems that little bit brighter and the world a better place! So it’s sunny days that are the inspiration behind this mini quilt. I do hope you get the chance to make it, and that the sun will shine brightly every day for you!
Hello Sunshine Summer Mini Quilt Pattern:

You will Need:
FPP Templates – Left and Right -Text template- download in the Sewing Template Library
Selection of yellow and orange scrap fabrics for the sunshine
6” square blue fabric for ‘Sunshine’ letters
12 1/2” x 6 1/2” pale orange background
Embroidery Hoop (Optional)
Embroidery Thread
Lightbox (optional)
EPP Glue pen
Basting spray
Batting – 14” square
Backing fabric 14” square
Binding fabric – 55” long
Usual sewing supplies – sewing machine, rotary cutter, mat, scissors etc.
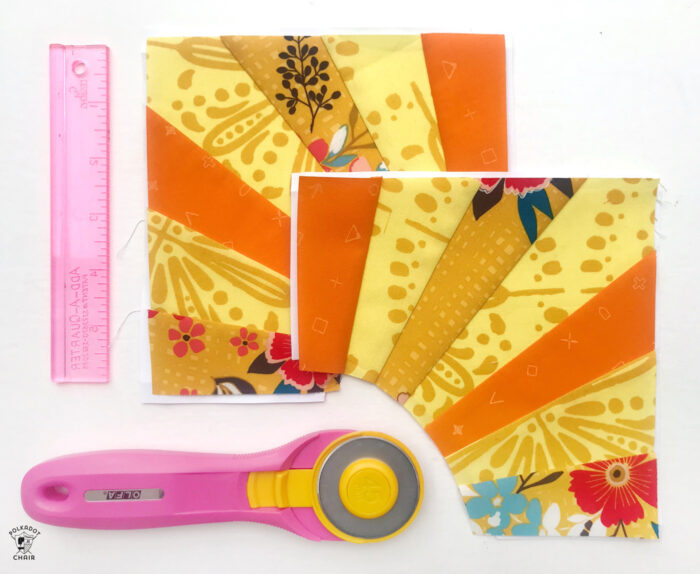
Step One: Foundation Paper Piece the Sun Rays
First of all, you need to make the sun rays of the two Foundation Paper Pieced blocks. If you’re unsure how to do this, please refer to my foundation paper piecing tutorial, (here) to tell you exactly how. You will notice though that this pattern has curves. You don’t need to stitch this section with FPP. Don’t worry, I have an easy technique to get around this!
Now stitch the two sections together so that they form an arc.
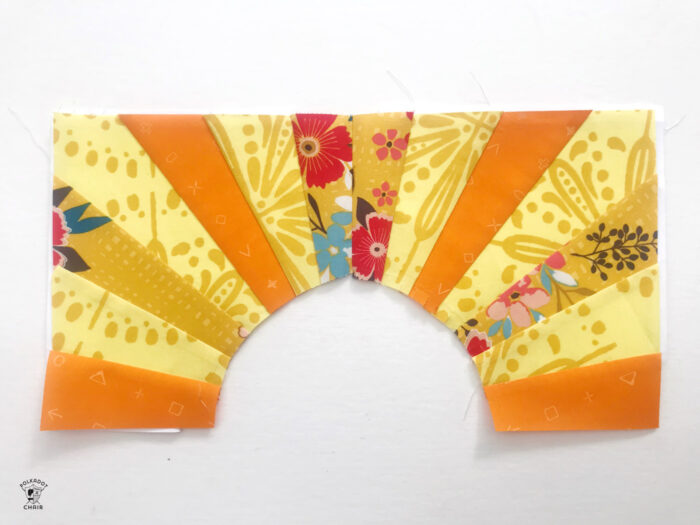
At this point, you should still have the papers in. We are now going to prepare to put the center of our sun in. Rather than remove all the papers (and for the block to lose stability) just tear away the papers an inch from the arc of the block.
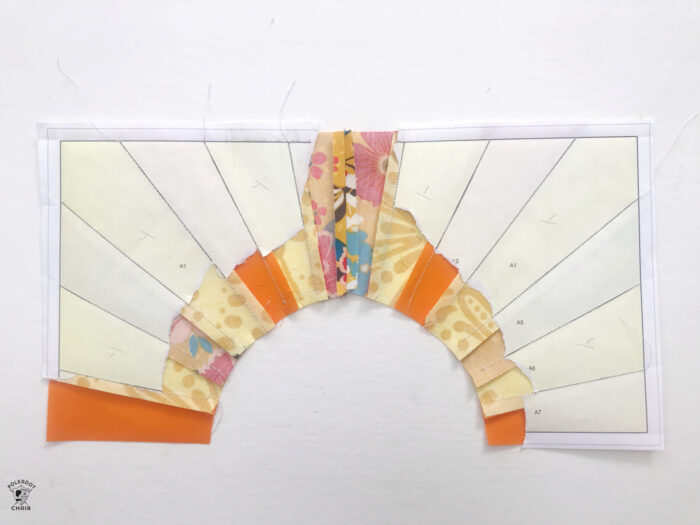
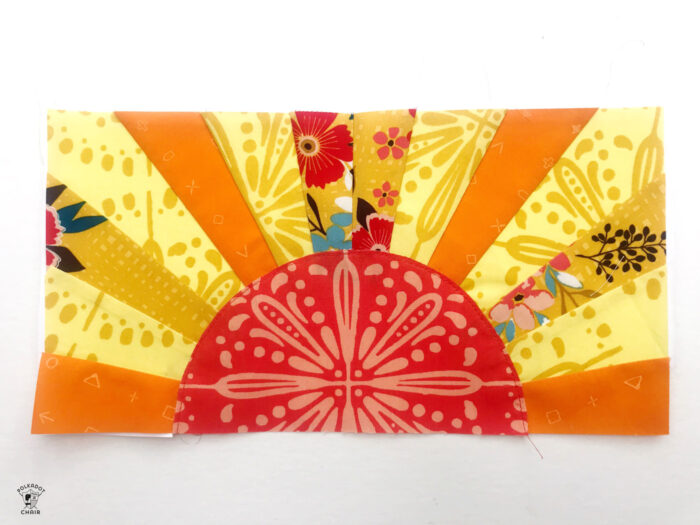
Using the arc template, draw on the reverse of your central sun fabric on the reverse side and cut out. Use a glue pen and put a small amount of glue all the way around the curved edge of the wrong side of the semicircle. Adhere to the block. (This method is better than pins as it helps stabilize things and doesn’t’ ‘weigh it down’ but keeps things nice and flat). Stitch close to the edge all around the arc to complete the sunshine block.
Step Two: Assemble the Block:
Step Three: Embroidery
Next, we move onto the embroidery. I love a bit of embroidery and the chance to slow down and listen to a podcast or two! But first to prepare. If you have a lightbox, this will be really useful, but if not, then holding the fabric up to the window should do the trick.
Take the ‘Hello’ template and place behind the fabric. Remember you’ve got to allow enough room for the word ‘Sunshine’ but you mustn’t be too close to the top. As a rough guide, I suggest that the right-hand tip of the ‘H’ is 1 1/2” from the top.
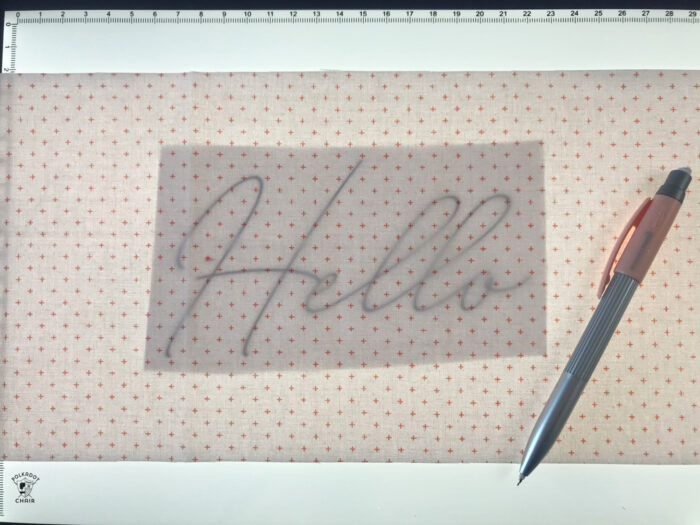
I like to use a mechanical pencil to trace my lines as it means the lines are thin and crisp. Trace the ‘Hello’ onto the background fabric.
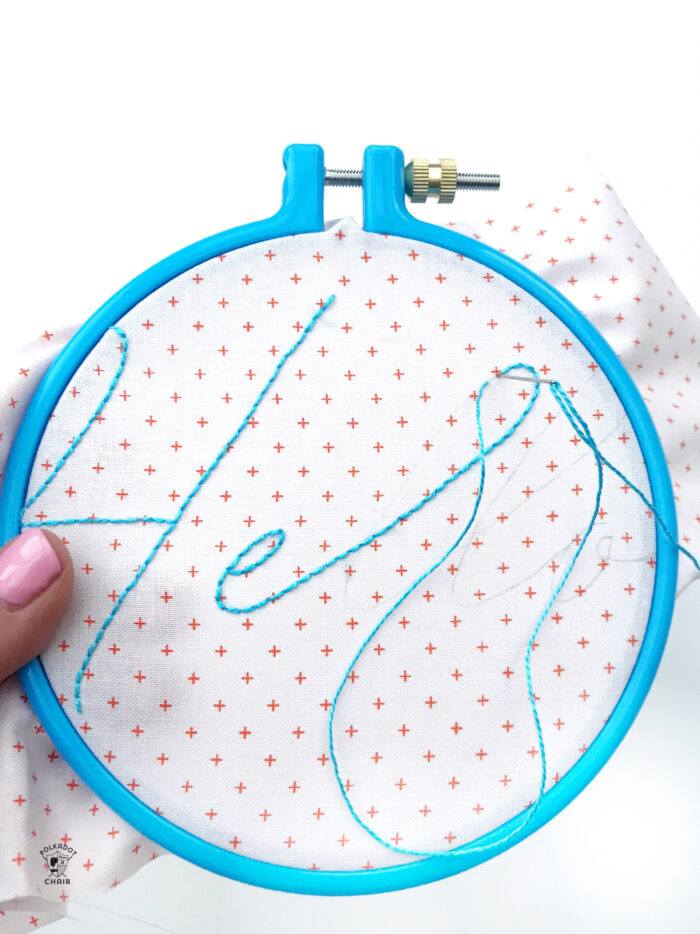
Use a backstitch to embroider the word hello in a contrasting color – you need to ensure that it stands out enough that you can read it! You may find it easier to use a small hoop for the embroidery. This makes it easier to stabilize and produce even stitches.
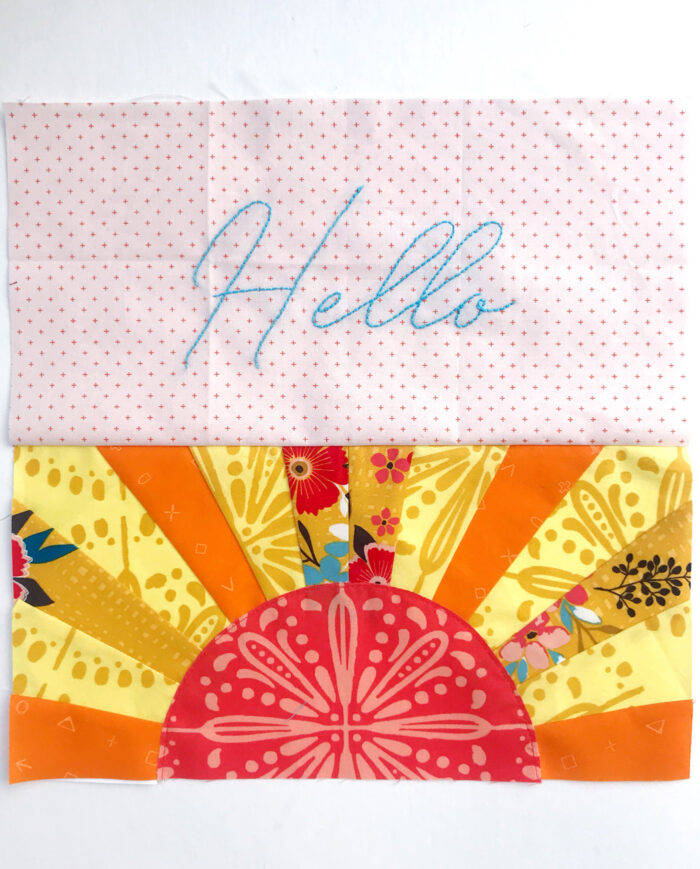
Step Four: Finishing
Give it a good press. Using a 1/4” seam, stitch it to the sunblock.
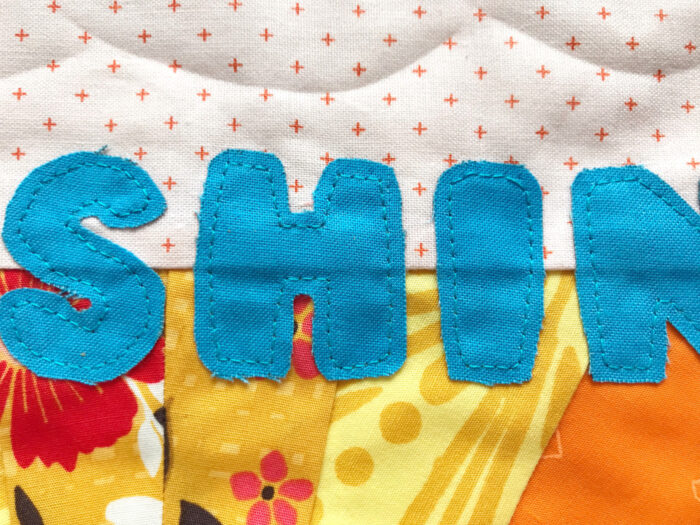
Take the ‘sunshine’ template and cut out the letters. Draw them onto the reverse of the fabric, ensuring that the letters are back to front. (I find a fine liner pen is good for this.) Using embroidery scissors, carefully cut out the letters.
Use spray baste to fuse the letters to the background, in the center where the two blocks meet.

Stitch around the edge of each letter to secure in place. Pull the beginning and end threads to the back and tie off.
Now you are ready to quilt. Create your quilt sandwich in the normal way. I like to use basting spray as it negates the need to use pins and is much quicker and easier. Quilt as desired.
Stitch all the way around the edge to ‘seal’ the quilt. Add the binding using your chosen method. For small projects, I like to use single fold binding, as it’s less bulky and uses less fabric.
And da-ta, you are finished! A mini quilt using lots of skills: foundation paper piecing, embroidery, raw edge appliqué, quilting…I hope you have a piece you are proud of!
Happy Quilting,
Sarah x
About the Maker:

Sarah Ashford is a British Quilter and embroiderer and founder of the GreatBritishQuilter challenge on Instagram. Sarah regularly contributes projects to magazines and loves to spread the joy of quilting everywhere she goes. Follow her on Instagram at @sarahashfordstudio and be sure to check out her beautiful sewing room decals in her Etsy shop www.etsy.com/shop/sarahashfordstudio