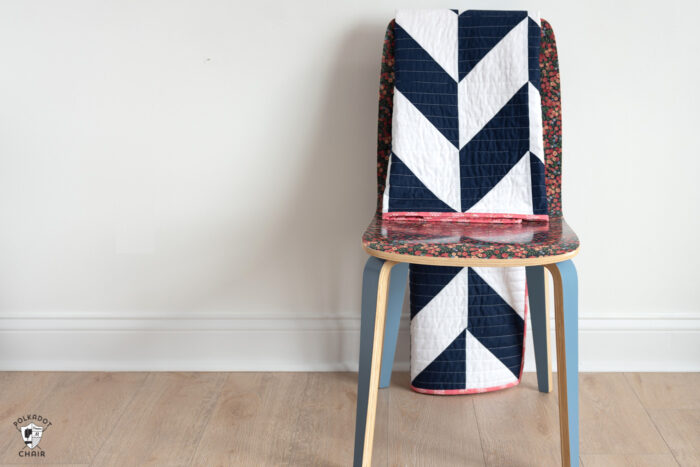
Herringbone Baby Quilt Pattern using 8 at a time HST Method
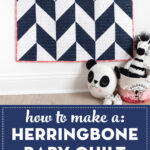
Learn how to make a simple modern baby quilt. This Herringbone baby quilt pattern features a quick-to-piece 8 at a time half square triangle method.

Last year we added a new baby to our extended family! My brother and his wife had a baby girl. As soon as I found out my sister-in-law was expecting, I started bugging them about baby quilt designs. I mean, of course, I’m making a quilt for that new baby!
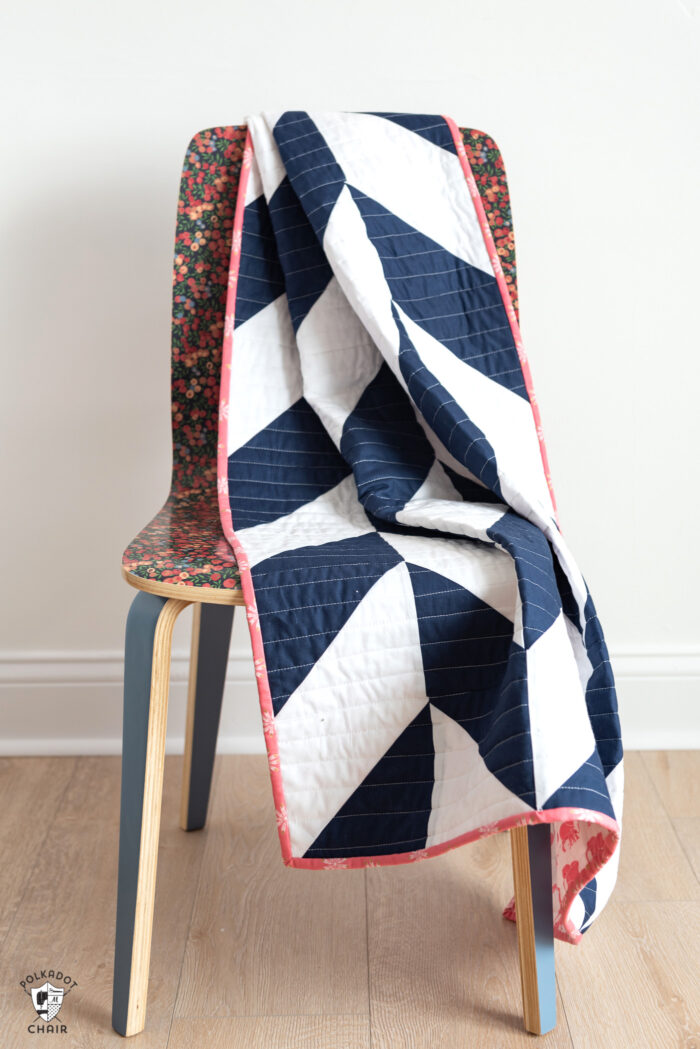
While talking to my brother about what he liked regarding quilting designs and colors, we kept returning to a simple herringbone pattern. I was up for making something more intricate, but my brother and his wife have a simple modern style, and the herringbone pattern seemed like it would blend into their nursery design perfectly.
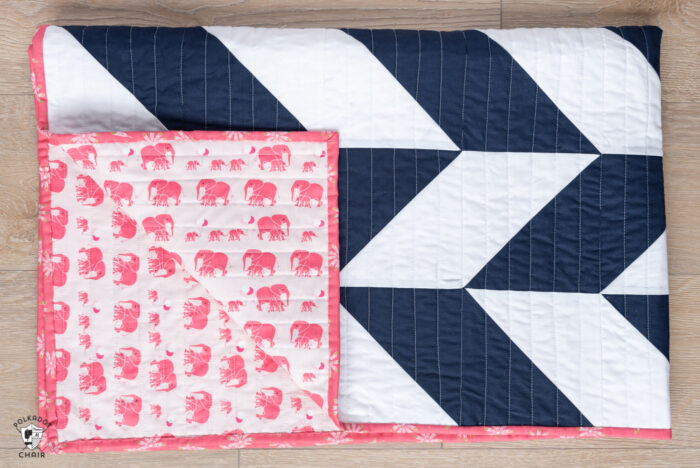
We settled on using solid fabrics for the front of the quilt then he asked me if I had any elephant fabric for the back.
I had to laugh because, YES, I have elephant fabric. My Safari Party fabric line had a print with rows of mama and baby elephants. I was so excited that I could use the print in the quilt.
Simple Herringbone Quilt Pattern
At first, I wasn’t going to write a tutorial for this quilt, show photos, and give some general dimensions. Then I remembered what happened the last time I did that and didn’t want a million emails again asking for specific directions, LOL!
Before I share the tutorial, know I did not “invent” a herringbone quilt pattern. It’s been around for AGES. I’m not claiming that I invented it. I’m just sharing how I made this quilt in case you want to make one yourself.
For this quilt, you need 54 Half Square Triangles (HST). I’m going to show you how to make 8 Half Square Triangles at a time, saving you LOADS of time while making this baby quilt.
Baby Quilt Dimensions: 36″ x 54″
The Half Square Triangles in this quilt are 6″ x 6″ finished (which means they are 6 1/2″ x 6 1/2″ before they are sewn into the quilt). You can make the quilt bigger by making more blocks; you’ll have to do a bit of math.
Quilt Supplies
Assuming 40″ of useable fabric width
- For Baby Quilt Top:
- 1 3/4 Yards of Fabric A (I used Riley Blake solid in Riley Navy)
- 1 3/4 Yards of Fabric B (I used Riley Blake solid in Riley White)
- For Quilt Back: 1 3/4 Yards of Fabric (Pink Elephant from Safari Party Fabrics line – out of print)
- Binding: 3/8 Yard of Fabric
- Quilt batting at least 40″ x 60″
- Basic Quilt Supplies
- Recommended: 6 1/2″ x 6 1/2″ Bloc-Loc Ruler
Cutting Directions
- 7 pieces from Fabric A 13.75×13.75
- 7 pieces from Fabric B 13.75×13.75
How to Make 8 Half-Square Triangles at One Time
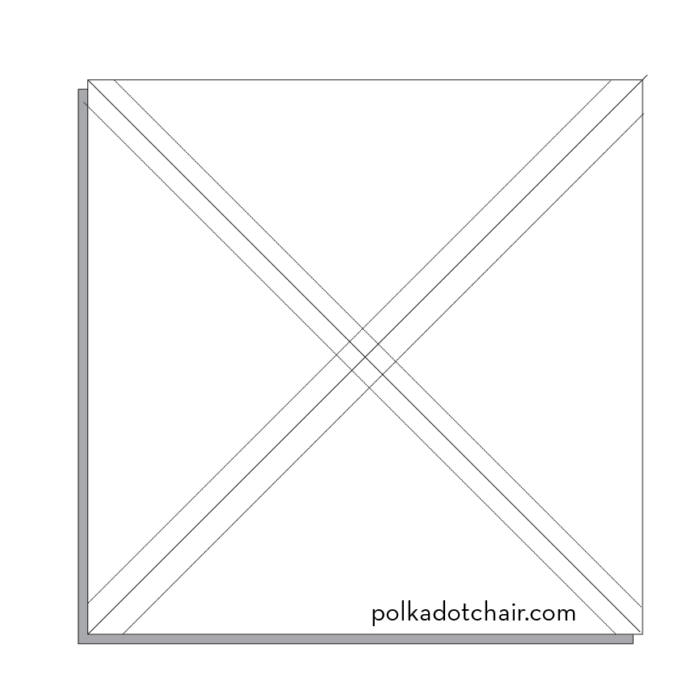
Step One Mark the Fabric:
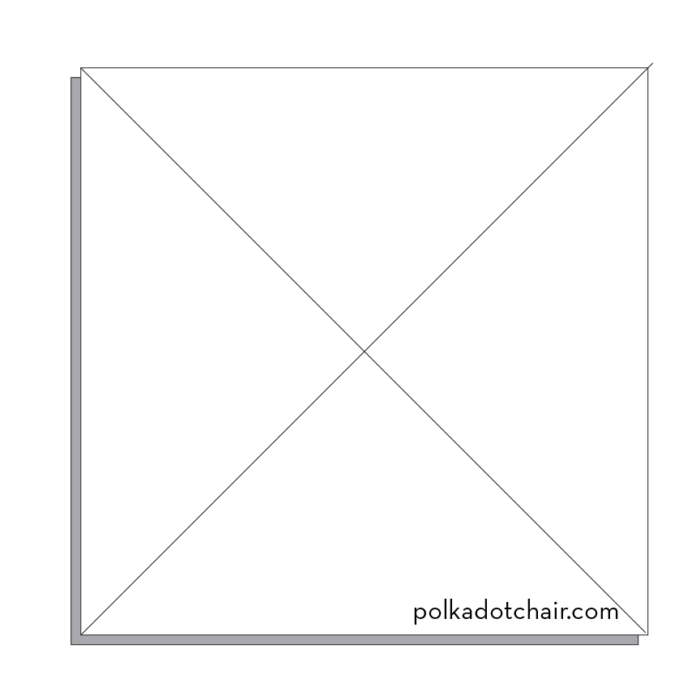
On all of the lightest pieces of fabric, draw an X diagonally on the wrong side of the fabric.
Step Two Pin:
Pin one marked fabric square with one fabric square from a 2nd fabric, right sides facing.
Step Three Sew:
Ensure you know where the 1/4″ seam mark is on your sewing machine foot. For these steps, it’s important to stitch exactly 1/4″ on each side of the line.
Stitch 1/4″ on each side of the line you drew in both directions.
Step Four Cut:
You are now ready to cut your square into eight smaller pieces. To do this, you will make four cuts using your rotary cutter and quilt ruler.
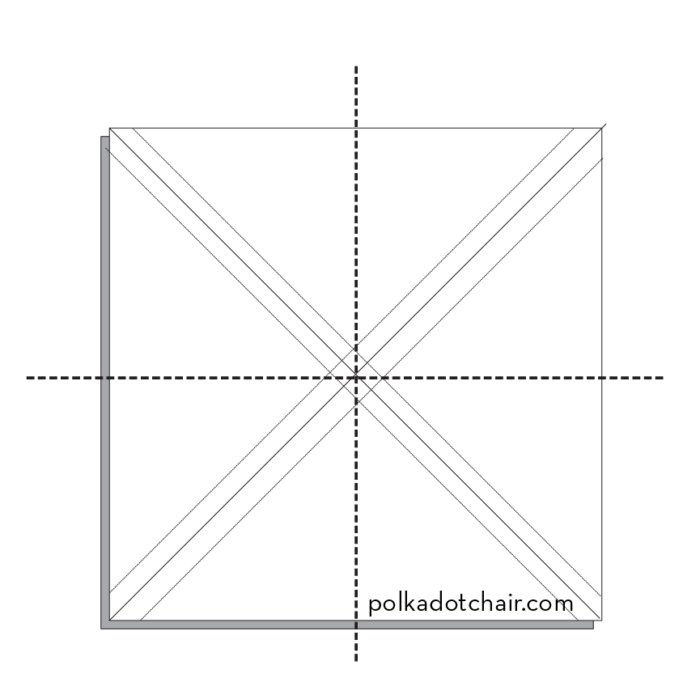
First, cut a line horizontally across your block exactly in the center. Next, make a vertical cut also in the center.
The last cuts are made diagonally along the line that you drew in step one.
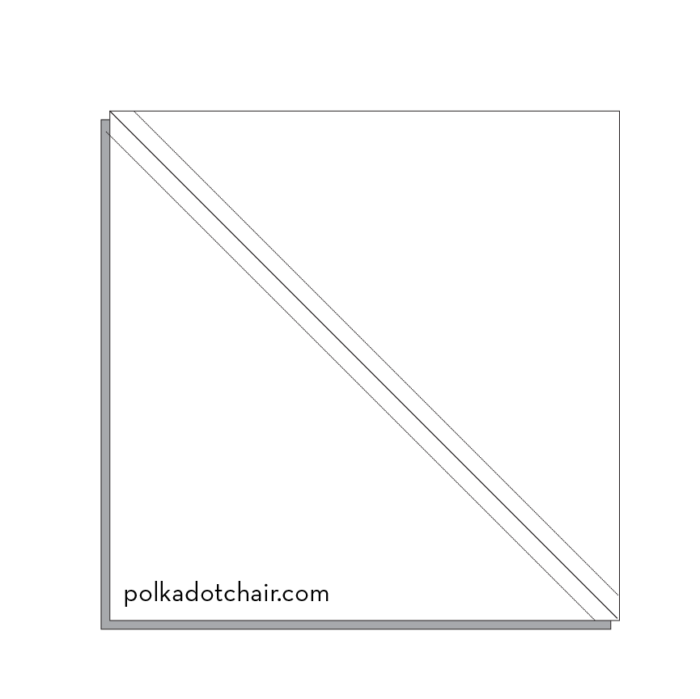
Step Five Press & Trim:
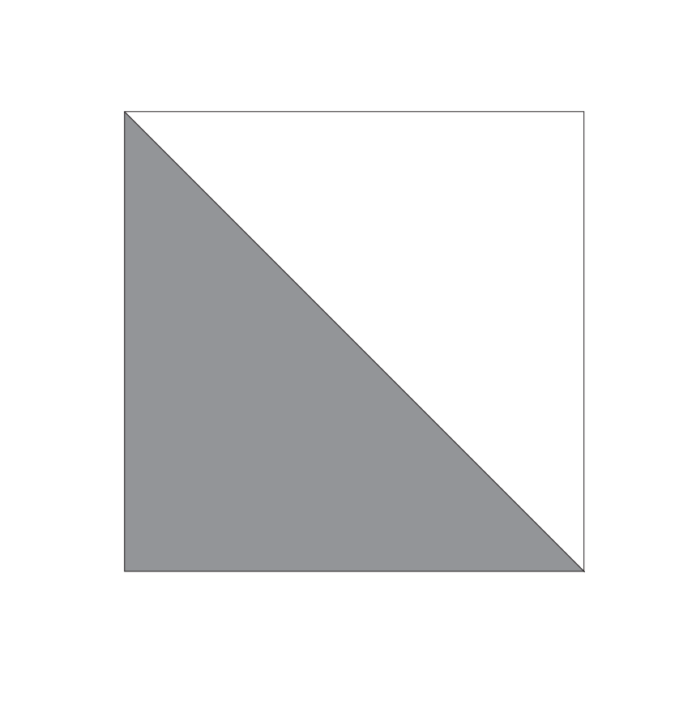
You should now have 8 pieces of fabric. Open up the HST’s and press the seam towards the darker fabric.
Trim up each sewn HST to 6 1/2″ x 6 1/2″. I like to use a Bloc-Loc ruler to trim and square up my HST’s.
How to Assemble the Quilt Top
There are dozens of ways to stitch half-square triangles together to create patterns in quilts. You can create chevrons, triangles, stars, pinwheels, and so many other patterns. The herringbone pattern created in this quilt is made by arranging the triangles in such a way to create a herringbone pattern.
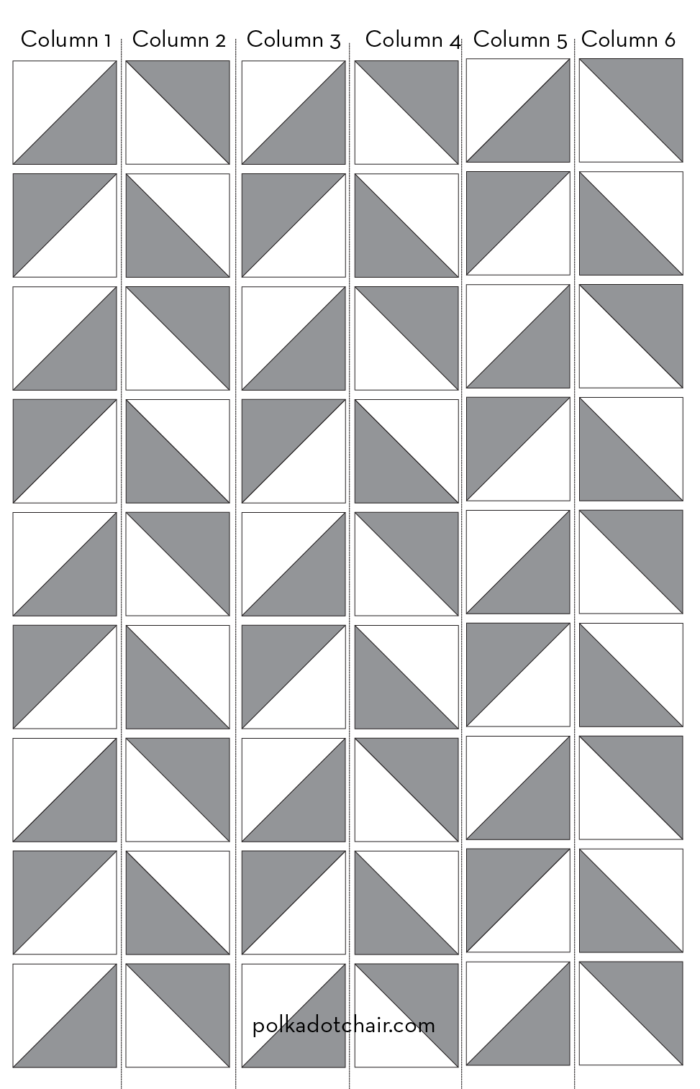
Normally I like to stitch my quilts together in rows; for this quilt, I think it’s easier to stitch it together by column.
Follow the diagram below to arrange the HST’s in the quilt. There are 9 HST’s in each column of the quilt.
After you’ve sewn 6 columns of HSTs together, you will stitch the columns to each other. Again following the diagram directions.
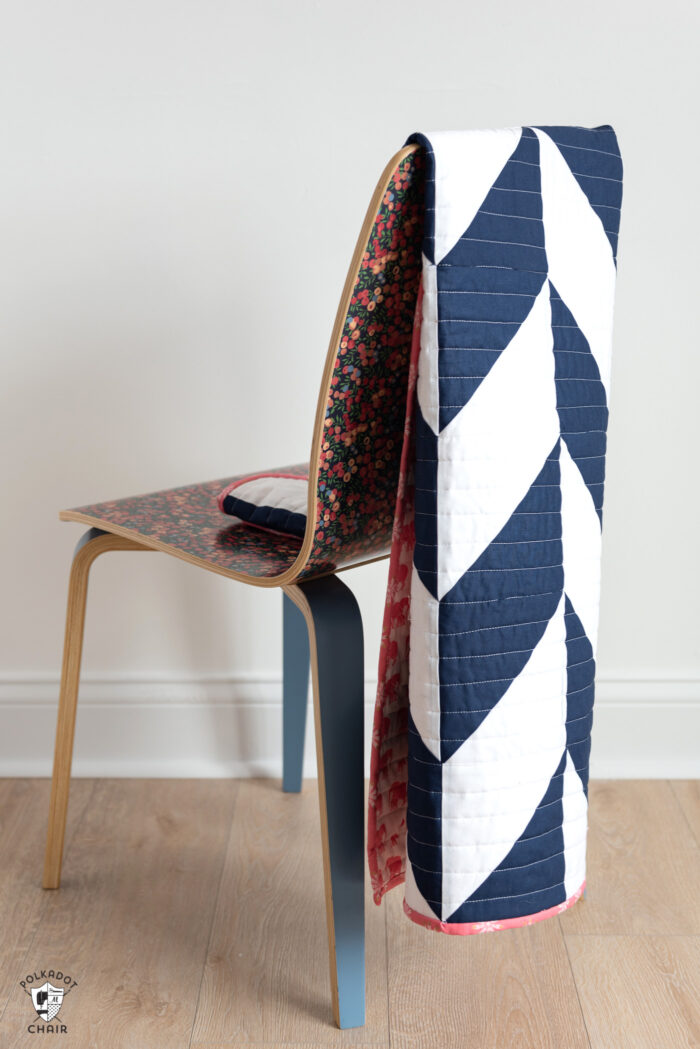
Quilt and bind as desired. To quilt my quilt, I just quilted straight lines 1″ apart using my BERNINA and walking foot.
So many cute baby quilts can be made using just Half Square Triangles. If you like this pattern, you may love this baby quilt pattern with six different layout options.