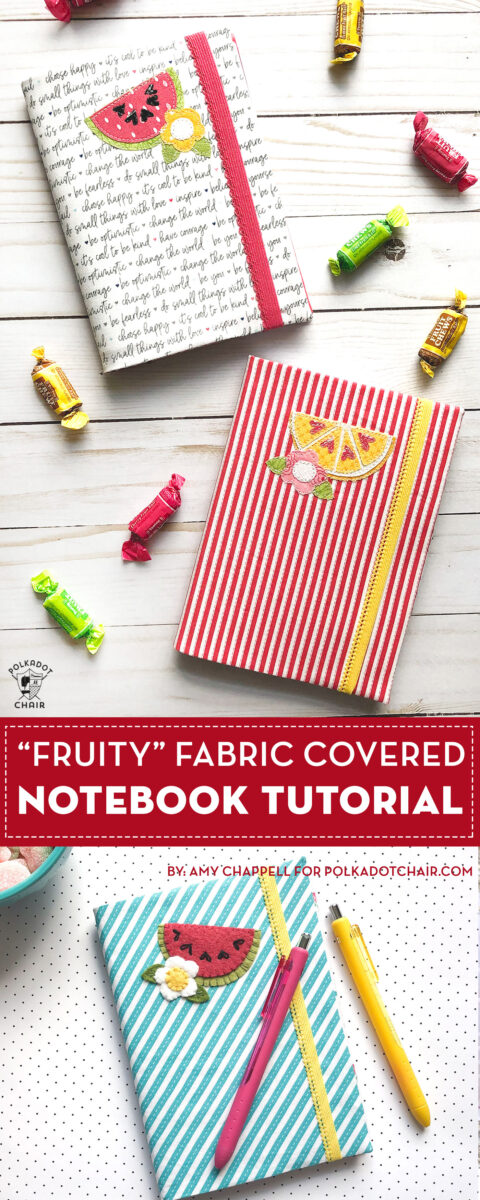
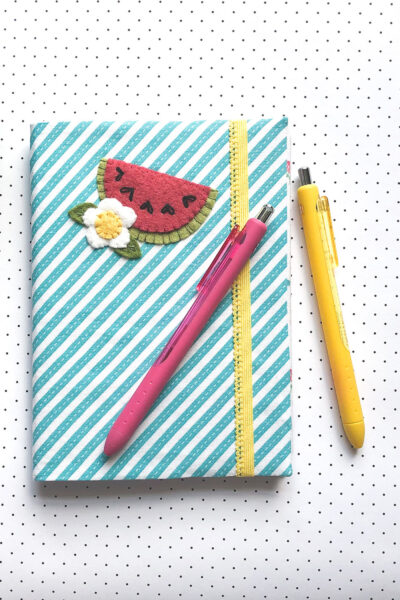
How to Make a Fabric Covered Notebook with Applique Details
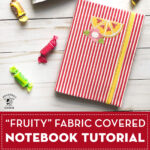
Amy Chappell is ready to teach you how to make a fabric covered notebook with this free sewing pattern. She’s even added a bit of applique detail to the cover making this the perfect simple summer sewing project!
Each summer I look for ways to keep my kids learning, just a little bit, and off screens as much as possible. Especially this year, with the strange ending of the school year, I really want to encourage my children to keep up some of the learning habits we have been working on.
Journaling is such a great skill for kids. Not only as a way to practice critical thinking and handwriting but as a way to process emotion and to document their lives in a creative way.
About the Summer Fabric Covered Notebooks

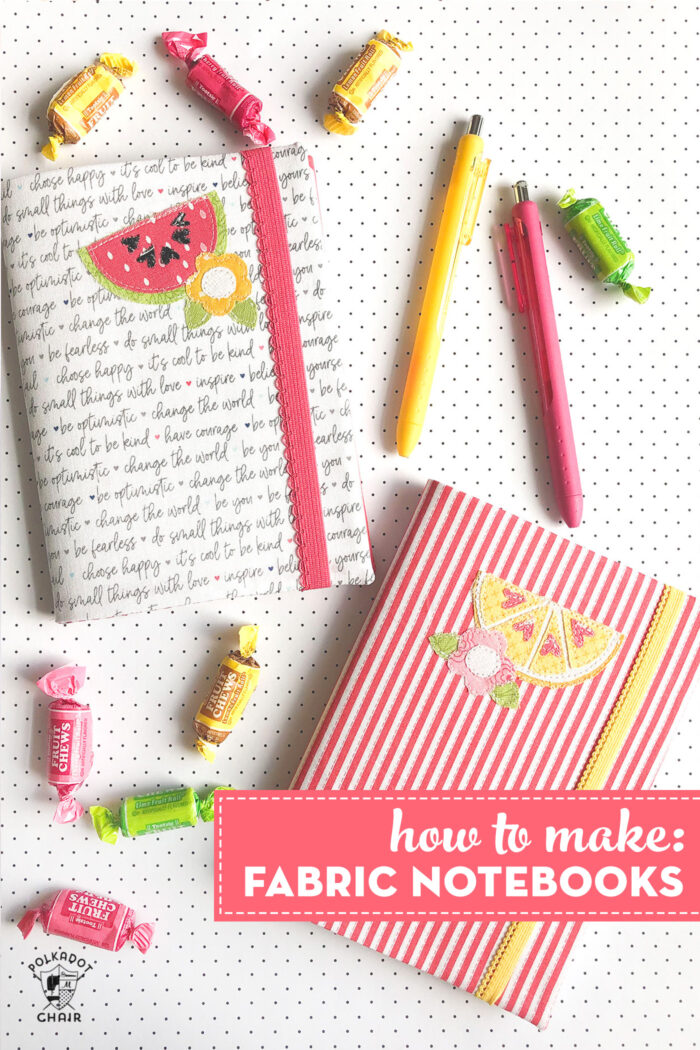
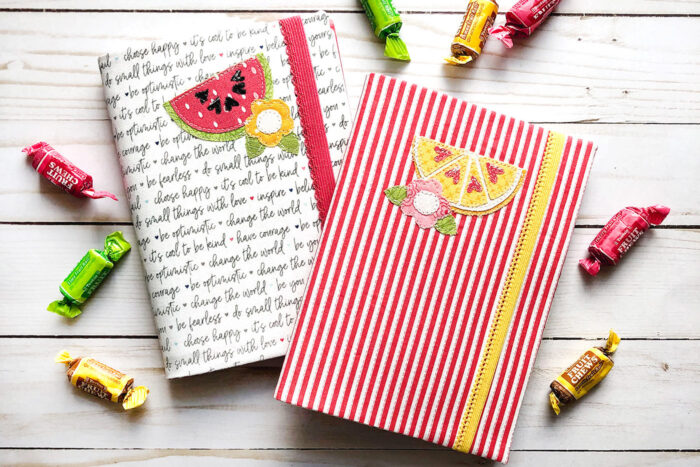
This is where the Summer Notebook Cover comes in. This fabric cover fits a mini 5” X 7” composition notebook and is a fantastic size for kids to write in without getting overwhelmed.
Plus, I know that if the supplies are cute, I am much more likely to be consistent and I find the same is true for my kids, especially my girls. These summer journals are great for responding to writing prompts, tracking goals, recording activities, or just doodling and drawing. Shall we make some?
If you are looking for a nice simple pouch to keep your journal in, my Summer Sling bag is a really quick sew as well.
How to Get the Applique Templates
Simply fill out the form and we will email you directions to get the PDF templates.
Fabric Covered Notebook
Equipment
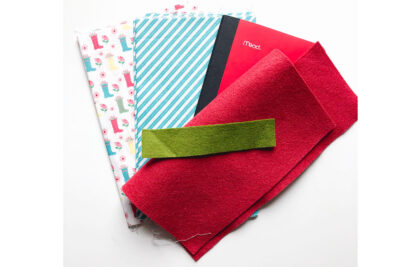
supplies
- 1 Fat Quarter Fabric for inside of notebook cover
- 1 Fat Quarter Fabric for outside of notebook cover
- Scraps of fabric or felt for the applique
- Freezer paper for felt or stitchable fusible adhesive (for fabric) for applique
- 1 5” X 7” mini composition notebook
- 1/2 yard Decorative elastic for closure Fold over elastic works great for this. You can also leave off the elastic if you prefer.
- 1/4 Yard Light to medium weight interfacing also optional- if your exterior fabric is light colored I recommend using interfacing to prevent the color of the notebook or the lining fabric from bleeding through.
- Pattern for Fruit Applique Download using this link or with the instructions in the gray box above.
- 1 skein Embroidery Thread for optional contrast hand stitching
Instructions
Cutting:
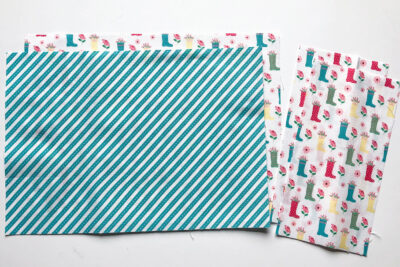
- Cut out fabric as shown in the directions below.

- Cut 2 pieces of fabric 10 7/8” X 7 ½” one from the exterior fabric and one from the lining fabric
- Cut 2 pieces of fabric 4” X 7 ½”- to create sleeves to hold the notebook, this can be from either the exterior or lining fabrics
- If adding interfacing, cut 1 piece 10 ½” X 7”.
- Cut one piece of elastic 7 ½” long.
Adding the Applique:
- Fuse the interfacing to the wrong side of the exterior piece of fabric.
- Print off the applique pattern.
- Trace the desired applique pattern onto either freezer paper or fusible adhesive. (The freezer paper method is my method of choice for preparing felt for applique, if you have a different preferred method, feel free to use that.) The fusible adhesive can be used for either the felt or fabric for raw edge applique.
- The applique steps apply whether using the freezer paper or the fusible adhesive.
- Cut around each pattern piece leaving a slight margin.
- Fuse to the wrong side of the fabric or felt. Follow package instructions for the fusible adhesive, for the freezer paper, use a warm iron with no steam)If you'd like more information about wool applqiue there are detailed instructions on my wool applique pincushion pattern.
- Cut out the pattern piece along the drawn line.
- Remove the paper backing.
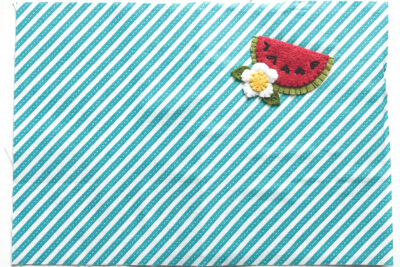
- Fold the exterior notebook fabric piece in half and gently crease the center line.
- Center your applique on the middle of the right side of the exterior fabric piece and either fuse into place, or stitch into place depending on the method you are using. If using fusible adhesive, sew down the applique pieces after fusing. If stitching into place, use one strand of coordinating floss to whip stitch the applique pieces into place. I used 2 strands of black floss to create the heart shaped seeds using two lazy daisy stitches.

Assemble the Notebook Cover:
- Place your exterior fabric piece right side up in front of you.
- Position the elastic for the closure, 1” from the left side of the exterior fabric.
- Pin the elastic into place.
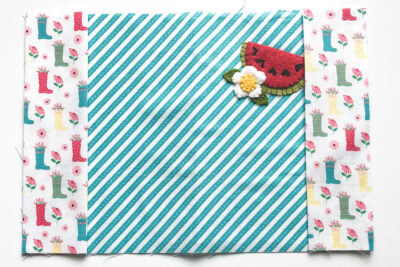
- Take the 2- 4” X 7 ½” pieces of fabric and press in half along the 4” side with wrong sides together to create 2- 2” X 7 ½” pieces.
- Line up the two sleeve fabric pieces with the two short sides of the exterior fabric. Be sure the raw edges of the sleeve pieces are lined up with the edges of the exterior fabric.
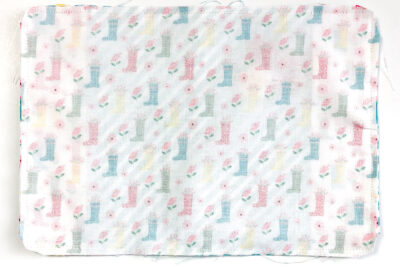
- Place the lining fabric piece for the notebook, right side down on top of the exterior fabric piece. All of the edges should be lined up.
- Pin around the notebook cover.
- Sew around the cover using a ¼” seam allowance, leaving a 3-4” opening on the bottom left side for turning. Back stitch at the beginning and ending of your sewing.
- Clip the corners and turn the notebook cover right side out.
- Push out the seams and press well, turning under the seam allowance of the opening as you press.
- Edge stitch the opening to close it.
- Now just slip the cover of the composition notebook into the sleeves of the cover and enjoy!


About the Designer

Hi! My name is Amy Chappell, and I blog over at Ameroonie Designs. I currently live in Wyoming with my husband and six kids. I love being a mom but needed an outlet that would give me something to do that stayed done. Enter sewing and creating. I love the satisfaction of taking fabric and ideas and making something new. I also love that blogging has given me a way to meet new people and find a community of amazing people who love fabric and sewing as much as I do.
xoxo,
Amy
Ameroonie Designs
www.amerooniedesigns.com
More Summer Sewing Projects Designed by Amy
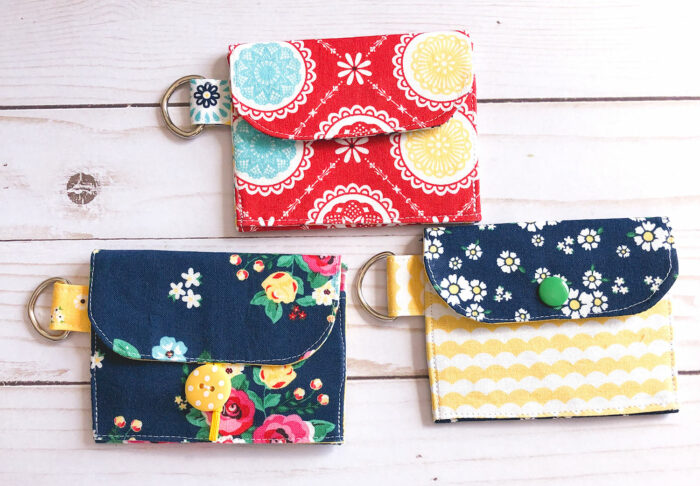
For more fun and quick summer sewing projects, check out my mini wallet tutorial, perfect for lanyards
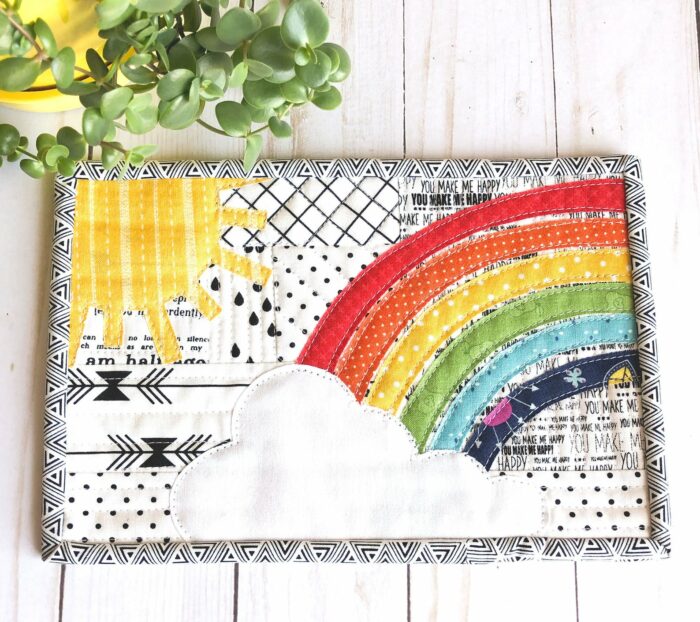
or my Rainbows and Sunshine mug rug pattern. Both sew up quickly using minimal supplies.
Happy Summer Sewing my friends! Xoxo, Amy
A few More Projects Perfect to Encourage Summer Journaling in Kids
DIY Map Covered Notebook Tutorial
How to Make a Smash Book Journal
Easy Kids Notebook & Journal Ideas