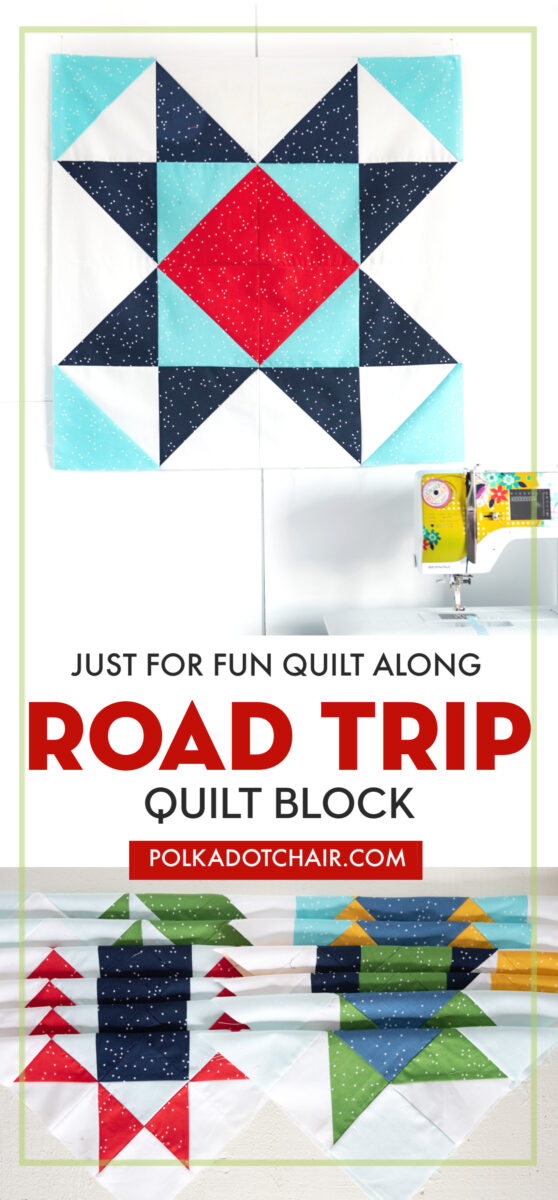
Road Trip Quilt Block; Just for Fun Quilt Along

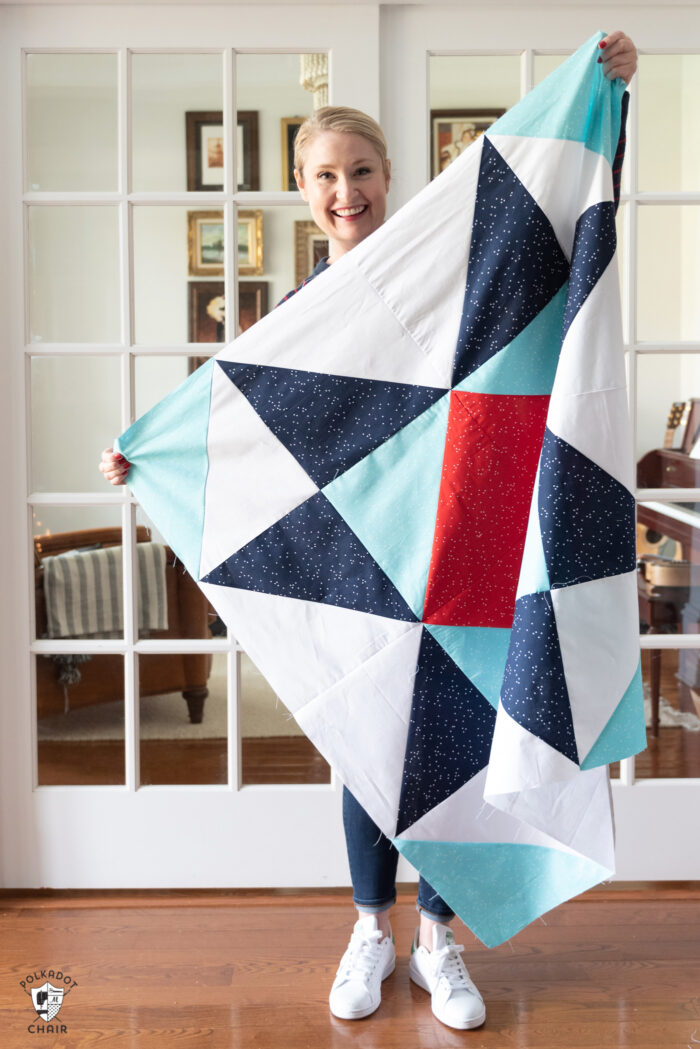
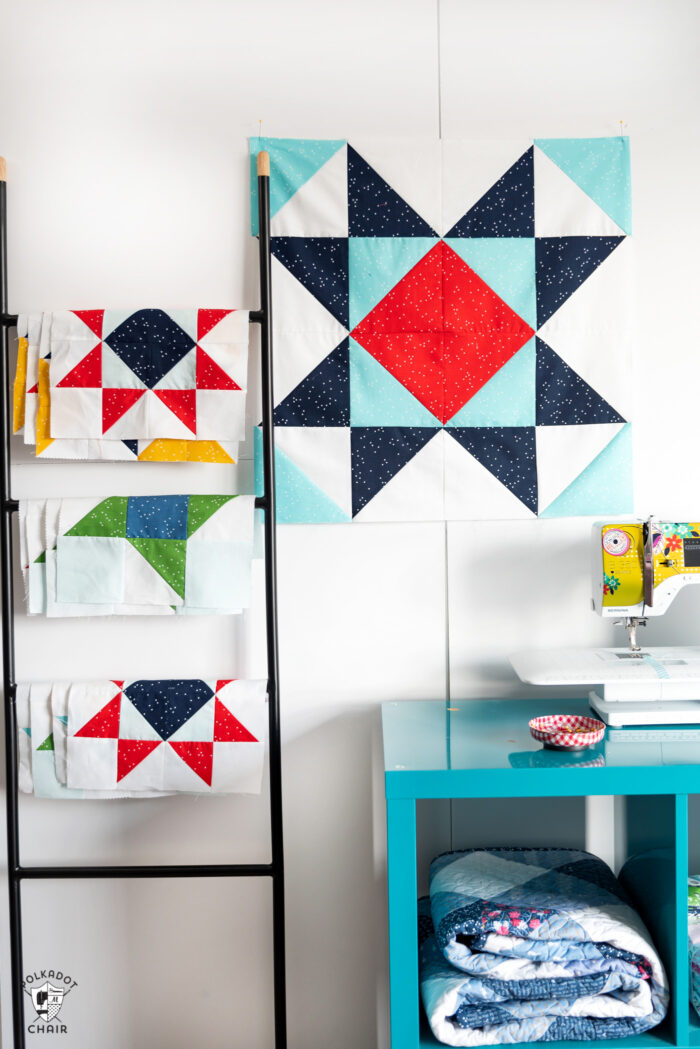
We’ve reached the end of our Just for Fun Quilt along! The Just for Fun quilt along is a year-long modern inspired quilt series designed to help you build your quilting skills. This block is the last quilt block in the series. I’ve named it the Road Trip quilt block.

We’ve reached the end of our Quilt Along! I hope that you have enjoyed sewing along with me this year. This quilt block actually comes with a funny story.
The Story of the Giant Quilt Block:
I knew that many of you were anxiously awaiting the last block in the quilt along and I was SUPER stressed that I was going to let someone down and not get it posted on time. To try to avoid this, I made sure to make a plan to finishing the quilt early so that it would not be a problem. I sat down in October to finish my quilt and realized I was out of fabric.
Riley Blake was kind enough to gift me with the fabric for this quilt so I just assumed that they were short some yardage when they sent it to me. Long story short, I had to order more fabric (thank goodness I chose a basic fabric that is always available) and wait for it to show up.
The fabric showed up and I started stitching away, although by this time I was running a bit behind. I created the quilt block and photographed it. I was so happy with how the quilt block turned out AND the photos. You guys don’t know the stress of photographing quilts, it was a big deal.
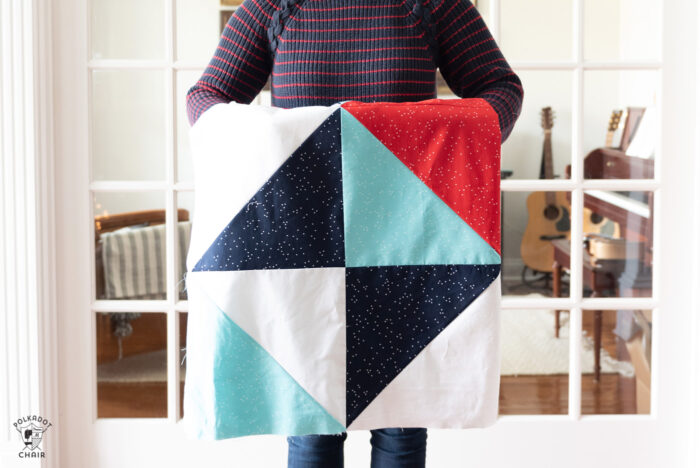
I sat down this week to write the post and thought “hmmm… this block seems kind of big.”. Five minutes later I realized that I made the block TWO TIMES TOO BIG. I have NO idea how I messed up the “quilt math” that much. I also realized that is WHY I ran out of fabric. You’d think that would have been a clue!
So, guess what? You guys get a BONUS quilt pattern with this quilt along. I’ll be sharing the pattern and tutorial for this Baby Quilt next week on the blog. My mistake, your gain right?
How to Make a Road Trip Quilt Block for the Just for Fun Quilt Along:
Okay, so onto the last block in the quilt along. I named this one “Road Trip” because I love a good road trip, and it seemed to perfectly tie in with the names of the other blocks in the series.
UPDATE:
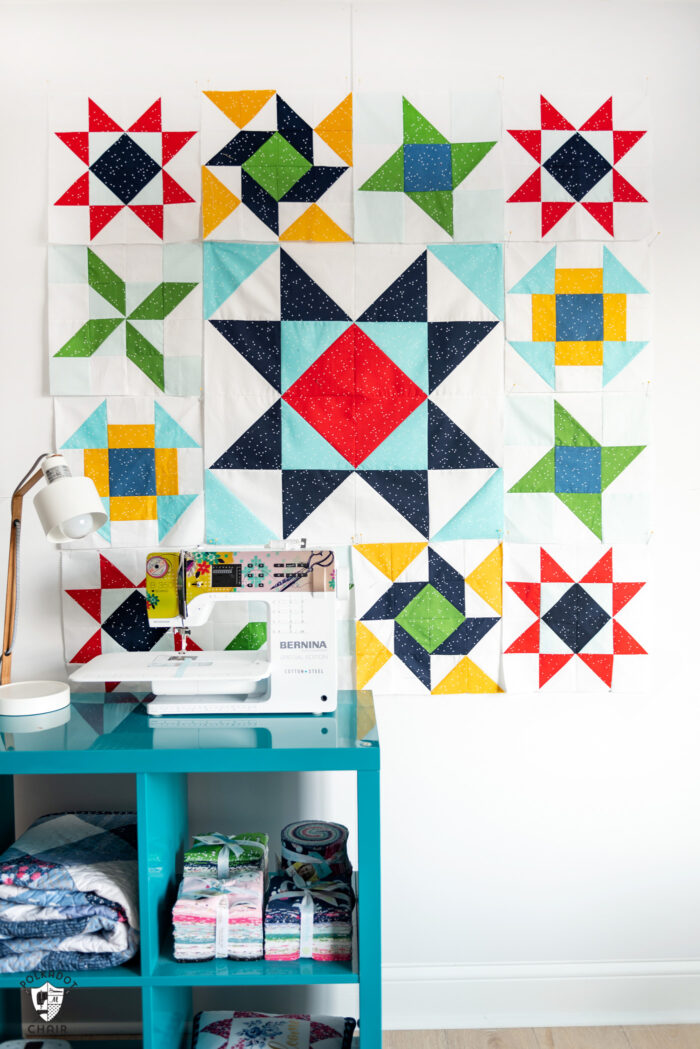
Now that the Quilt Along is over, you can purchase a PDF with all of the Quilt Block in ONE document. It includes all of the blocks shared in the series in an “easy to print” format.
If you’re new here, you can read all about the Just for Fun Quilt Along on this post.
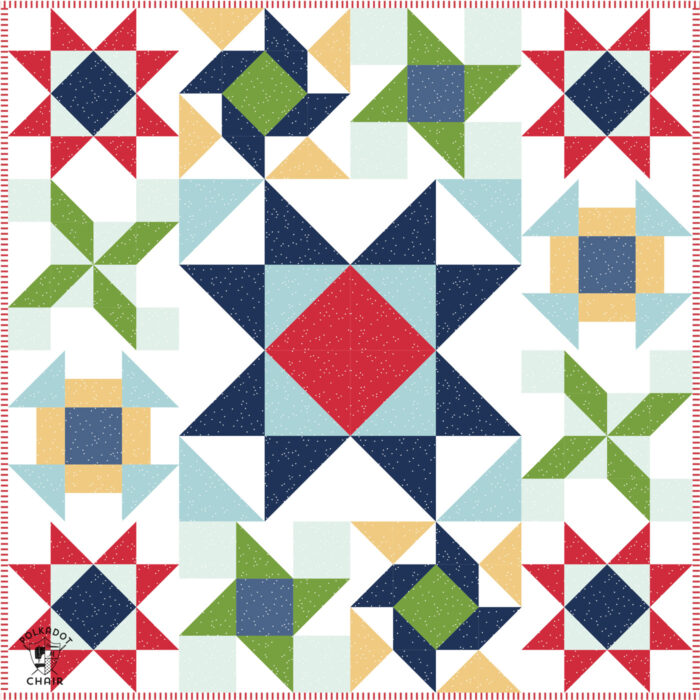
The Road Trip quilt block is constructed in a similar way to the other blocks in the series, the only difference is that the pieces are larger.
Cutting Directions:
Navy Fabric:
4 Pieces each 7″ x 7″
Aqua Fabric:
4 Pieces each 7″ x 7″
Red Fabric:
2 Pieces each 7″ x 7″
White Fabric:
6 Pieces each 7″ x 7″
Road Trip Quilt Block Directions:
Time needed: 1 hour
How to Make a Road Trip Quilt Block
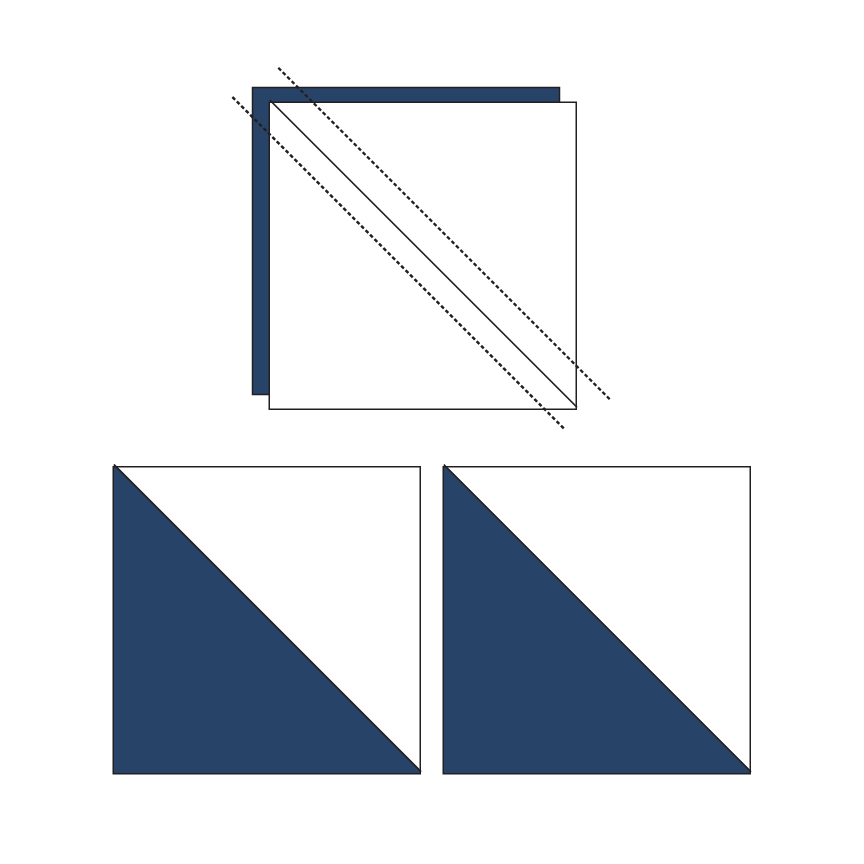
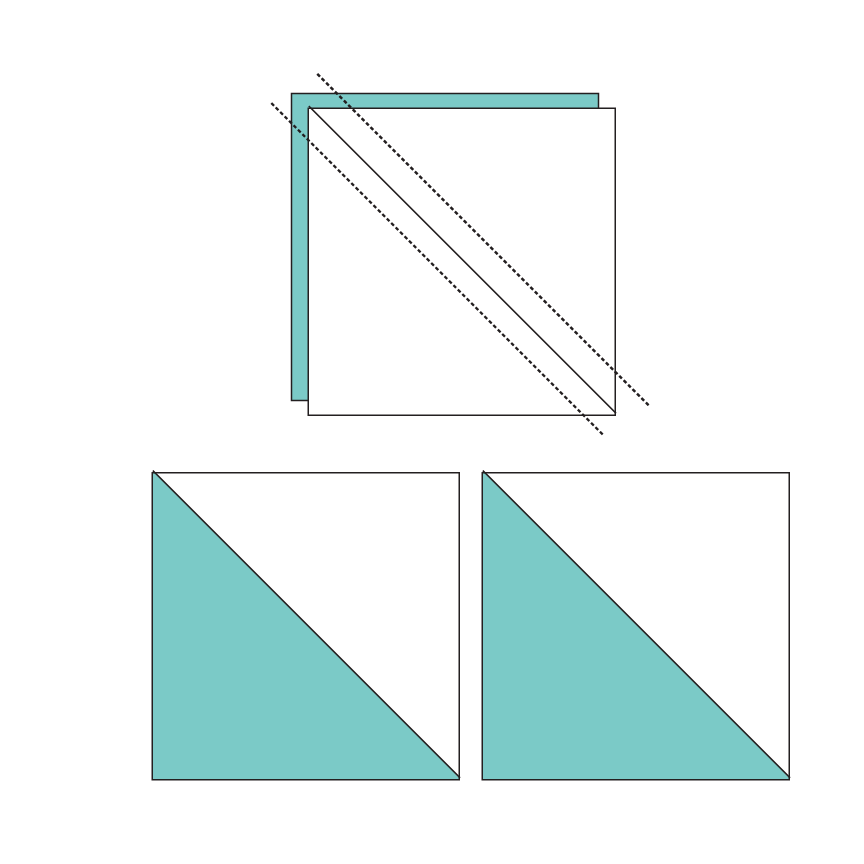
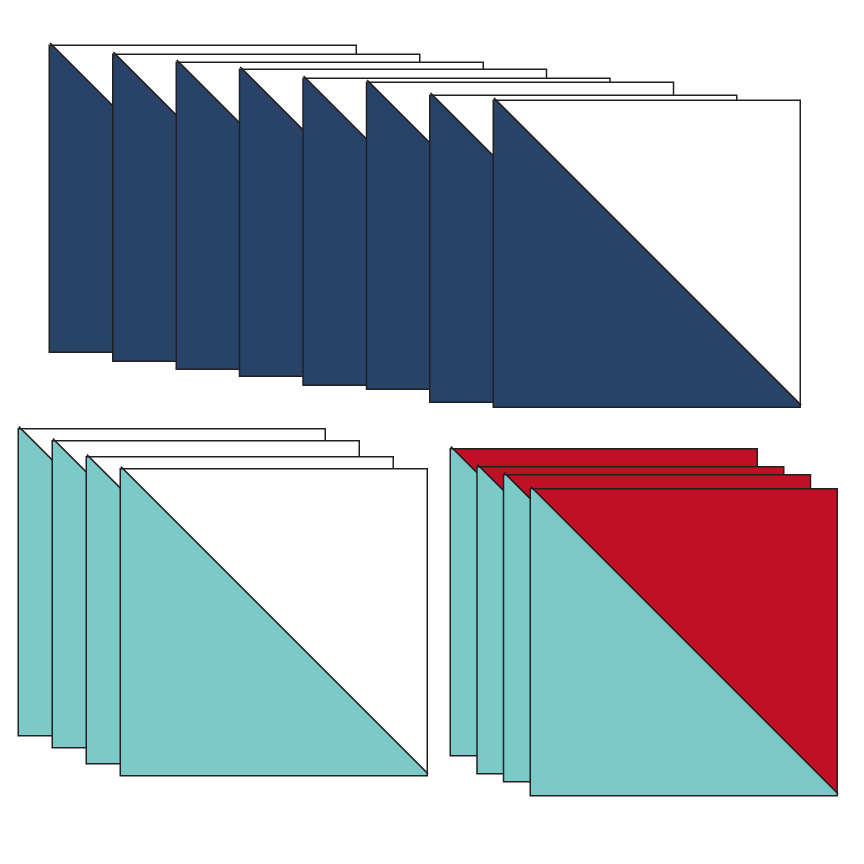
- Create the Half Square Triangles from Navy and White Fabric
Pair one Navy 7″ x 7″ pieces of fabric with one of the White 7″ x 7″ pieces of fabric. Create 2 Navy/White Half square triangles.
Repeat, 3 times. You should have 8 Navy/ White Half Square triangles.
Trim and square up to 6 1/2″ x 6 1/2″
If you need help making a Half Square Triangle, you can view THIS post for full instructions.
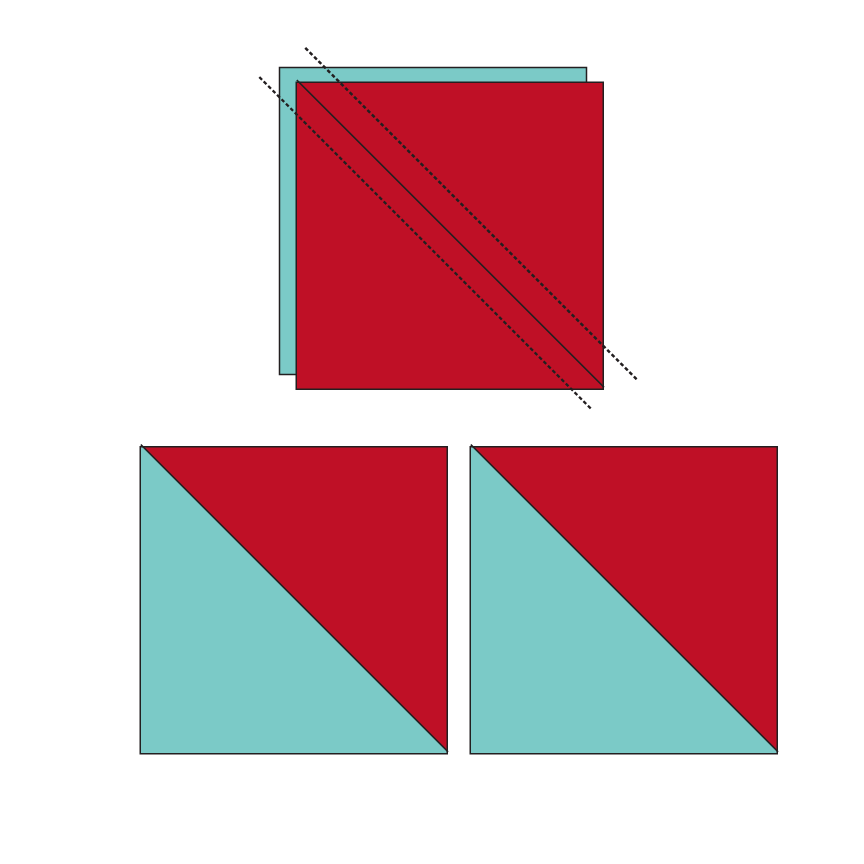
- Create the Half Square Triangles from Red and Aqua Fabric
Pair one 7″ x 7″ pieces with one of the Aqua 7″ x 7″ pieces. Create 2 Red/Aqua Half Square Triangles.
Repeat. You should have 4 Red/Aqua Half Square Triangles. Trim and square up to 6 1/2″ x 6 1/2″ - Create the Half Square Triangles from White and Aqua Fabric
Using 1 white and 1 Aqua 7″ x 7″ pieces of fabric, create 2 Aqua/White Half Square Triangles.
Repeat. You should have 4 Aqua/White Half Square Triangles. Trim and square up to 6 1/2″ x 6 1/2″ - Count your Blocks
Before you go further make sure you have:
8 White and Navy Half Square Triangles
4 Red and Aqua Half Square Triangles
4 Aqua and White Half Square Triangles.
All pieces should be 6 1/2″ x 6 1/2″ - Assemble the Block
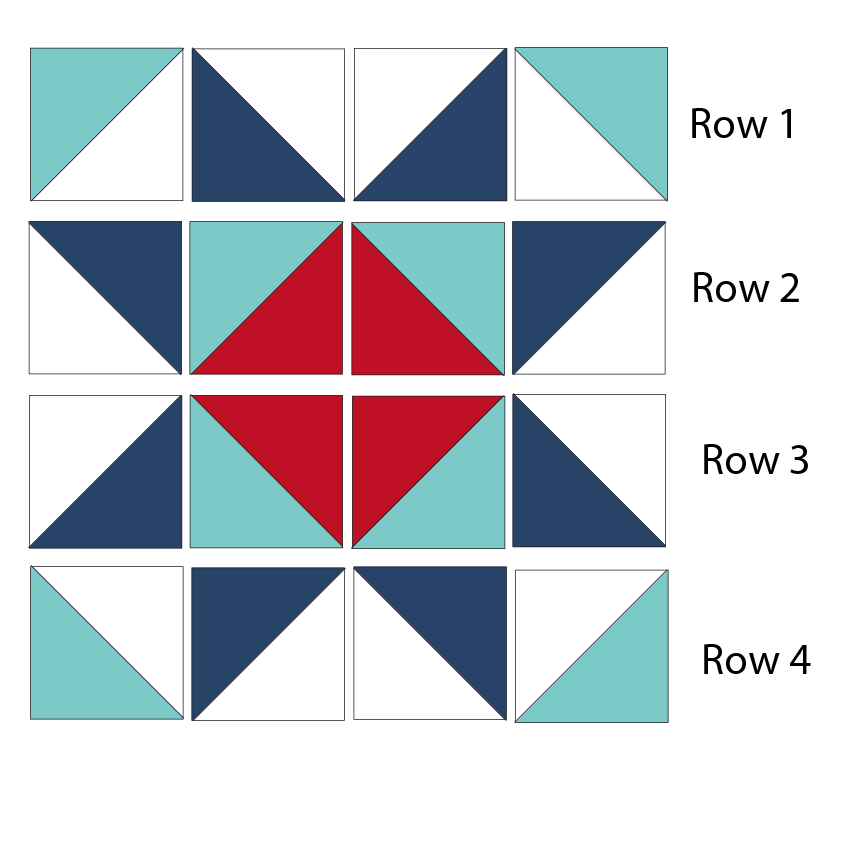
Assemble the block by rows according to the diagram.
- Finishing
If necessary trim your block. It should measure 24 1/2″ x 24 1/2″.
How to Finish your Just for Fun Quilt:
I’m planning another post with photos of my finished quilt and more detailed finishing tips and instructions. However, if you’d like to finish your quilt now, here’s how to do it.
Quilt Assembly Note (Important):
Before I took the photos I accidentally swapped two of the blocks in my layouts below. I didn’t realize this until after the photos were taken.
For assembly, you can use the Illustration above, or the layout below. Both layouts work as the both balance the aqua and green blocks on the quilt.
One: Stitch Top and Bottom Rows Together
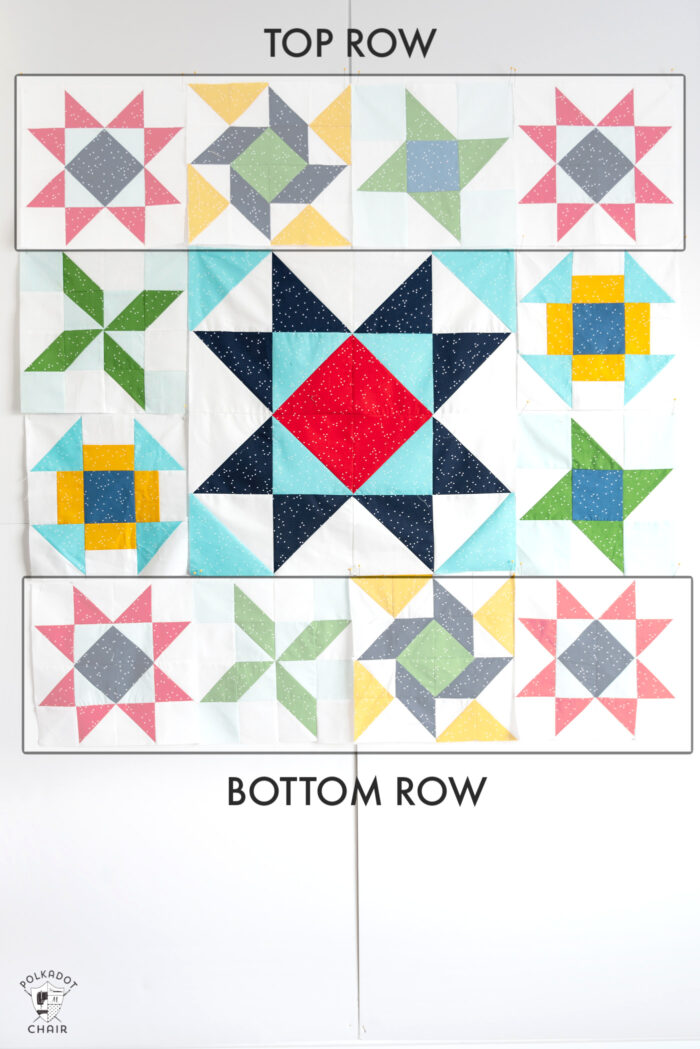
Begin by stitching the blocks in the top row and bottom row together. Make sure that you use a 1/4″ seam allowance. I recommend pressing the seams to one side after you’ve sewn the seams.
Two: Stitch Side Blocks Together
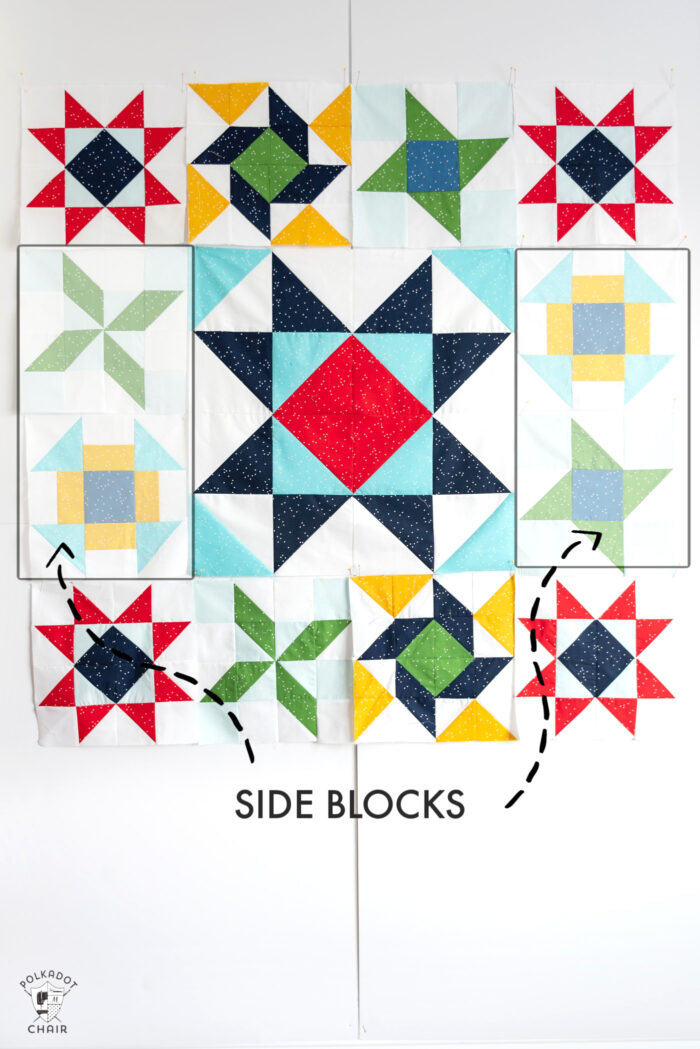
Next stitch the 2 blocks on each side to each other. Press.
Three: Stitch Side Blocks to Center Block
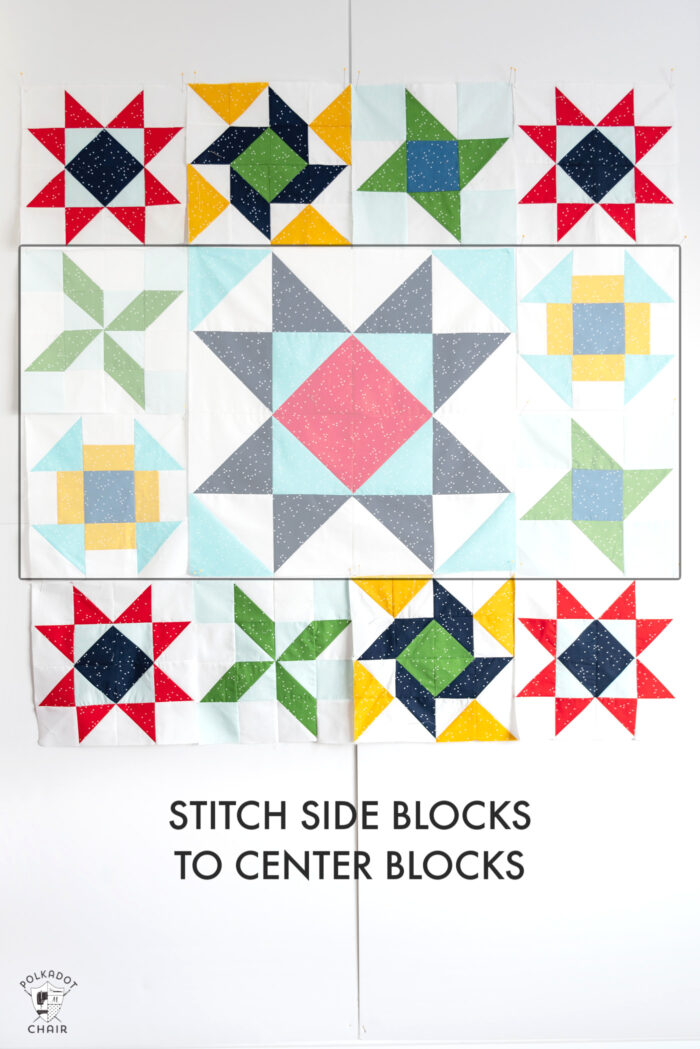
Stitch those blocks to the large center block.
Four: Assemble the Quilt
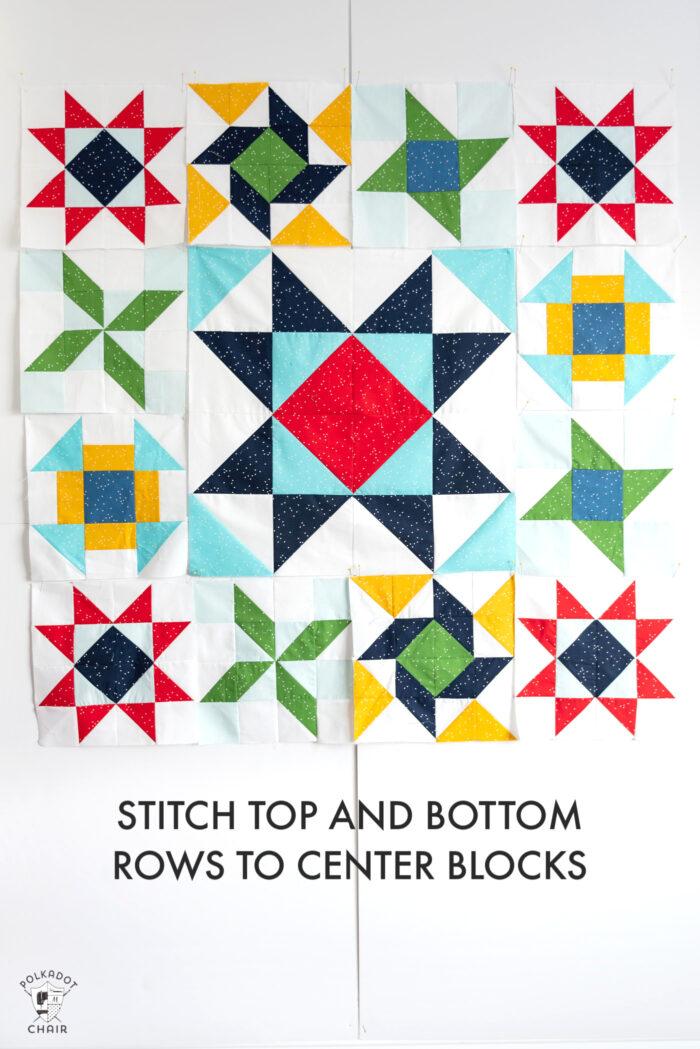
Lastly, stitch the top and bottom rows to the center sewn blocks.
That’s it!
Share your Quilts!
Love to Quilt? Please join us in our Quilt Fun Facebook Group!
If you’re new to Quilting Check Out These Posts:
Herringbone Baby Quilt Pattern
45+ Quilt Patterns for Beginners
How to Make a Quilt from Start to Finish