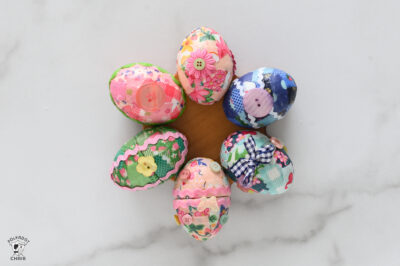
DIY Fabric Scrap Easter Eggs
Use your fabric scraps to create colorful and fun deucopaged Easter eggs!
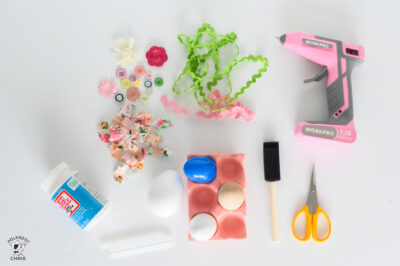
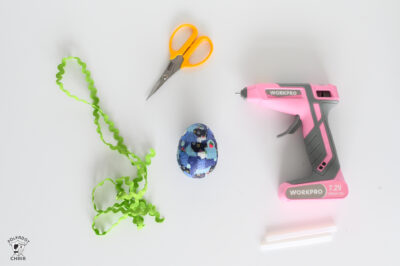
Equipment
- Foam Paint Brush
Ingredients
- Scrap Fabric
- Modgepodge I used both fabric and matte finish
- Hot Glue Stick
- Tacky Glue (optional)
- Ricrac/Ribbon
- Vintage Buttons
Instructions
Step 1:
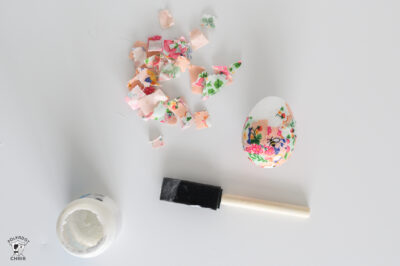
- First, figure out what fabric you want to use. I found scrap pieces and jelly roll strips to be the best option, but you can use any fabric. Take your fabric and cut it into small pieces; they don’t have to be uniform, and if they are too big, they won't lie smoothly when glued. If you have a really graphic pattern, you can fussy cut the fabric.
- Cut out pieces around things like flowers, fruit, bugs, etc., to add a design element. You can use whatever color scheme you want for this; you can also use the same fabric if you would like. Given the overlap required for this project, I find that a monochromatic color scheme, paired with various patterns, works best.
Step 2:
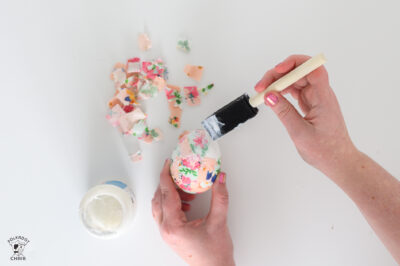
- Using your cut-out pieces of fabric, take your fabric modgepodge (I recommend this specific type because it is thicker and will make it easier to make sure everything is glued down properly) and, using your foam brush, paint a layer onto the egg. Place the fabric onto the Modgepodged parts of the egg, then apply another layer of Modgepodge over the fabric.
- Applying more ModPodge over the fabric will ensure that the next piece of fabric is fully glued down. As you add more pieces of fabric, make sure they overlap slightly with the others to ensure the egg is completely covered.
- If you are using an egg base that doesn’t open up, gluing the fabric to the egg is as simple as that. If you wish to create an egg that opens, you will need to keep a clean edge to ensure it actually opens.
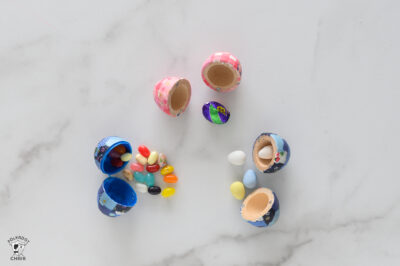
- If you are using one of those plastic eggs that open and close, make sure you don’t glue fabric over the bottom lip of the egg, and keep the edges flush with the bottom/top of the egg. If you are using wooden eggs that magnet together, you can place fabric over the inside lip of the egg, but avoid covering the magnets as much as possible to ensure they can still close.
Step 3:
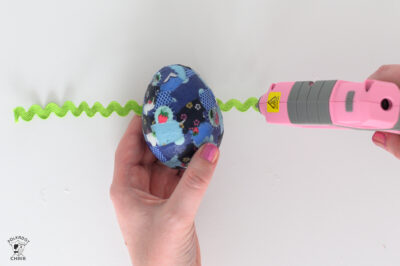
- Once your eggs are covered in fabric and have fully dried, you can start adding on decorative elements. I like to start with the ribbon or ricrac to create stripes on the egg. I found that ricrac works better than ribbon for smoothly covering an egg's contours. If you want to use a ribbon, a skinnier ribbon will sit more smoothly than a thicker one due to the egg's curved shape. You will want to wrap the trim around the egg to make sure you cut the appropriate length.
- To attach the ricrac to the egg, there are two ways: the first is the easiest, but might not be the smoothest. For this method, you will use hot glue to apply the trim in small increments; you don’t need to apply glue to the entire trim. Using this method, I put hot glue directly on the ricrac and slowly apply it to the egg, trying to keep the line even. For the second method, I take some tacky glue and spread it across the egg where I want it to go. I find a paintbrush helpful to maintain precision. Once you have applied the glue to the egg, simply wrap the trim around it to hold it in place.
Step 4 (optional):
- Once you have all your ricrac/ribbon glued down, you can seal everything together with a layer of matte madgepodge. This will help ensure everything is stuck together while also changing the egg's overall finish, since the fabric Modgepodge has a shiny finish.
Step 5:
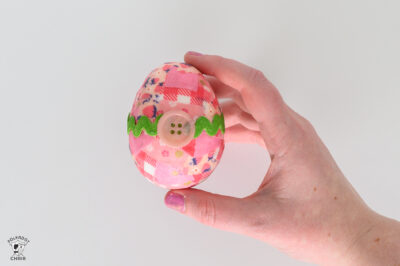
- Now you get to finish decorating your eggs. If you have a bunch of buttons or other decorative notions lying around, this is a great way to use them. I had some small fabric and plastic flowers that worked perfectly for this. You can use small buttons to create polkadots. I liked using medium-to-large buttons to cover the seam lines on the ricrac I glued down and create a central focal point. There are so many ways you can arrange these notions to create the cutest easter eggs. You simply take the pieces you picked out and hot-glue them to the egg.