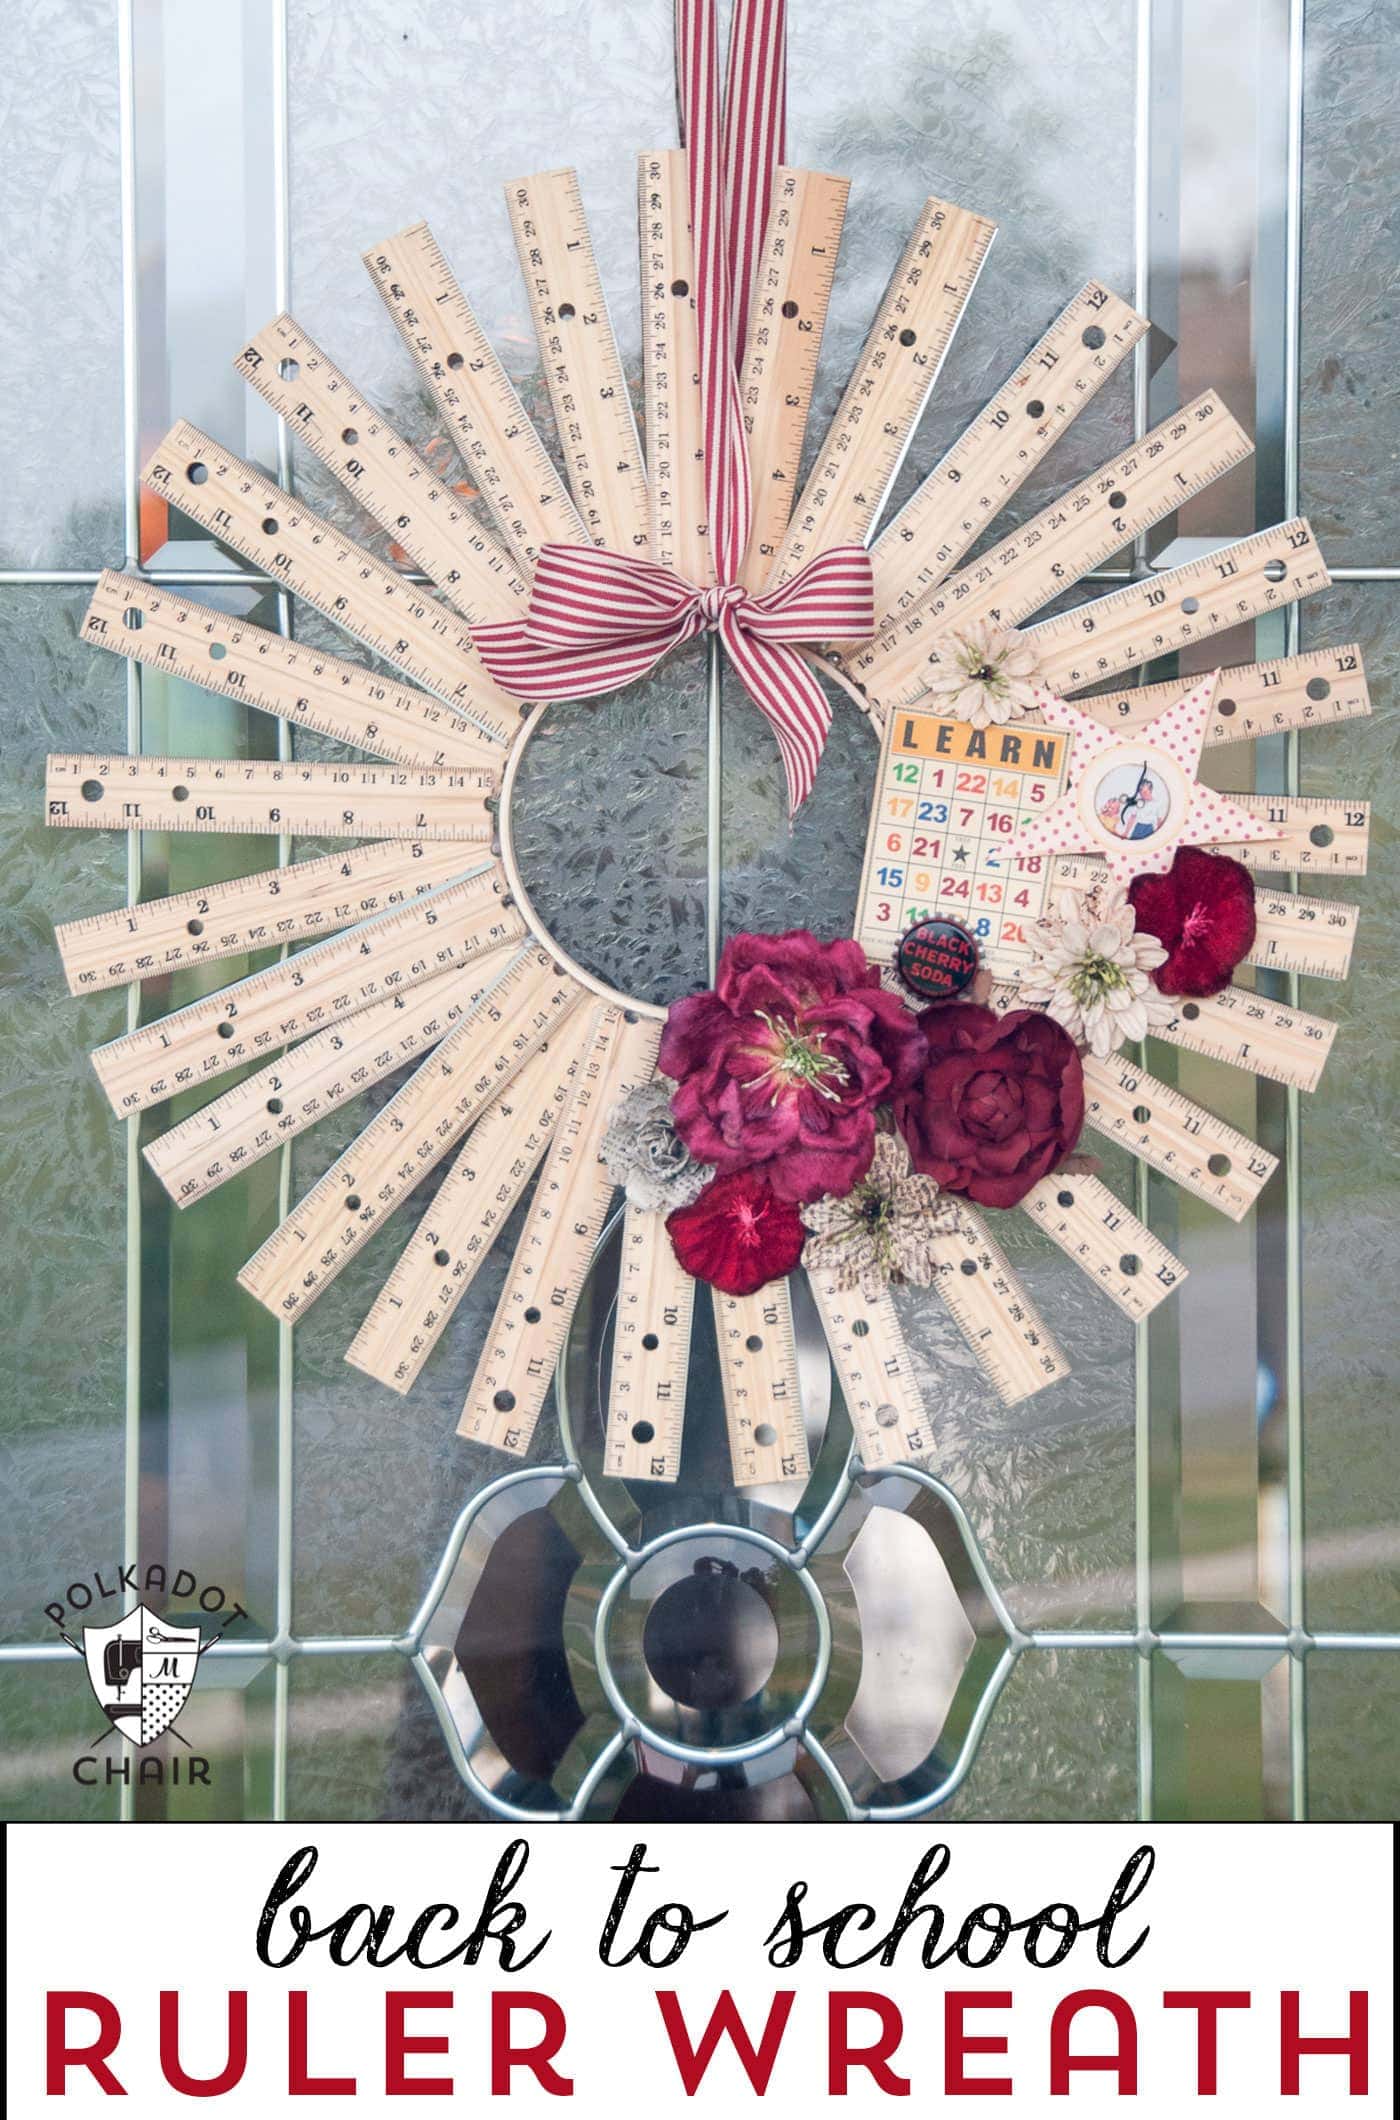
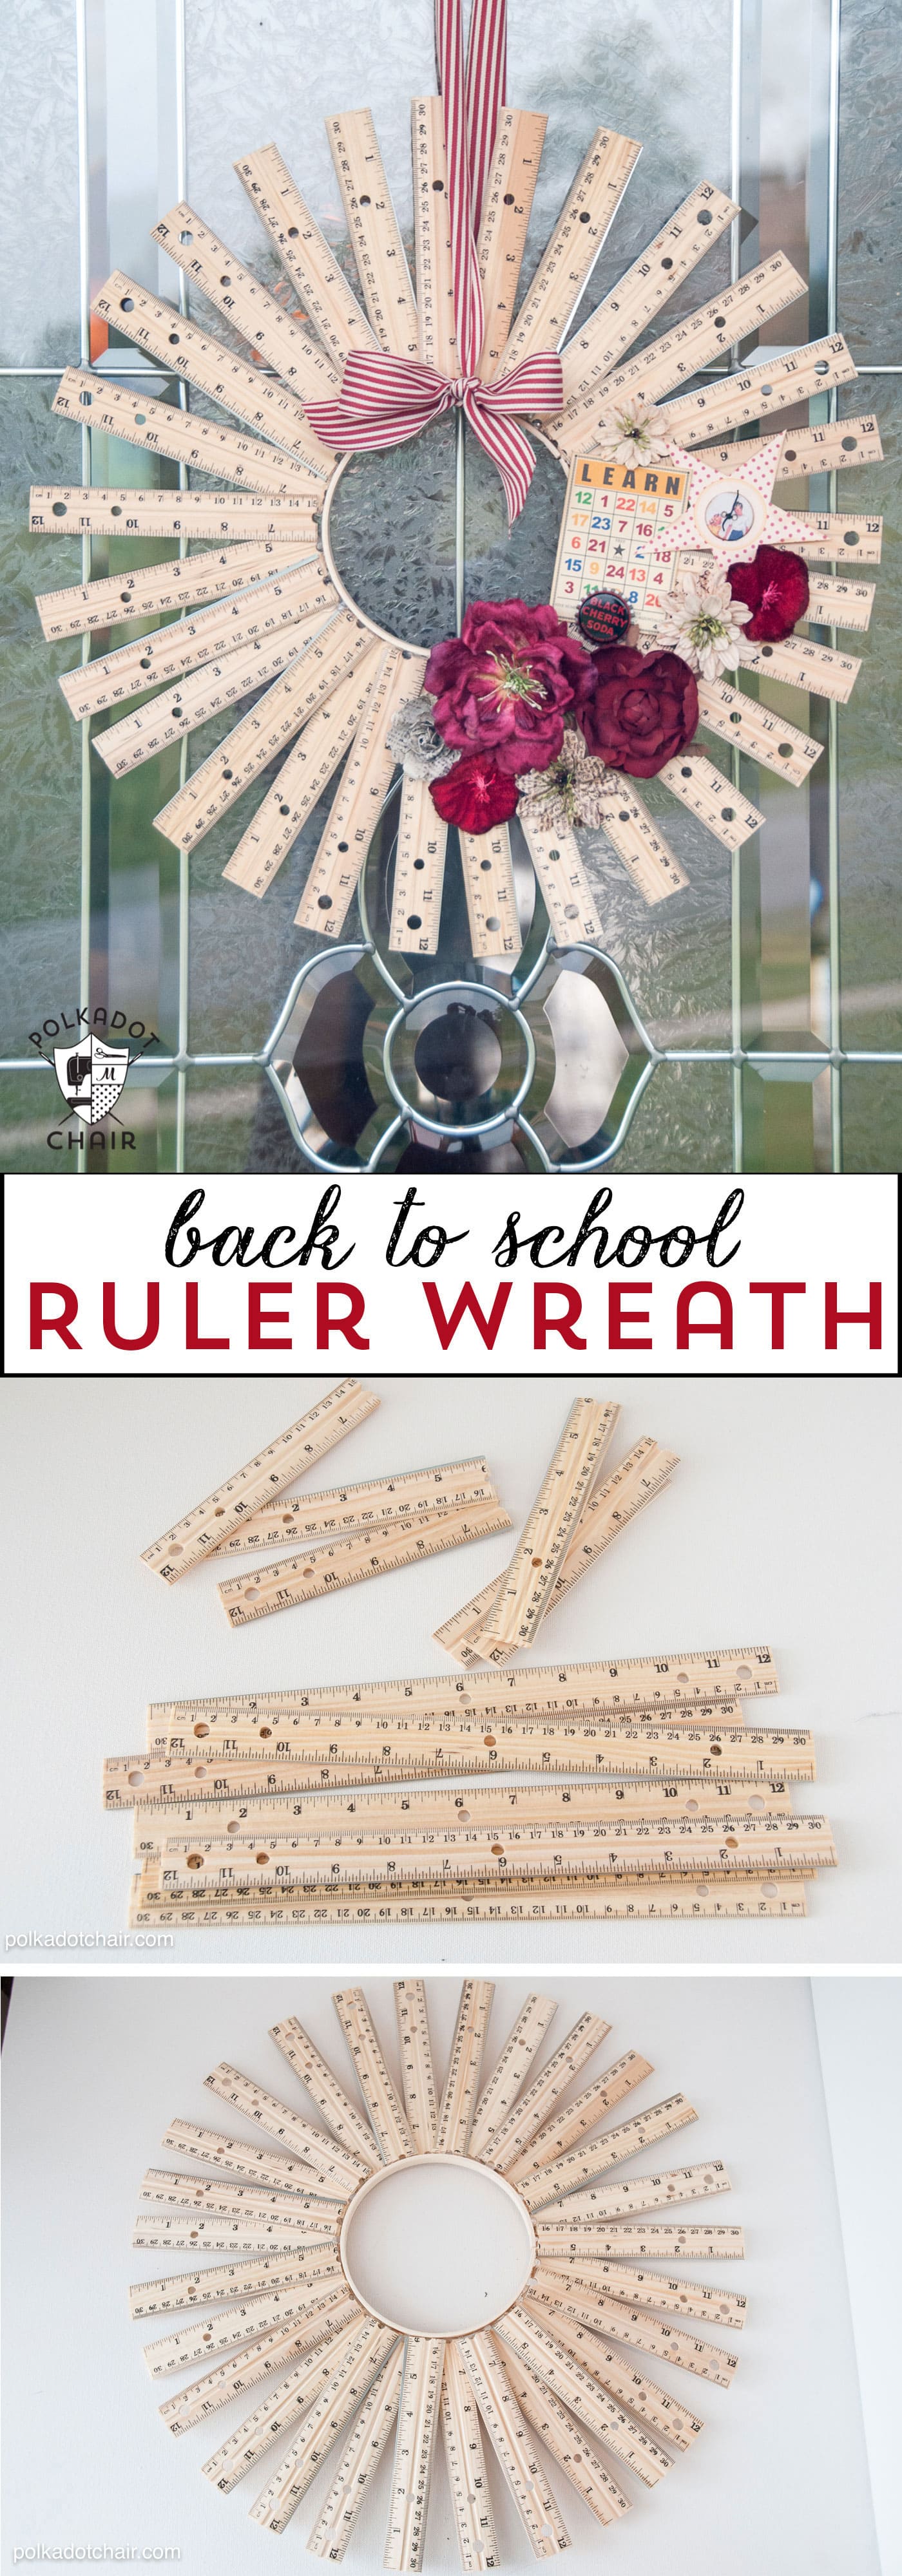
DIY Back-to-School Ruler Wreath
Looking for a fun craft idea for back to school or a teacher appreciation gift? You may enjoy making this Back to School Ruler Wreath. If you like this project, you may also enjoy this Personalized Teacher Appreciation Banner tutorial.
A couple of days I posted on the Polkadot Chair Facebook page asking for ideas for a wreath for my front door. I was stumped, too late for summer, too early for fall. Lots of people suggested that I do a back-to-school wreath. Then they suggested I use school supplies to make it; then VOILA, I had an idea! (thanks, guys!!!).
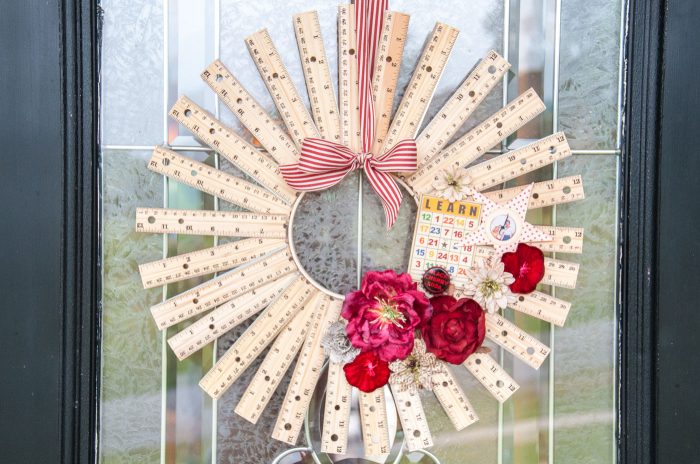
I decided to make a wreath out of rulers! The idea might have come from my unnatural obsession with starburst mirrors lately – I thought this was a fun spin on that idea.
Supplies Required
- 14 Wood Rulers
- 6″ Wood Embroidery Hoop
- Hot Glue Gun
- Decorations such as silk flowers, paper, and buttons
- Ribbon
How to Make a Ruler Wreath
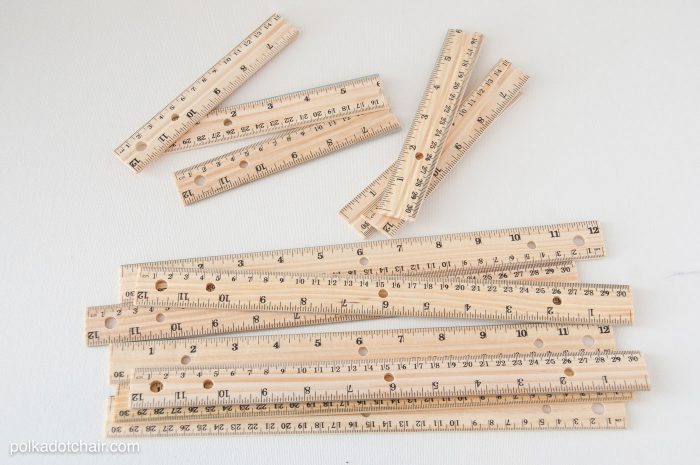
Purchase wooden rulers (I got mine at Target for .50 each).
Next, cut them in half. (I used a saw, it was pretty easy).
This wreath took 14 rulers in all. You could also use 6″ rulers, but I couldn’t find any, and I liked the variation of the numbers when you cut them in half.
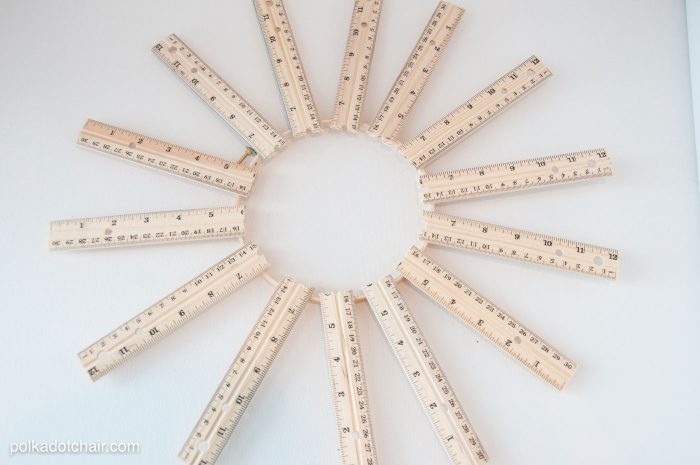
After you cut all of your rulers in half, you will hot glue half of the rulers to a 6″ embroidery hoop. Leave a little space between each one, and try to space them evenly.
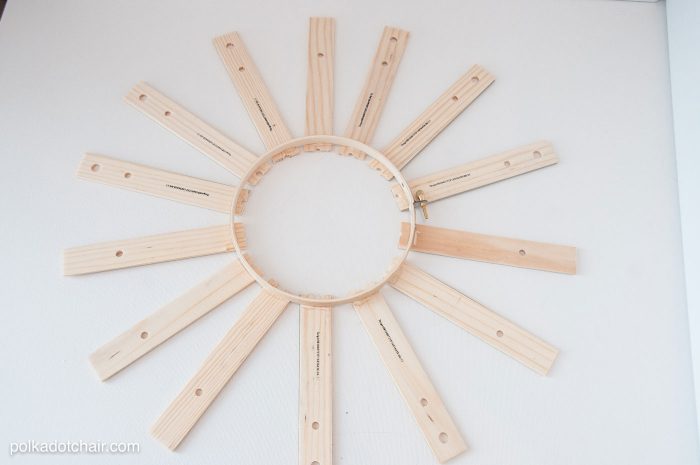
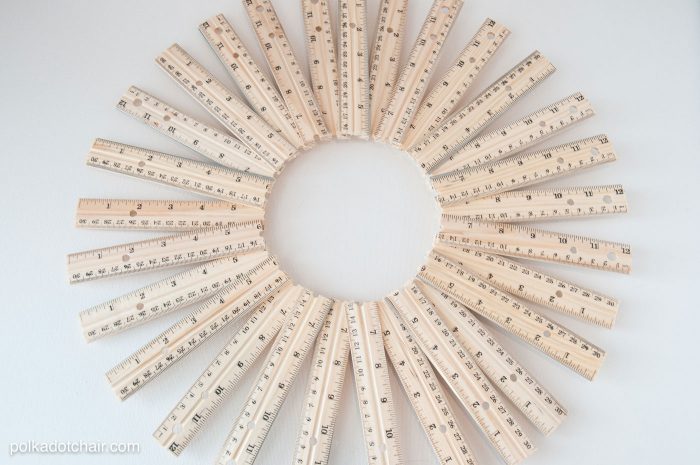
Hot glue the remaining rulers on top of the space between the rulers on the bottom row. You will get a starburst design.
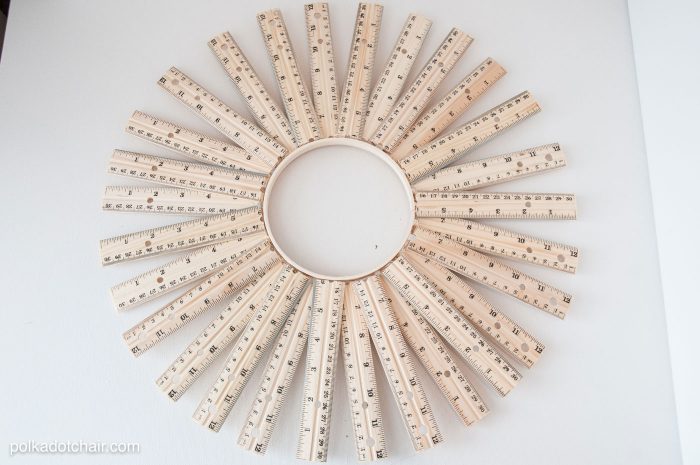
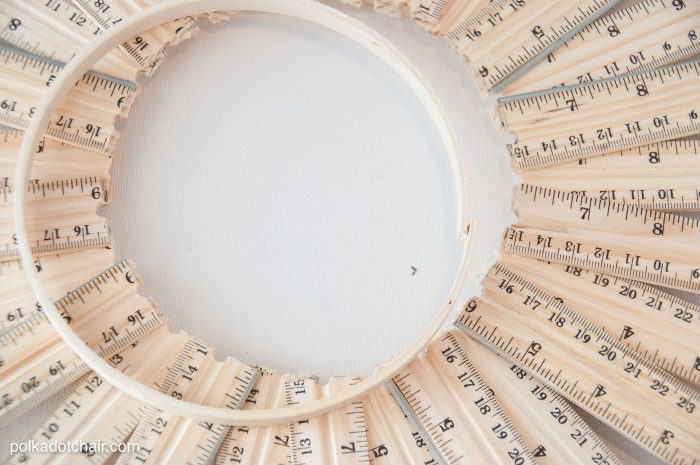
Next, cut a slit in the other half of the embroidery hoop. Fit it into the center of the wreath, mark where they meet. Cut off the excess so that the hoop fits into the space.
Hot glue in place.
Finishing Steps
When you are done the wreath base will look like this. I kinda like it just plain… but I decided to decorate it up a bit.
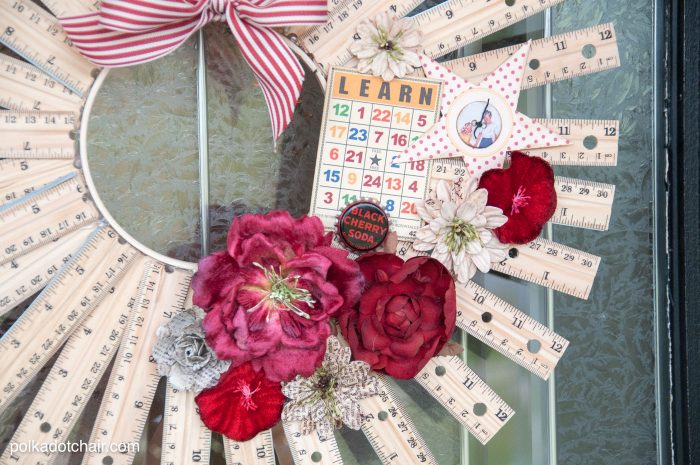
I added a few scrapbooking supplies (most are Jenni Bowlin) and some flowers that I had to the corner. I just used hot glue.
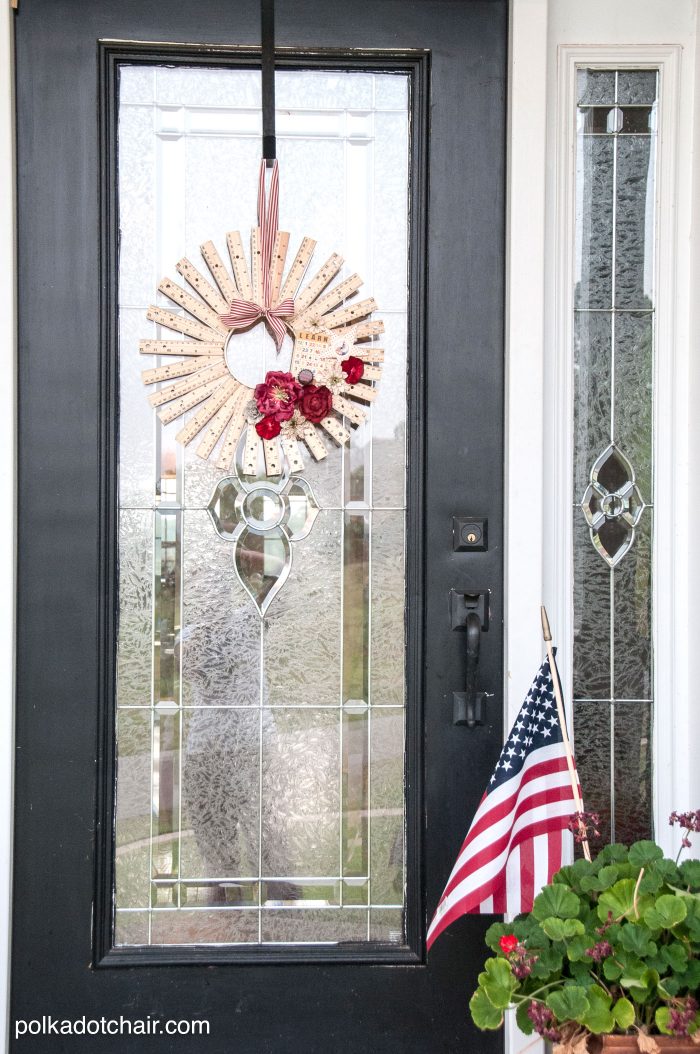
I love the way it looks on the front door; I’m just not sure if I trust it out there with the humidity- I think I’ll move it indoors, which means I still need to come up with an idea for the front door 🙂
I made one of these for each of my son’s teachers. So fun! I change out the decorations and ribbon on the wreath each month to fit holiday themes. I use decorative clothespins to attach the new decor. I put each month’s decor in a labeled bag for them after I change it out. Now they have a whole year of wreaths. I was a way I could give them a gift for each holiday. Thanks so much for your idea and design!
Hi! I love this idea! So cute!
I’d like to create this but I’m confused about the middle of the wreath. After you glue the rulers on top of the first set – do you use another embroidery hoop? I’m having a block and can’t figure out what what you mean by cutting the hoop in half. Sorry! Help would be much appreciated! Thank you!!
Those designs are awesome! I never knew so many designs could be done with rulers before 🙂
I just made mine!!! I can’t wait to out it on my classroom door for the first day of school, and…see all the compliments from my colleagues!!
I’m so glad you are able to use the tutorial! Good luck with school this year!
I just uploaded my picture if you want to see how mine came out…I personalized it a little more, thank you again for the idea!
I loved this so much that I shared it in a roundup of Back-to-School projects on my blog today! You can see it here: http://justagirlandherblog.com/21-creative-back-to-school-projects/ Thanks so much for the inspiration!
~Abby =)
Just a Girl and Her Blog
I’m a math teacher… I’ve gotta make this for my classroom! I’m going to add a round chalkboard to the center with my name painted on it to welcome my new students next year! Thanks for the inspiration!!!
I have a lot of 6 inch rulers I was looking to do a craft with, this is perfect. Thanks
Fabulous little wreath!
<3 Christina at I Gotta Create!
Wildly Original Linky Party is open.
Thank you!!
I Love your Idea… I’m going to make this in use it in my Sewing Room…
Love it Love it …looks so easy to do all so ,,,Great Job..Cookie17 in Va.
A wonderful idea, using your method made one for my sister in her school colors. She starts her 5th year in a couple of weeks, but at a new campus with a new age group (8th graders) I hope the wreath I made with your lovely inspiration, reminds her what an amazing thing she does every day. Thanks so much for the idea, and the tutorial, it was such fun, can’t wait to take it to her tomorrow!
Thank you! I’m so glad you had fun making the wreath!
Love it. Thanks for sharing
Hi Melissa – I did a post a day ago about one of those shim mirrors. I mentioned that I had seen one with rulers and would look for it.
I found it this morning and posted it on my blog, and did give you credit for it. The rulers look great, too.
Let me now if I did this right as it’s my first time posting with other’s material.
What a great teacher gift- and it looks so easy to make!
immeasurable creativity! you rule! 🙂