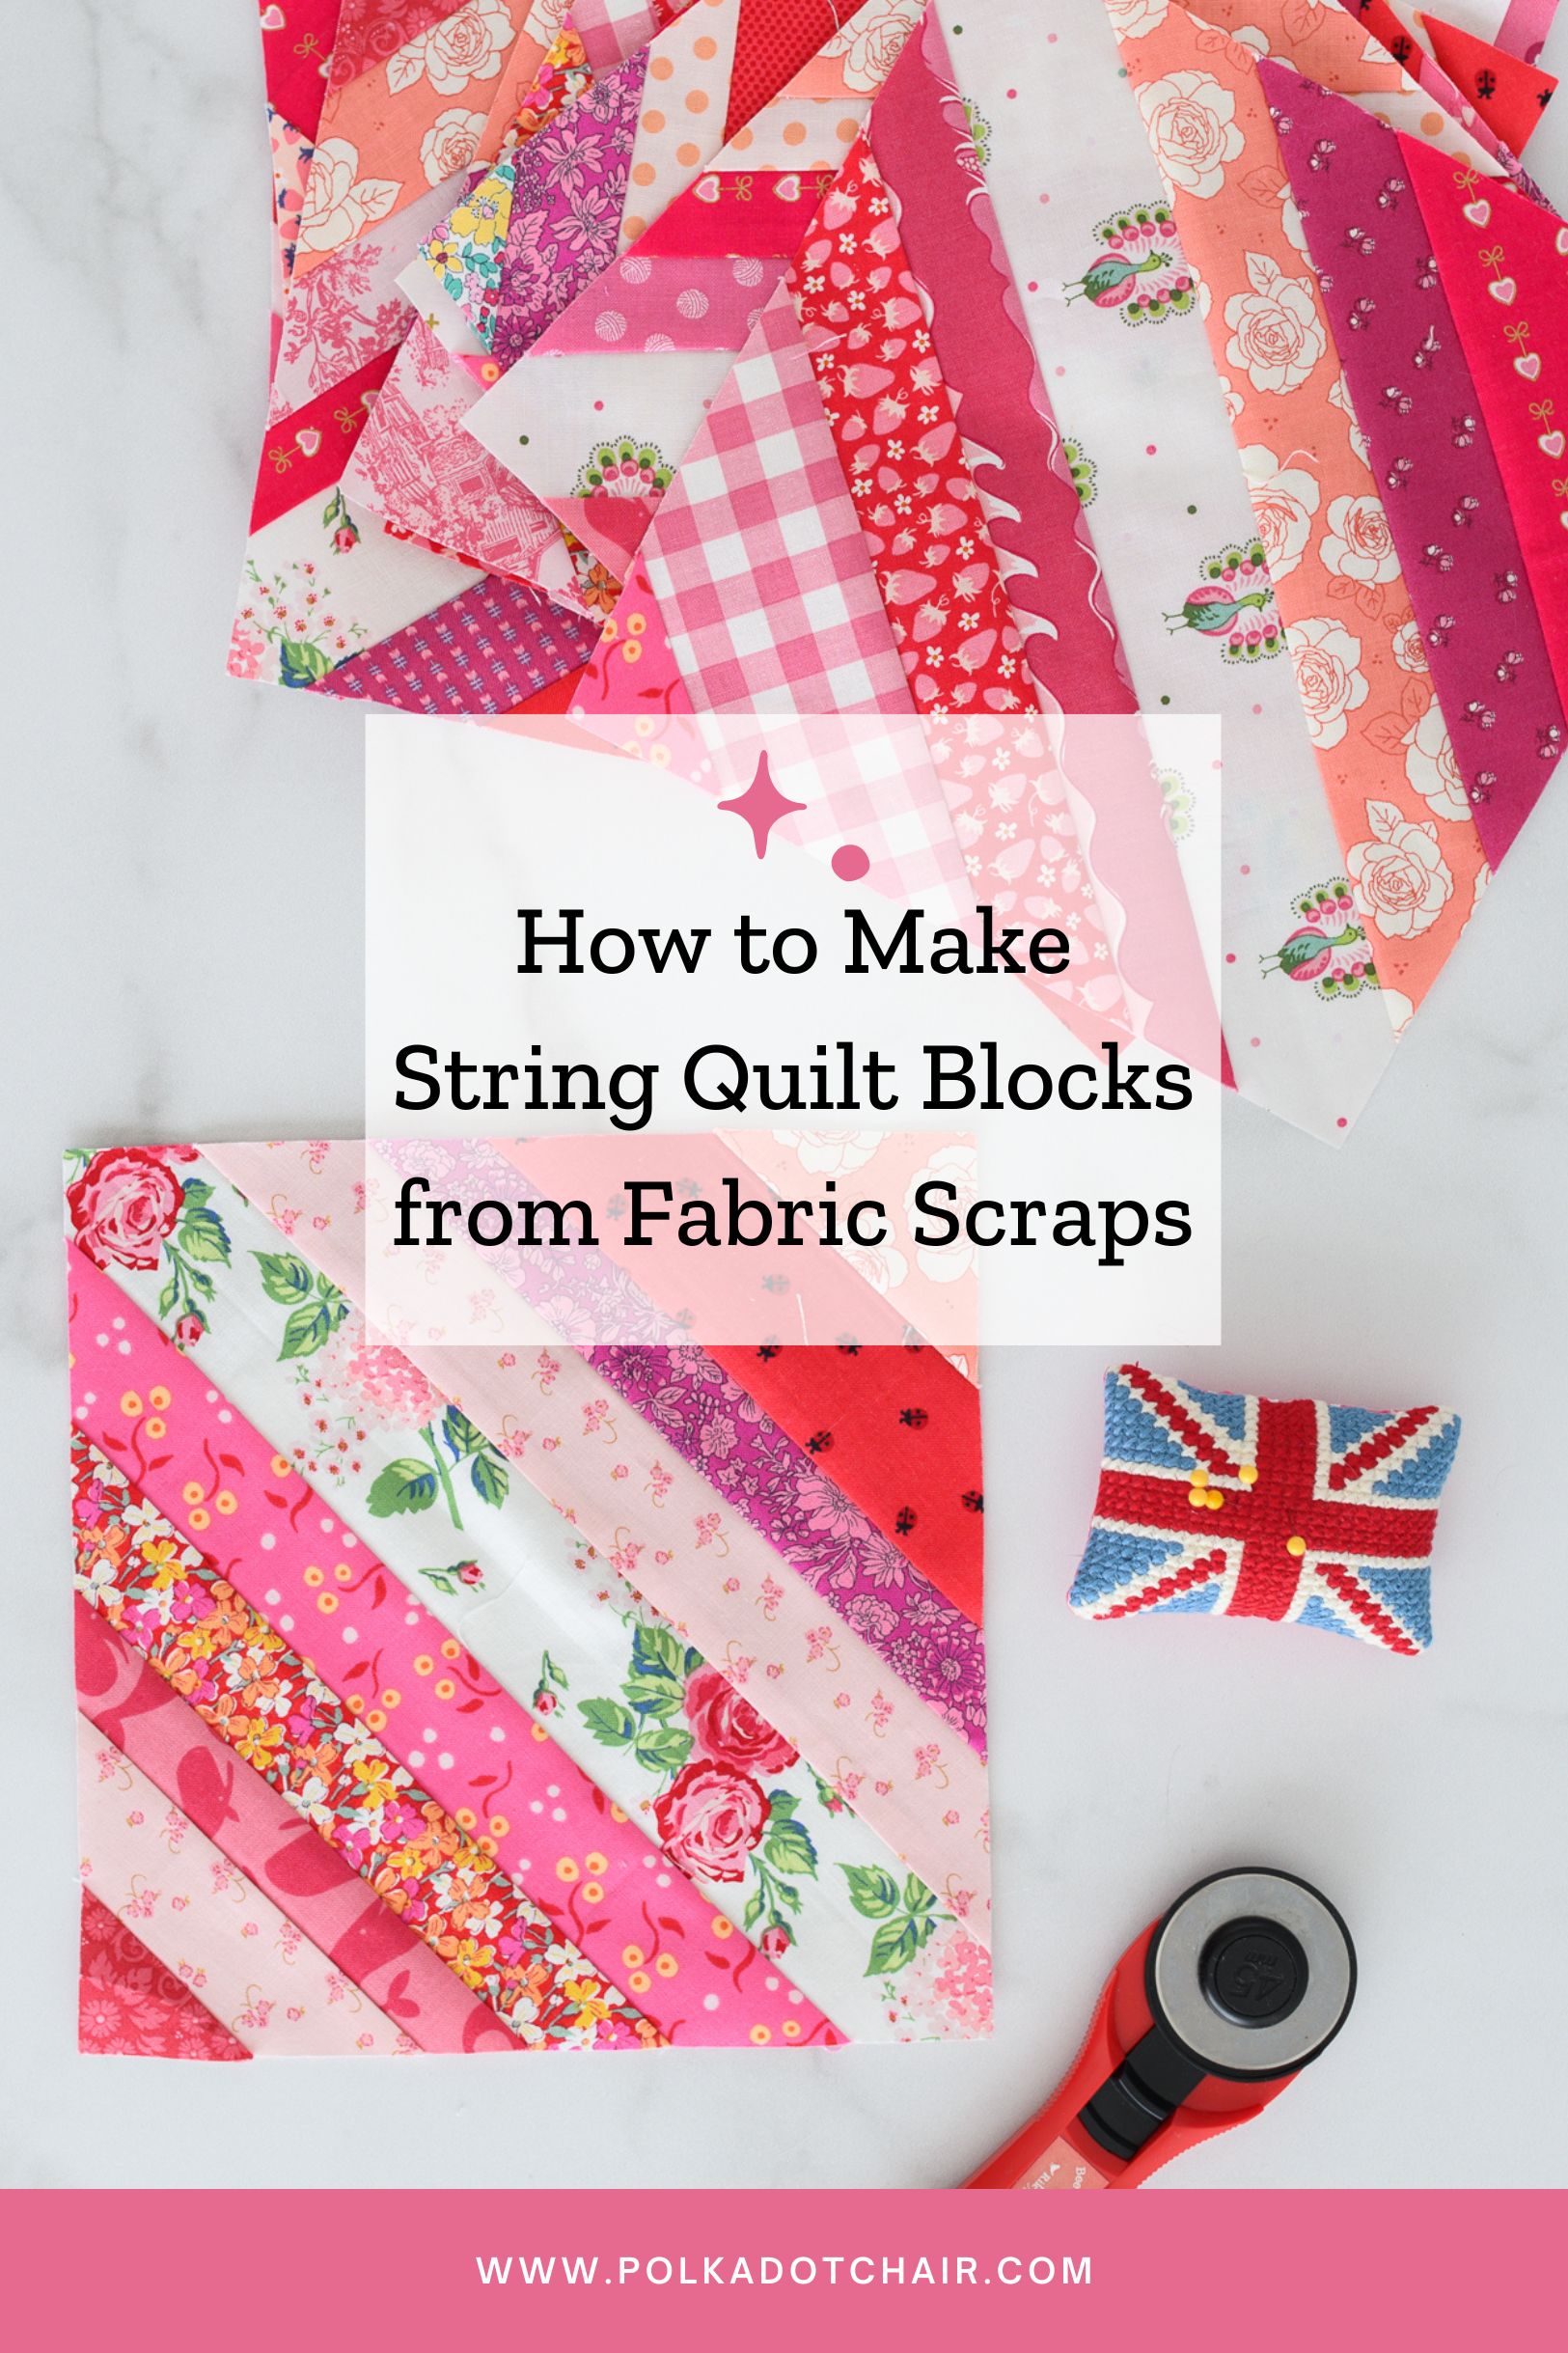
Turn Your Fabric Scraps into a Colorful Quilt by Creating String Quilt Blocks
String quilt blocks are one of the most satisfying ways to turn fabric scraps into something beautiful and usable. They’re fast, forgiving, and perfect for quilters who love a scrappy, colorful look. If you’ve been saving leftover strips from past projects (and I know many quilters do), string piecing is a fantastic way to put them to work.
Recently, a large winter storm rolled into Kentucky, and my family and I were snowed in for a few days. I have a “to-do” list a mile long of quilt projects to complete for work, but I decided I wanted to work on something a bit more improvisational and fun, something that felt more like “quilting for fun” and less like work!
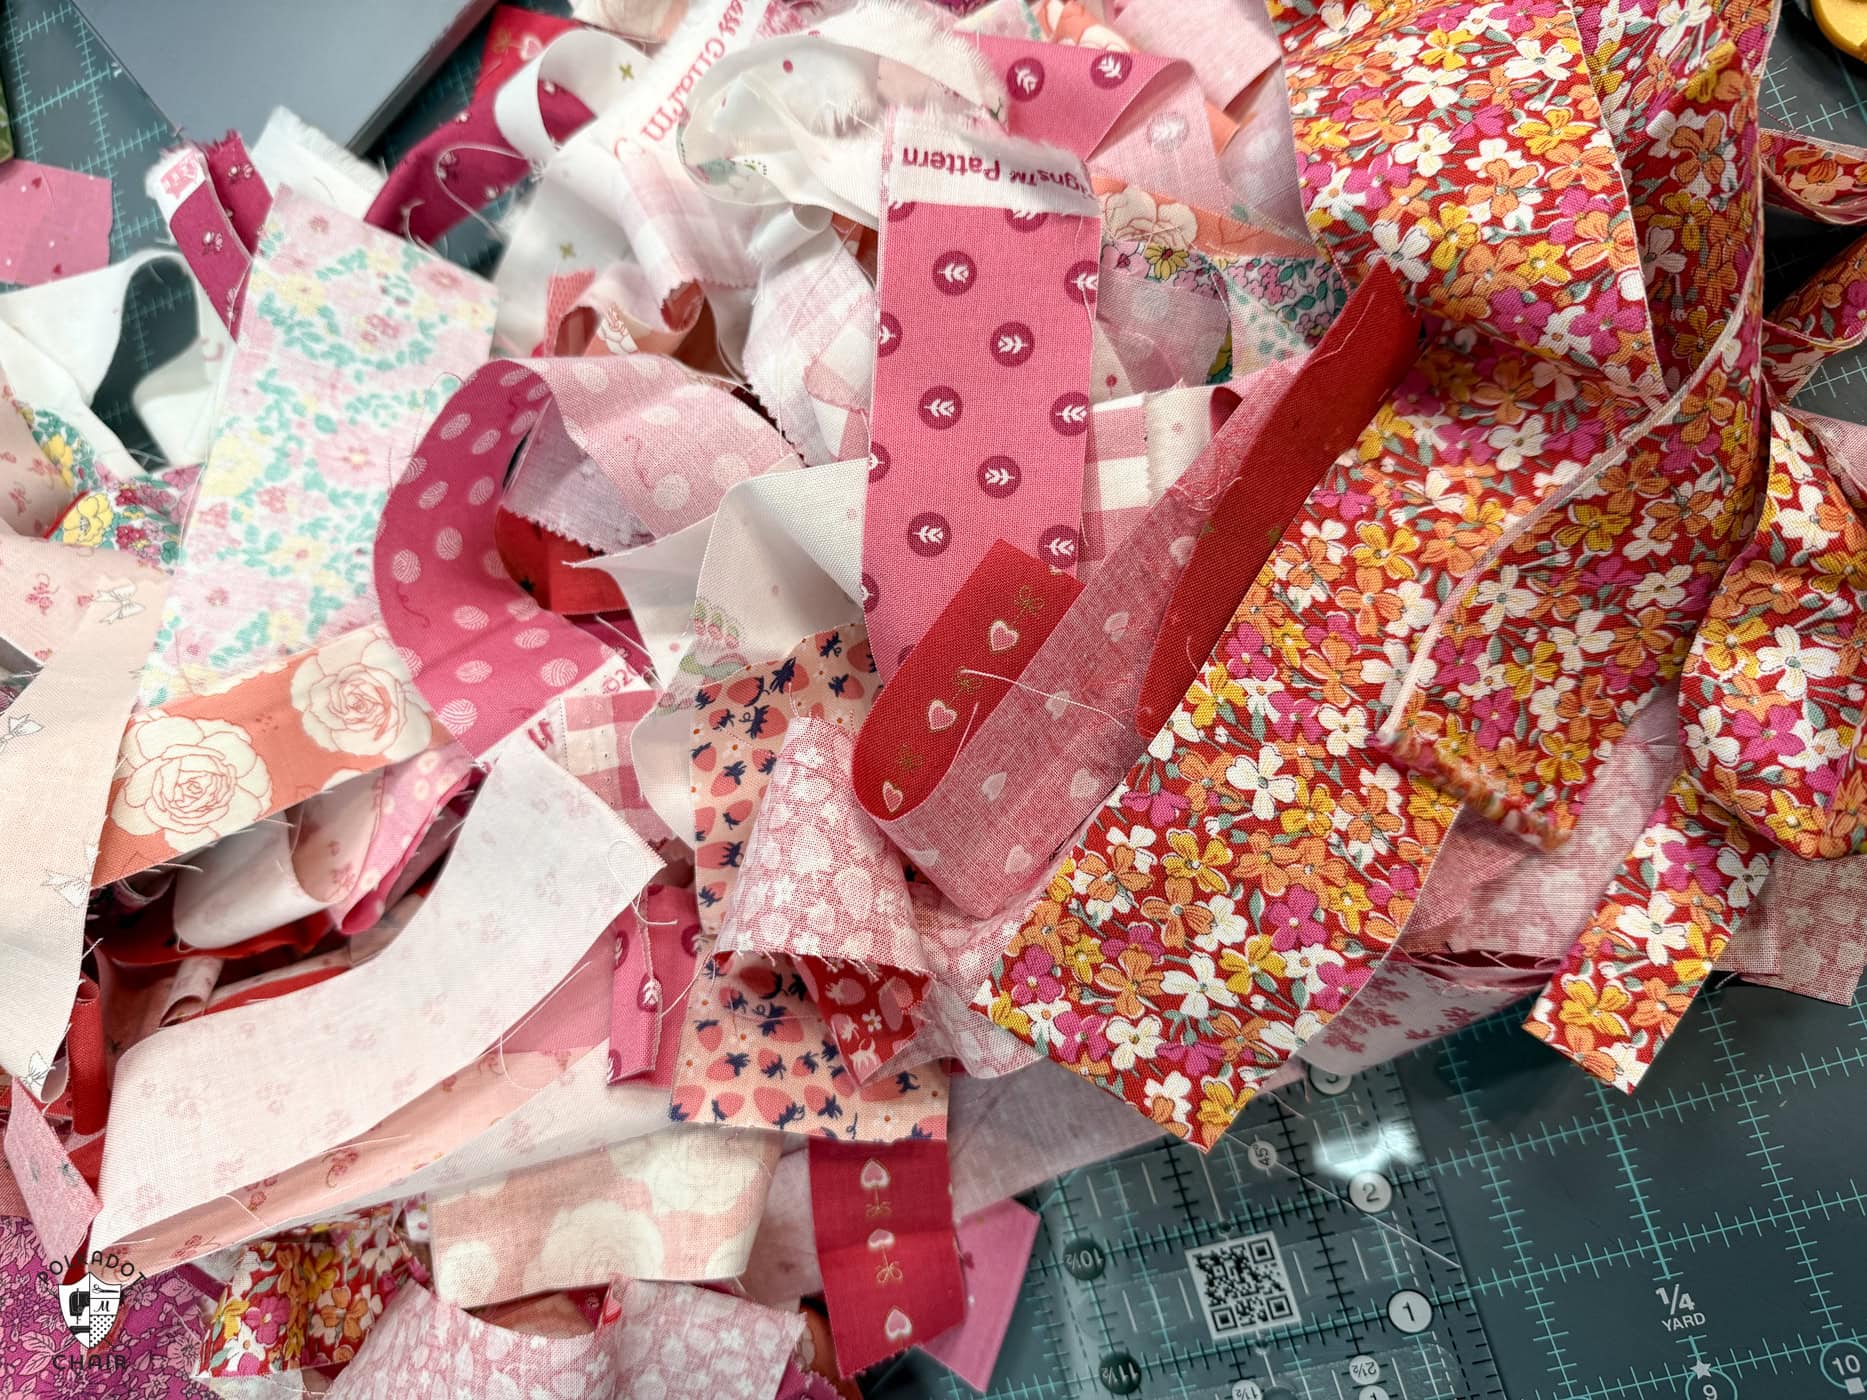
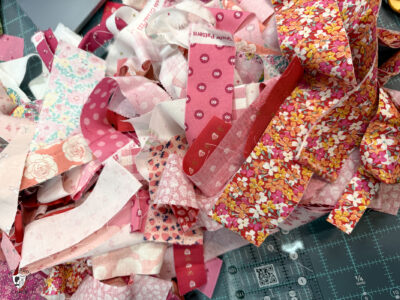
I have a giant bin of fabric scraps and decided to tackle a project I’ve wanted to try for a very long time: making a String quilt from some of my leftover scraps!
I spent about a week working on these blocks (it was a big snowstorm!). I loved how “mindless” the creation was; I was able to listen to an audiobook (The Unselected Journals of Emma Lion, volumes 3 & 4) the entire time, which made the whole process much more enjoyable. On a side note, I can not recommend these books enough. Book one has a slow start, but it’s still very enjoyable. By book 3, I was absolutely hooked, and the narrator is fantastic!
Since there is no “math” or counting for these blocks, you don’t need to pay as much attention as you normally would while quilting. It was a great and much-needed distraction.
I did not “invent” this technqiue and I’m not claiming that I did, but I did learn quite a bit while making these blocks and am happy to share my best construction tips with you today if you’d like to tackle a similar project.
In this guide, you’ll learn how to make string quilt blocks using a paper foundation, how to organize your scraps by color for better results, and a bit of the history behind this classic technique.
What Is a String Quilt Block?
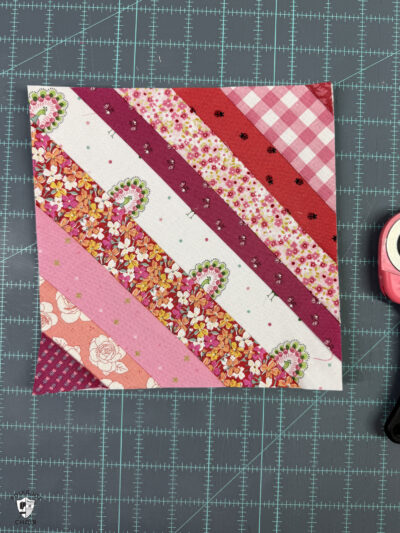
A string quilt block is made by sewing narrow strips of fabric onto a foundation. The strips are stitched one at a time until the entire foundation is covered. The unit is then trimmed to size and used as a quilt block.
Unlike precise patchwork, string blocks are meant to be organic and varied. No two blocks are exactly alike, which is part of their charm.
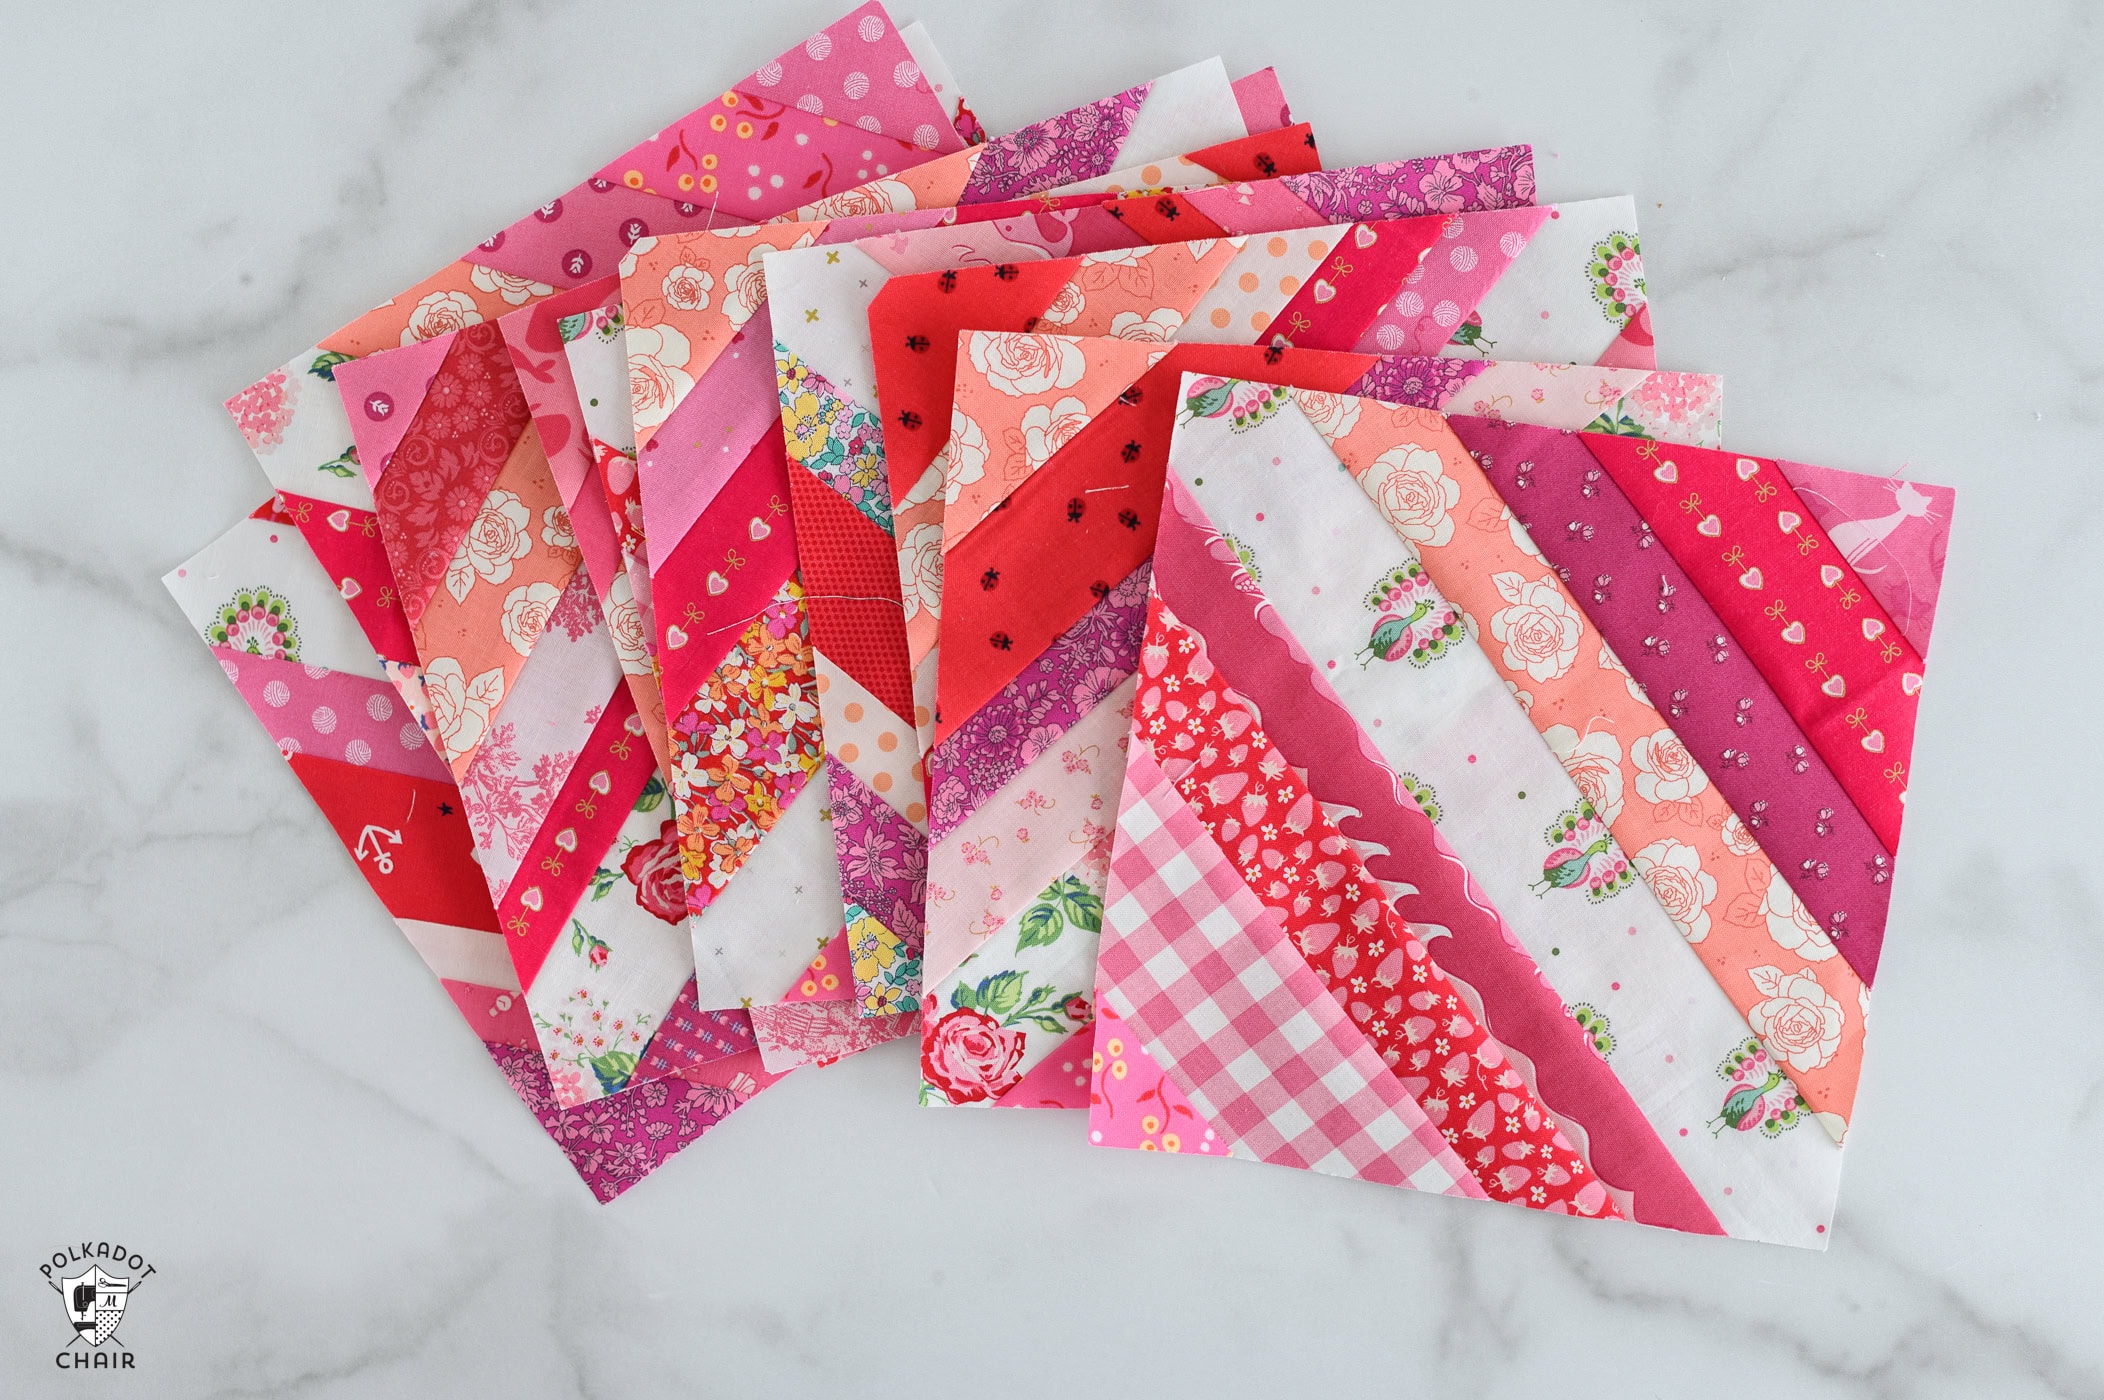
My string blocks all feature a wide white or very light strip of fabric in the center of each block. That way, when the blocks are sewn together, you get a diamond pattern. If you experiment with the placement of light and dark fabrics in your blocks, you can create many different secondary shapes.
A Bit of String Quilt History
String piecing has deep roots in quilting history, especially during times when fabric was scarce. Quilters saved every usable scrap and strip, stitching them onto a backing foundation to avoid waste.
String quilts became especially popular during the Great Depression, when resourcefulness was essential. Foundations were often made from newspaper, catalog pages, or saved paper packaging. These quilts are sometimes called “string quilts” or “foundation scrap quilts” and are still admired today!
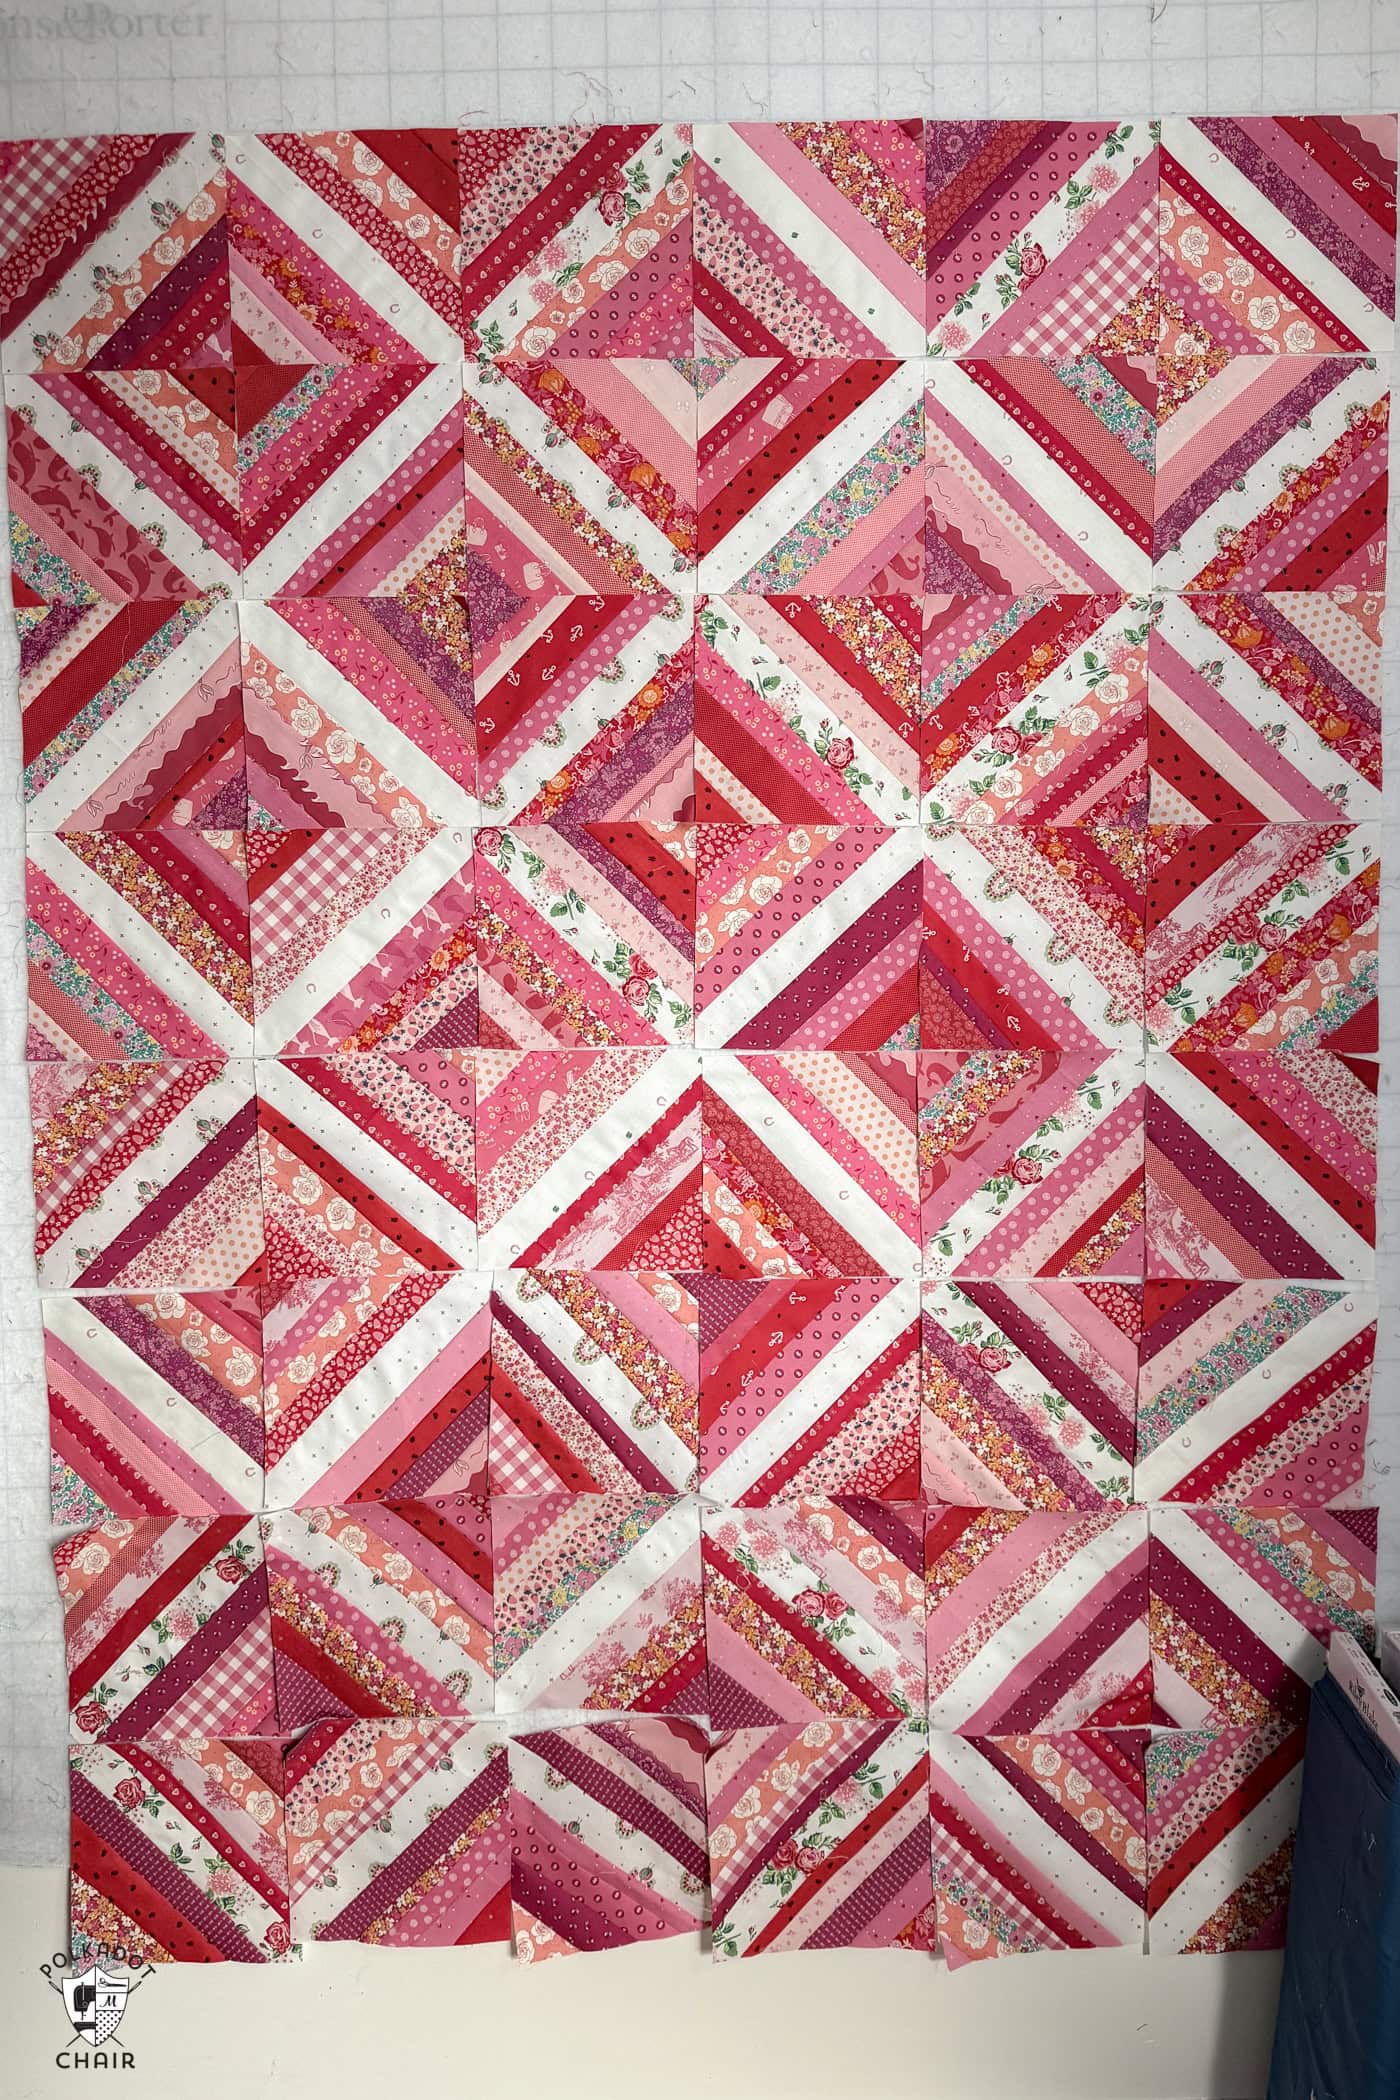
(my quilt blocks laid out on my design wall)
Current quilters still love string blocks for the same reason: they transform leftovers into something really interesting, and there are so many different ways to construct the blocks!
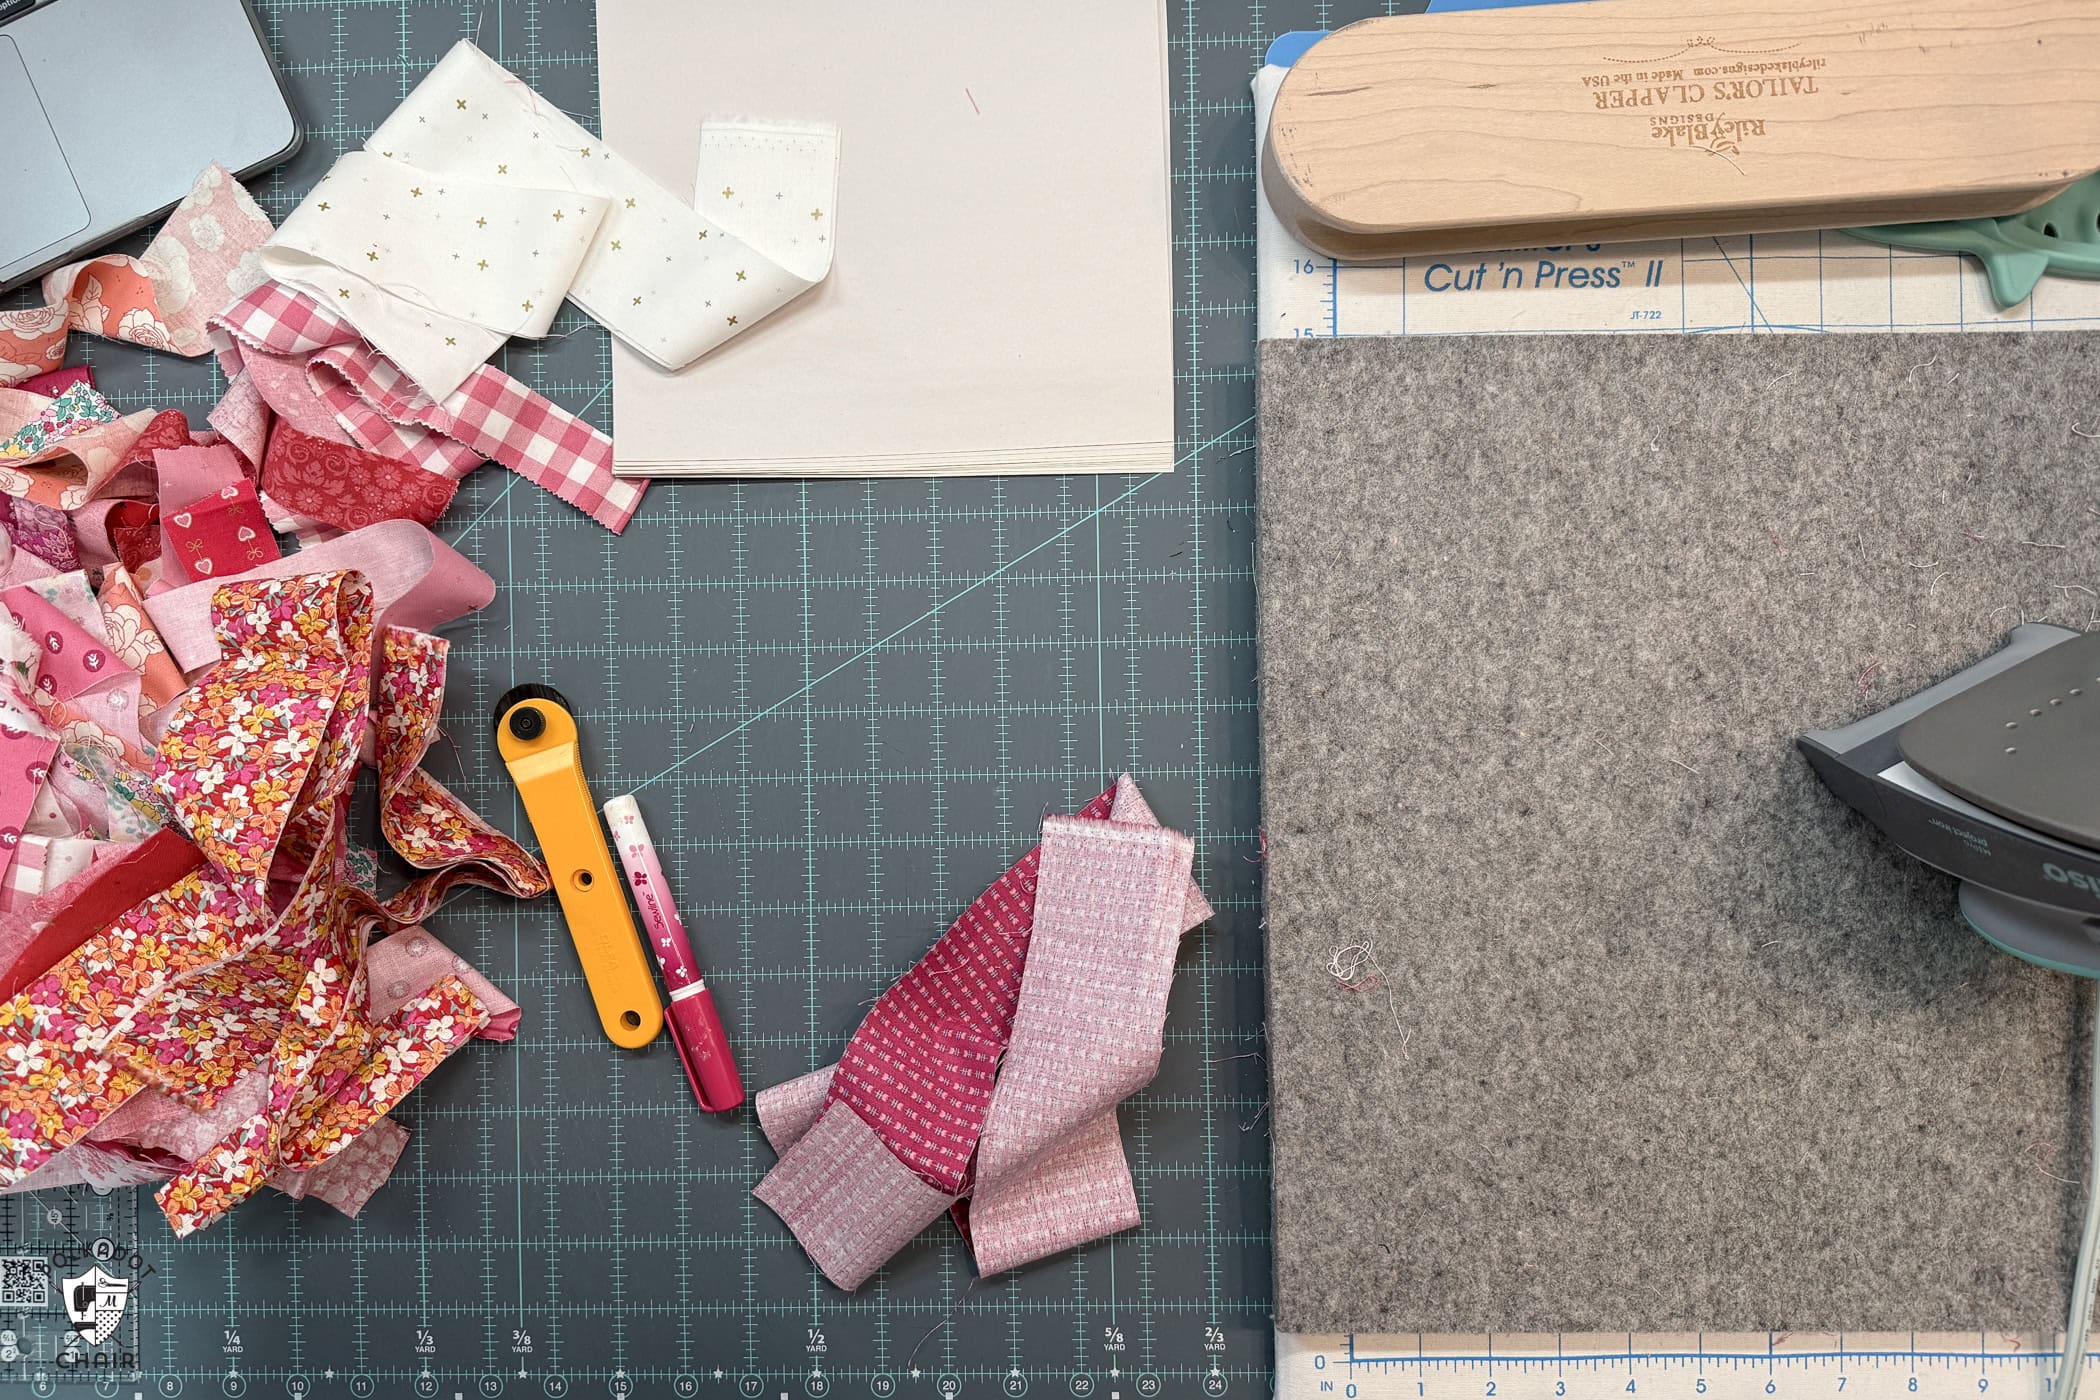
Supplies You’ll Need
- Fabric scraps cut into strips
- Foundation to sew the strips to (copy paper, muslin, newsprint, or specialty foundation paper)
- Sewing machine
- Thread
- Rotary cutter and ruler
- Cutting mat
- Iron
- Fabric Glue Pen
Sewing Tip:
If you can set up a sewing station for yourself so that your iron is close by your cutting mat and sewing machine, you will find this process a lot more enjoyable. That way, you do not need to stand up and move every time you need to press a sewn seam.
What to Use as a Foundation?
For my foundation, I used specialty Foundation Paper, which is made for quilting. It’s easy to tear away and stands up well to pressing.
I chose to make my blocks 8 1/2″ x 8 1/2″ before finishing, since the paper comes 8 1/2″ x 11″ and I only need to trim the paper once. You can also use regular printer paper or newsprint (which you can also buy in letter-size packs).
If you want a heavier quilt, you can also use plain fabric (such as quilting cotton or muslin), but the fabric’s weight will add to the quilt’s overall weight. The upside of using fabric is that you don’t need to tear the paper off the back of the fabric when you’re done making your blocks.
You may be wondering why you need the foundation at all. You don’t, but as you sew, it helps to have a visual guide so you know when to stop sewing scraps together. It also gives you a great template to trim and square your blocks when you’re done.
How to Make 8 inch Finished String Quilt Blocks
Equipment
supplies
- 1 yard White or "mostly white" fabric can be scraps of various fabric prints, at least 2" x 12 1/2", or yardage
- 100+ pieces Colorful Scrap fabrics in varying widths and colors See for fabric selection tips
Instructions
Prep:
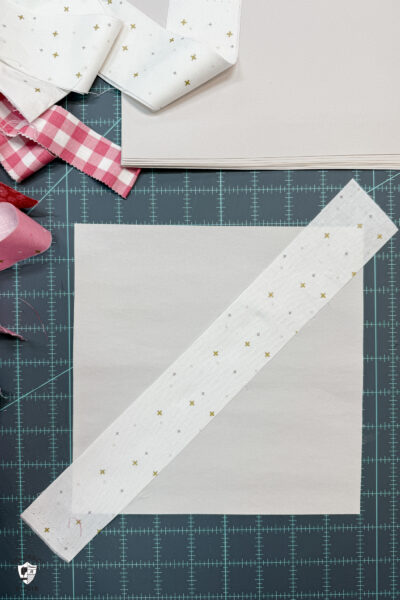
- Cut your foundation (paper or fabric) to 8 1/2” x 8 1/2”Reduce the stitch length on your machine to 1.5. This will allow the paper to tear more easily when it's time to remove it. If you are using fabric instead of paper, you do not need to do this.
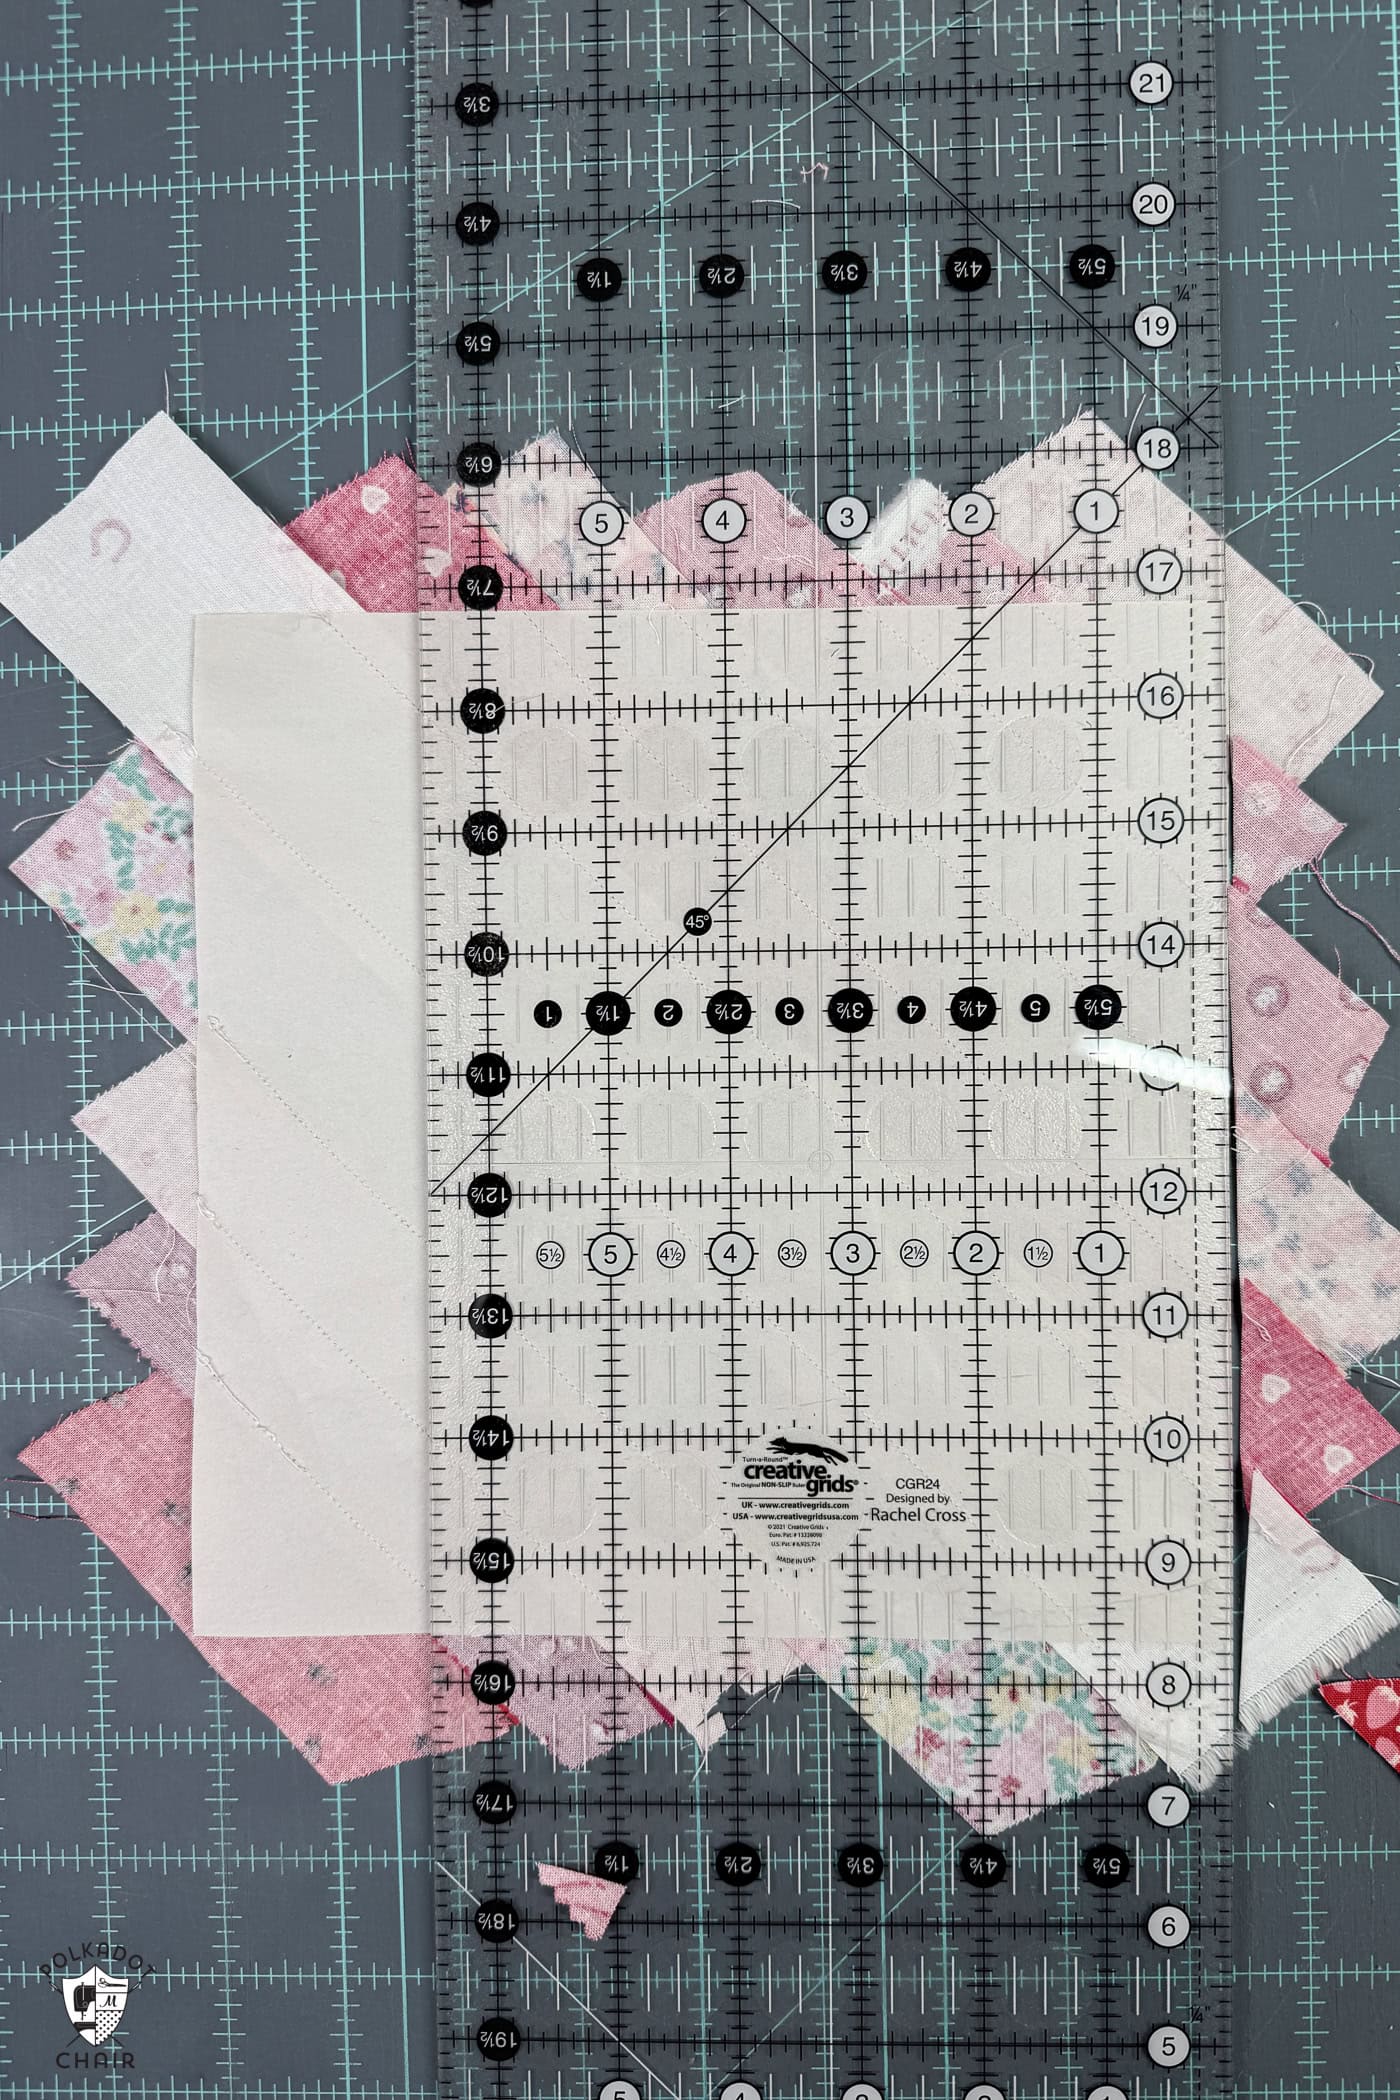
Step One: Cut White Fabric into Strips
- Using white strips at the center of blocks of the same size creates a “criss-cross” pattern when the blocks are sewn into a quilt top.
- Cut your white or “mostly white” fabric into strips 2” wide. The white strips in the block are the only ones I cut to the same size. The remaining strips (the colorful ones) are cut to various widths.
Step Two: Cut Colorful Fabric into Strips
- Pre-cut scraps into usable strips; they do not need to be the same size or even in increments. I found cutting my fabrics in sizes ranging from 1” to 2 1/2” worked best for an 8” block. Anything larger than 2 1/2” is too large for the block, and smaller than 1” is too hard to work with.
- All the strips should be at least 12 1/2” long.

- After cutting, bundle by color for grab-and-sew convenience.
TIP: Use Value, Not Just Color
- Separate lights, mediums, and darks. Even in very scrappy blocks, value contrast is what keeps the design from looking muddy.
- A quick rule: Include at least a few light strips in every block and avoid using only mid-tones.
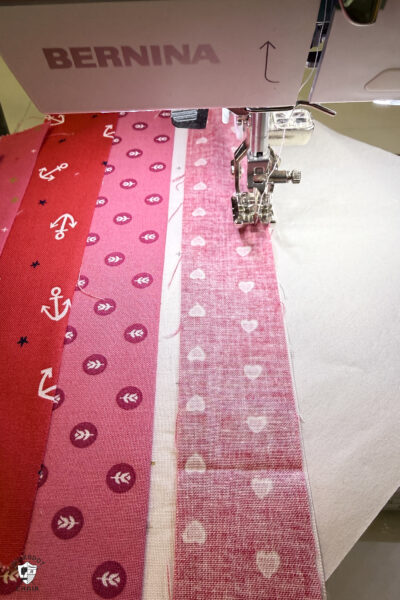
Step Three: Sew Strings to Paper
- Beginning with one 2” wide white strip, place it right side up onto the 8 1/2” x 8 1/2” piece of paper diagonally with the center of the strip in the center of the paper. Use a dab of fabric glue to hold it in place.

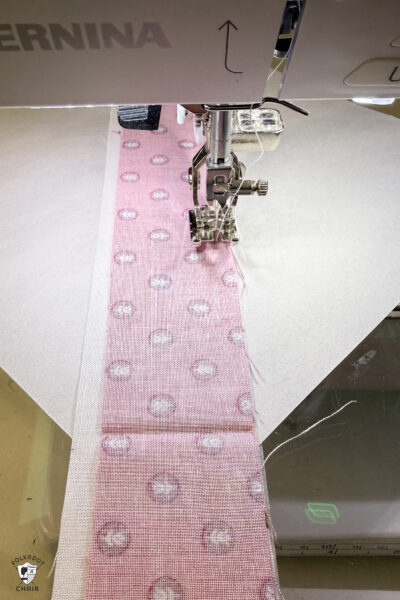
- Choose one of your colorful strips of fabric and place it right sides facing on top of the white strip, with raw edges even. Sew in place with a 1/4” seam allowance.
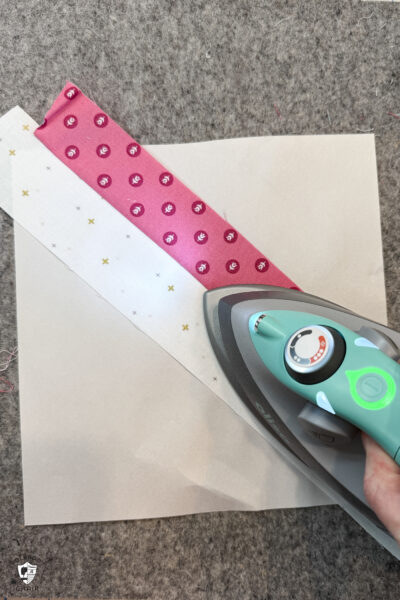
- Flip the fabric strip right side up and press.
- Repeat with another strip of fabric. Keep going until you reach the corner of the paper, then rotate and sew from the other side of the white strip, until the entire block is covered.
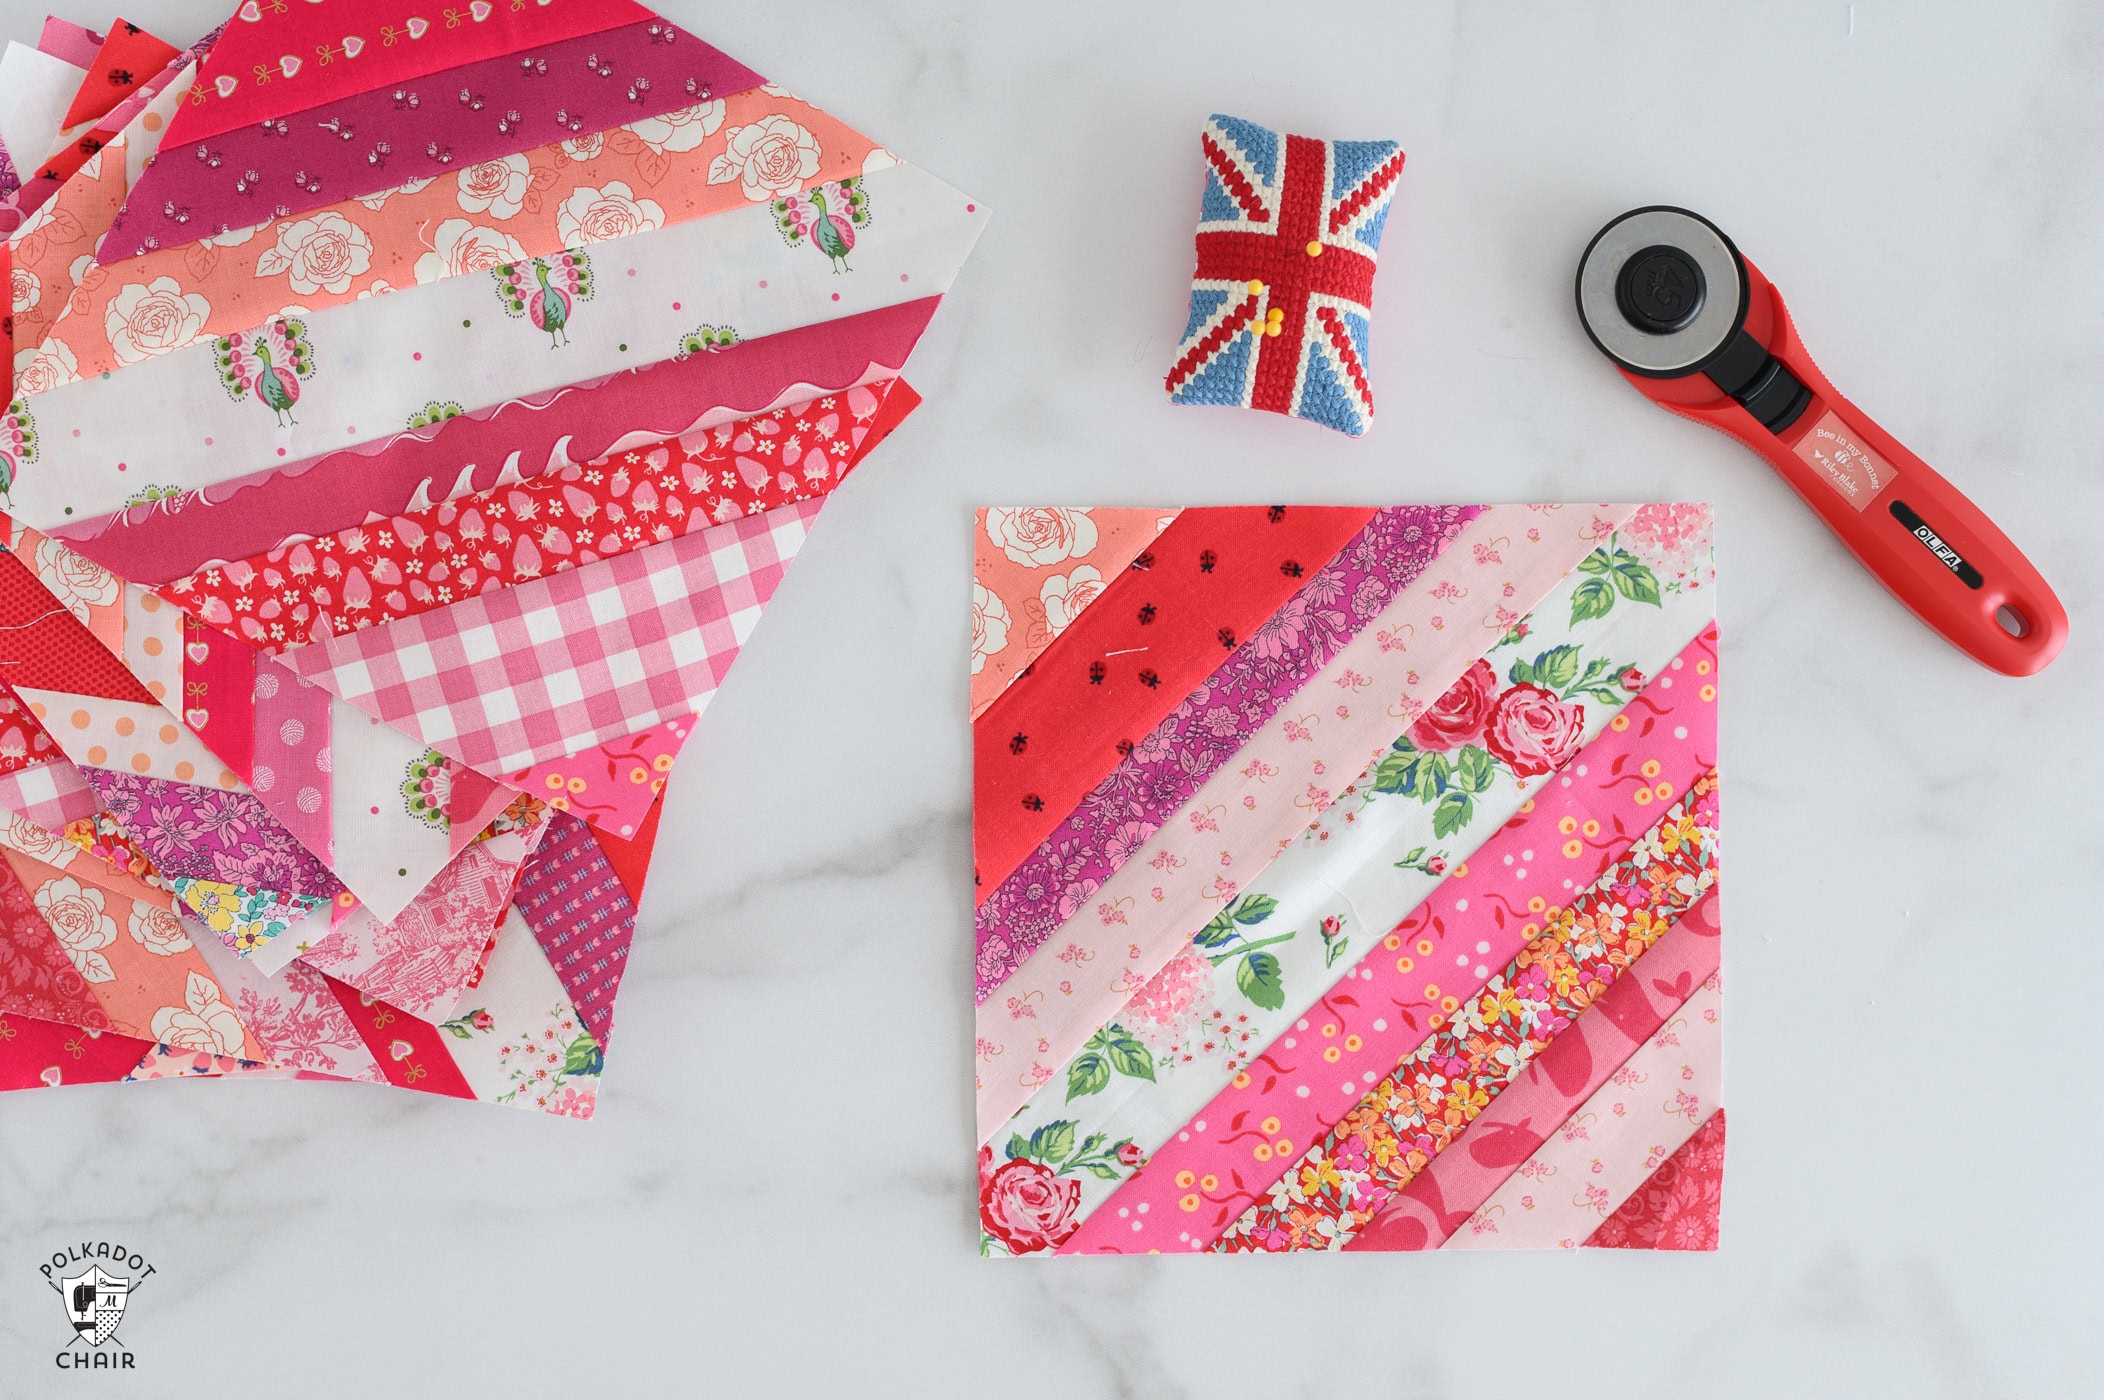
- Keep making blocks until you have as many as you need. I made 48 blocks, which will give me a quilt approximately 48” x 64”.

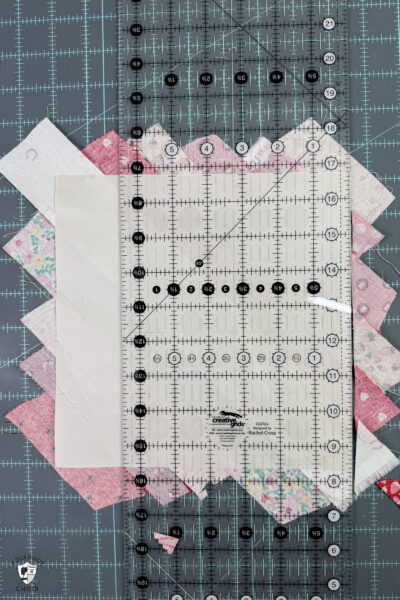
Step Four: Trim
- Flip the block upside down so that it’s paper side up. Trim the excess fabric from the block using the paper edges as a guide.
- After trimming, remove the paper from the back of the block.

Tips for Organizing Scraps by Color

Since you work with many small strips at once, organization makes string piecing smoother and faster.
Sort Into Simple Color Families
Use bins, drawers, or zip bags labeled:
- Reds & Pinks
- Blues
- Greens
- Neutrals
- Warm colors
- Cool colors
- Low-volume prints
This makes it easy to build blocks with intentional color stories instead of random chaos. You can, of course, do this project with all the colors; it will yield a different result than a quilt made from fabrics from similar color families. It’s really up to you and the look that you want!
For my quilt, I chose warm colors, mostly Reds and pinks, with a bit of orange and coral to give it a bit more contrast.
I have sewn all my blocks, and they’re ready to assemble into a quilt top. I’ll be sure to share the finished project with you when it’s quilted and bound!
Have you ever made a string quilt? What tips would you offer others starting the same project?
I love the way you used the reds and pinks. I just finished a string butterfly print quilt for our Children’s hospital. I used multiple colors and it was ok…but I think sticking to one color theme would look nicer. I did used your white center strip mine had butterflies on it. Thanks for all the information.
I love this idea and can’t wait to try it!
Thank you 💝
I just completed the top of my first string quilt. Thinking of adding a yellow border before binding. Thanks for your great directions. I used some lightweight white fabric as a base. Took me a few days to cut up my strips, so I will be cutting more of my leftover fabric into strips immediately before putting it away. I will be ready when I want to make my next string quilt.
I have also made several string quilts and other quilts items with string blocks. I have always used ‘ugly’ fabrics, those I can’t ever imagine using otherwise, as my foundation for the blocks. Nice way to use up dated stash. 😉
such a good idea! Thanks for sharing!
I’ve made several string projects over the years, quilts, potholders, pillows, purses etc. My tip for newsprint or any lightweight paper is to have it cut at the local newspaper office. Not sure how many of those are left. You can use any kind of mail that comes in “book” form i.e. last years “prospectus”. The big deal is having the pages cut all at once. I don’t have any problem tearing the paper off. Sometimes I need to fold each strip back but that just takes seconds. What you said about a light strip in the center is important! I learned that the hard way. Thanks for your posts and hope your weather is better.
Oh that’s a good tip about newspaper offices!
I just finished my first string quilt and I am hooked! I was gifted 110 9” thin cotton squares so used those as my foundation but I want to try paper next time. In the past I’ve found the secret to removing the paper easily is to use a smaller than normal stitch length which basically perforates the paper for you OR you can paint each seam with water and the paper will tear right off. Hope this helps!
Yes! I forgot to add that detail to the blog post, updating it now.
I can’t wait to try this! Thank you!
I made a string quilt during the pandemic with several friends via zoom. Such a truly fun quilt it was to stitch up. Love your idea of using mostly white fabrics with a print in the middle, we used plain white.
You our quilt is just beautiful with the pinks and reds! This article makes me want to sew another one! 😉
~Michelle
i’m in the process of switching my Son’s old room and my sewing room. which means, i’ve got a LOT to sort through and donate as far as craft items goes that i’ll never use.
i’ve collected all kinds of materials that will be perfect for a strip quilt.
Thank You so much for all the tips! they’ll come in handy for the moving process!
You can also use batting as your foundation, then your quilt is all quilted when you finished. Press the seams open then when you put the backing on, quilt straight lines next to the seams to hold down the seams & the backing.
That is genius! Thank you so much for sharing!
I loved your insights on making a string quilt. I can’t wait to see yours when it’s all finished! I tried to make one once, but had a terrible time with getting off the newspaper that I used. Do you have any tips for removing the newsprint?
I used the foundation paper and it was pretty easy to remove, I wonder if it was the brand of newsprint you used?
Thank you for your timely string quilt directions. My guild challenge is to make a string quilt with my chosen blue as the main color. I appreciate your tips to use various lights, mediums & darks of other fabrics to make the final quilt top more interesting,with the light center starting point. Can’t wait to use what I’ve just learned!
I have yet to attempt a string quilt but l really like your idea for the same color being in the center.The diamond pattern created gives a sense calm to it. I’m not really sure if that is the correct way to describe it. Thank for the idea.
I’ve made several string quilts. My favorite foundation to sew them to is light-weight sew-in interfacing. The interfacing comes in 20” widths, so I cut my squares 10 x 10.
I was debating doing that, but decided to go with paper since I already had it in the house, I might try that method if I make another quilt.
S0, AFTER FINISHING THE SQUARES HOW DO YOU FINIS THE QUILT?
You just sew the square together the same way you would with any quilt top, the quilt and bind as usual.