DIY Disney Trading Pins Display Idea
Do you love to collect Disney Trading Pins as much as we do? Get those pins out of a box and onto your walls with this fun DIY Disney Trading Pins display idea!
When we first went to Disneyworld several years ago, I kept wondering what all those pin trading stands were. You see them all over the park. Feeling overwhelmed at the time I didn’t pay too much attention.
Why We Love Disney Pin Trading
After our first visit to Disney World, we went back again. This time our Disney package came with a free pin trading starter kit for each of the kids (those genius marketing minds at Disney). Soon we learned that as you went around the park, any employee with a pin HAD to trade with you for any pin you wanted. So my super shy kids decided to give it a try.
They ended up loving it. Not only did it help my kids to get used to talking to people, but it gave us something to do when we were waiting in line. After a while, the kids all started to collect their “favorites”.
What do you do With Disney Trading Pins?
Each time we came home I’d think “what are we supposed to do with these pins???” I know that there are some die-hard pin collectors out there, but we are not them.
I have no idea why one pin would be more valuable than another pin. We were just doing it as a fun side activity for my kids. We didn’t spend a lot of money on pins, and the kids were able to collect most of the ones they wanted.
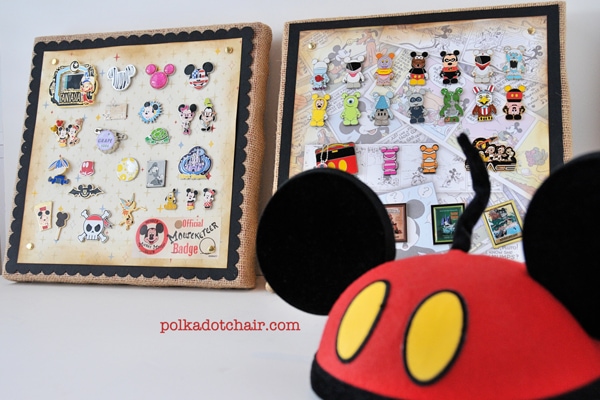
We’ve been to Disneyworld a few times now and go back every few years. Recently, I decided it’s time to go through the pins, decide which ones we want to keep and put the rest in a pile for our next visit.
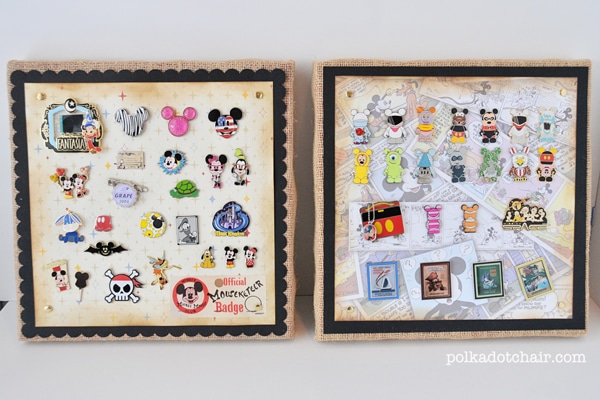
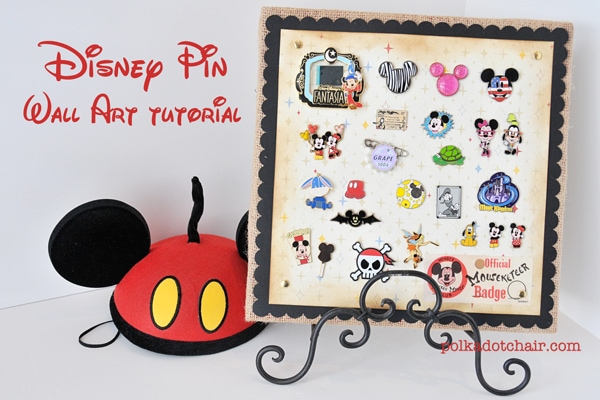
I decided that a canvas would be a great way to display the images. I didn’t want a shadow box, and I thought the canvas would look great hanging in our Movie Room. (since that’s the room I contain all the Disney stuff to).
I ended up making 2 canvases. If you want to make your own here’s how to do it:
DIY Trading Pin Display Supplies
- Thick edge (2″) canvas. Mine are 12×12.
- Spray Paint
- Burlap
- 2 pieces 12×12 scrapbook paper for each canvas (if your canvas is larger than 12×12, you’ll need something else to cover it with)
- Staple Gun
- Poker (piercing tool)
- Large Brads
- Paint
Note: You can also do this and leave the canvas plain. I liked the idea of using the Disney Scrapbook paper and decided to incorporate it into my design.
How to Make a Trading Pin Wall Display; Construction Steps
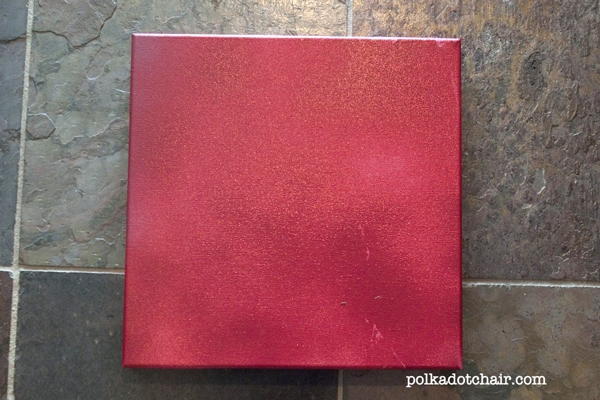
Step One: Spray Paint the Canvas
First, you need to paint your canvas. I’m lazy so I spray painted mine. Most of the canvas won’t show, but some of it will (since the burlap is a bit see-through).
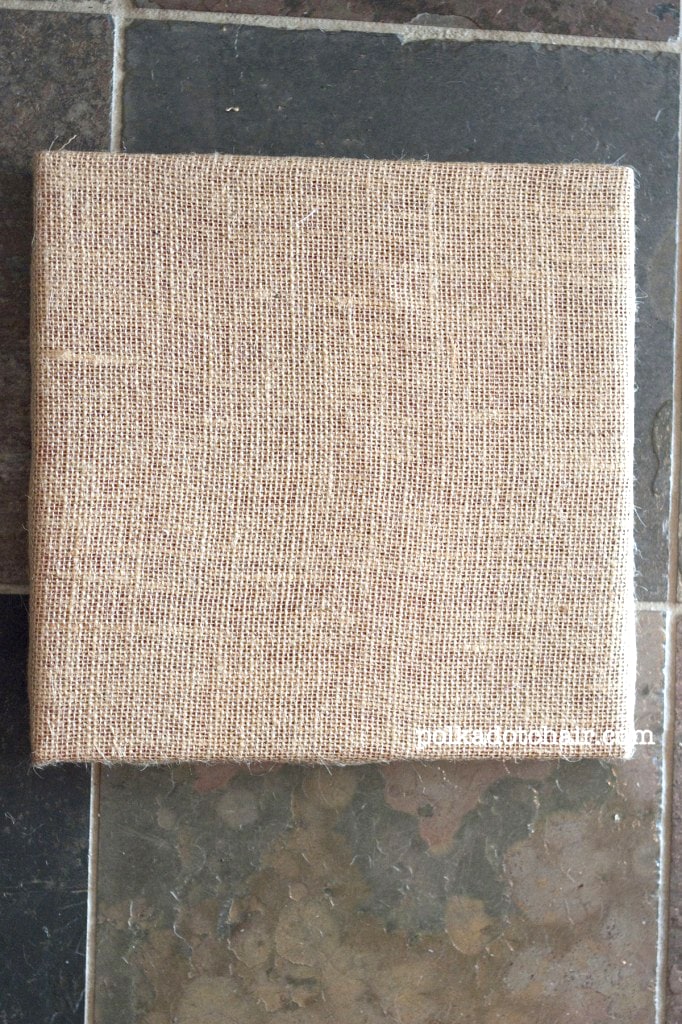
Step Two: Attach the Burlap
Next using a staple gun, staple the burlap to the canvas, mitering the corners.

You will now have a covered canvas.
Step Three: Add the Paper
If using a 12×12 canvas, cut one piece of card stock to 11.5×11.5 and one piece of pattern paper to 10.5×10.5.
Layer them on top of each other and glue (just use scrapbooking tape adhesive) to the top of the canvas (before I glued my down, I inked the edges of the top scrapbook paper).
Step Four: Attach with Brads
Next, on the back of the canvas, in the corners — where the wood meets, poke 4 holes. Set 4 brads through your scrapbook paper into the canvas and set the brads. This will help you with positioning the pins so that you don’t try to place a pin into the wood, and it will help keep the scrapbooking paper on the canvas.
poor iPhone photo- late night crafting = bad lighting
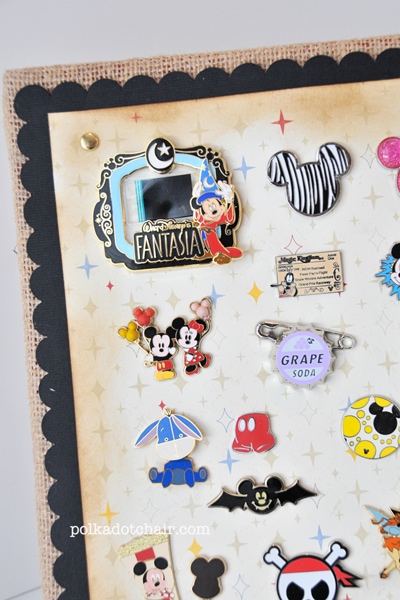
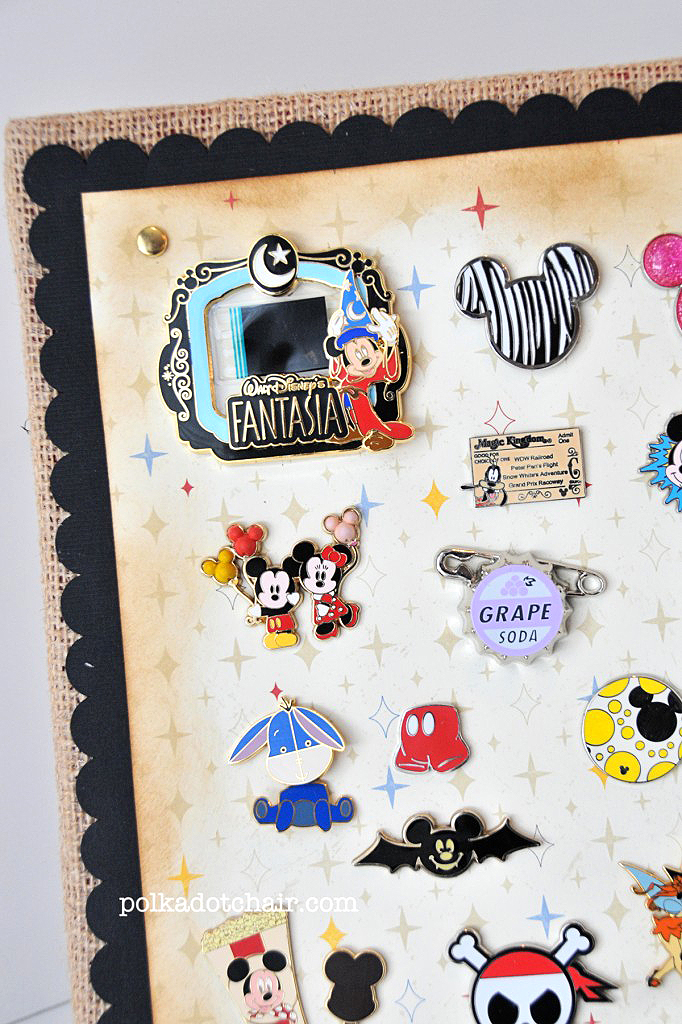
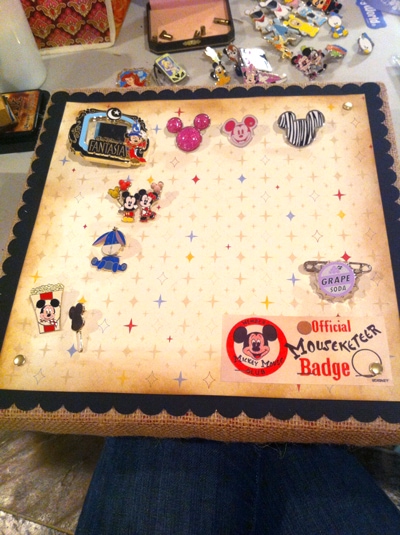
Step Five: Add your Pins!
Next layout your pins how you’d like on your canvas. This is the hard part!! Once you get them where you want them, I HIGHLY recommend taking a photo of them with your phone (so you can remember where they go).
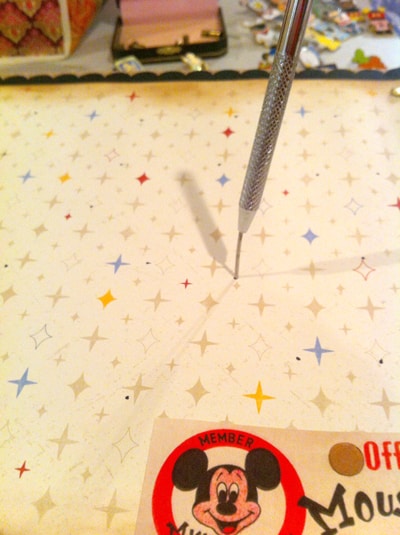
With a pen, mark where each pin prong is. Then take your poker and pierce a hole through the canvas for each pin.
Put the pins back on the canvas and adhere to using the rubber stoppers that came with them.
More Fun Disney DIY Projects!
15 Simple Tips & Tricks to help make your Vacation a Little Bit Better
Disney Villains Party (with free printables!!)
You can also find a lot of fun Disney DIY’s on the Disney Parks Blog!
If you’d like to see some of my other Disney Crafts just click here