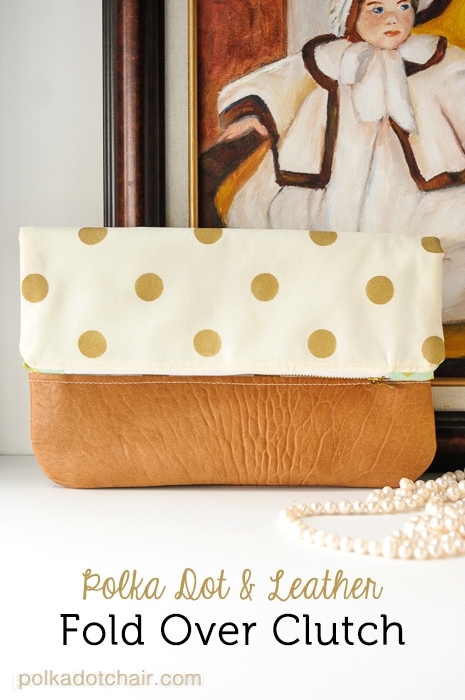
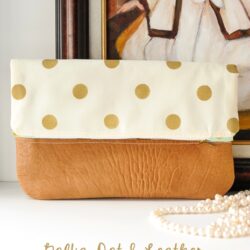
Polka Dot Fold Over Clutch Tutorial (with custom stenciled fabric)
It was a long and horrible winter, have you heard??? I’m sure you didn’t hear me complain about the cold, dark winter at all, huh?!? (ha! who are we kidding?) The winter started early and lasted FOREVER, in fact, we are under a freeze warning today…. AUGHH! Totally NOT normal for Kentucky… but I digress.
During this long cold winter, I left the house as infrequently as possible, I mean I didn’t even want to go get the mail… towards the end of the winter, my friend Gretchen, emailed me and said “Hey I found this cute clutch online, do you think we could make it?” – and with that a crafternoon was born.
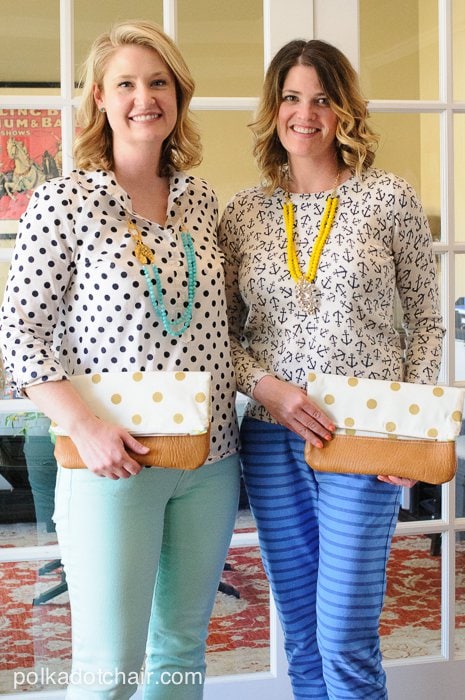
To be honest, I don’t know why I didn’t reach out and try to spend more time with like-minded friends all winter long- but as I said, I didn’t want to leave the house. We had a great afternoon, just what the Dr. ordered.
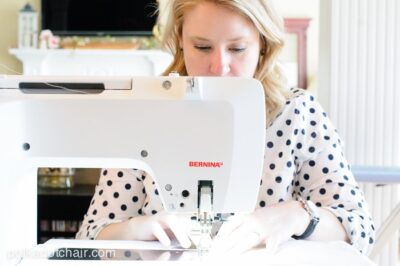
Today I’m going to share with you how we made the clutches. If you’ve ever sewn a zip pouch, you’ll know they’re very simple; there are just a few tricks, which I’ll share with you today.
That being said, I was chatting away the entire time we were sewing, so I was not the best “step by step” picture taker- if any part of this tutorial throws you off, refer to my Necktie Zip pouches for help- it’s the SAME pattern, just with a bit of leather added.
Since we couldn’t find the fabric we wanted anywhere, we made it ourselves!! I used the Medium Polka Dot stencil sent to me by Royal Design Studios for the project Polka Dot last month, and some acrylic paint- more on that part in a bit.
Polka Dot Fold Over Clutch Tutorial (with custom stenciled fabric)
Equipment
- Foam roller brush
- Leather Needle
supplies
- 2 13” x 13” pieces of cream fabric get lighter than a denim fabric but heavier than quilting cotton
- 2 13” x 13″ pieces of fabric for the lining
- 2 13” x 13” pieces of fusible fleece
- 2 pieces of leather 3” x 13” -something lightweight- I used lambskin
- 2 pieces 13” x 13” shape flex to press onto the back of the clutch outside pieces- I didn’t use this, but I would if I made it a second time. Recommended but not required.
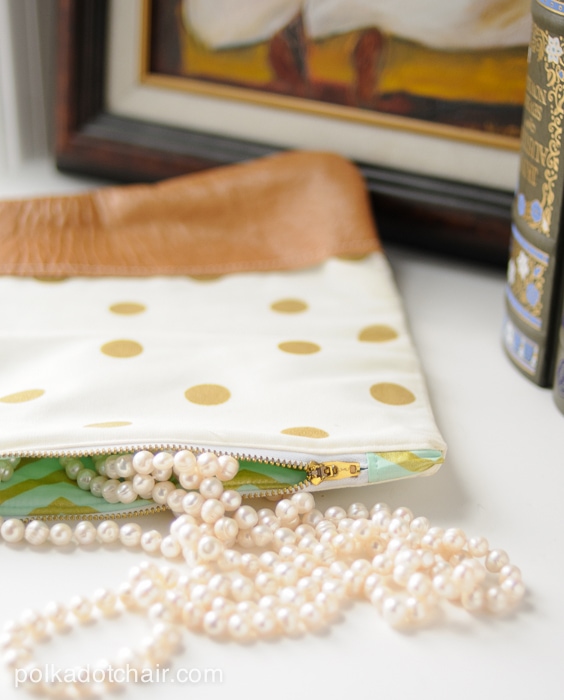
- 9” metal zipper
- 2 3”x2” pieces of fabric for zipper tabs
- Heavy Duty Thread
- Regular Thread
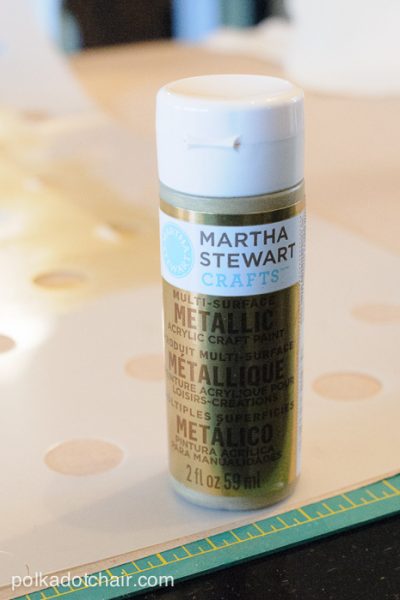
- Metallic Paint
- Fabric Painting Medium
- Spray Adhesive
- Royal Design Studios Medium Polka Dot Party Stencil
Instructions
- First up, you’re going to need to stencil your fabric. To do this, mix 1 bottle of metallic gold acrylic paint with one bottle of Fabric Painting Medium.

- We used Martha Stewart Metallic Gold paint and DecoArt Americana Fabric painting medium.

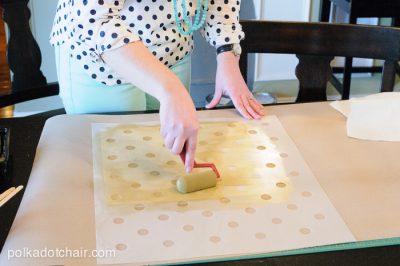
- Spray the back of the stencil with repositionable adhesive spray. Then, on a clean surface (one that’s disposable, like the craft paper in the photo above), place your fabric. Place the stencil on top of that. Check that the stencil and fabric are lined up how you want them.
- Pour your paint mixture into the plastic tray that came with your foam roller brush… load up the brush with paint, then blot off the excess on a paper towel. Roll over the fabric until the desired color is achieved. Do NOT overapply your paint; it will bleed and look bad.
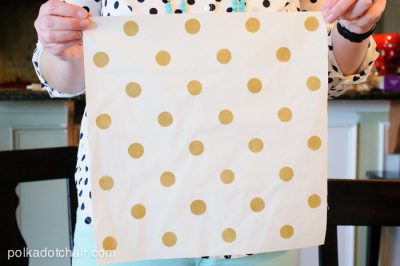
- When you’re done, you’ll have a piece of custom gold polka dot fabric! Let the fabric dry well, then set the paint with a dry iron. If desired, apply Shape Flex to the wrong side of these two pieces.
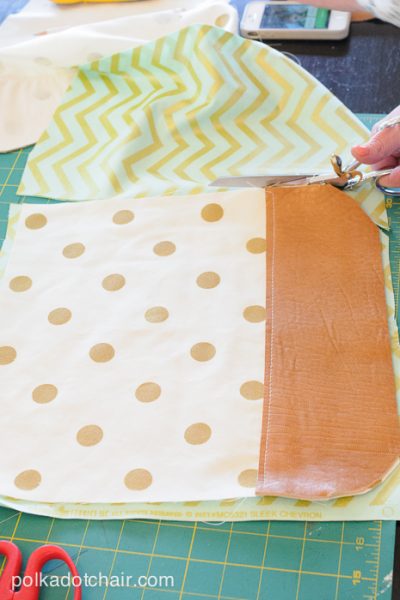
- Using binding clips, attach the 3” x 13” piece of leather to your stenciled fabric, with the bottoms even. If you need tips for working with or cutting the leather, check out my Monogrammed Leather Zip Pouch tutorial.
- With a leather needle in your sewing machine, and heavy-duty thread in the upper thread (you can leave the bobbin as standard thread), stitch the leather trim piece to the stenciled fabric. Repeat for the other clutch outside piece.
- Using a CD, round the bottom corners of the pouch on both the front and back clutch outside pieces.
- Do the same thing to the clutch lining pieces (shown being cut out here).
- Apply fusible fleece to the wrong side of both clutch lining pieces.
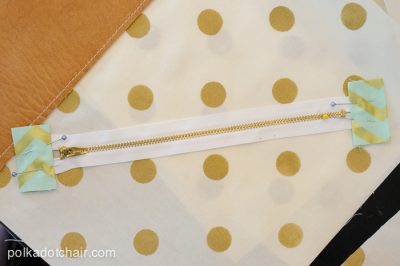
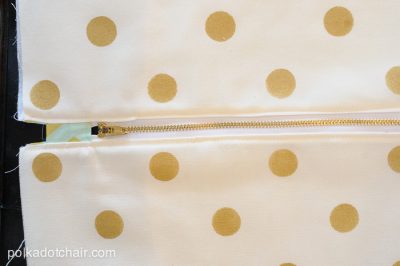
- Next, fold your 3” x 2” pieces of fabric in half parallel to the 2” side. Open up and fold the raw edges to the center fold. Refold. Pin the folded piece over the raw edges of your zipper (think of the folded fabric as an alligator chomping the ends of the zipper—silly analogy, I know, but it works for me).
- Stitch along the side of the fabric closest to the zipper. Trim the fabric flush with the zipper.
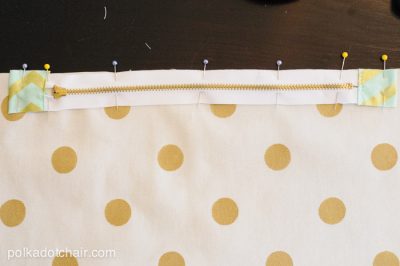
- Pin the zipper piece to the clutch outside piece, with the right side of the zipper facing the right side of the clutch. Center the zipper on the clutch piece; it will be smaller than the clutch piece. Pin the right side of the lining piece to this, the right side of the lining, facing the wrong side of the zipper. Put a regular needle back in your machine, and standard thread. Stitch with a zipper foot.
- Repeat for the other side of the zipper.
- Open up and press the seams away from the zipper. Top stitch along both sides of the zipper. Unzip the zipper.
- Pin the 2 clutch outside pieces together, right sides facing. Pin the two lining pieces together. Have the zipper seam allowance folded towards the lining pieces. Stitch around the perimeter, with a 1/2” seam allowance, leaving a 2” opening to turn the clutch right side out.
- Clip your curves well (if you’re not sure what this means, check out this tutorial). Turn the right side out.
- Press well, AVOID ironing the leather.
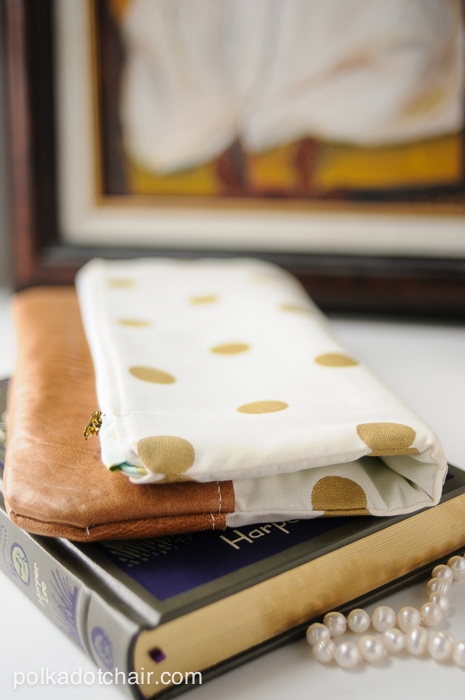
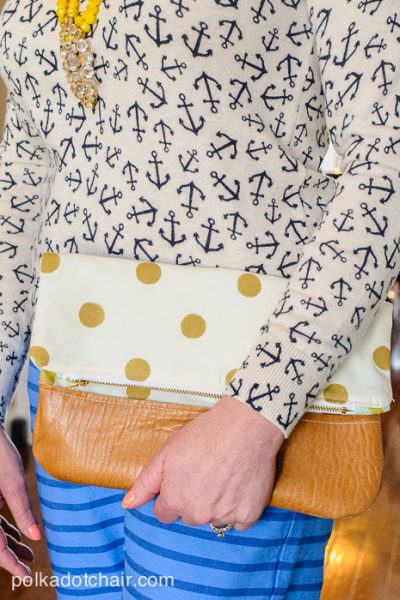
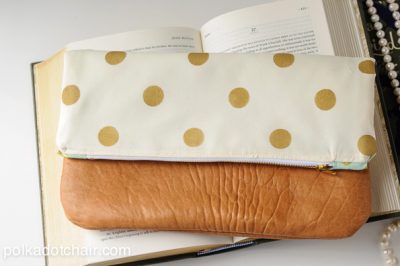
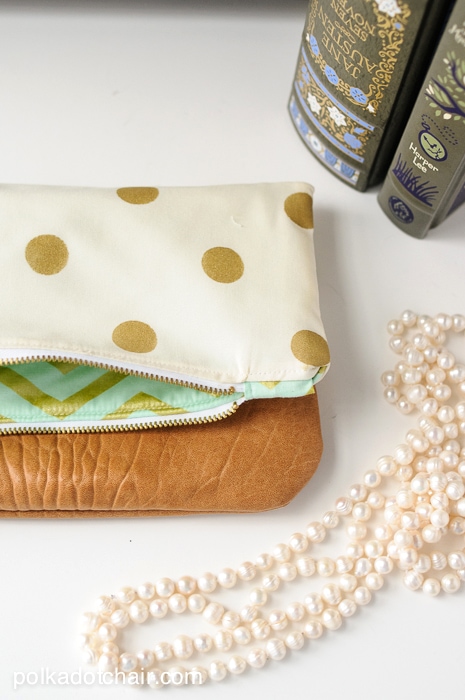
- There you go!! Enjoy your clutch! Now to plan another crafternoon- just need something else to make!
Connect with me:


Linking UP: