DIY Canvas Banner & Cute Dorm Room Decorating Ideas

Learn how to create this Canvas Banner – it makes a fun decoration for a dorm room or a teenager’s room. I’ve even included a free pattern for the lettering!

My oldest daughter just moved into her 4th college apartment. As much as I loved college, moving every few months was NOT one of my favorite parts of the experience. I’ve flown out to help her move a few times but this time she tackled most of the task on her own. Having helped her move in (and out) a few times I’ve learned a thing or two about decorating college dorm rooms and apartments.

You don’t want to leave the walls blank; it’s too stark. A touch of home goes a long way towards easing the adjustment to college life, and it’s very hard to hang anything on the wall that is heavy. We’ve found that anything heavier than a poster is unlikely to work, even with the best removable hooks and tabs available.
Over the years, while she’s been away at college, we’ve created several fun DIY projects for her room. From personalized pillows to artwork and, of course, quilts. Recently, I began brainstorming ideas for her new apartment.
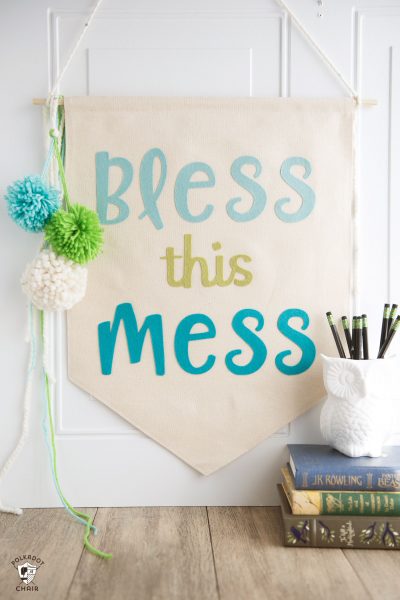
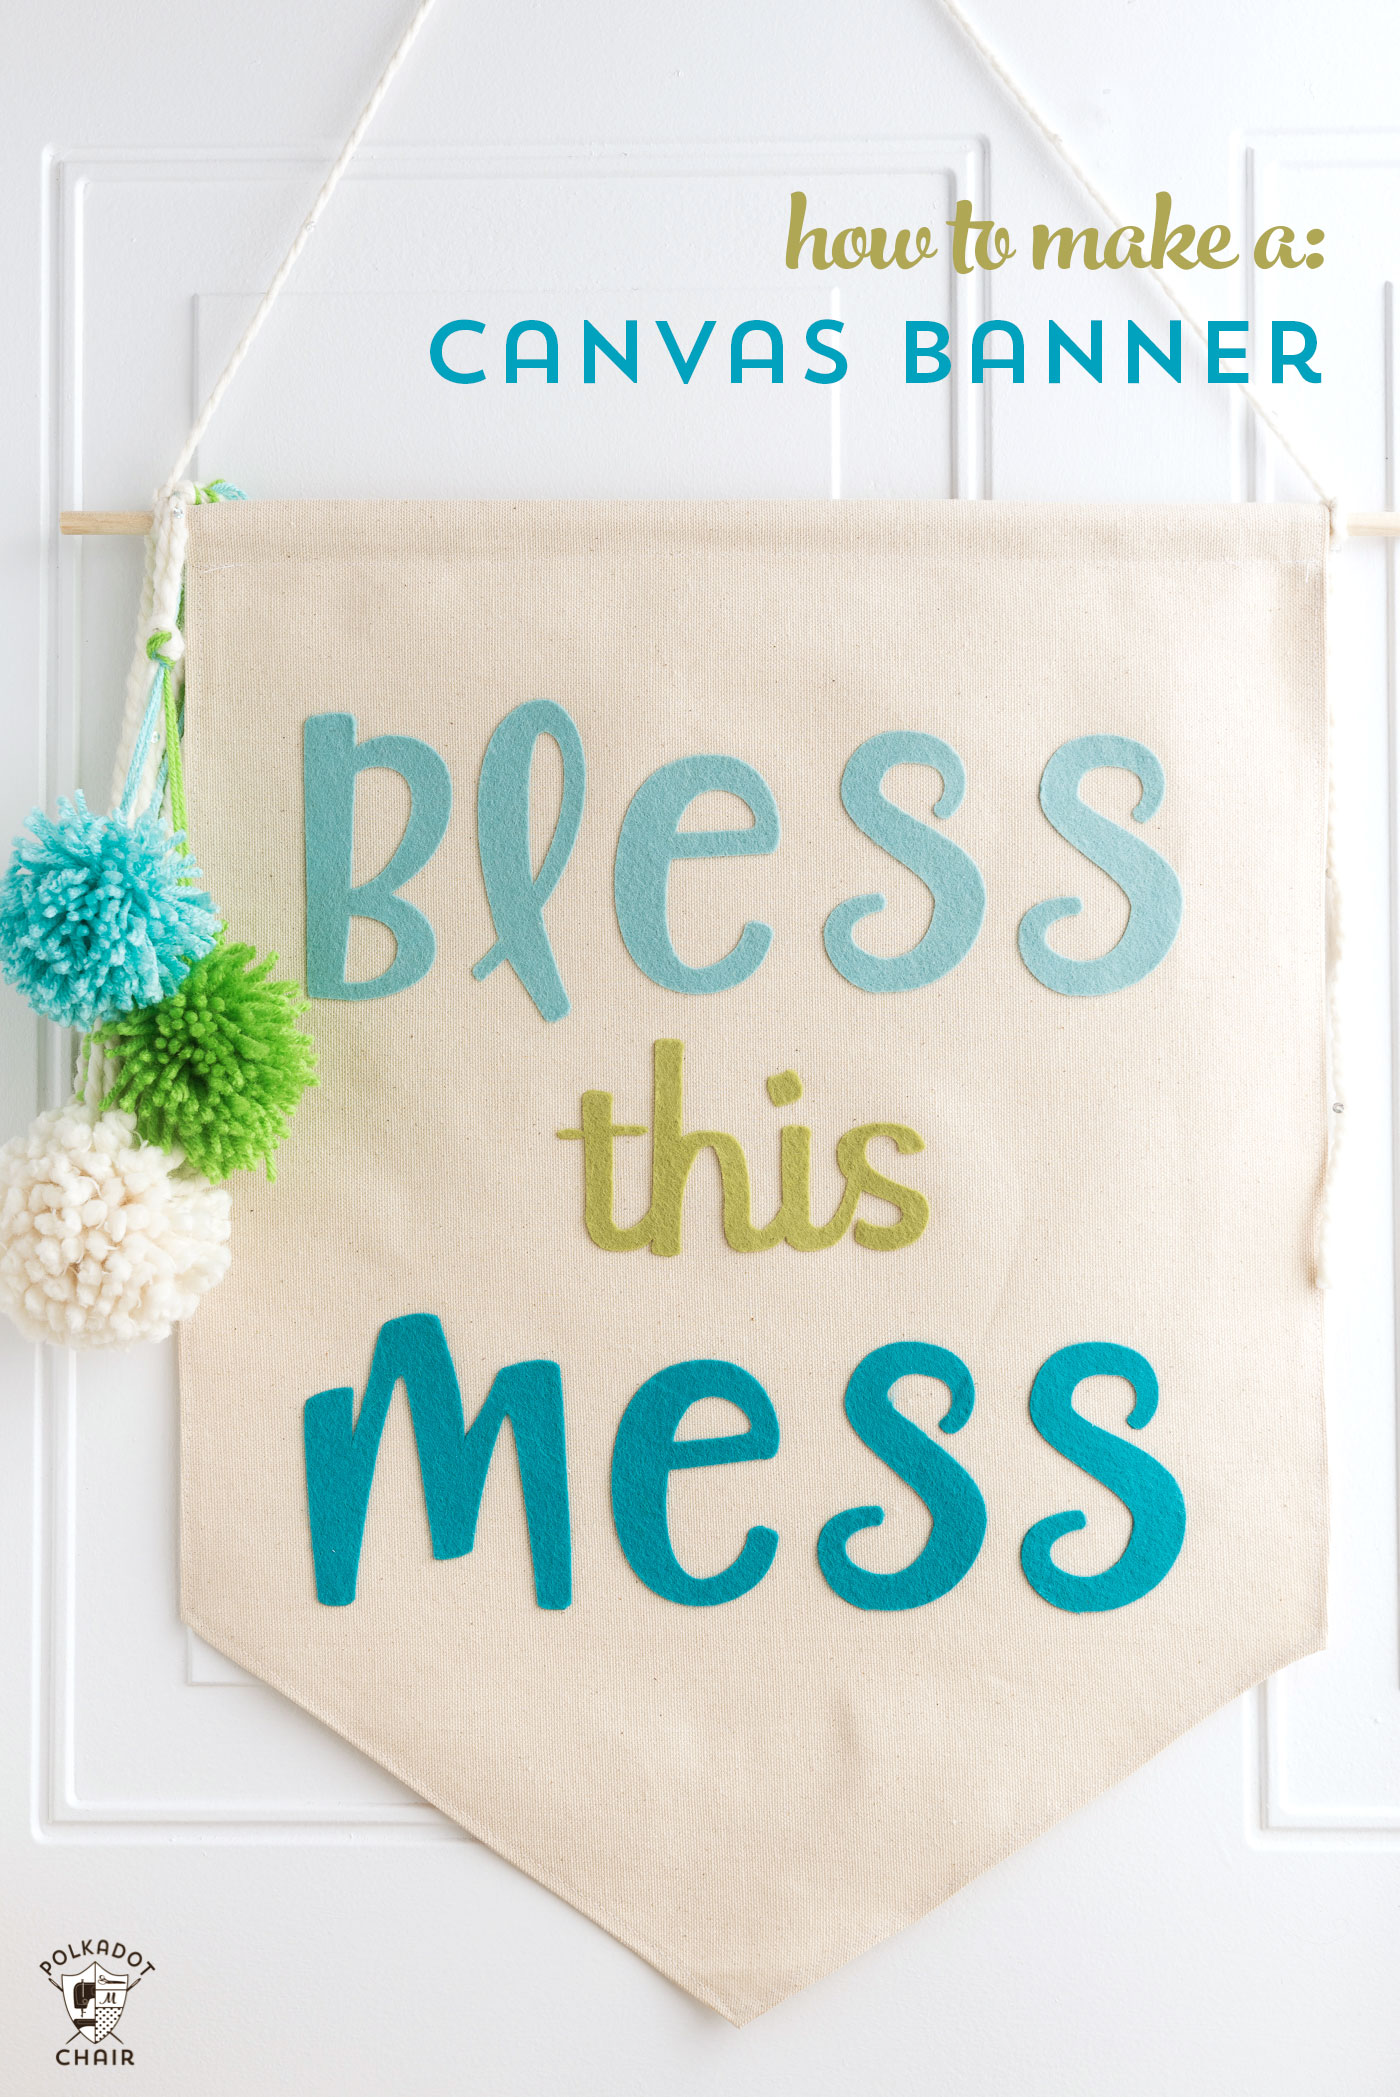
Right now, she’s moved in, but nothing is on the wall. I thought I’d surprise her with a fun new banner to hang in her room. The banner is made out of canvas and felt and can EASILY be held up with a removable hook. The one I’ve made says “bless this mess”, but I’ve included two additional designs if you’d rather make those:


A class of 2018 one if you’ve got a kid headed off to college this coming year… and this Sleep, Study Repeat one. Okay, are you ready to make one?
DIY Canvas Banner & Cute Dorm Room Decorating Ideas
Equipment
- Pom Pom Maker
- Sewing Machine (I recommend BERNINA or Bernette) OR Steam a Seam
supplies
- 1/2 yard of canvas
- Dowel rod cut to 18″
- Felt Heat n Bond
- Lite Yarn
Instructions
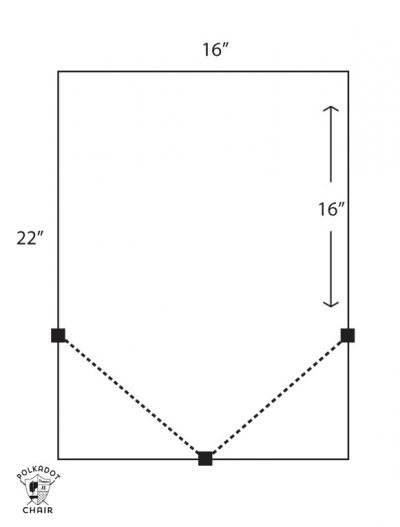
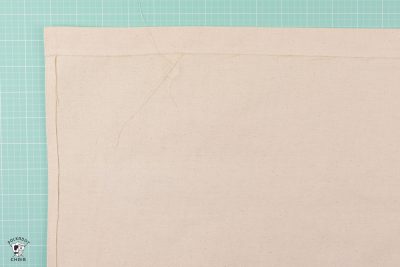
- First, you need to make your canvas shape. Begin by cutting your canvas to 16 inches x 22 inches. Find the center of the 16″ side and mark it. Then, measure down 16 inches from the top of the banner on the 22-inch side. Place a mark. Draw a line connecting the center marks with the 16″ marks. Cut along this line. Repeat for the other side. Next, fold the top of the banner over about 1 inch and press. Then, fold in all the sides of the banner 1/4 inch and press.

- If you have a sewing machine, stitch the top of the banner along the edge of the seam to create a pocket for the dowel rod. If you would rather, you can use steam a seam and “glue” the seam in place. Stitch down the sides of the banner (or glue) as shown.

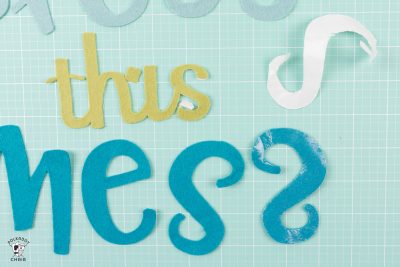
- Next, cut out your letters from felt. To find out how to do this, just click here for my “How to Make an Applique” post (NEED TO ADD LINK). Peel off the paper backing from the letters.
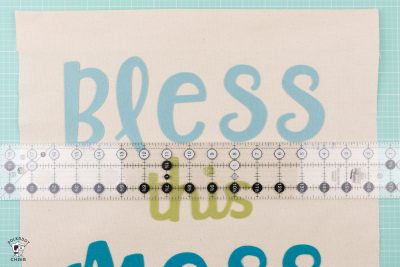
- After you’ve cut out your letters, lay them out on your banner where you’d like them to go.
- I like to use a ruler to help me keep them in place. After you have them where you want them, simply iron them in place.
- For a fun finishing touch, create some yarn pom poms to hang from the side of the banner. If you want to know how to make a pom pom, just click HERE.
- Then, simply run the dowel rod through the pocket you created on top of the banner and hang it up. That’s it!