Memory Necklace Papercraft Project
Turn a cherished photograph into a “Memory Necklace”. Decorate it with ribbon and ephemera to create a truly unique piece of jewelry.

I’ll be sharing all of the projects I made at Creative Escape with you guys, I can’t post step-by-step directions for anything out of respect for the teachers, but I will be showing you photos of the finished projects! I’ll spread the projects out over the fall season, as not to overwhelm you with a bunch of scrapbook-related posts all in one week!
About My Memory Necklace
There was a supply list given to each of us going to Creative Escape. Various tools and items that we would need to complete our projects. Most were things like scissors, adhesive, ink pads, etc.
On that list were 2 items, a 2×2 photo of someone you love and the proof sheet that comes with your photos when you have them printed ( you know the little tiny photos all on a sheet). Me being who I am and leaving things to the last minute was packing at midnight the night before we left and just grabbed a stack of photos off of my scrapbook table. It was from my trip to Paris, I figured there were lots of great photos in there one or 2 would work.
Part of the fun of Creative Escape is the “mystery” of the projects you are working on. You know the teachers ahead of time but not much else.
When I sat down in Margie Romney-Aslett’s class I pulled out the pack of photos and discovered we’d be making a Memory Necklace. I was soooo excited! Of all the things I had done this year the photos from this trip work best with this project. I’m so glad I grabbed them.

I LOVED the concept of this class. It turned out to be a little “mini” scrapbook you could wear. Although I don’t think I’ll wear mine, it makes the perfect “friend” for the dress form in my craft room :).
Supplies Used
The main part of the necklace is a 2×2 metal frame, we just slid the photo into it and placed an initial on the back of it. All of the products were from Margie’s Girls Paperie line.
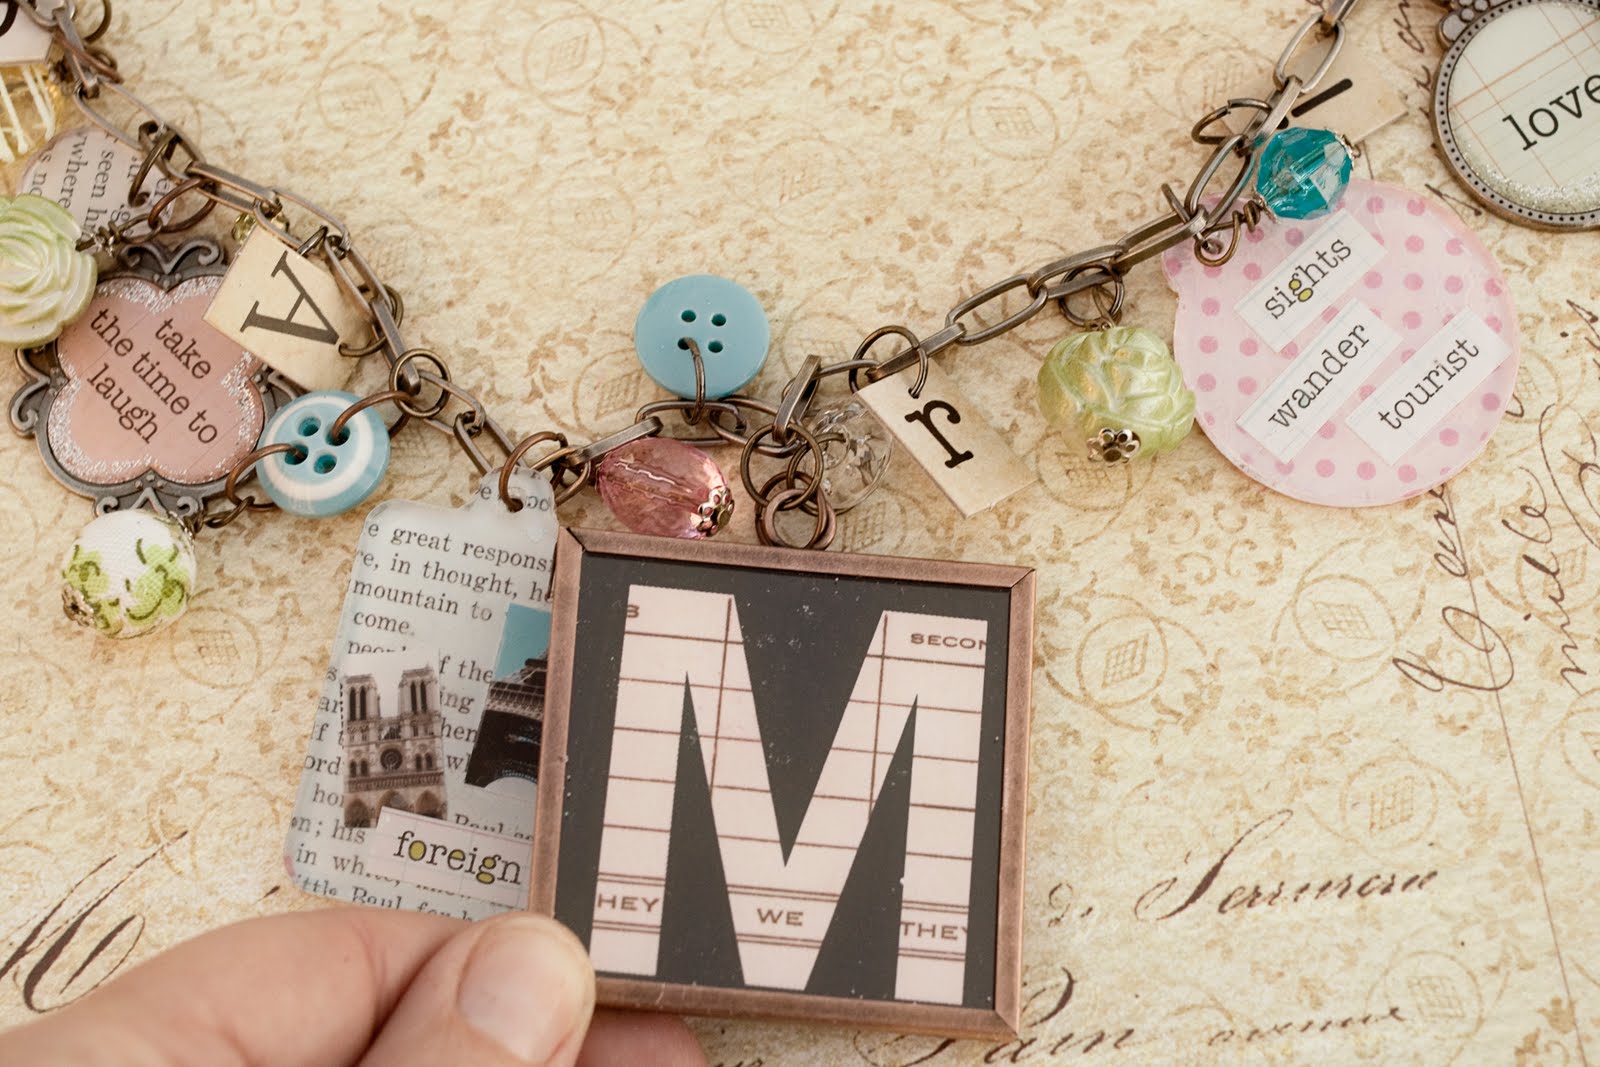
For the other clear charms on the necklace we used Tim Holtz fragments.

It’s a really easy process to get the photos under the fragment charms, I did a similar thing for my daughters party this year, you can see it here…

The rest of the necklace is made from awesome baubles, buttons, charms and ribbons. She gave us all of the stuff then we each got to design the necklace our own way.