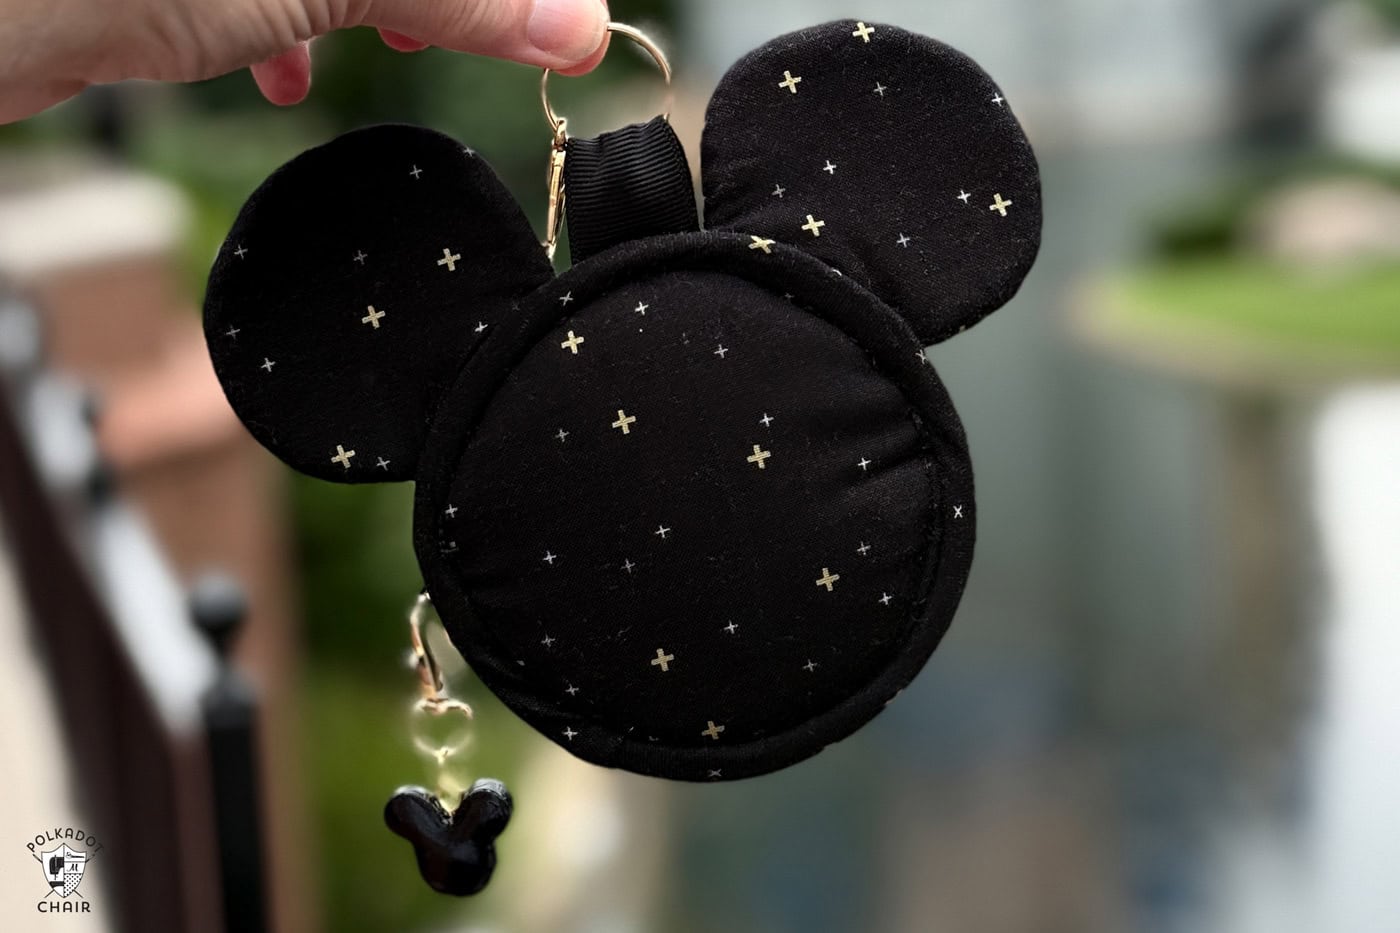
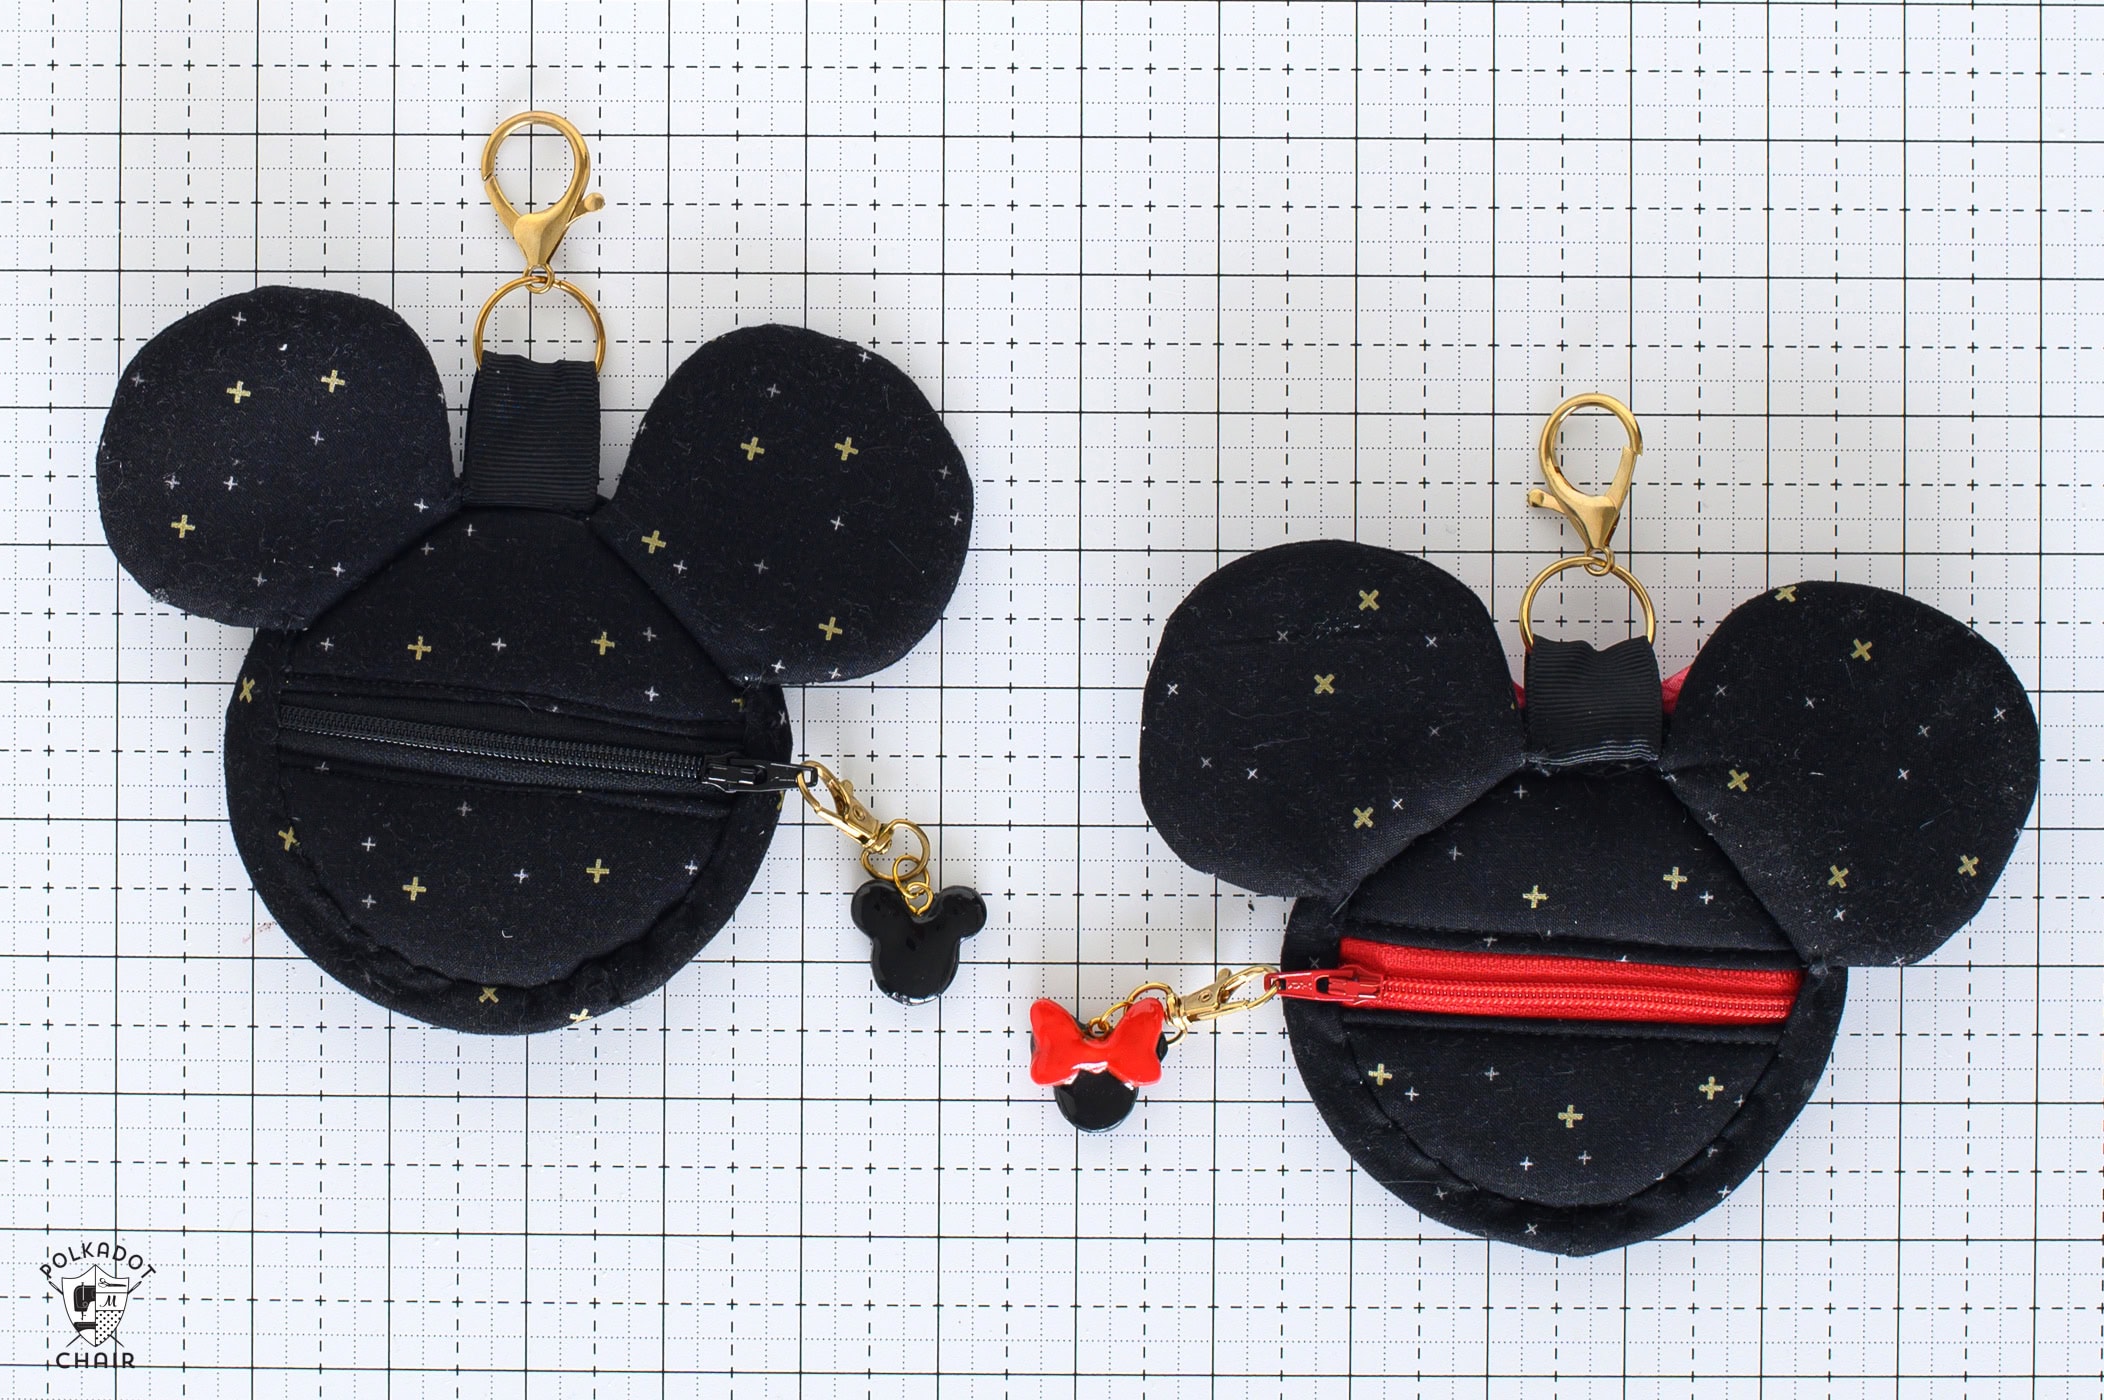
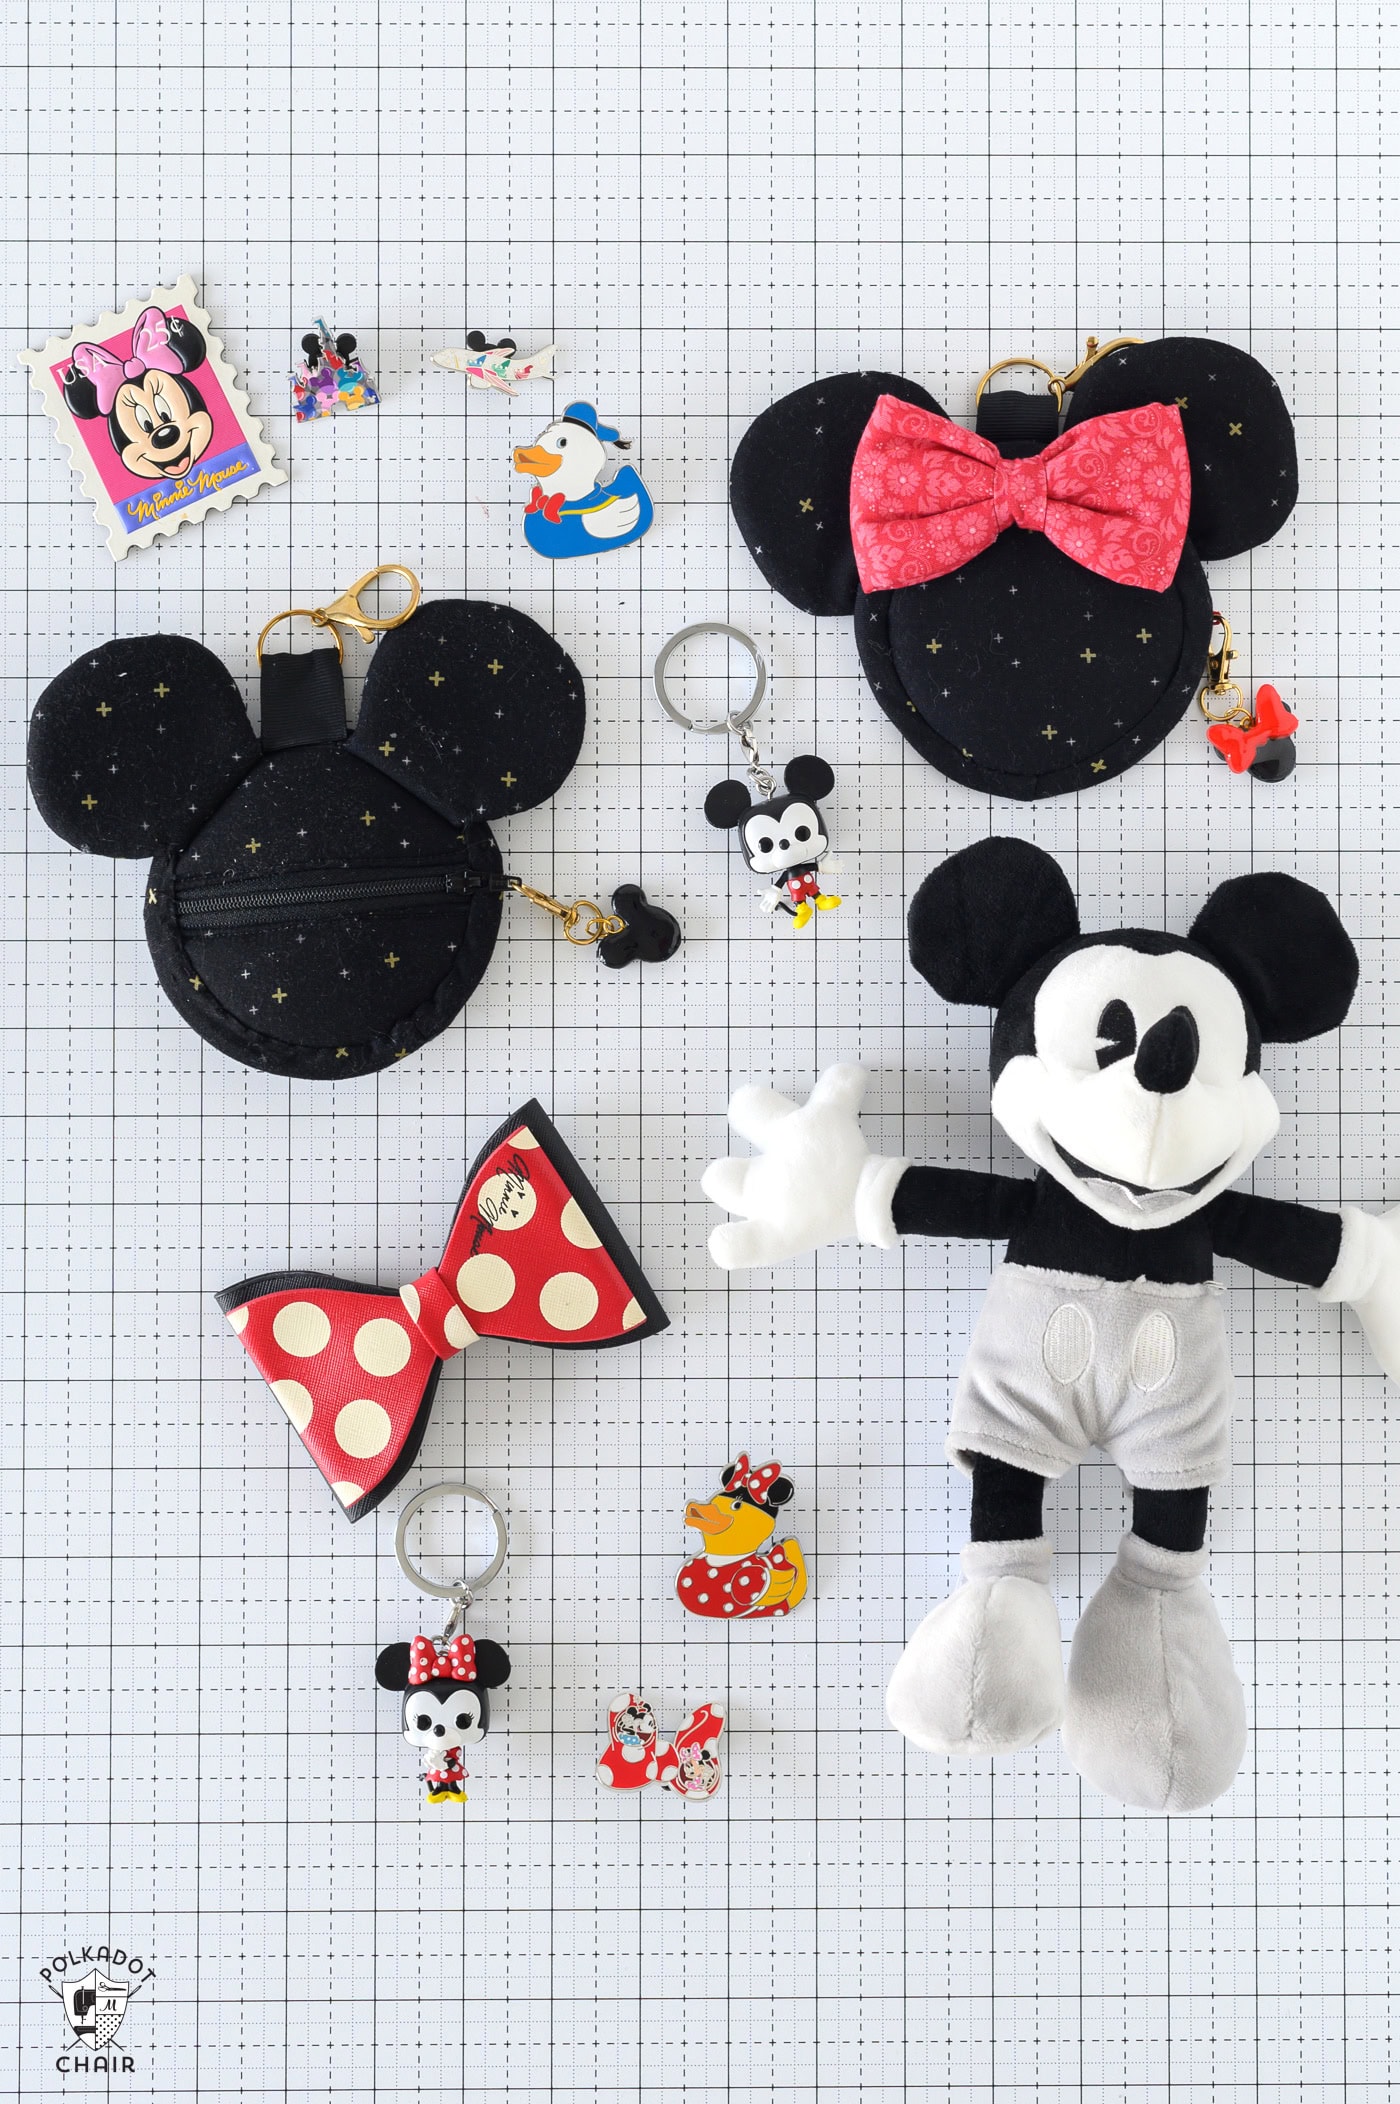
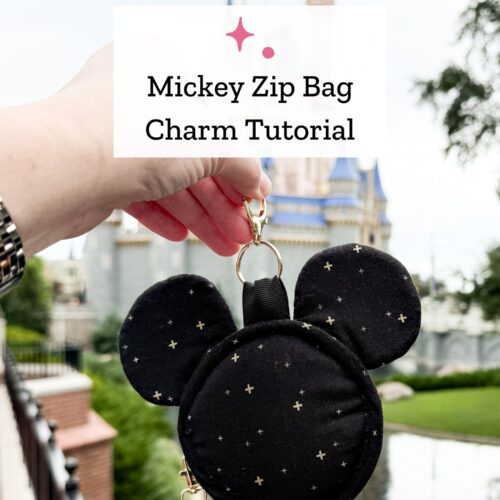
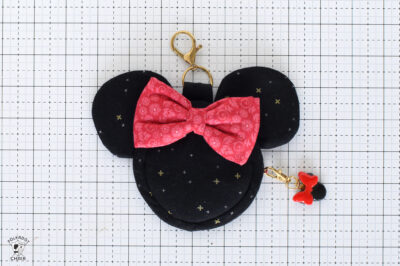
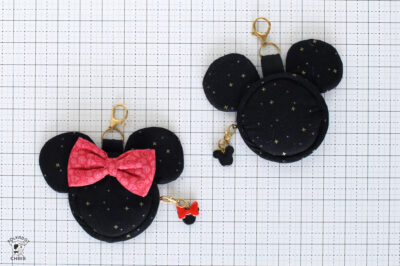
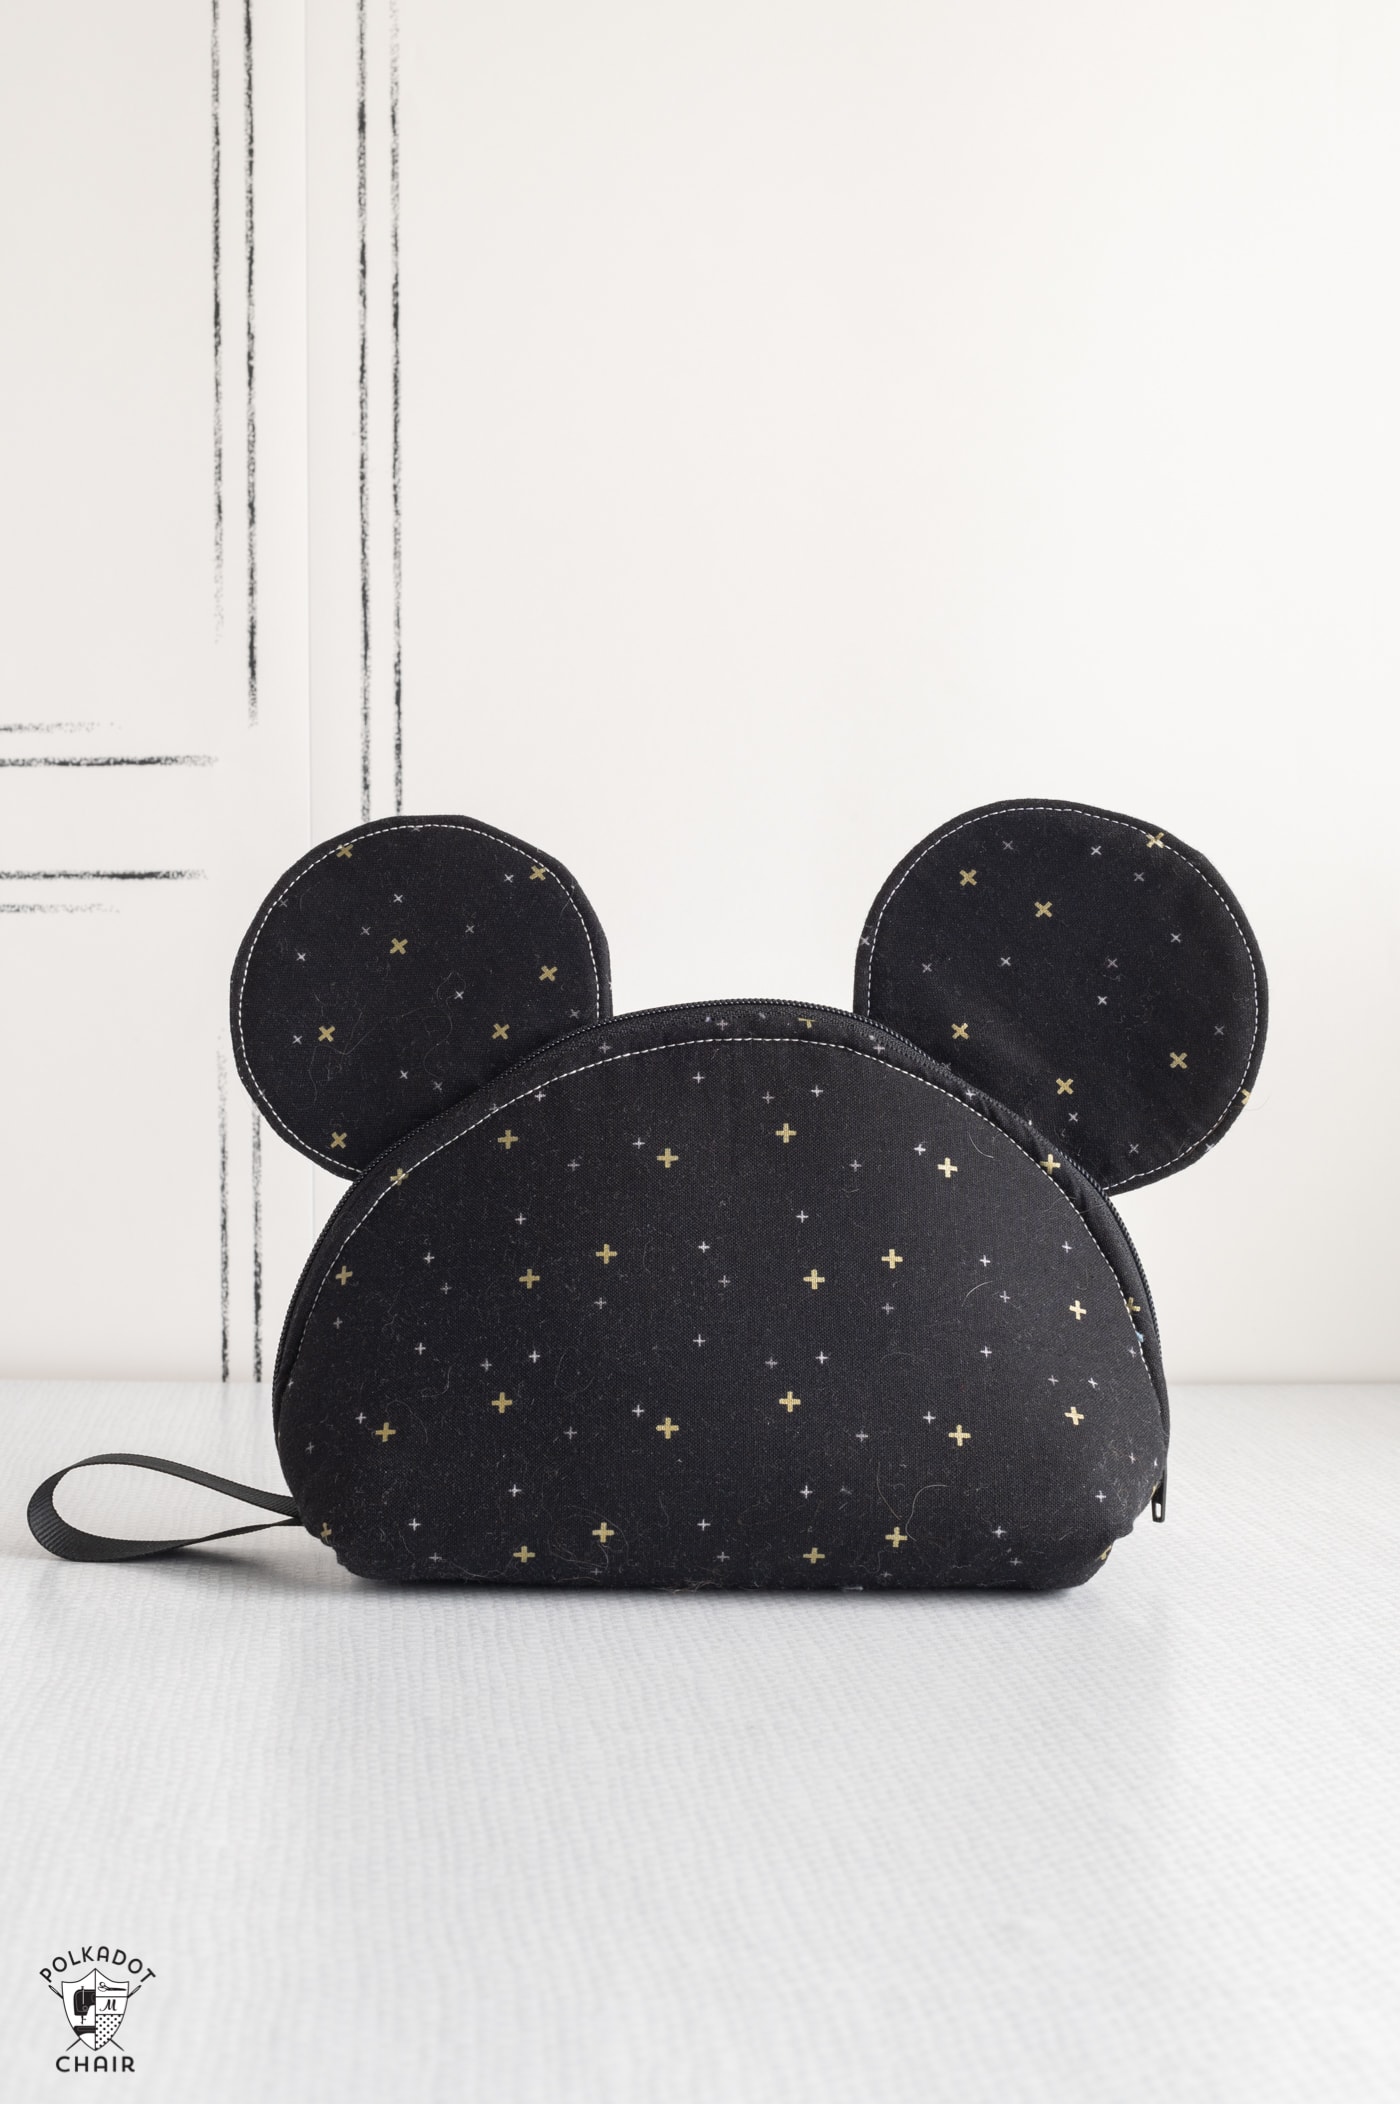
Mickey or Minnie Bag Charm Sewing Tutorial
Bag charms are all the rage right now! Learn how to make a zippered bag charm inspired by the shape of a Disney mouse with our free sewing pattern!
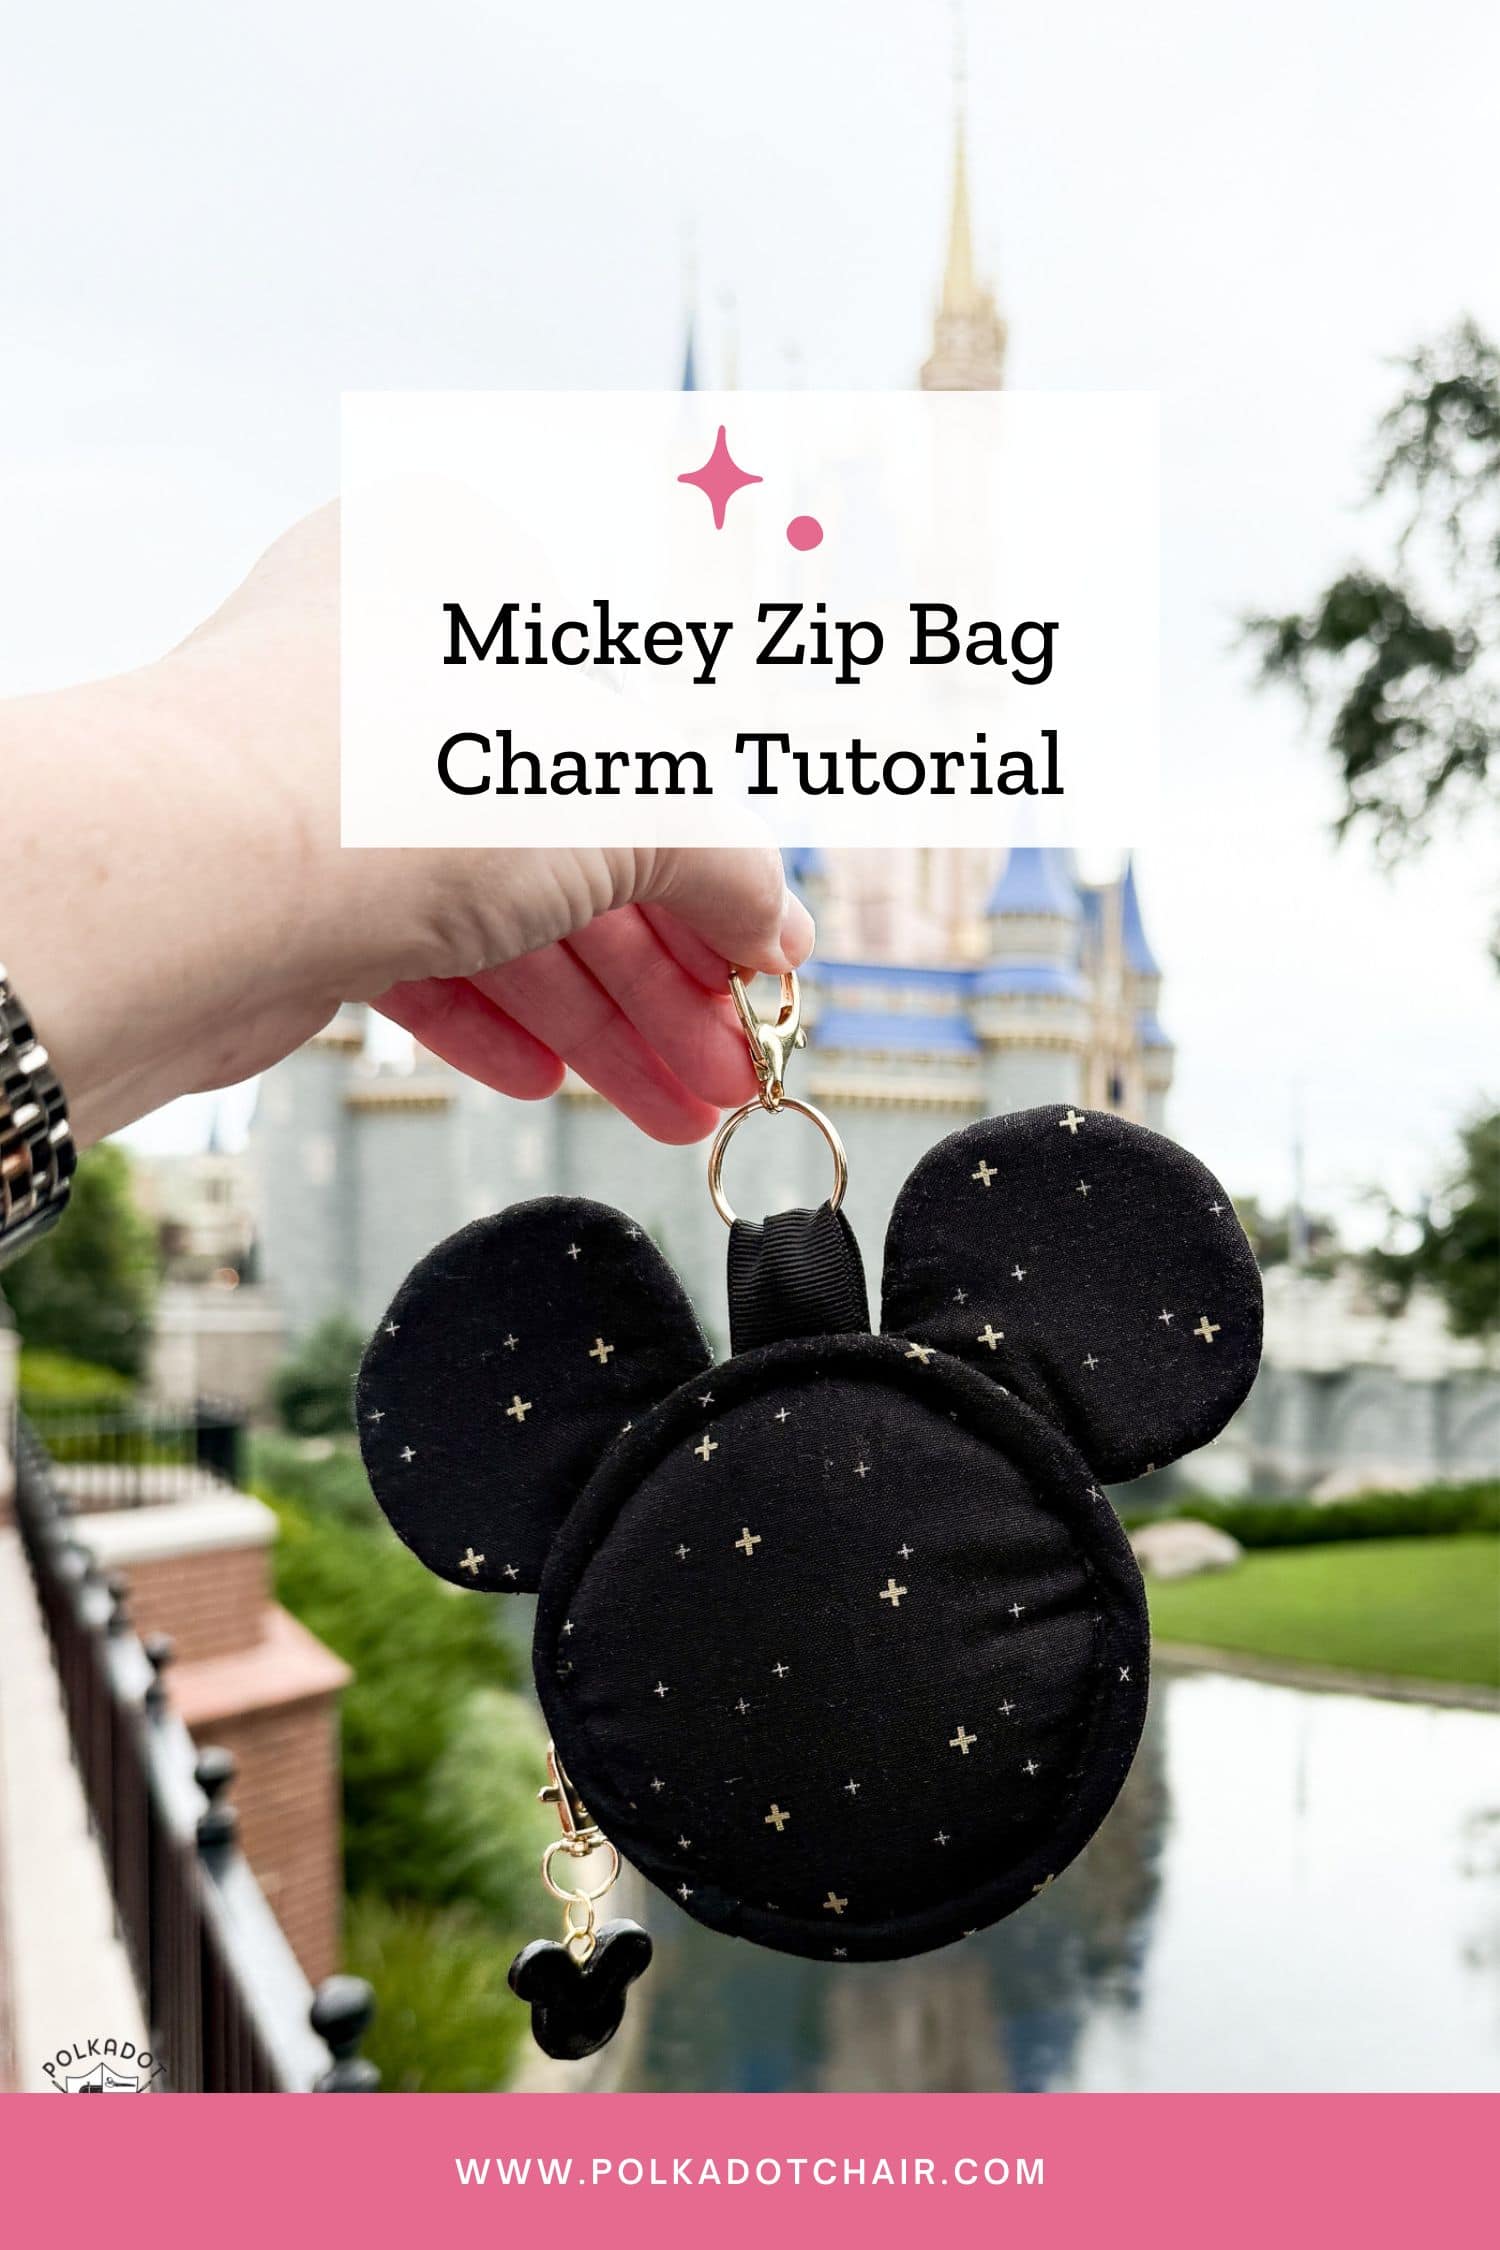
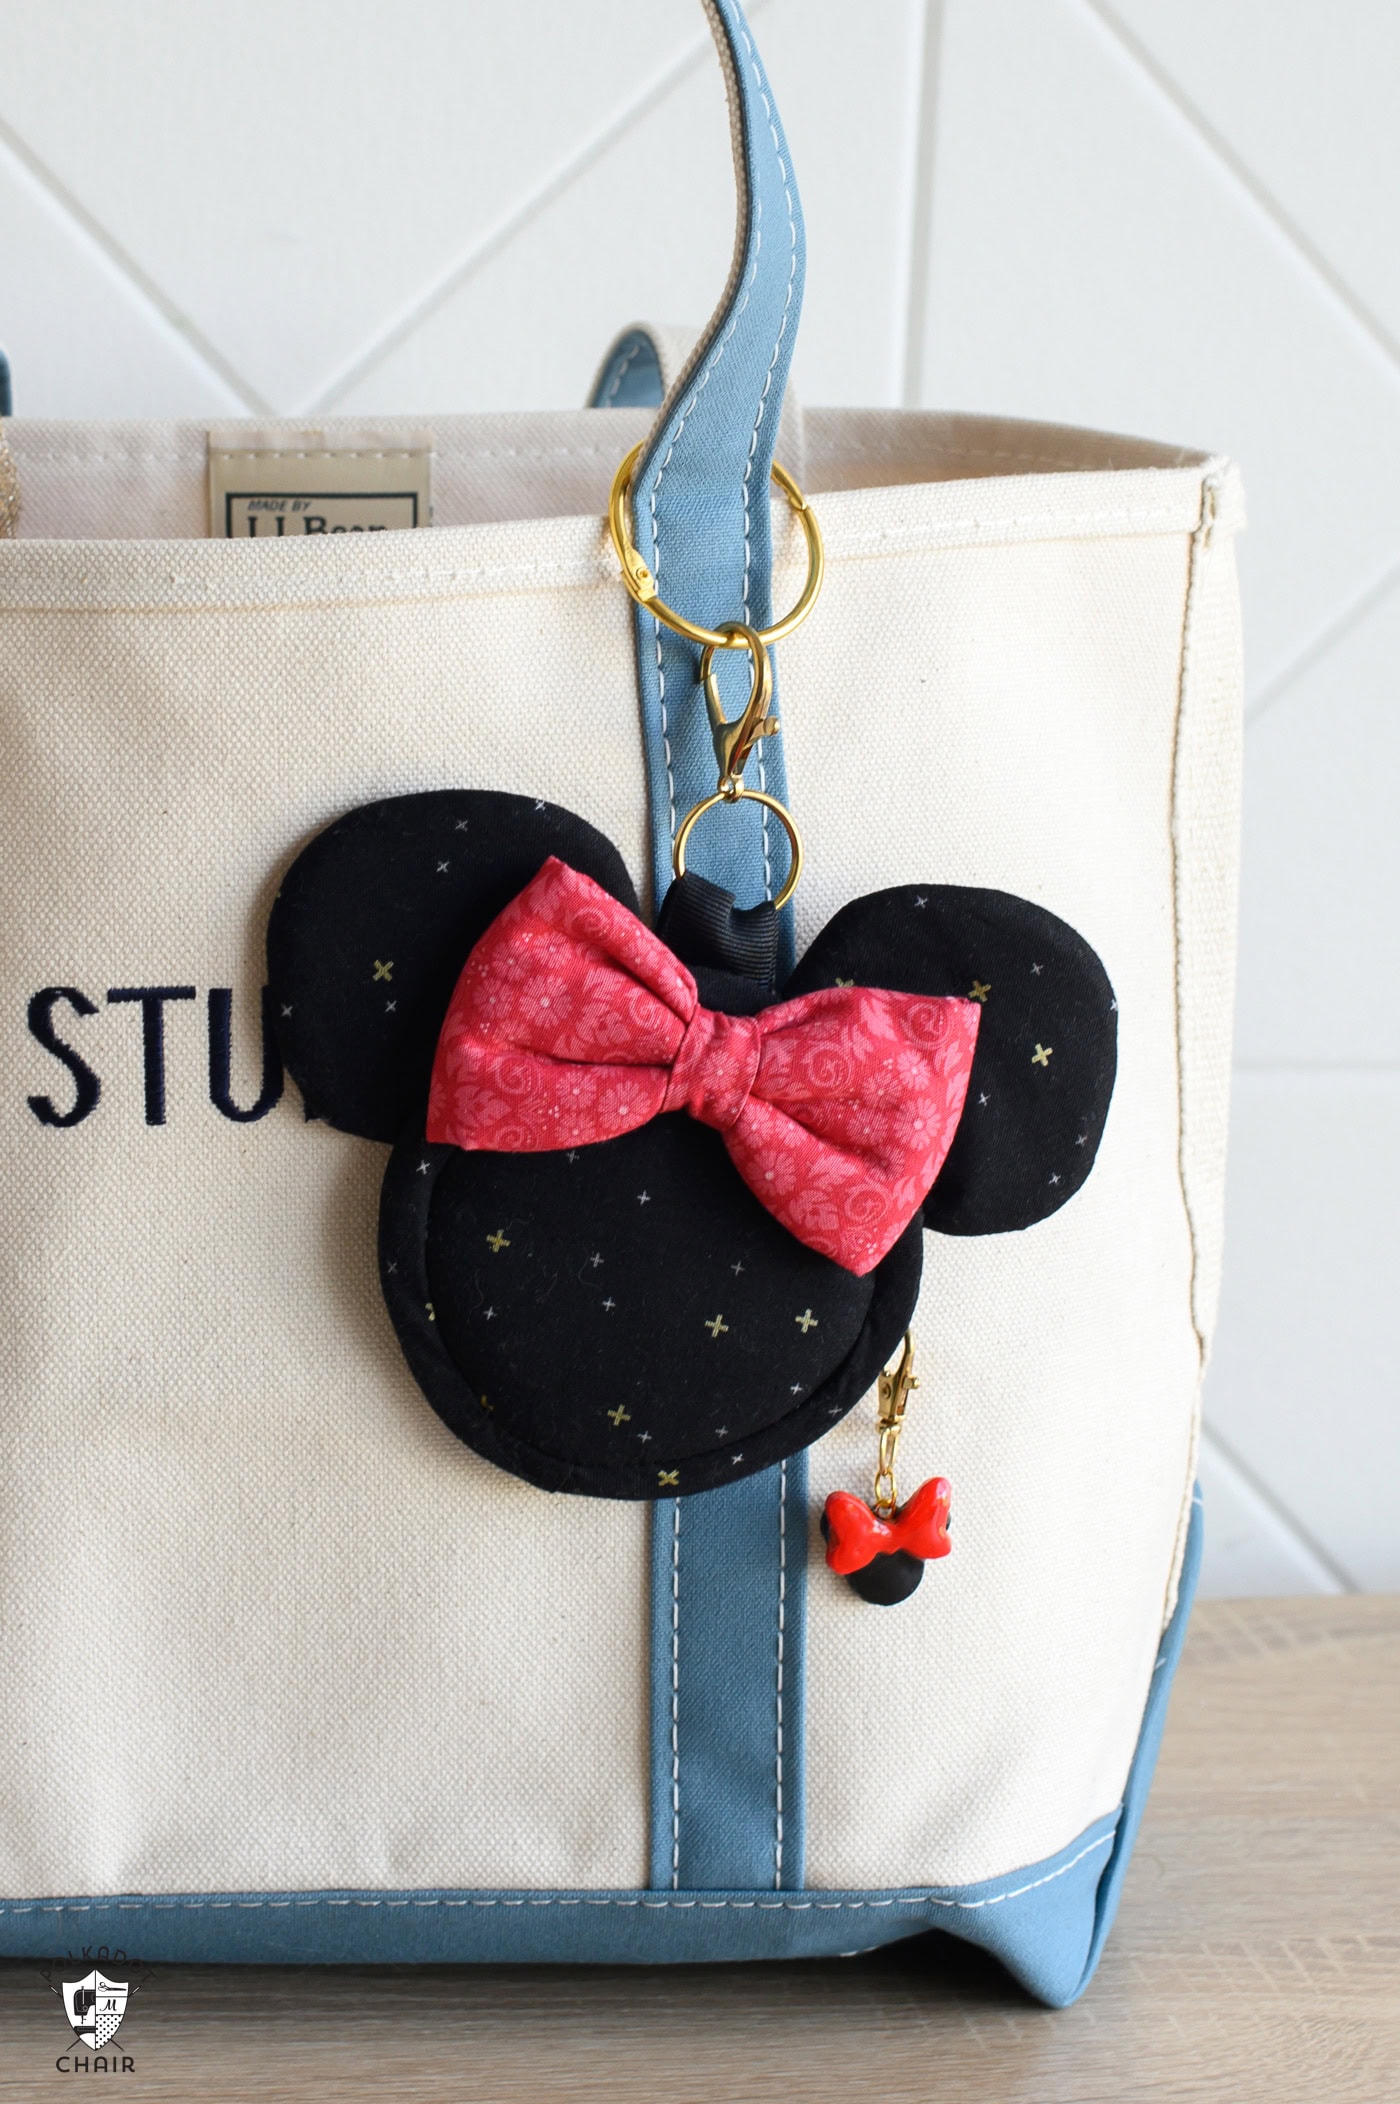
Looking for a fun way to add a little Disney flair to your bag? These Mickey and Minnie bag charms are the perfect quick project!

They stitch up easily from fabric scraps and make such a cute accessory for purses, backpacks, or even travel totes. You can customize them with different prints or a bow for Minnie, and they also make sweet handmade gifts for Disney-loving friends.

Several years ago, I created a Mickey earbud case. I’ve loved using it over the years on our Disney vacations. Recently (inspired by the current bag charm craze), I got the idea to update the coin purse tutorial.
What is a Bag Charm?
Bag charms are having a serious moment right now; they’ve jumped from niche accessory status to must-have adornment on purses, backpacks, and even travel luggage.
Designers and street-style fans alike are accessorizing with everything from plush creatures and beaded tassels to sleek metallic pieces, transforming ordinary bags into unique canvases of personality.
I created a Mickey and Minnie version of this trend and took it on our most recent trip to Disney World. If you’d like to make one for yourself or another Disney fan, follow the directions on our site!
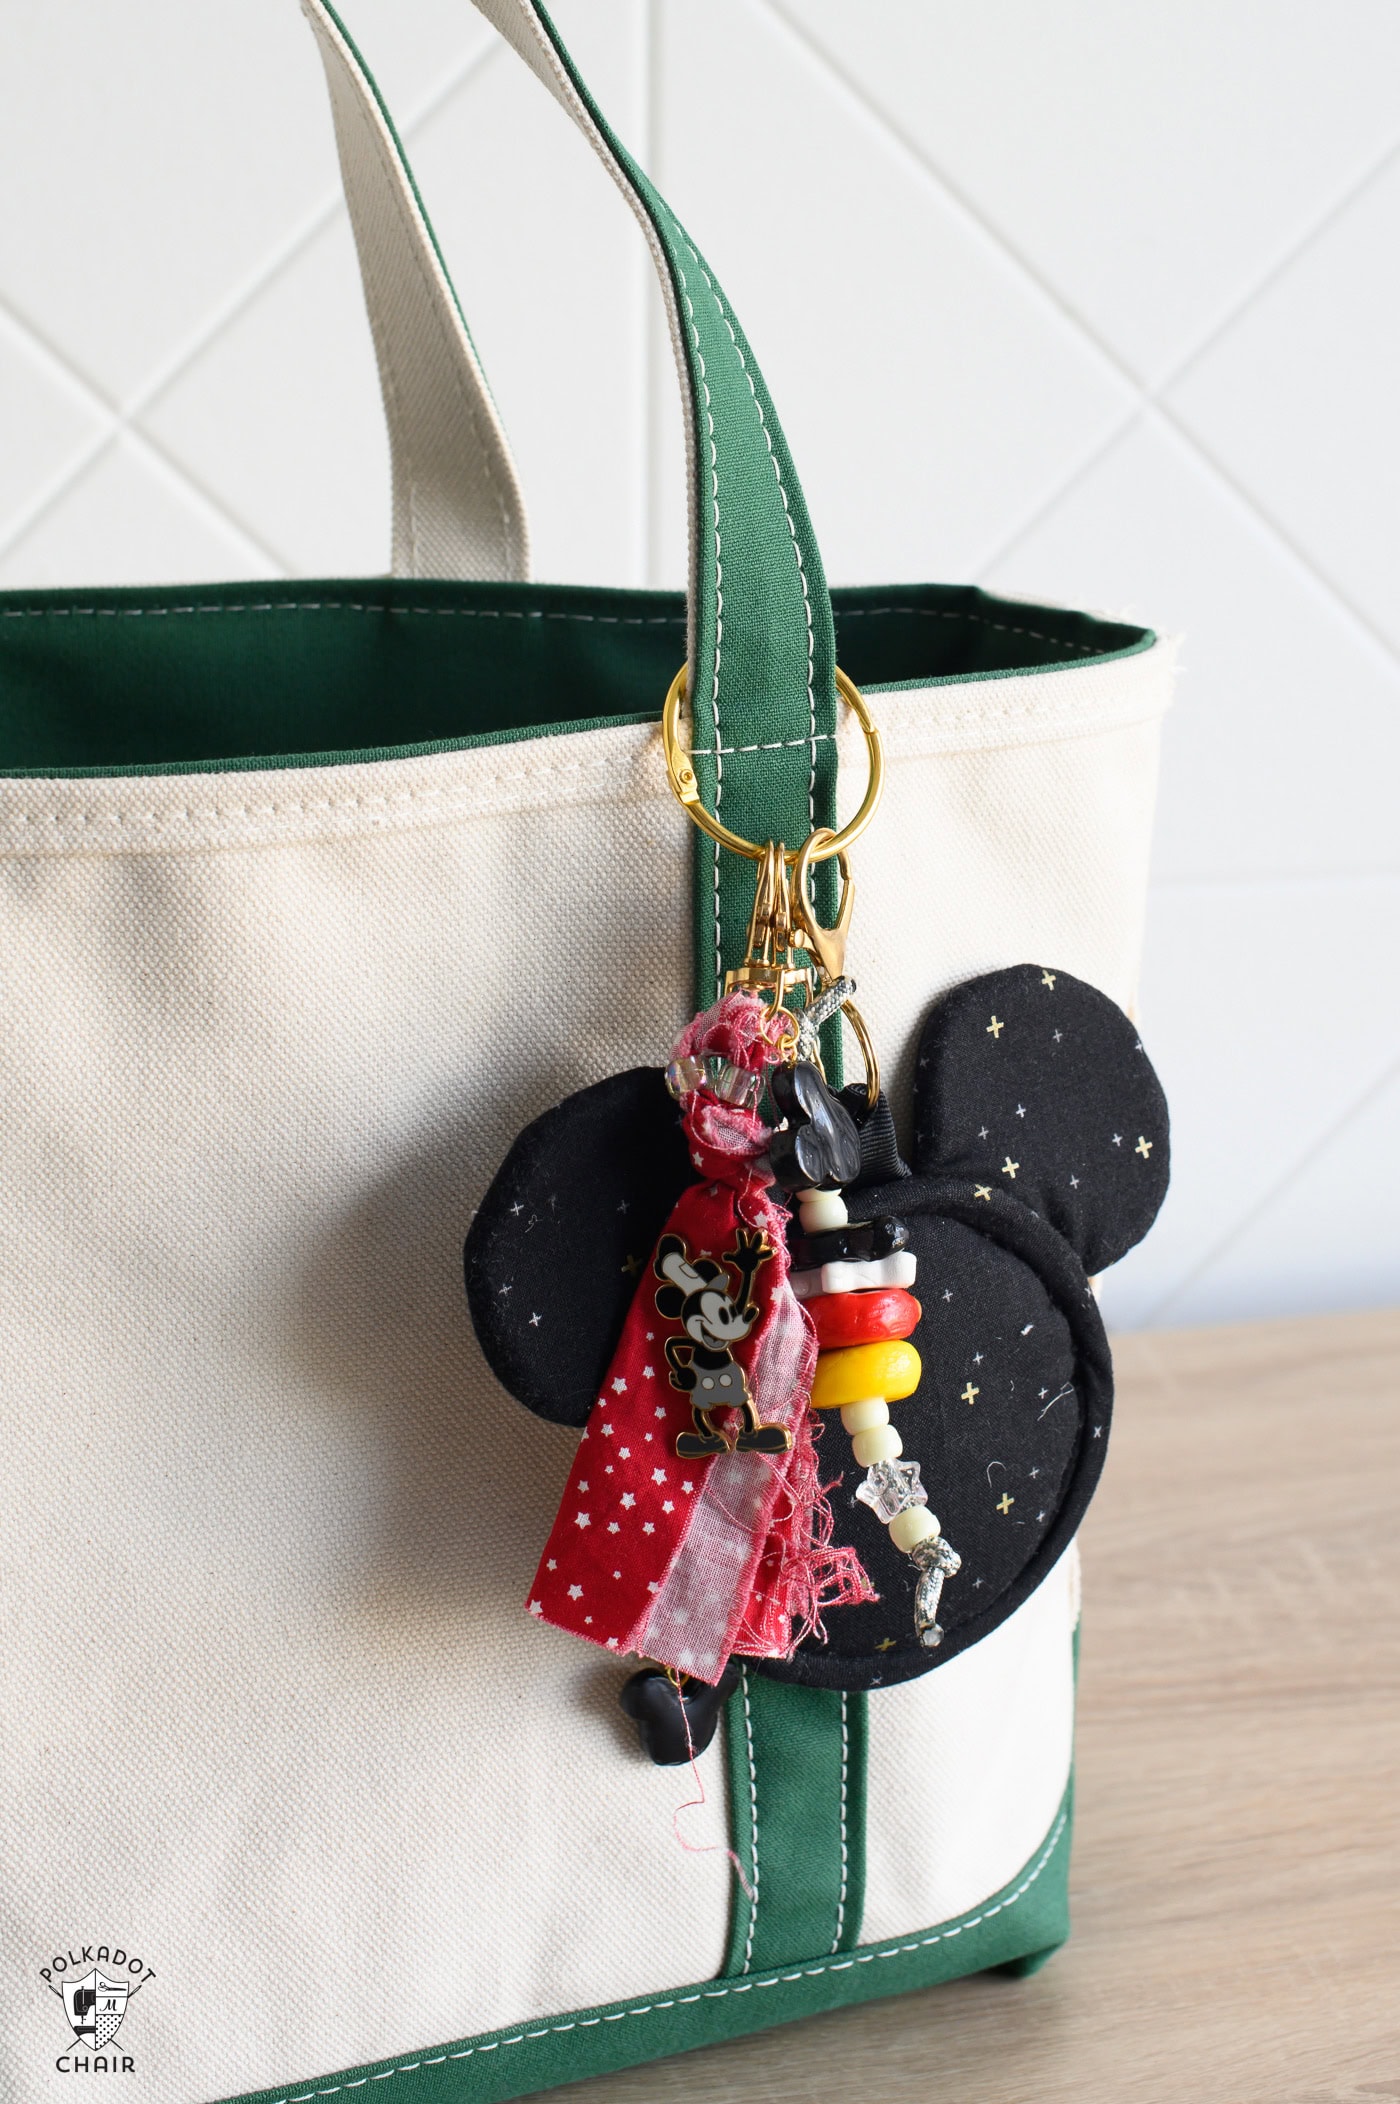
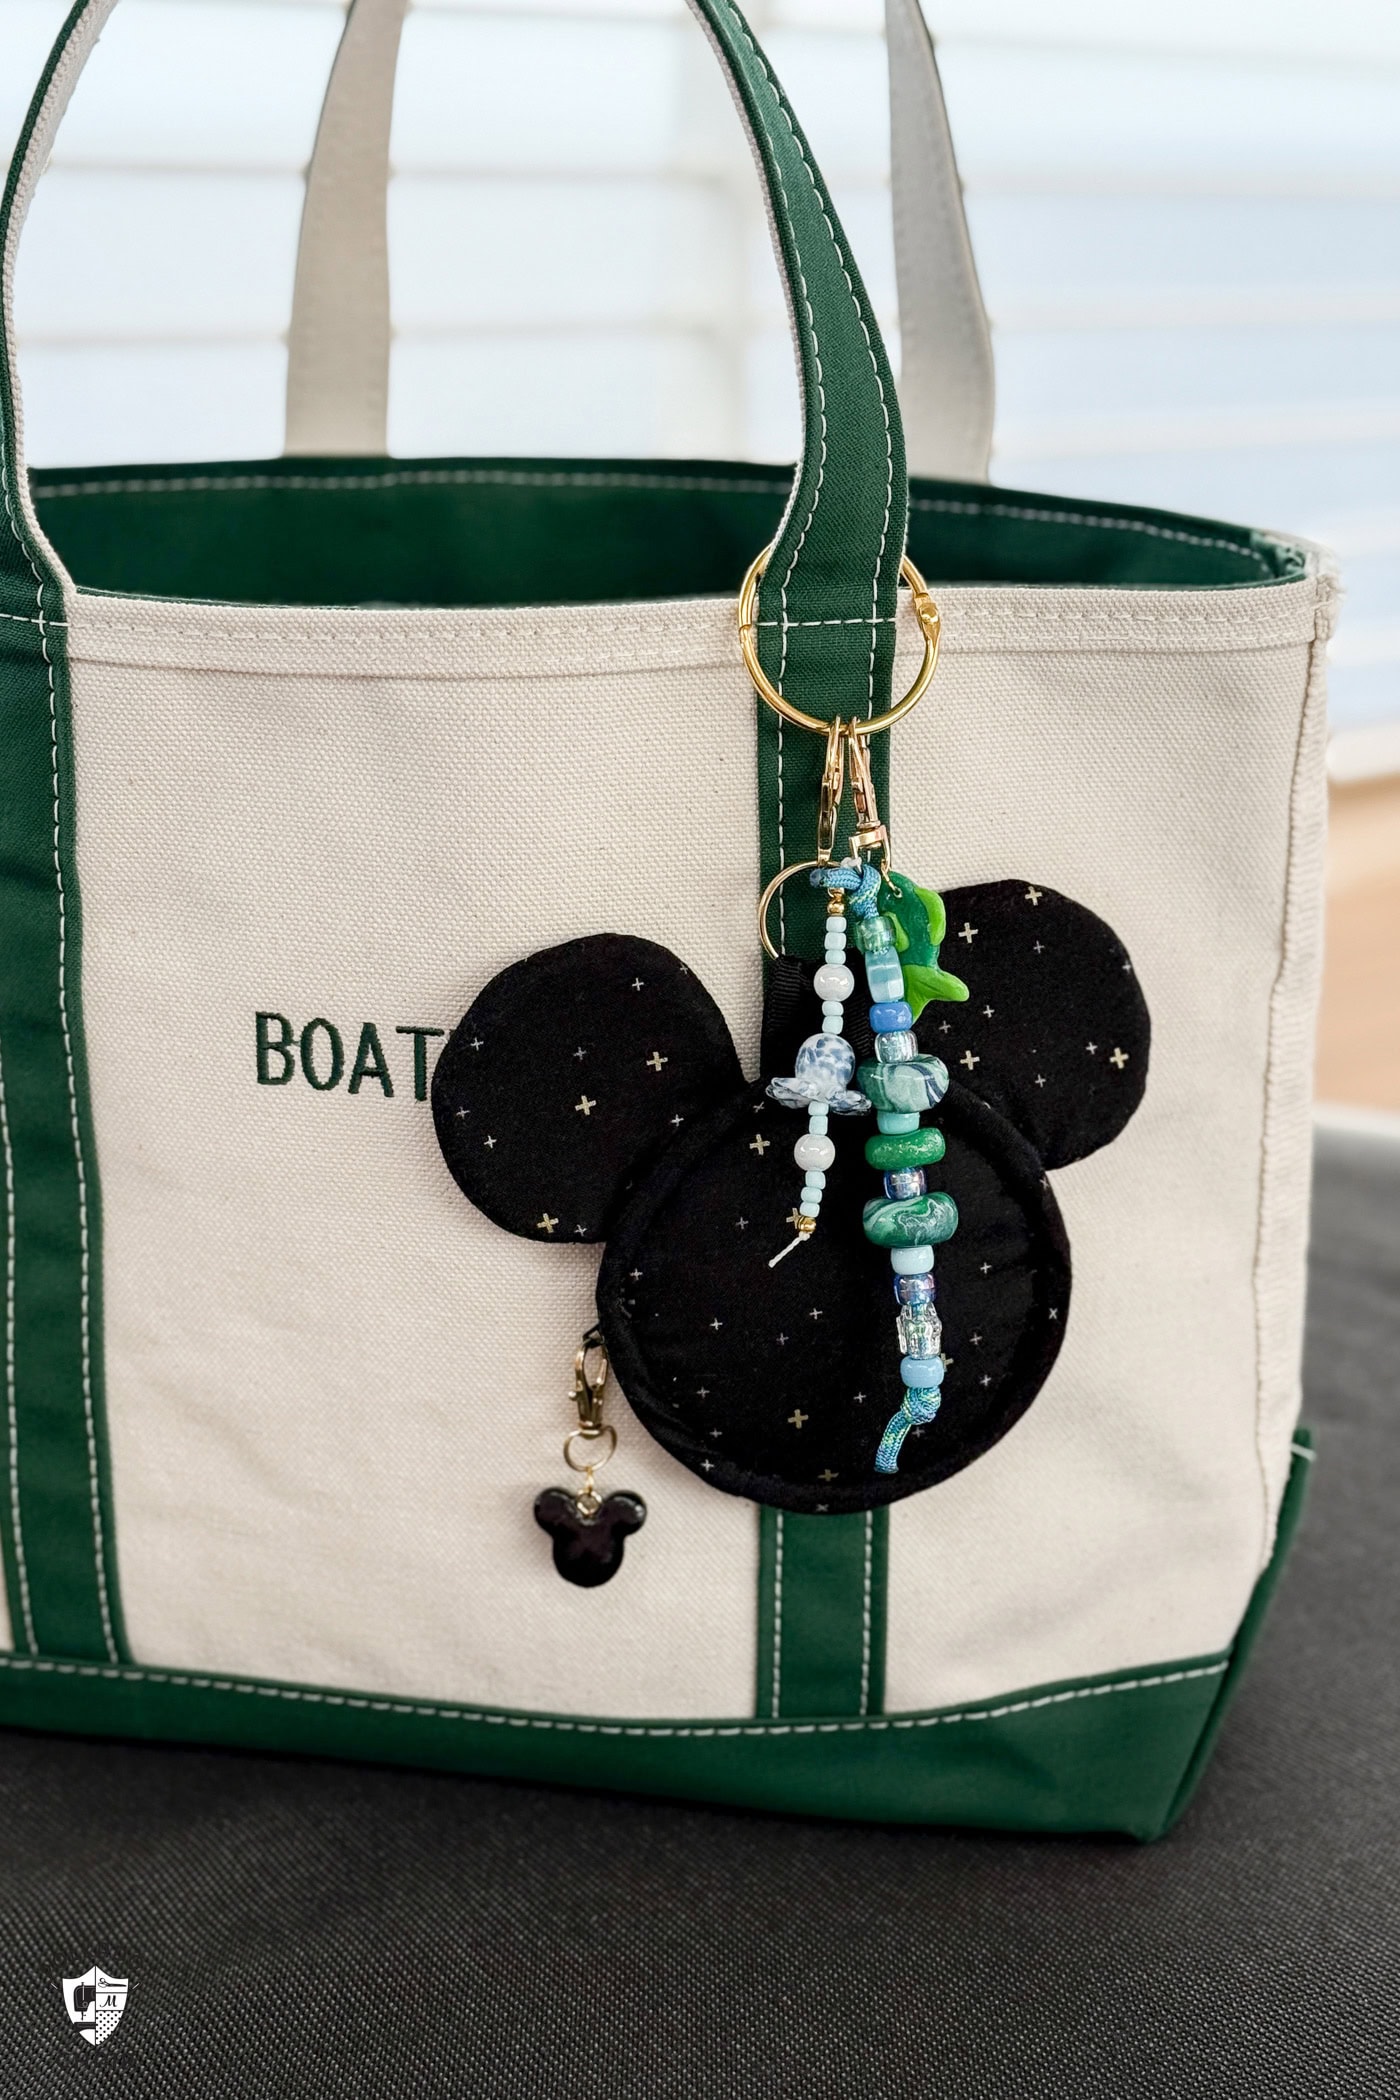
(Did you spy the cute beaded keychains? We’re working on a tutorial so that you can make those too!)
What Fits in the Pouch?
The pouch features a zipper on the back, allowing you to store a few essentials for your park day. It’s not a huge bag by any means, but I was able to store some Band-Aids, gum, and a small hand sanitizer in my pouch.
How to Cut Fabric on the Bias
For this tutorial, you need to cut binding strips on the bias. If you haven’t done that before, here’s how to do it.

To cut a 1 1/2″ wide bias strip from a fat quarter, first place the fabric so you can align your ruler on the 45° diagonal line. Place the 45° line of your quilting ruler along one straight edge of the fat quarter and make the first angled cut.

From that clean diagonal edge, measure over 1 1/2″, align your ruler, and cut. Continue cutting additional 1 1/2″ strips as needed, keeping them on the true bias (diagonal), which allows the fabric to stretch and curve smoothly.
Supplies Required
- 6” or longer polyester zipper
- 1 piece non-fusible Flex Foam, Bosal Foam, or Soft N Stable
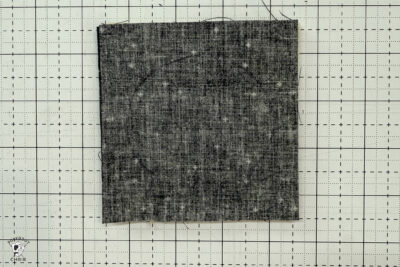
- 1 Fat Quarter for Pouch Outside (Sparkler Fabric in Black)
- 1 Fat Quarter for Pouch Lining (Red from Bluegrass Charm)
- 1 Fat Quarter for Binding (Sparkler Fabric in Black)
- Large Scrap for Minnie Bow (Red from Bluegrass Charm)
- Bag Ring and Clip – Ensure your bag ring can be attached to an existing ribbon and is not a solid ring.
- Thread to match fabric
- 1” wide ribbon
- Pinking Shears
- Pattern Piece (fill out the form below, and we will email it to you)
How to Get the Printable Pattern Piece
(Note: if you do not see the form below, can you please let us know which device and browser you are using, and if you are using any type of pop-up blocker or other security software.)
Fill out the form above, and we will email you a copy of the pattern piece. You will still need to read the directions in this blog post to finish your project.
Mickey or Minnie Zip Bag Charm Sewing Pattern
Equipment
supplies
- 1 Zipper 6” or longer polyester zipper
- 1 small package Flex Foam or Soft and Stable non fusible
- 1 Fat Quarter Pouch Outside
- 1 Fat Quarter Pouch Lining
- 1 Fat Quarter Binding
- 1 Large Scrap for Minnie Bow
- Bag Ring and Clip – make sure your bag ring can be added to an existing ribbon and is not a solid piece.
- Thread to match fabric
- 1/2 yard 1” wide ribbon
- 1 Pattern Piece Fill out the form on this page and we will email you the pattern piece.
Instructions
Step One: Create the Ears
- Cutting:From the pouch outside fabric, cut four pieces each 3” x 3From flex foam, cut two pieces each 3” x 3”
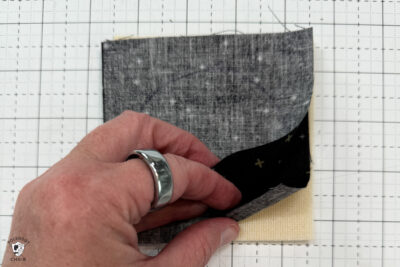
- Trace the ear pattern piece onto the wrong side of a 3” x 3” piece of fabric (you need to trace the shape of the ear, not cut out the ear).

- Layer this piece with another 3” x 3” piece of bag fabric, right sides facing. Layer the 3” x 3” piece of flex foam behind this piece.
- On your sewing machine, sew ON THE LINE you drew to create the ear. You will sew through all the layers of fabric.
- Cut out the ear using the pinking shears, get close to the seam, but be careful not to cut into the seam allowance. If you don’t have pinking shears, that’s ok, just use sharp scissors.
- Turn the ear right side out and press.
- Repeat all steps to create a second ear.
- Set aside
Step Two: Zipper
- Cut:Bag Outside Fabric: 2 pieces 3” x 6”Bag Lining Fabric: 2 pieces 3” x 6”Flex foam: 2 pieces 3” x 6”
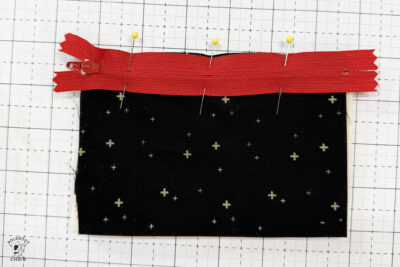
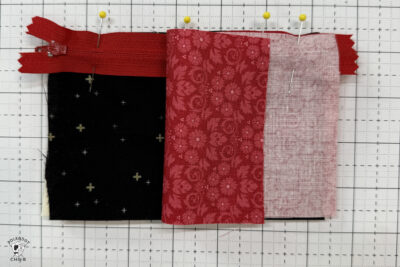
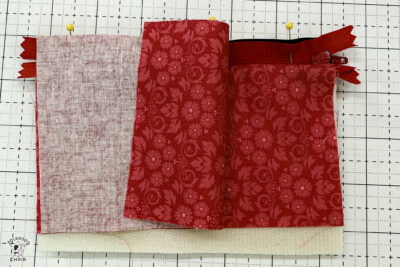
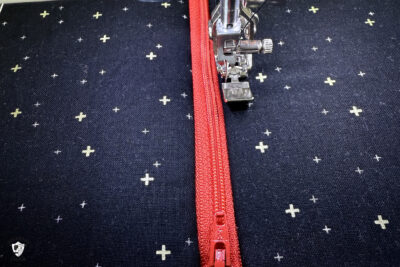
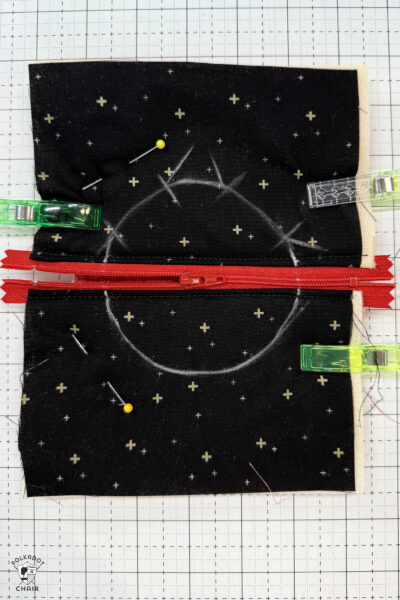
- Layer the 3” x 6” piece of bag outside fabric on top of the 3” x 6” piece of flex foam. Place the zipper on the top of this piece, the edge of the zipper even with the edge of the fabric, and the right side of the zipper facing the right side of the fabric.
- Pin the 3” x 6” piece of lining fabric on top of this. The right side of the lining fabric will face the wrong side of the zipper.
- Stitch in place using a zipper foot (your seam allowance will be 1/4”)
- Pull the fabric away from the zipper, then repeat this process with the other side of the zipper and the other flex foam and fabric pieces.
- After the piece is sewn, press the seams away from the zipper and top stitch down both sides of the zipper.

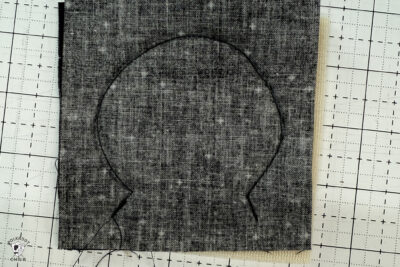
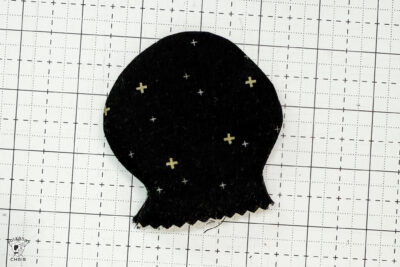
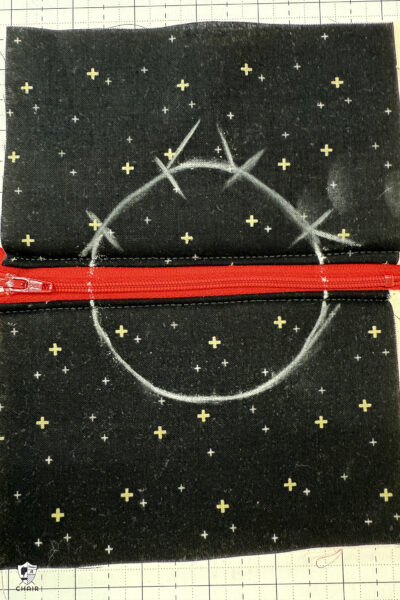
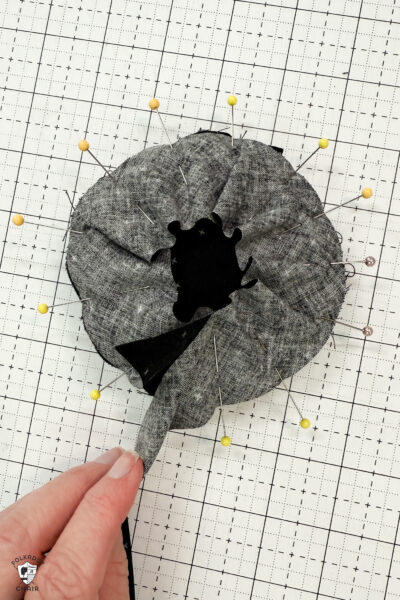
Step Three: Cut out the Shape
- Cut out the circle pattern piece and lay it on top of the sewn zipper piece so that the zipper is in the center of the circle, and none of the metal parts of the zipper are under the pattern piece.
- Trace around the outside of the circle. Mark the placement locations for the ears and the center top.

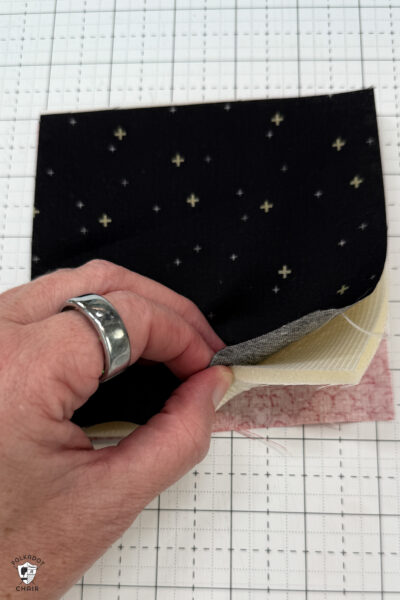
- Cut:Bag Outside Fabric; One 5” x 5” pieceBag Lining Fabric: one 5” x 5” pieceFlex Foam: One 5” x 5” piece
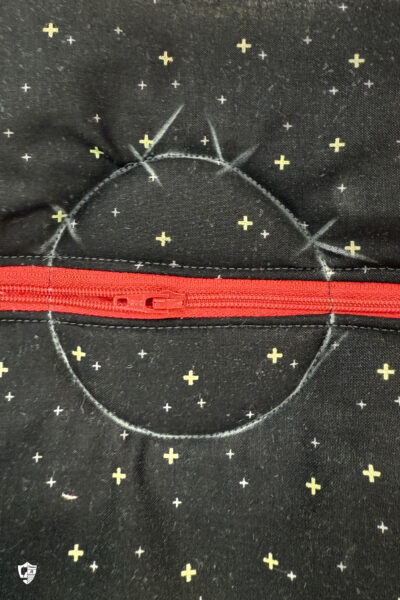
- Create a “sandwich” by placing the bag outside and lining it with pieces of fabric. The fabric pieces should have the wrong sides facing the flex foam in between the two pieces.
- Place this piece behind the zipper piece (that has the circle traced on it).
- Use binding clips to hold all the layers in place.
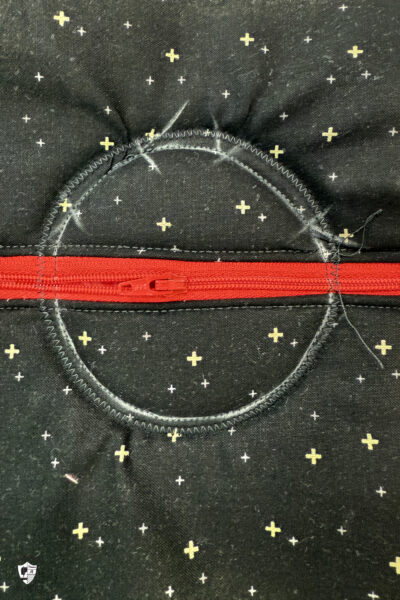
- Move the zipper pull on the sewn piece ot the center of the zipper.
- Sew around the perimeter of the circle, ensuring you sew over the top of the zipper without sewing over any metal parts. It’s ok to sew over the teeth of a polyester zipper, just don’t sew over the pull or the stop at the end of the zipper.
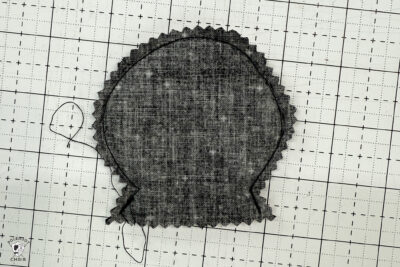
- Cut out the piece using sharp scissors 1/4” on the outside of the sewn line.
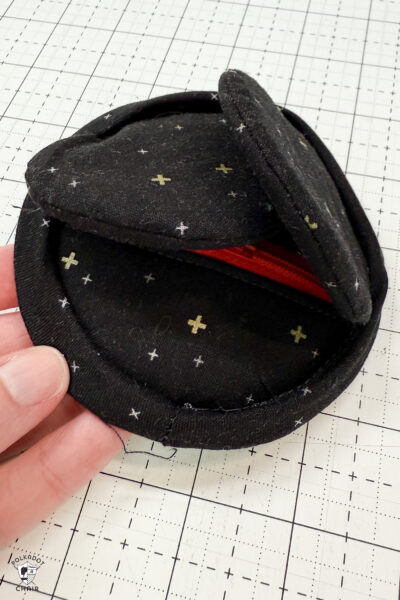
- Using a zig-zag stitch on your sewing machine, zig-zag around the outside of the bag, making sure to catch all the layers of fabric as you sew. Adding the zig-zag stitch will help keep all of the layers in place during the binding steps.
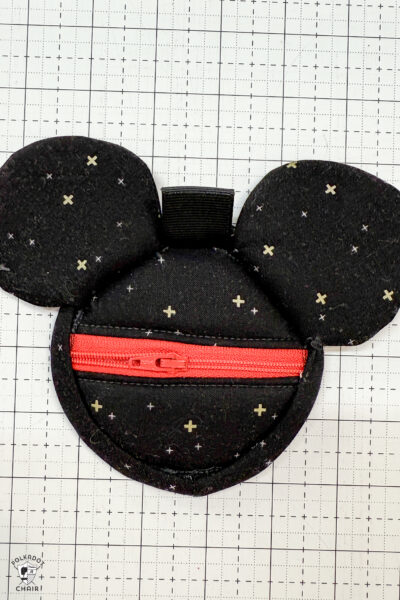
Step Four: Ears & Ribbon
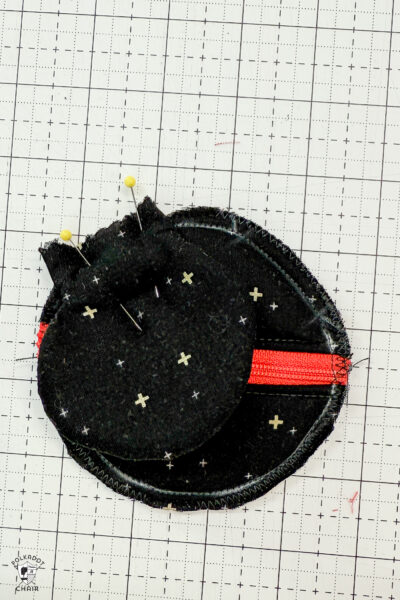
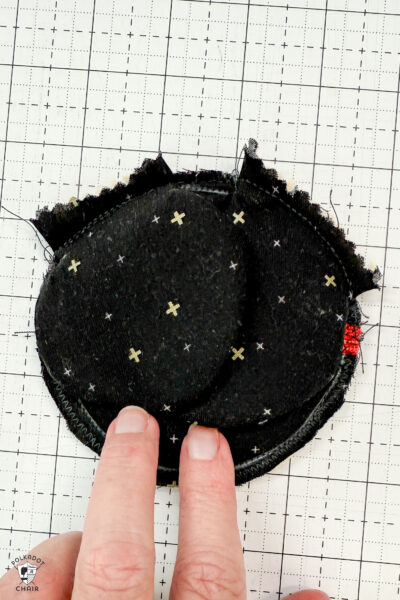
- Lay the ears on the sewn circle, the raw edge of the ears extending slightly beyond the edge of the circle. Use the X's marked on the pattern piece as a placement guide.
- Sew the ears in place, sewing over the existing stitching line.
- Cut a piece of ribbon to 3” long, and finish the ends of the ribbon with fray check.
- Fold the ribbon in half and place it on top of the sewn circle, at the center point. Stitch in place along the existing seam in the circle.

Step Five: Binding
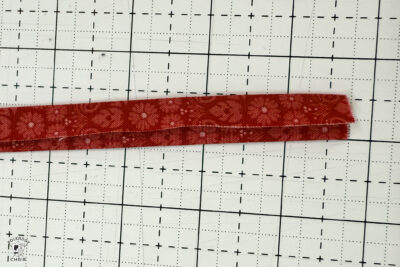
- From your binding fabric Fat Quarter, cut a piece of binding on the BIAS of the fabric 1 1/2” wide by the length of the fat quarter.
- Working on the front of the sewn circle, sew the bias binding in place with a 1/4” seam allowance. When you get back to where you started, mark the location where the ends of the binding strips should meet, unpick a bit of the seam, and sew in place.
- (I sew a seam perpendicular to the binding, and do not worry about mitering the seam).
- Finish stitching the binding in place.
- TIP: Be careful not to pull the binding too tight as you sew; you want a bit of ease in it as you go around the circle.
- Bring the binding over to the zipper side of the pouch, fold it under, and press. Hand-sewn in place.
- After the binding is sewn, flip the ears and the ribbon up, press ( a bit of steam will help keep them in place). Place a few hidden stitches between the ears and the binding to hold them in place.

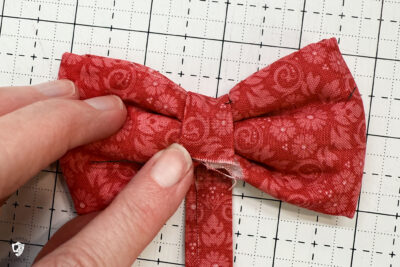
Step Six: Optional Bow
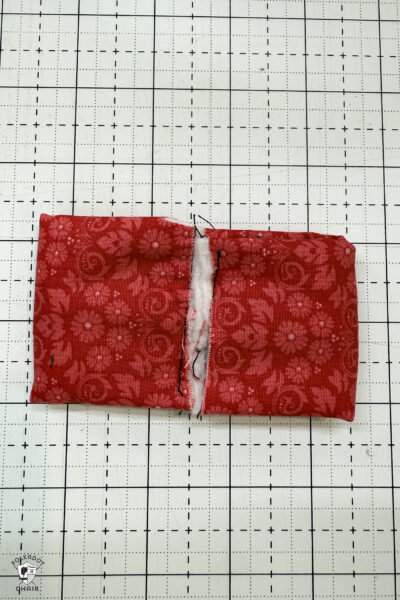
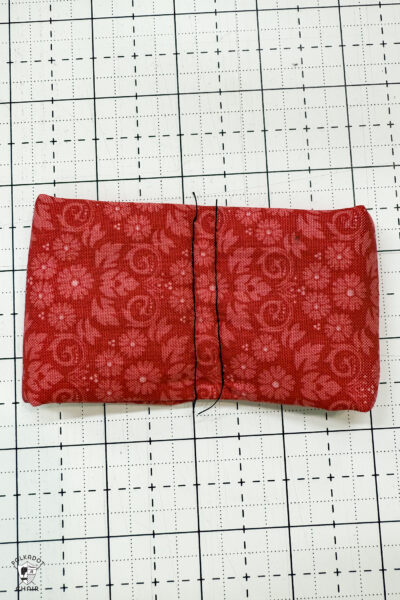
- From Bow Fabric Cut:1 piece: 5" x 8"1 piece: 1 1/2" x 6"
- From Fusible Fleece Cut:1 piece: 5" x 8"
- Adhere the fusible fleece to the wrong side of the bow fabric.
- Fold the bow fabric in half lengthwise and stitch in place with a 1/4” seam allowance. Turn right side out and press; the seam should be in the center of the bow unit (not at the top or bottom edge).
- Fold the two raw edges of the bow unit so that they meet in the center. On your sewing machine, stitch along the raw edge of the two ends.
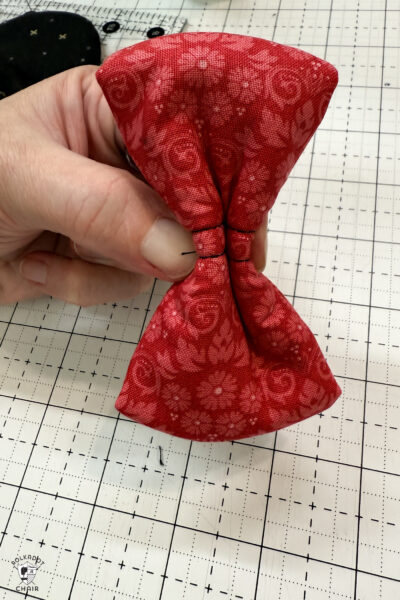
- Pinch this piece in the center so that it “pleats”.
- Using heavy-duty thread, wrap the center of the bow several times to hold the pleat in place. You’ll need to wrap it several times. Tuck the end of the string under the wrap.
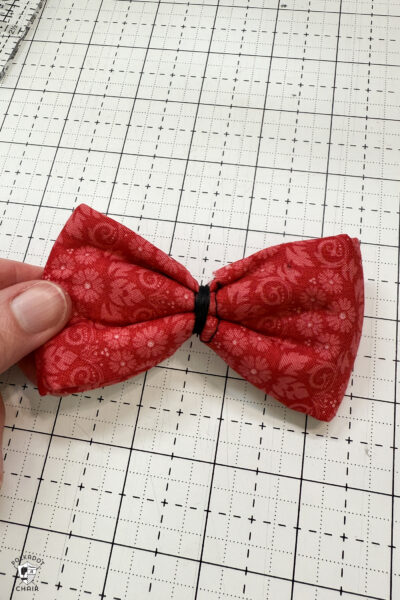
- Fold the 1 1/2” x 6” piece of fabric in thirds so that the two raw edges overlap in the center and press.
- Wrap this piece around the bow piece, starting at the back of the bow. Hand stitch it in place.
- Fold under the 6” piece of fabric where it meets the back of the bow and trim off the excess fabric.
- Hand stitch in place.
- Hand-sew the bow to the front of the pouch.


Finishing
- Feed the bag ring through the ribbon at the top of the bag. Attach the clip and enjoy!
More Disney Bag Projects!
If you like this project, you may also like some of these Disney-inspired bag patterns.
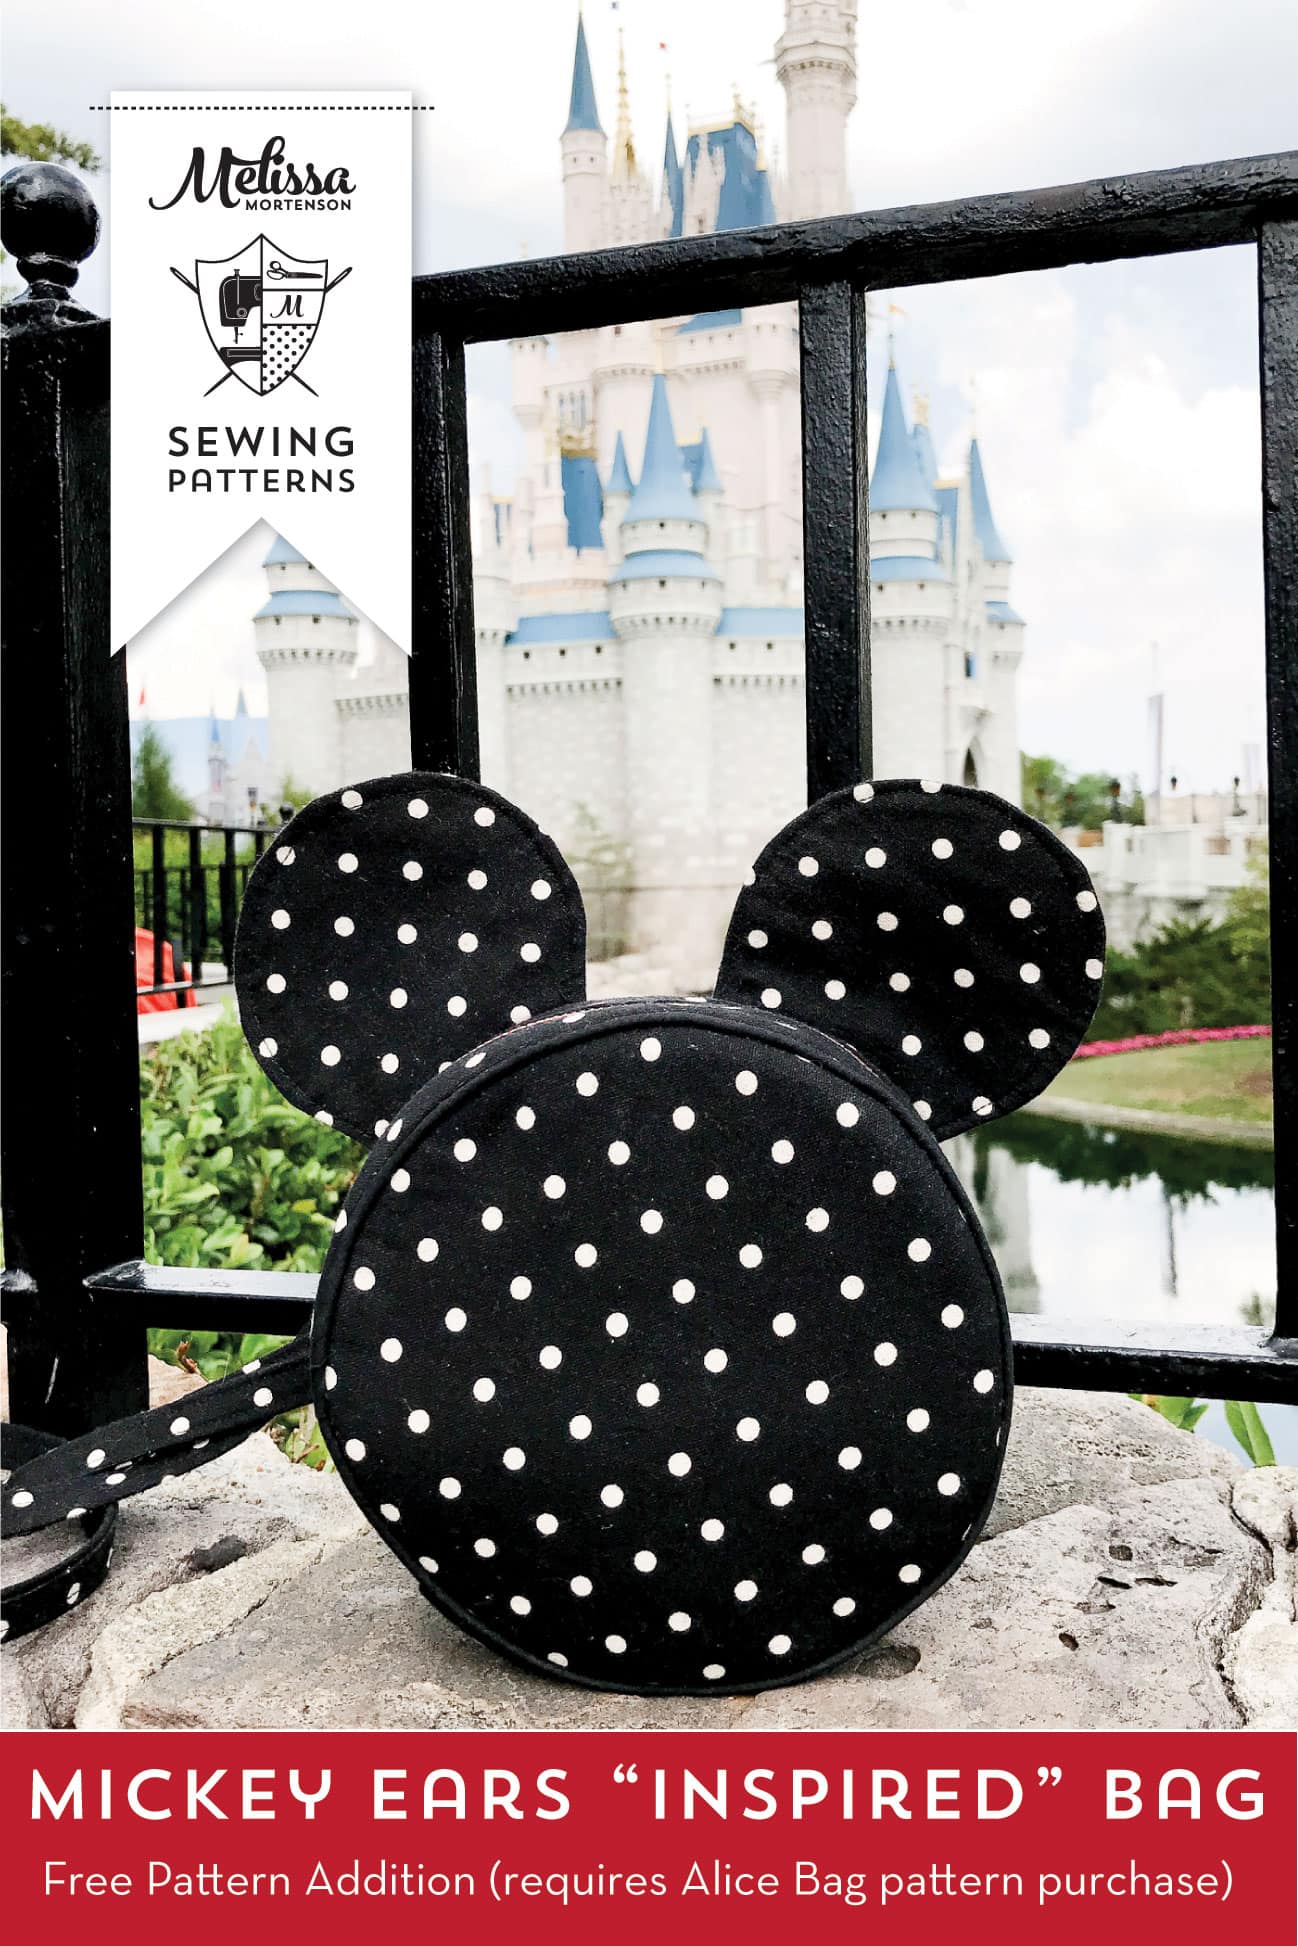
Alice Bag with Mickey Ears Addition
So cute, but I don’t see the form for the free printable pattern … I am on Windows 11 and I use Firefox browser…
Thanks!
Can you use another browser? Firefox seems to be blocking our email forms.
I got it using Edge, thanks!
So cute! and a lovely trip down memory lane. I found you original ear bud pouch yonks ago. Made them for my buddies and our Mom’s Disney trip to the food and wine festival. You taught me zippers and then later how to quilt. I love your instructions and fabrics. My Halloween one is out now.
Hello Melissa,
I would love to download the Mickey pattern, but cannot find the form for asking for it.
One sentence is “please enter your Email adress below”, and the next is “please enter your Email adress above”, with no form to enter. Please help.
Thank you, Inge
There is a form there that does not seem to be displaying on your computer – I checked here on 3 different computers and it’s displaying for us – can you tell me what internet browser you are using?
I love it but there is no form to fill out to get the pattern! Weird.
Hi, what computer/browser are you using?