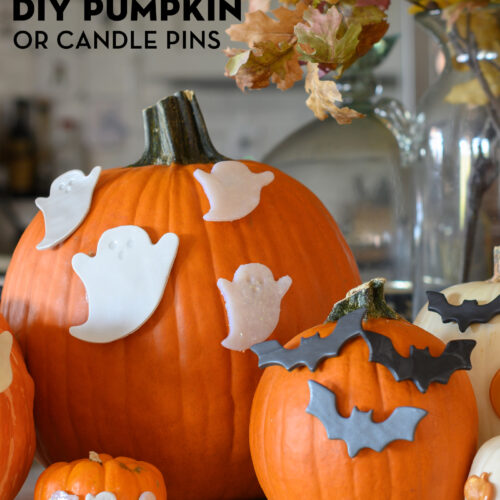
DIY Halloween Pumpkin and Candle Pins
Create a fun and clever Halloween decoration by using a bit of polymer clay to make pins for your pumpkin! It’s a cute, mess-free, no-carve alternative to pumpkin carving! Read our step-by-step tutorial to learn how to make your own no-carve polymer clay pumpkin (or candle) pins for a festive and creative Halloween display.
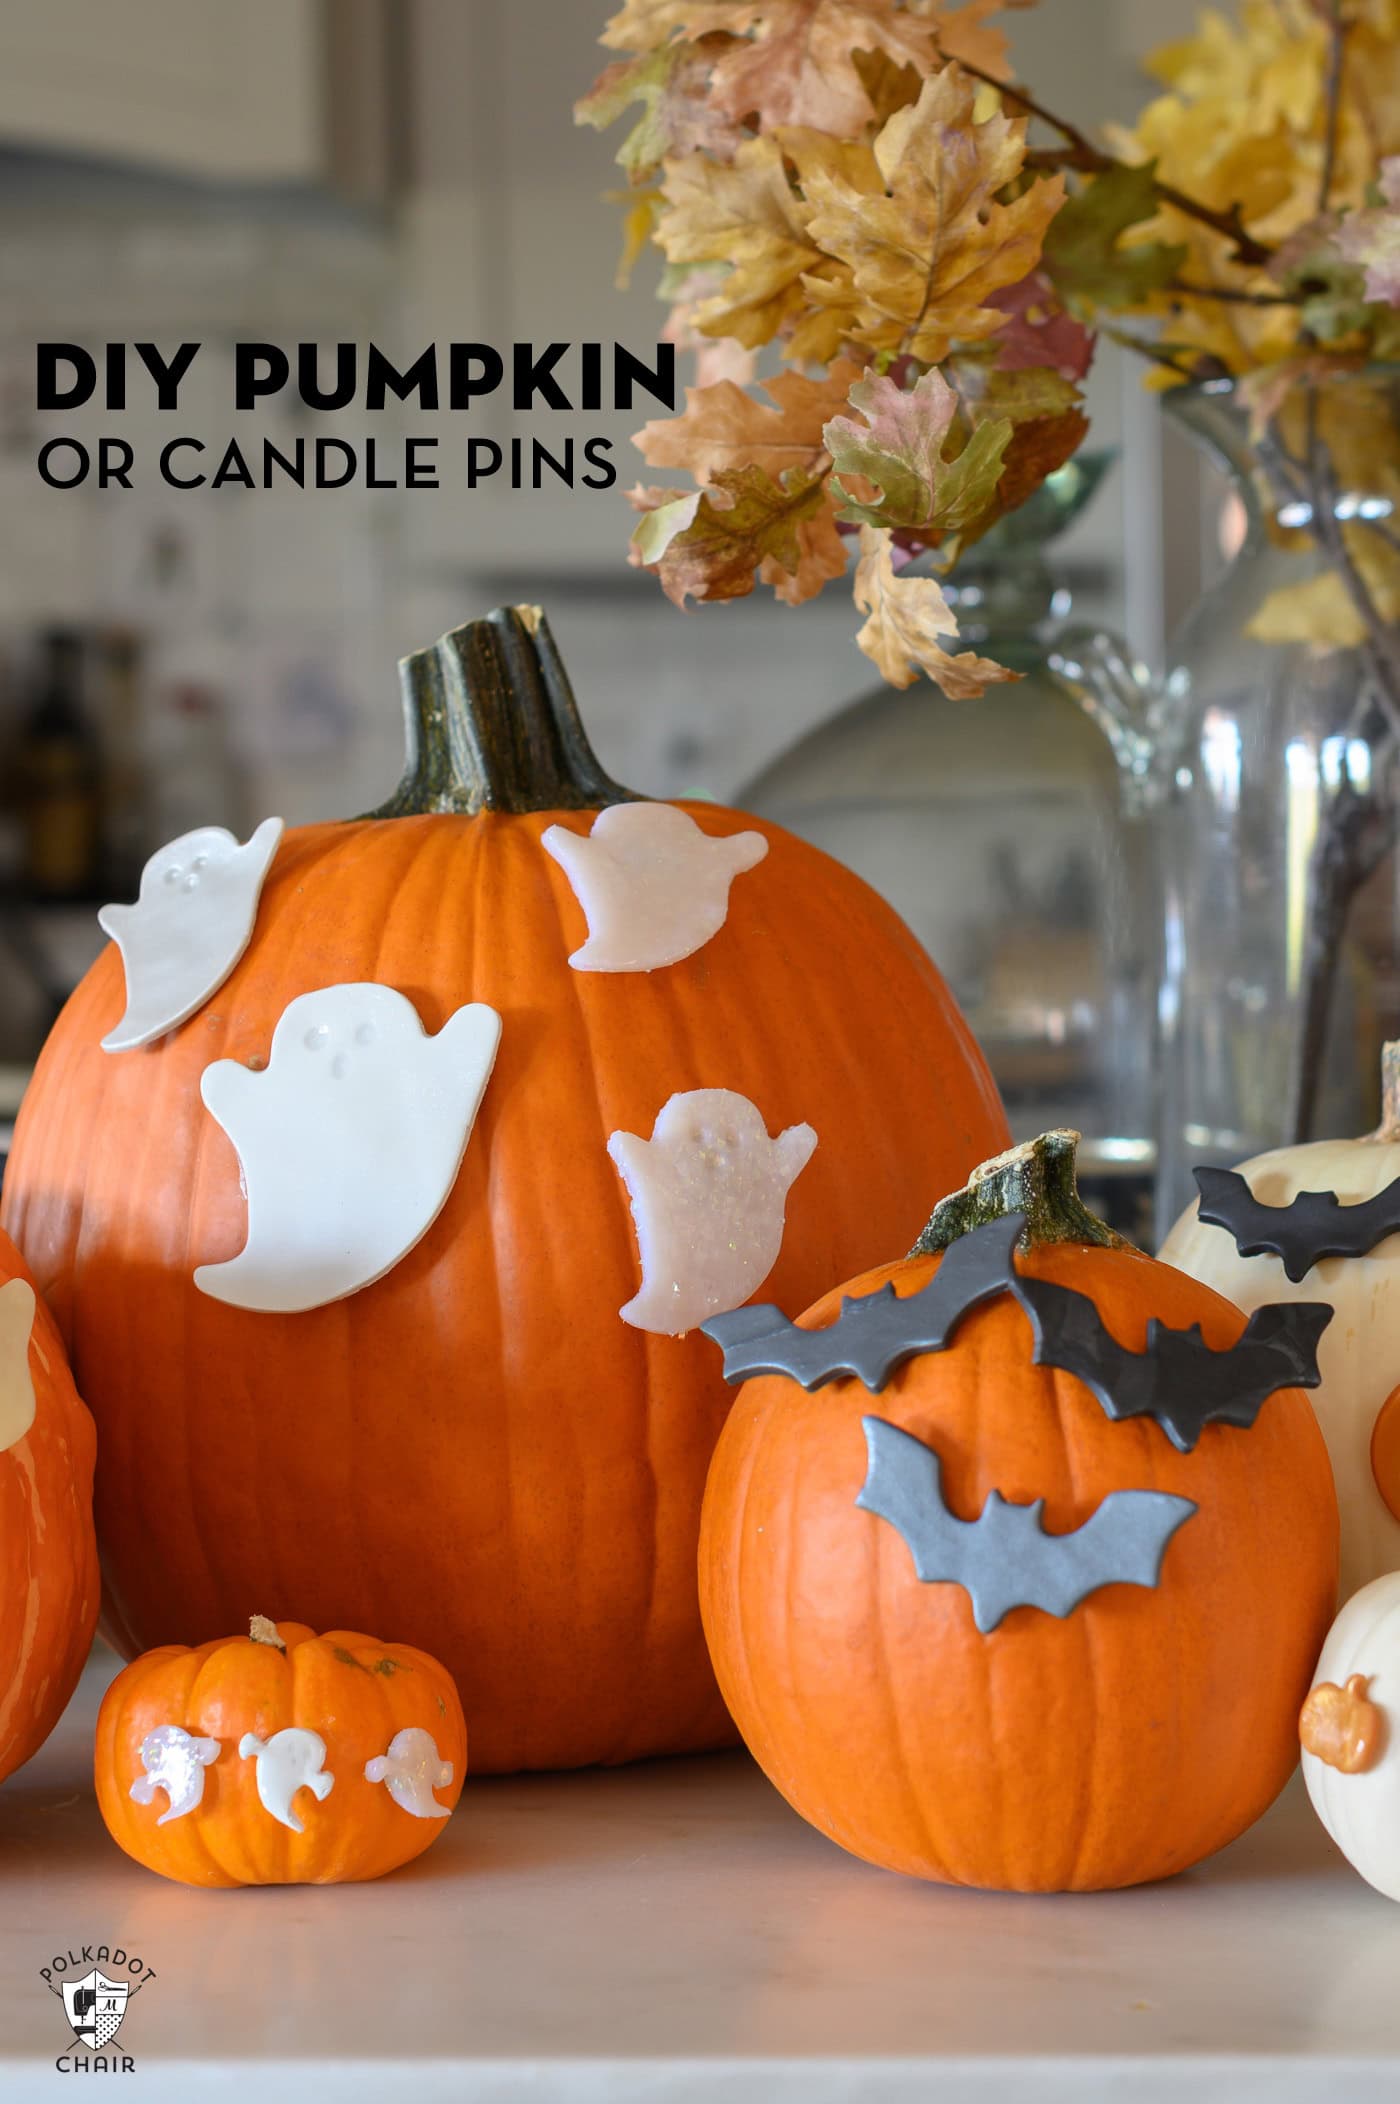
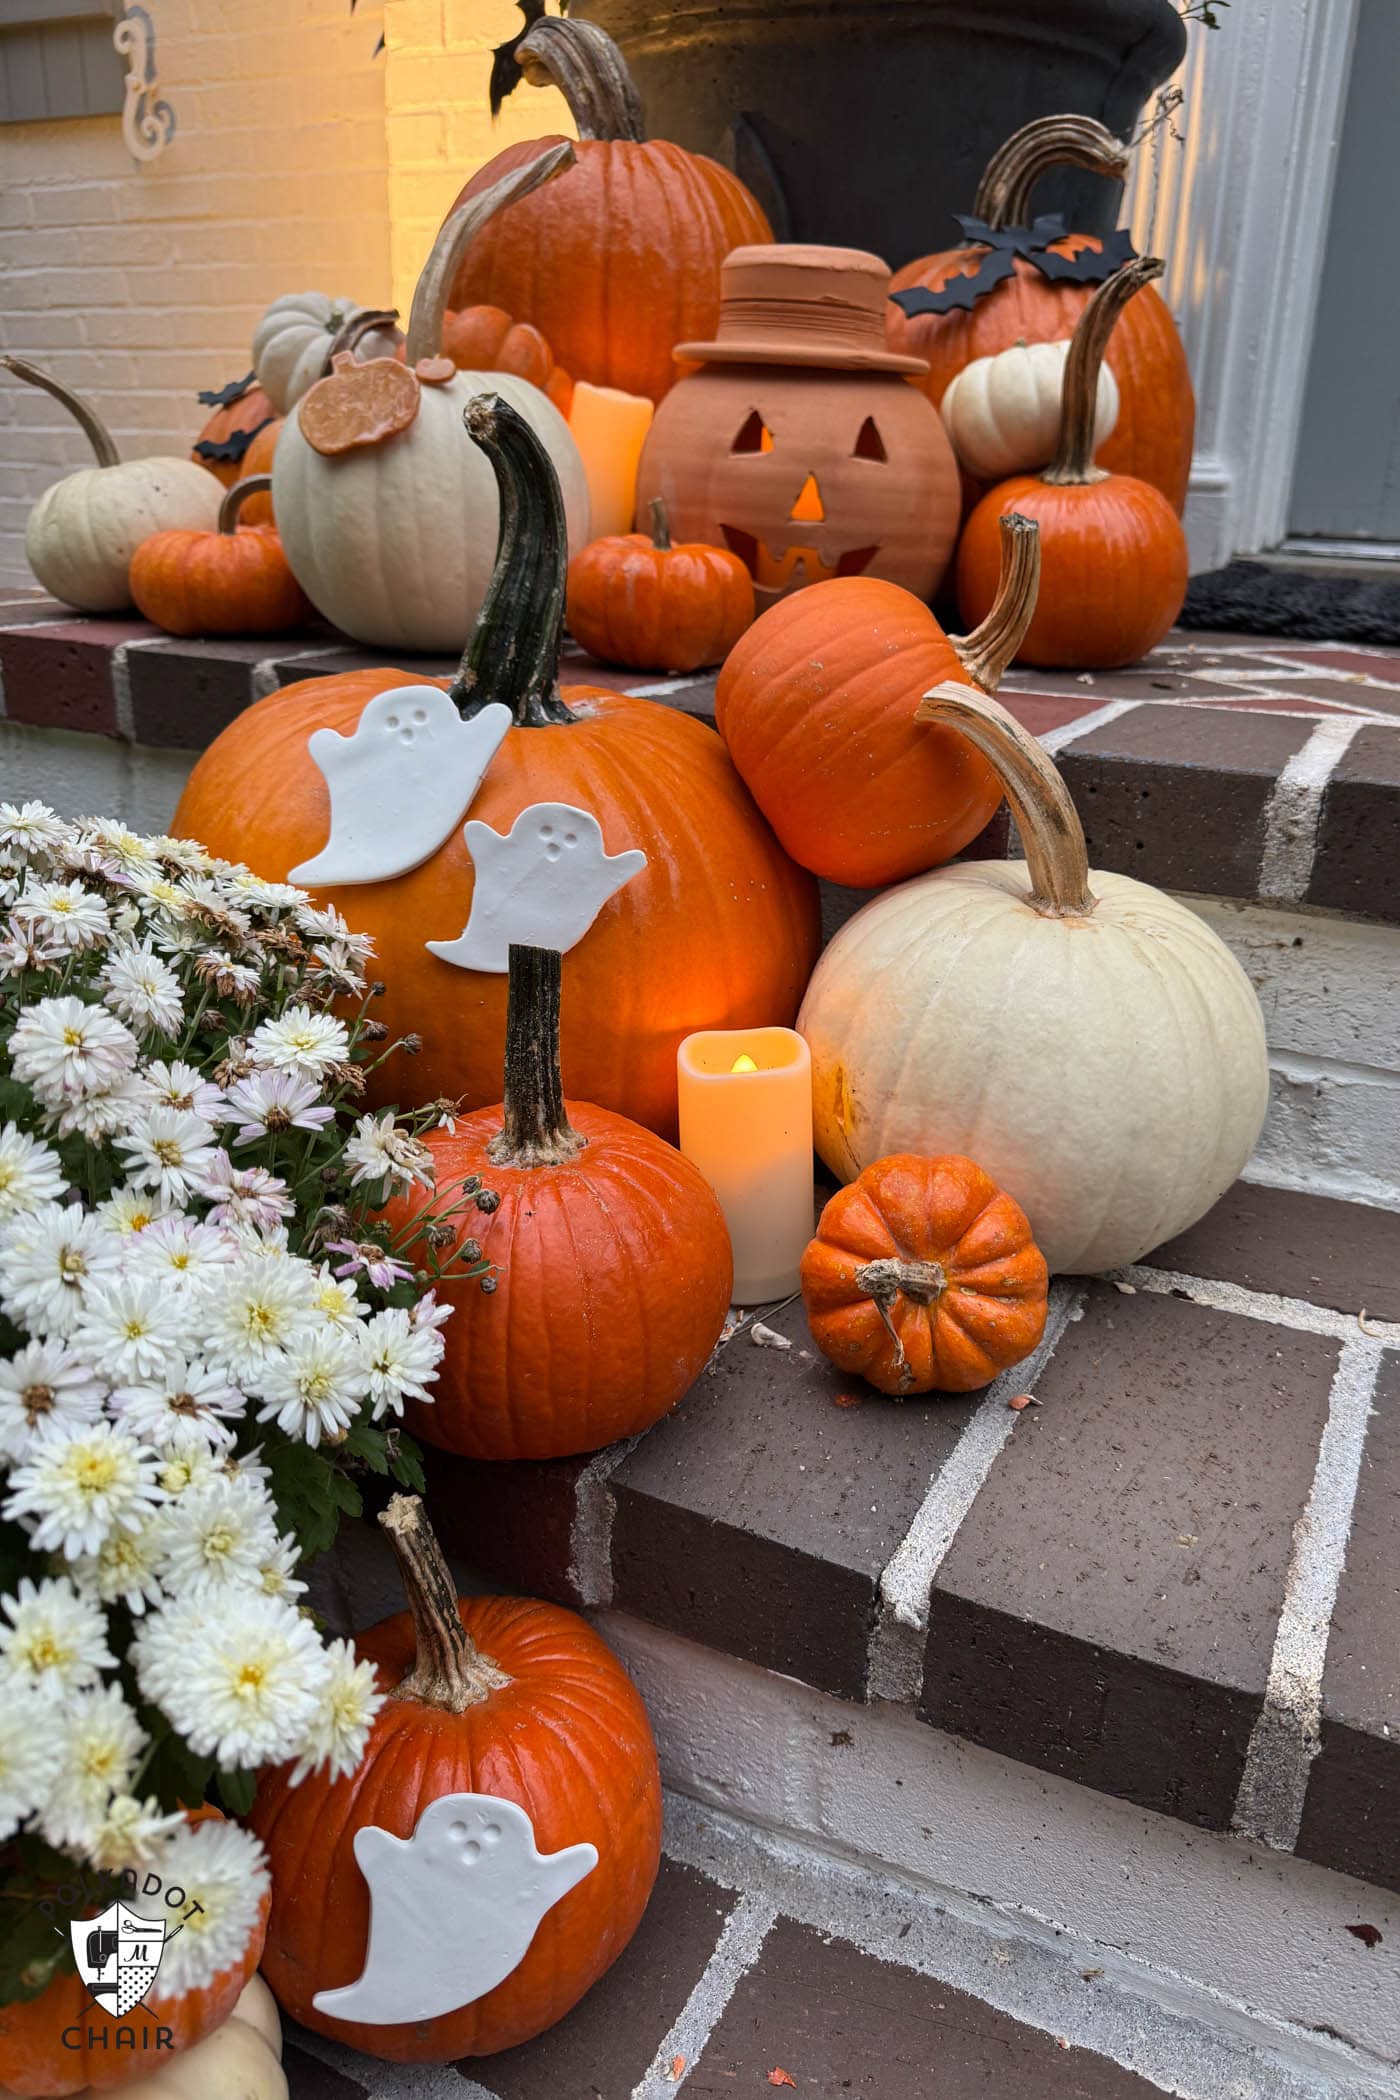
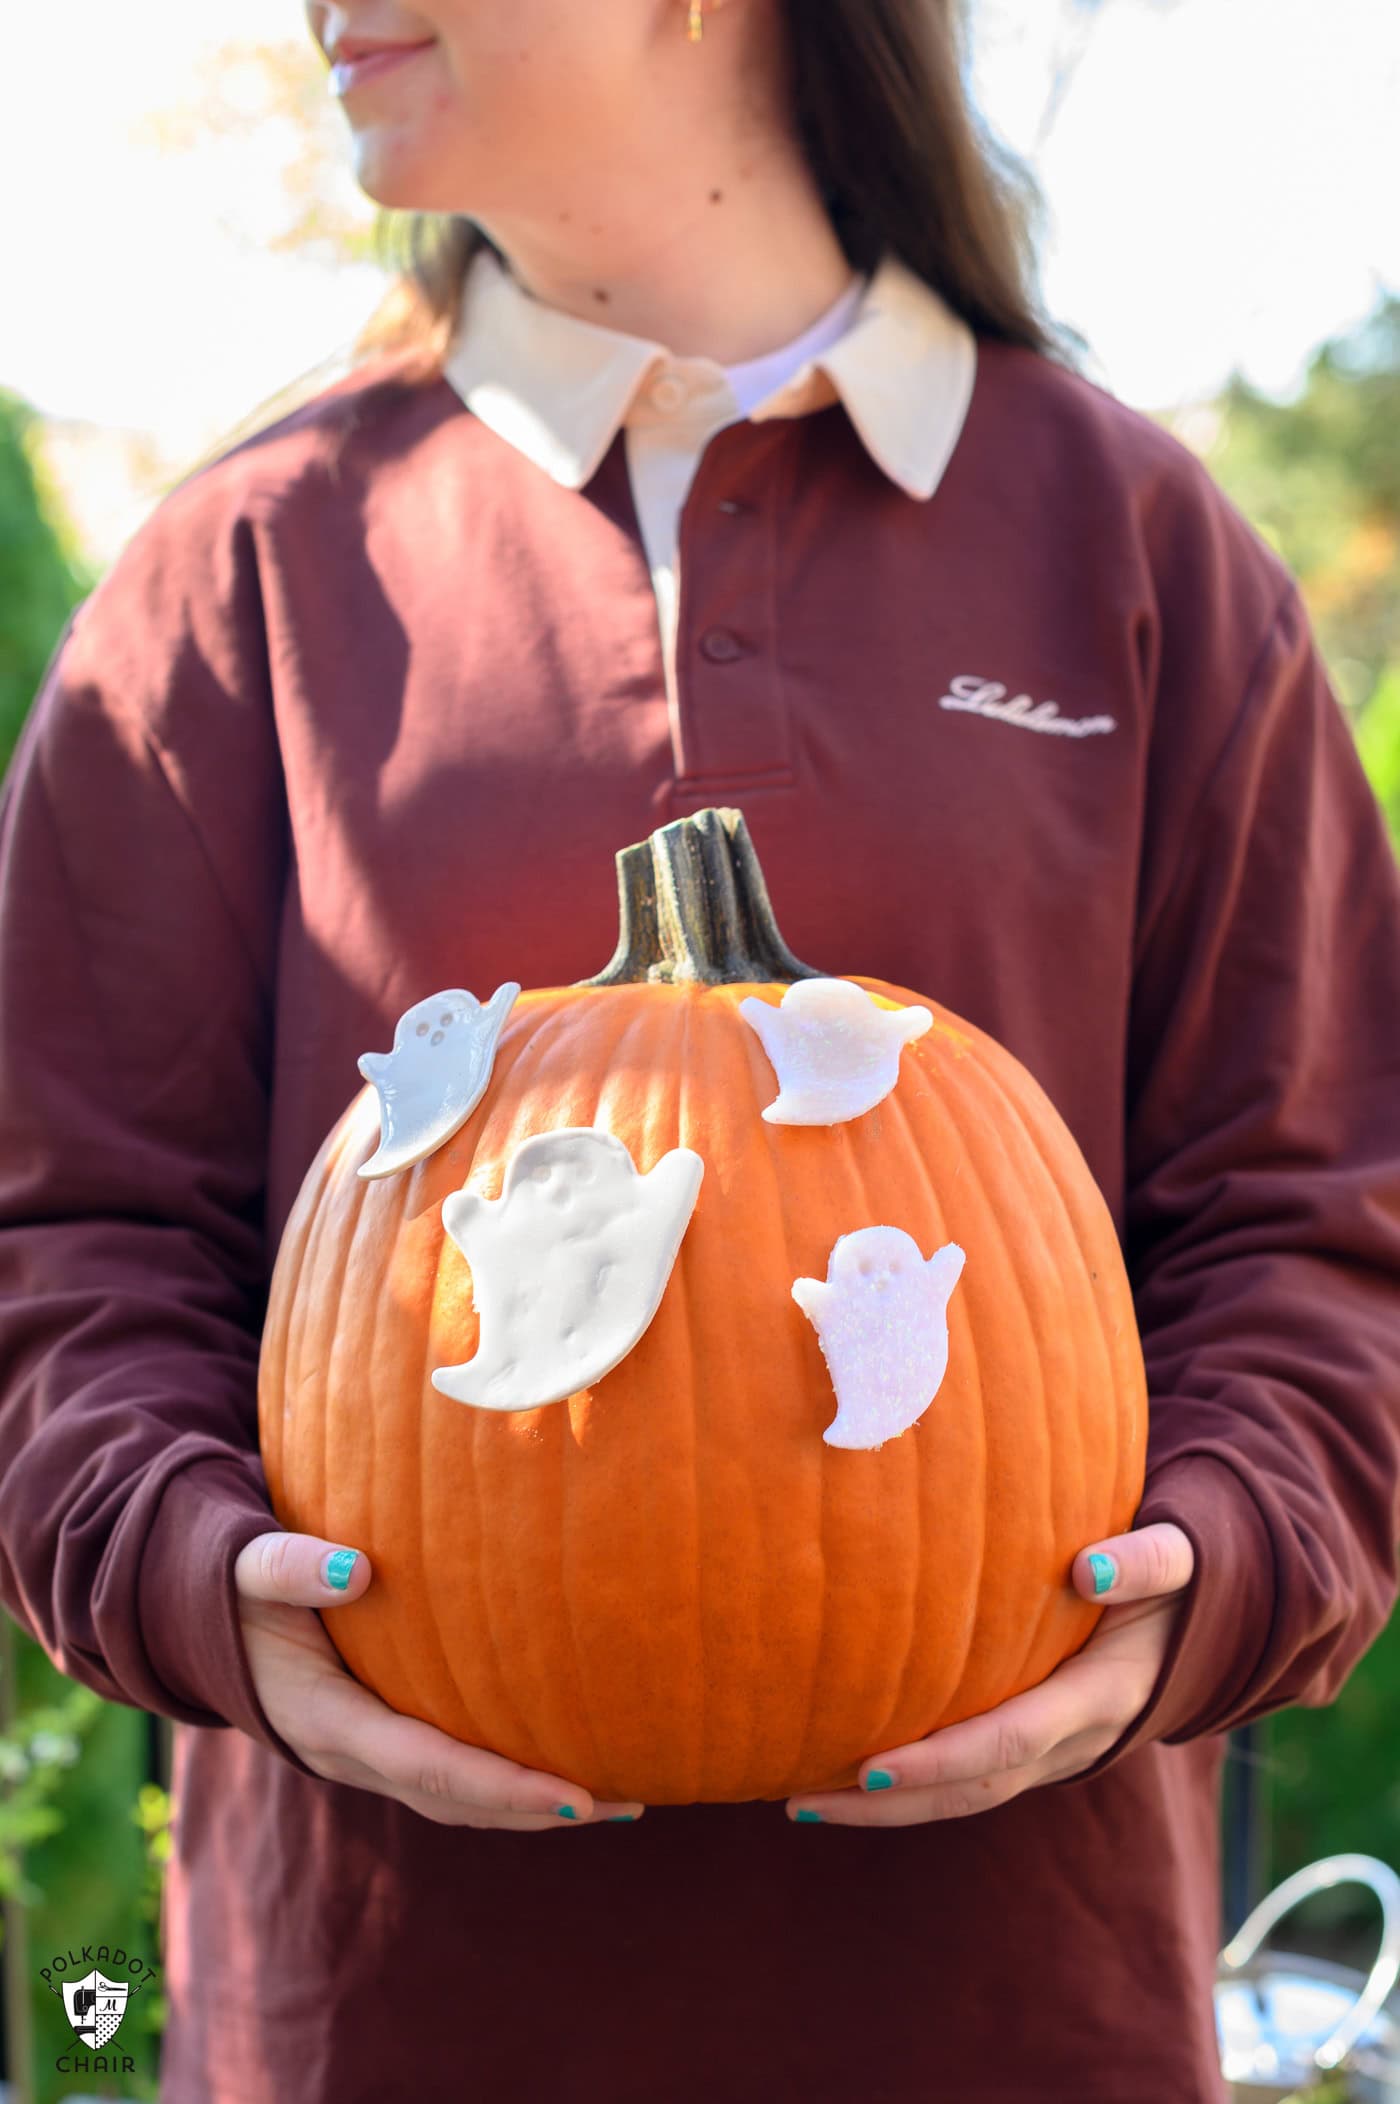
Carving pumpkins is a classic Halloween activity, but it can be messy and complicated. With these polymer clay pumpkin pins, you get all the fun of pumpkin decorating without any of the mess.
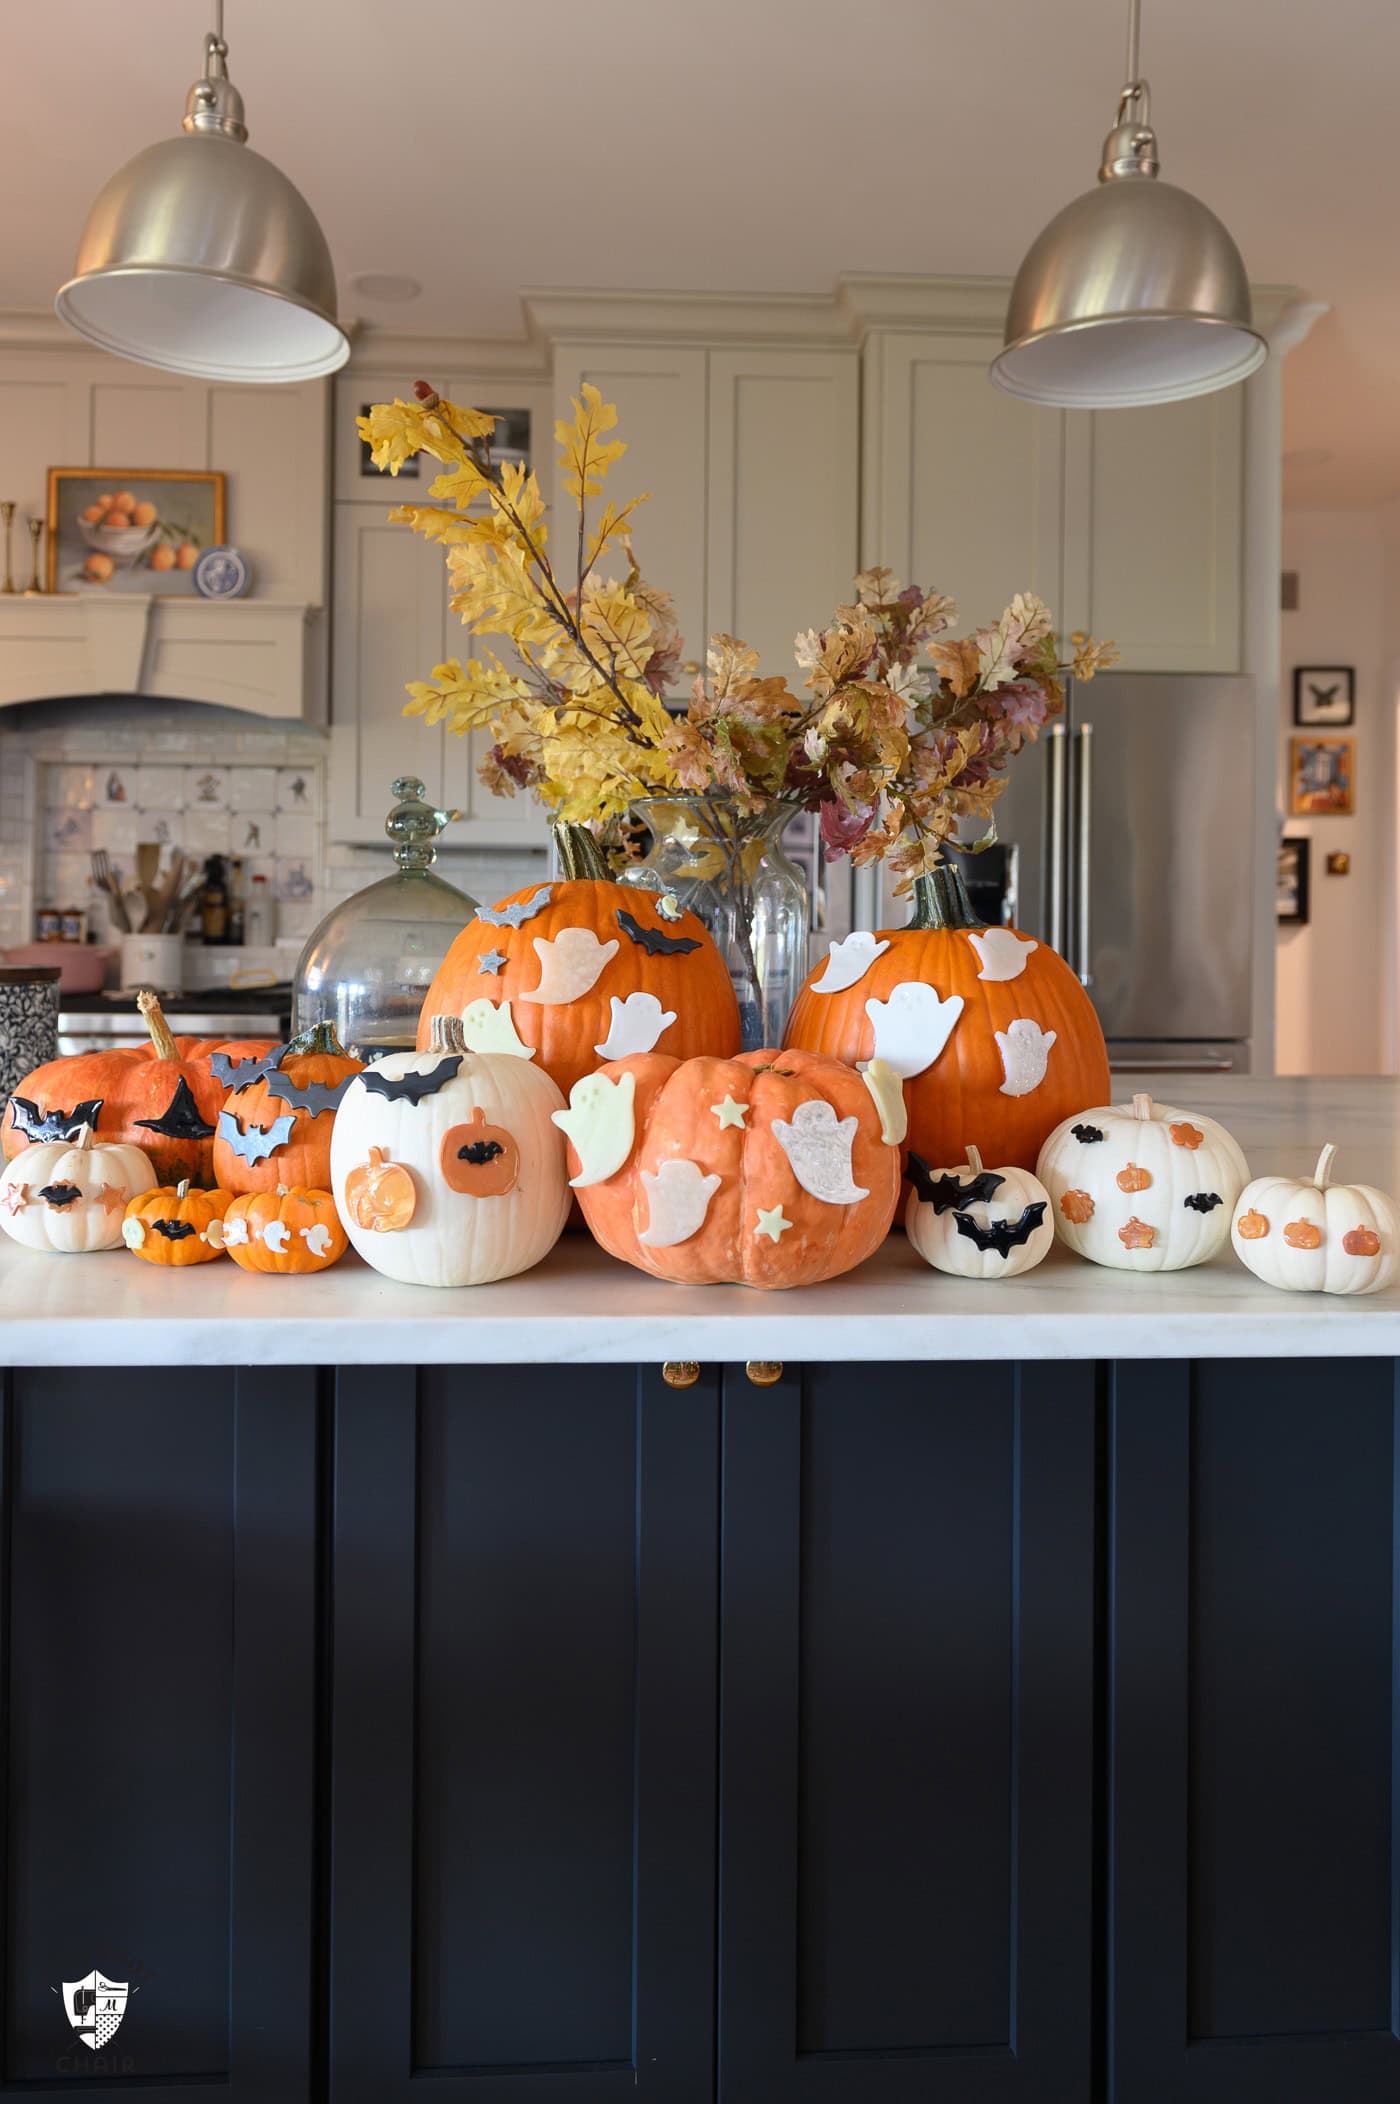
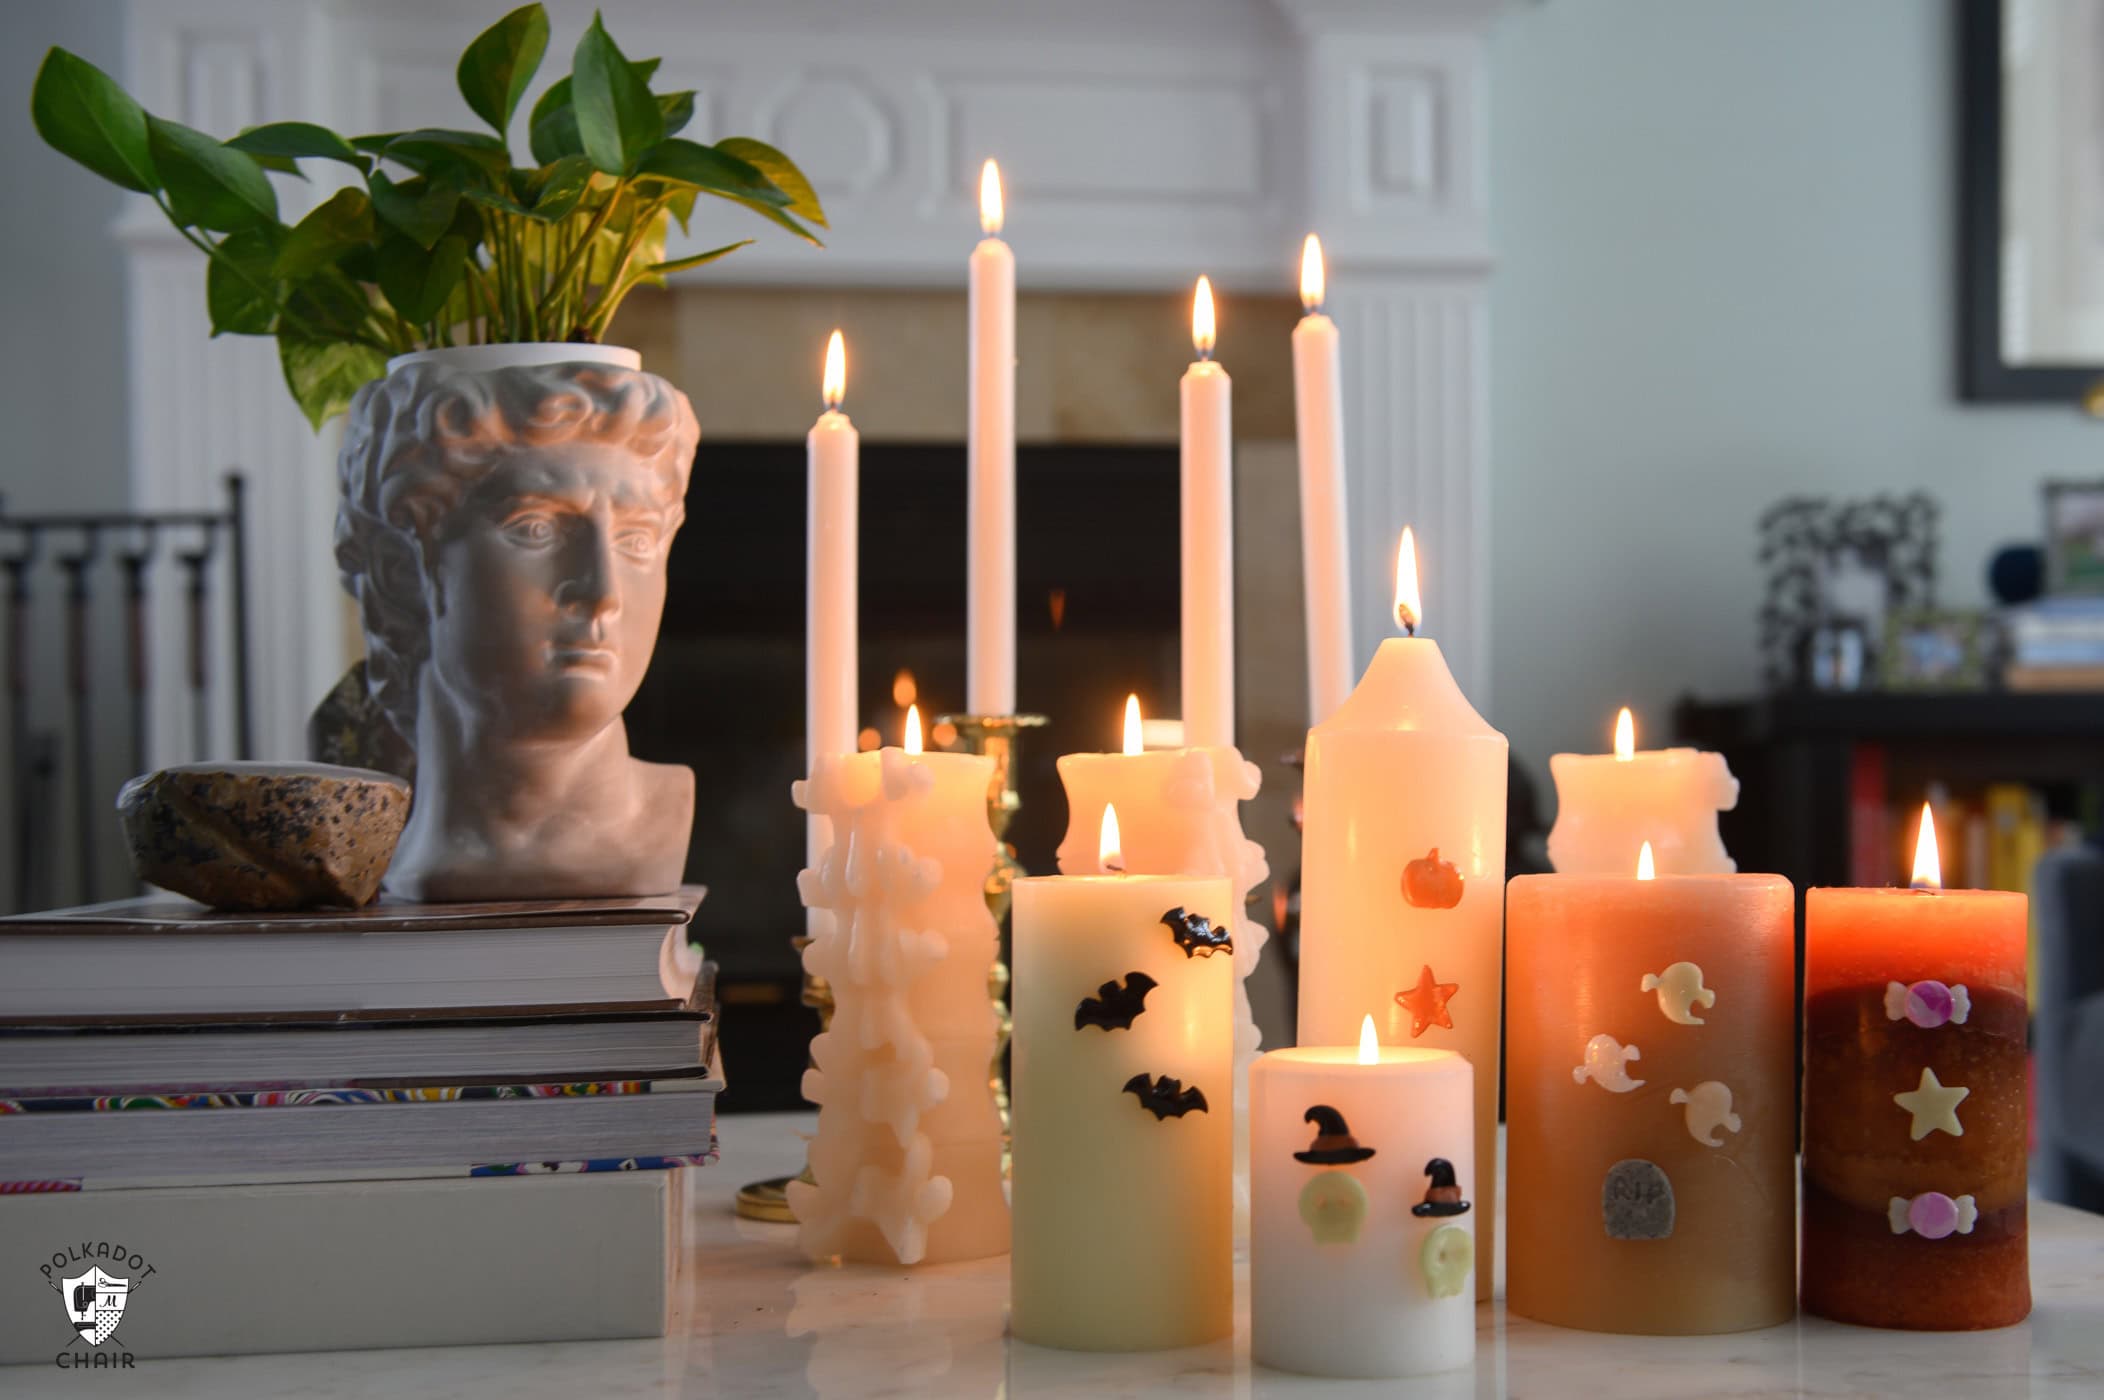
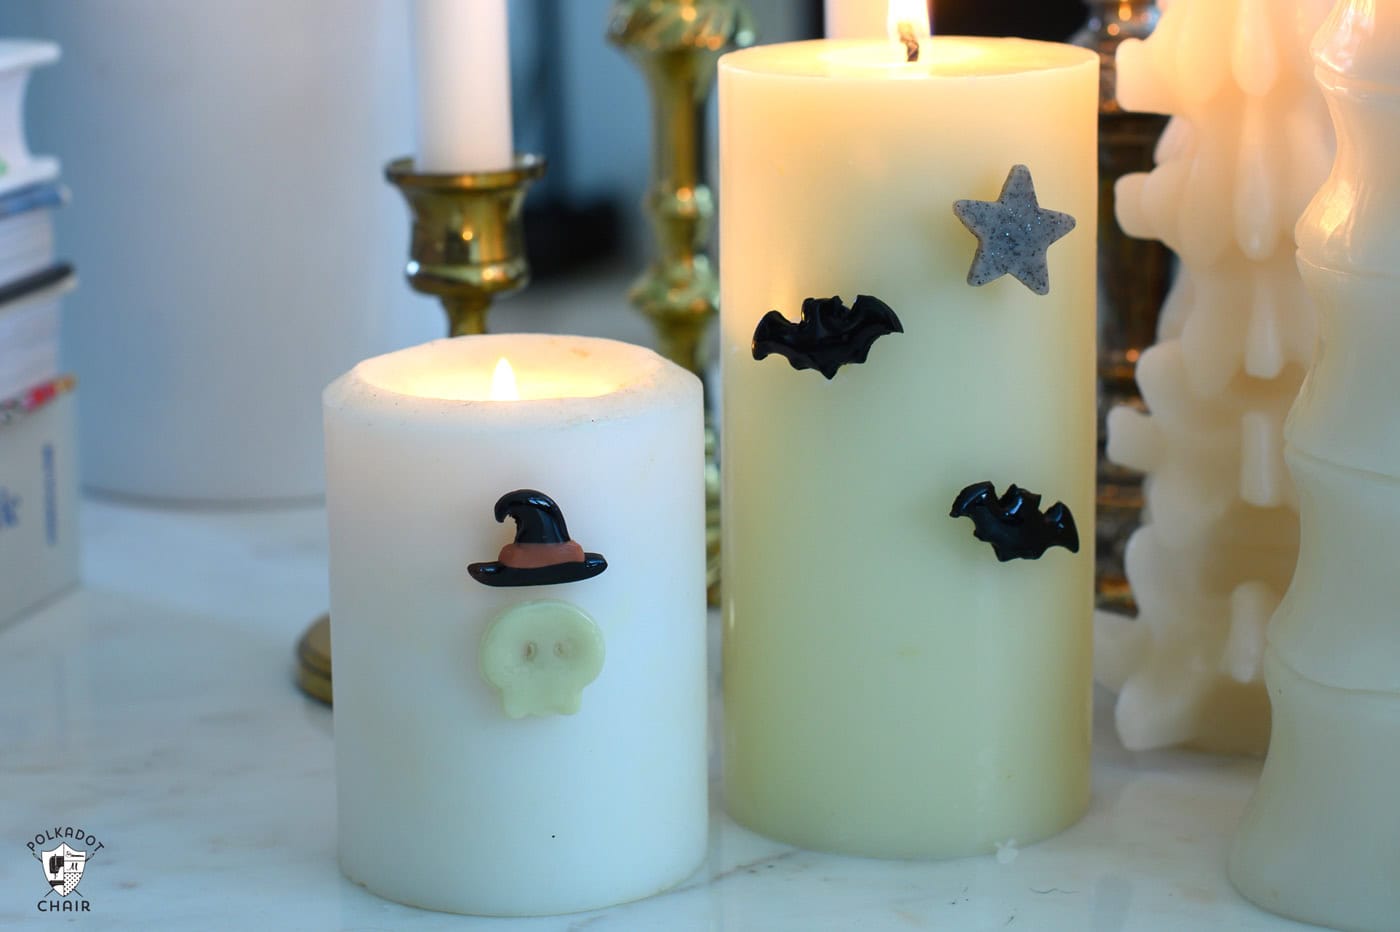
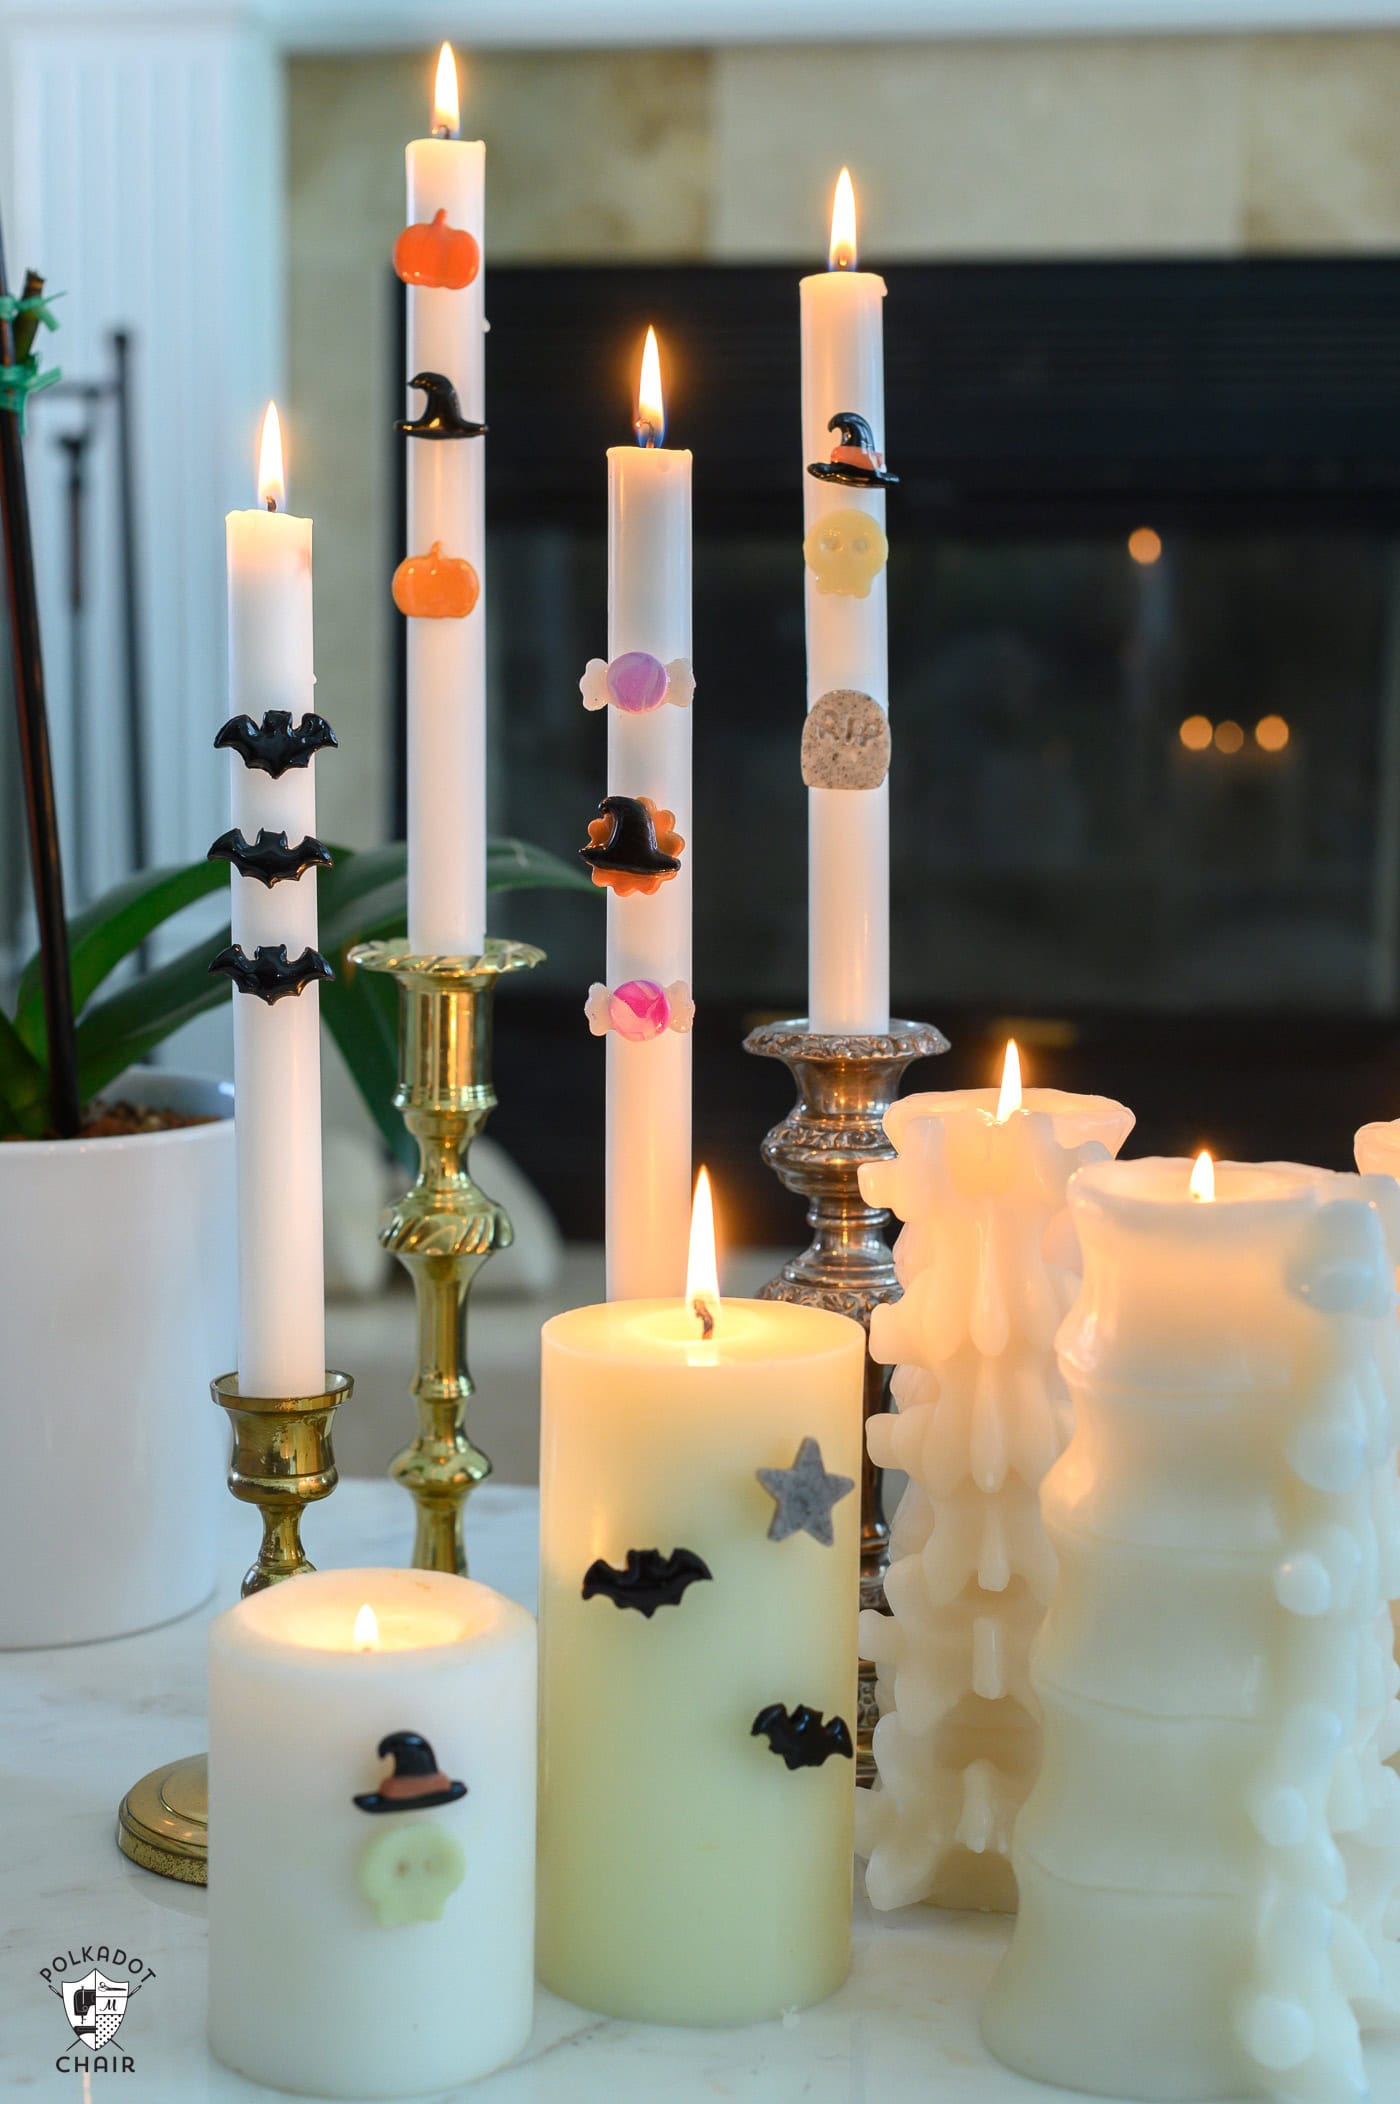
What is even better is that you can easily adapt this project to work for candle pins as well, creating fun and cohesive Halloween decor. Wouldn’t a bunch of these be adorable on a kitchen table decorated with floating candles above?
The great thing about this project is that, in addition to being easy to make, it is something you can use year after year.

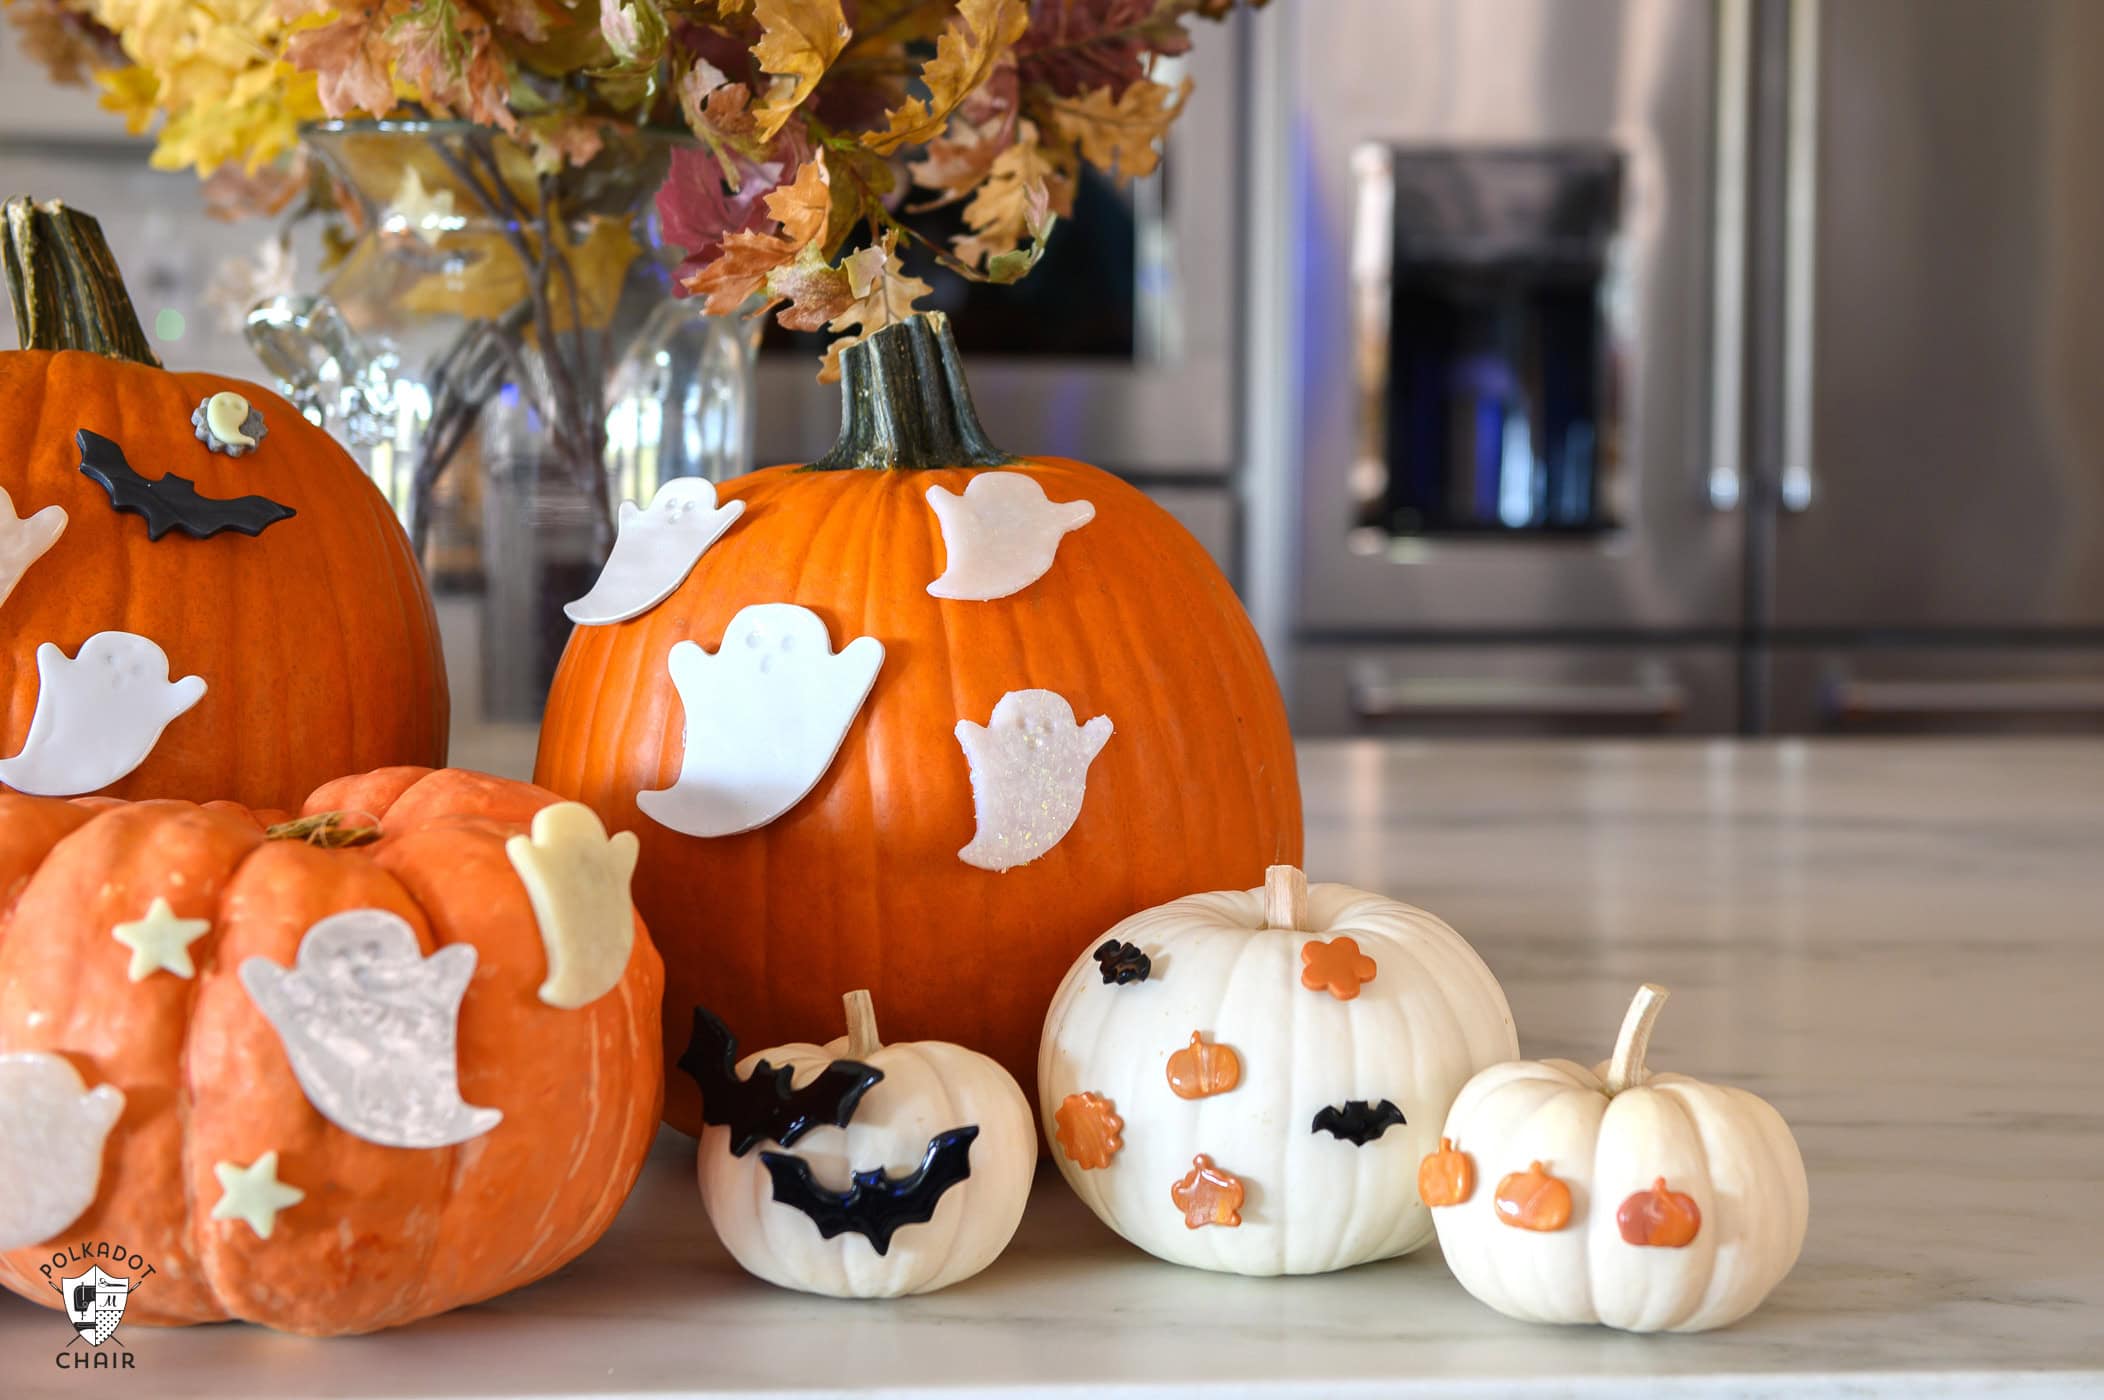
All you have to do is buy new pumpkins each season, or you could use this on plastic reusable pumpkins (you might need to poke a hole before inserting the pin if it isn’t sharp or thick enough).
Disclaimer:
This project involves the use of sharp pins and small parts that may pose a choking or injury hazard. These decorative pins are for adult use only and should be kept out of reach of children and pets. Always supervise crafting activities and use caution when handling sharp objects.

DIY Halloween Pumpkin and Candle Pins
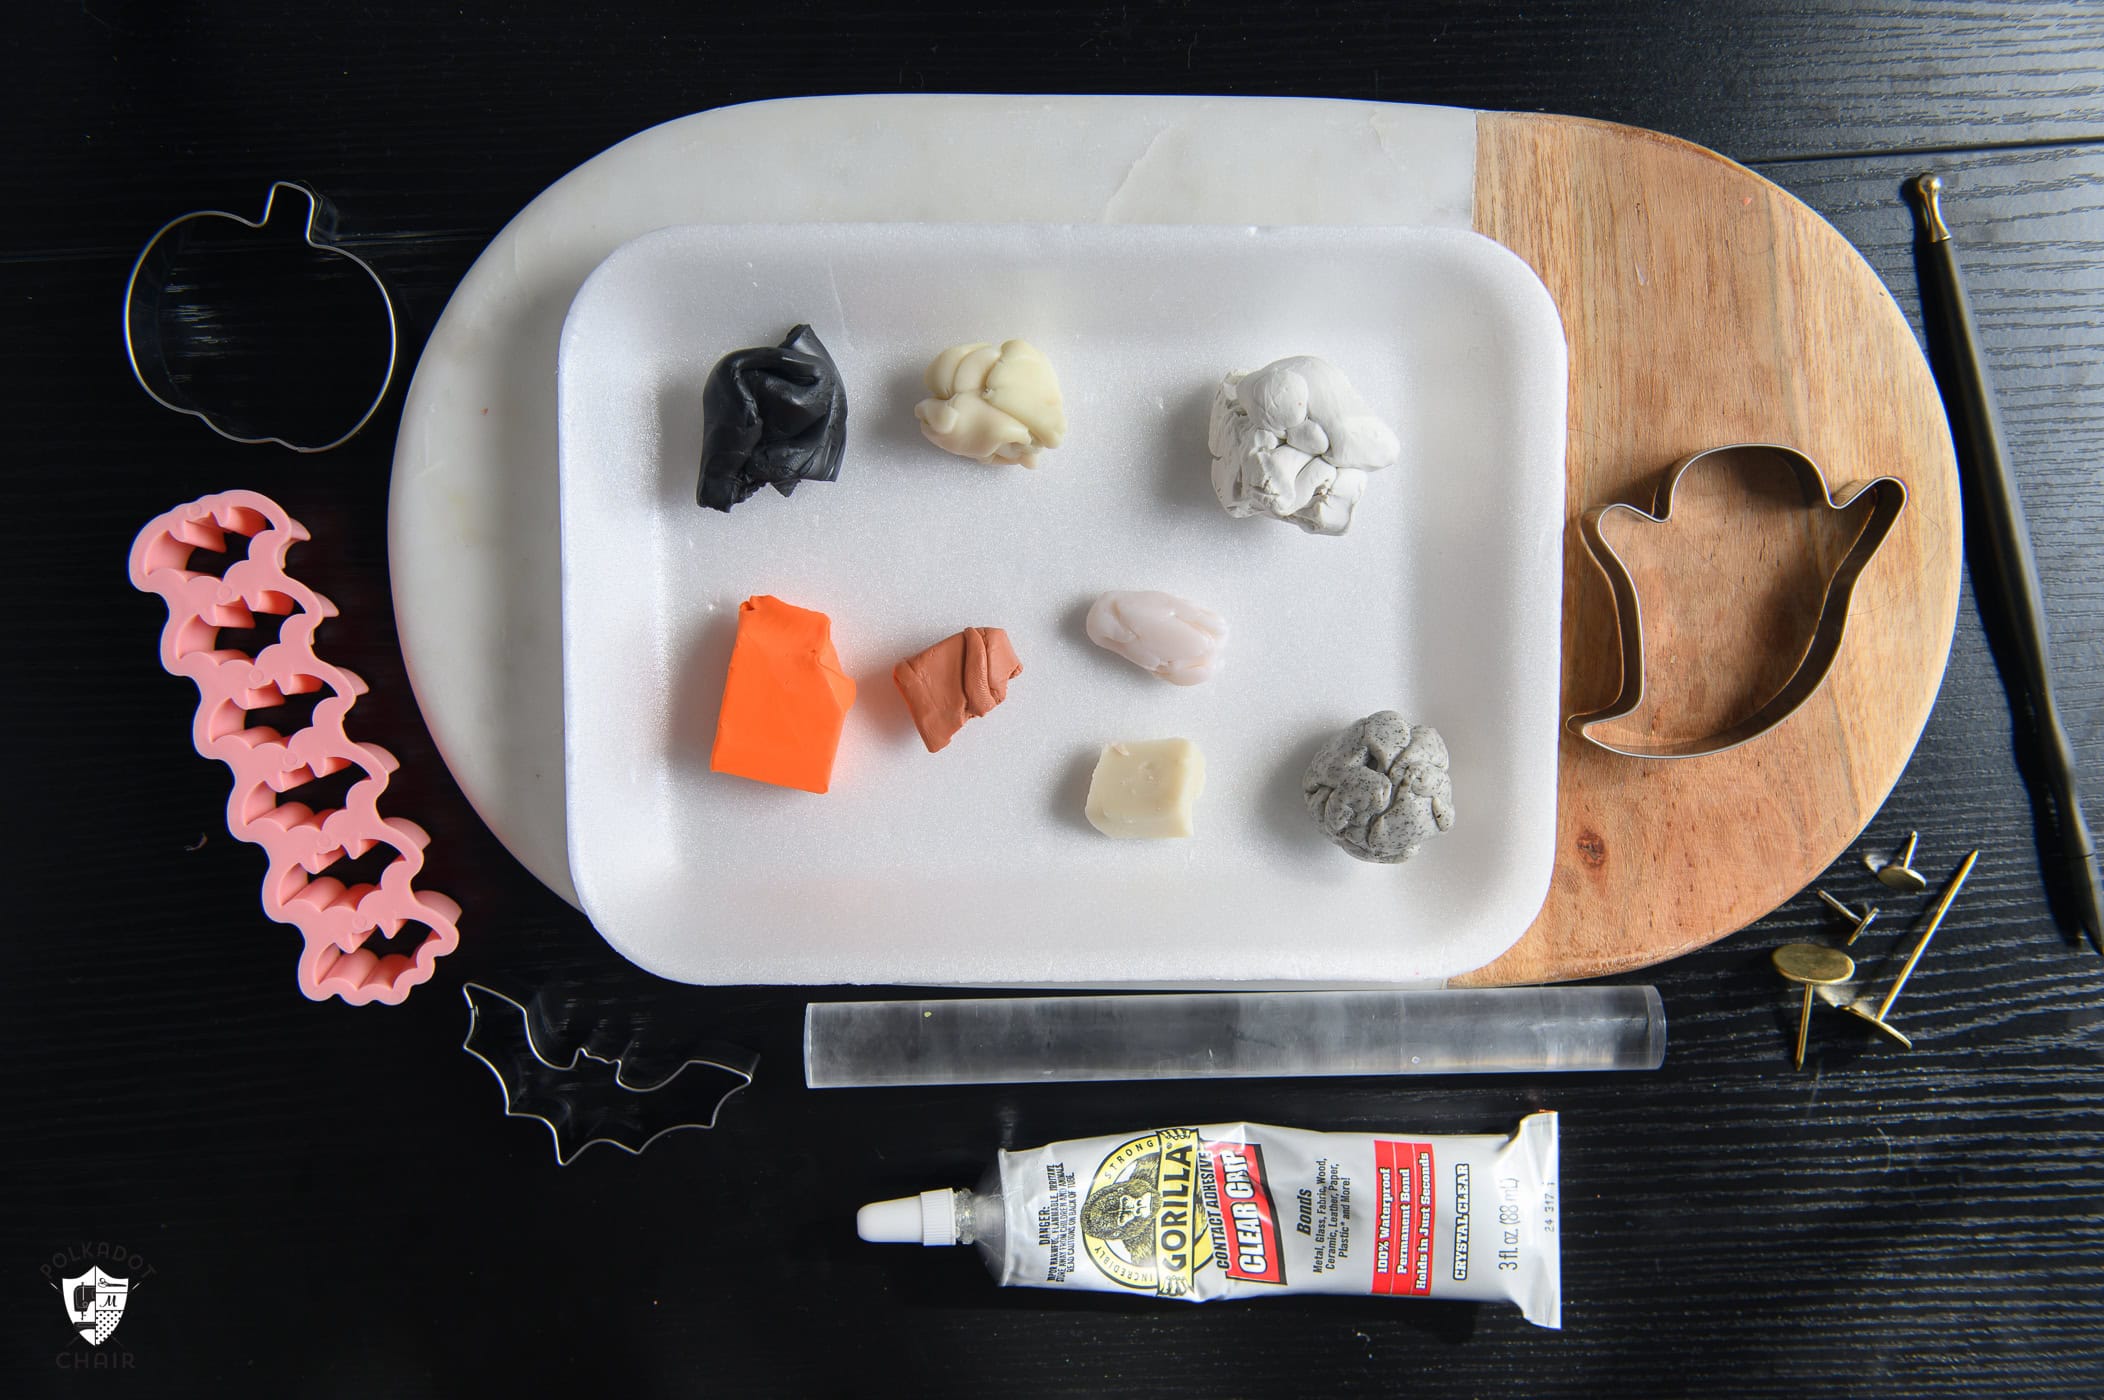
Equipment
- Halloween-shaped cookie cutters (variety of sizes is recommended, especially small ones for candles)
- Upholstery pins (pumpkins)
- UV light (optional)
supplies
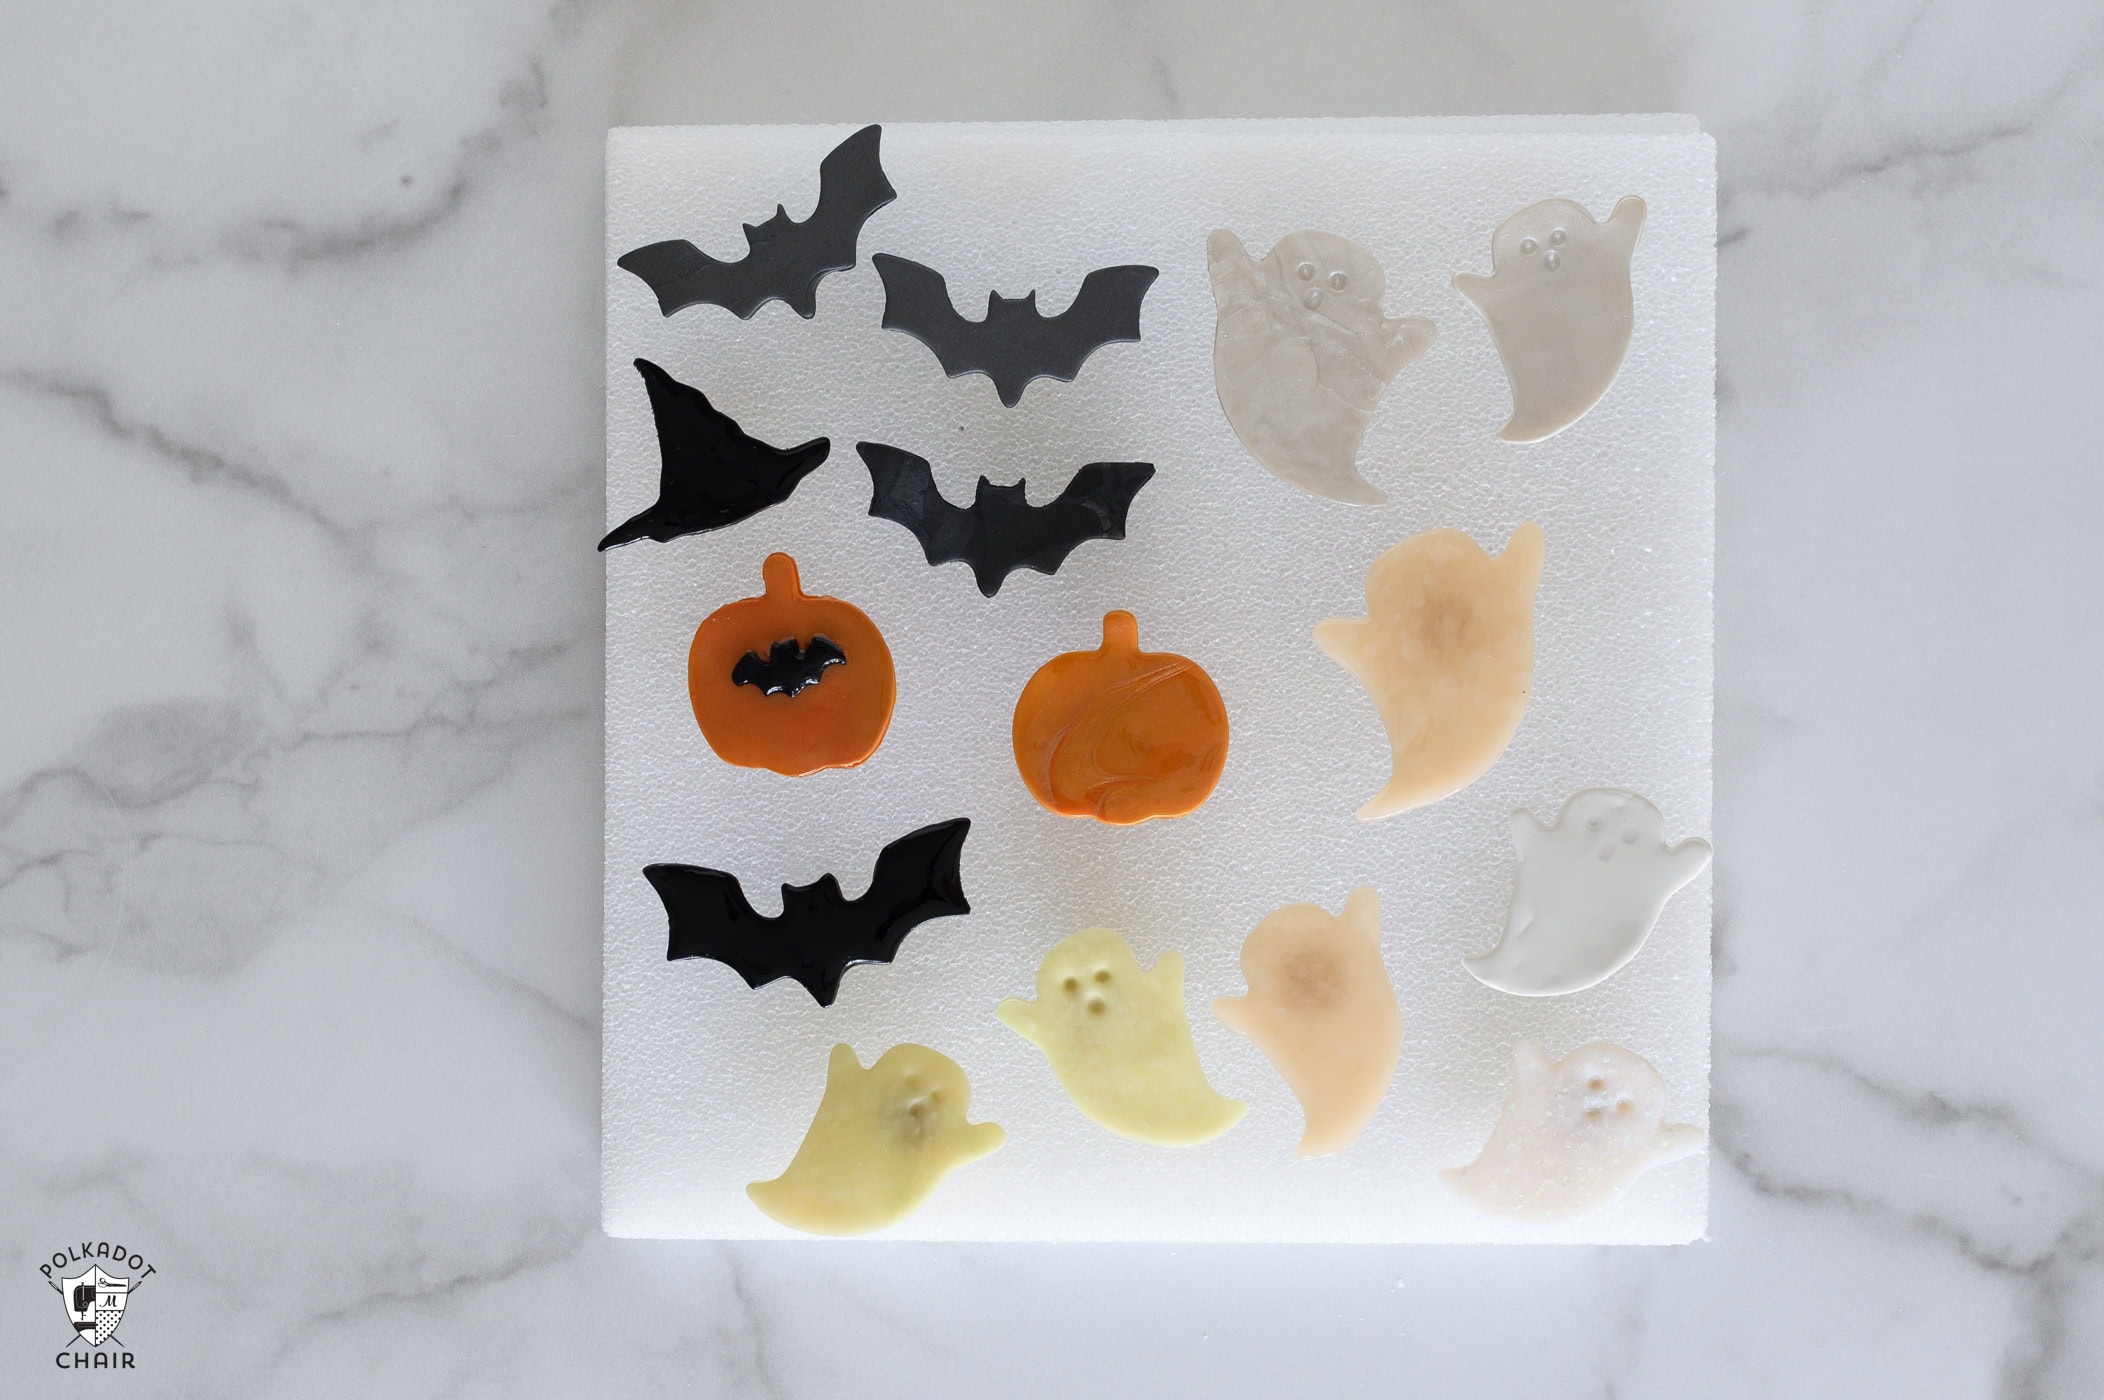
- Polymer clay in various colors glow-in-the-dark, sparkly, and translucent can be fun additions to basic colors like black, white, and orange.
- Flat stud earring backs candles
- Strong glue
- UV resin optional
- Pumpkin and/or Candles this works for taper or pillar candles
Instructions
Step 1: Prep
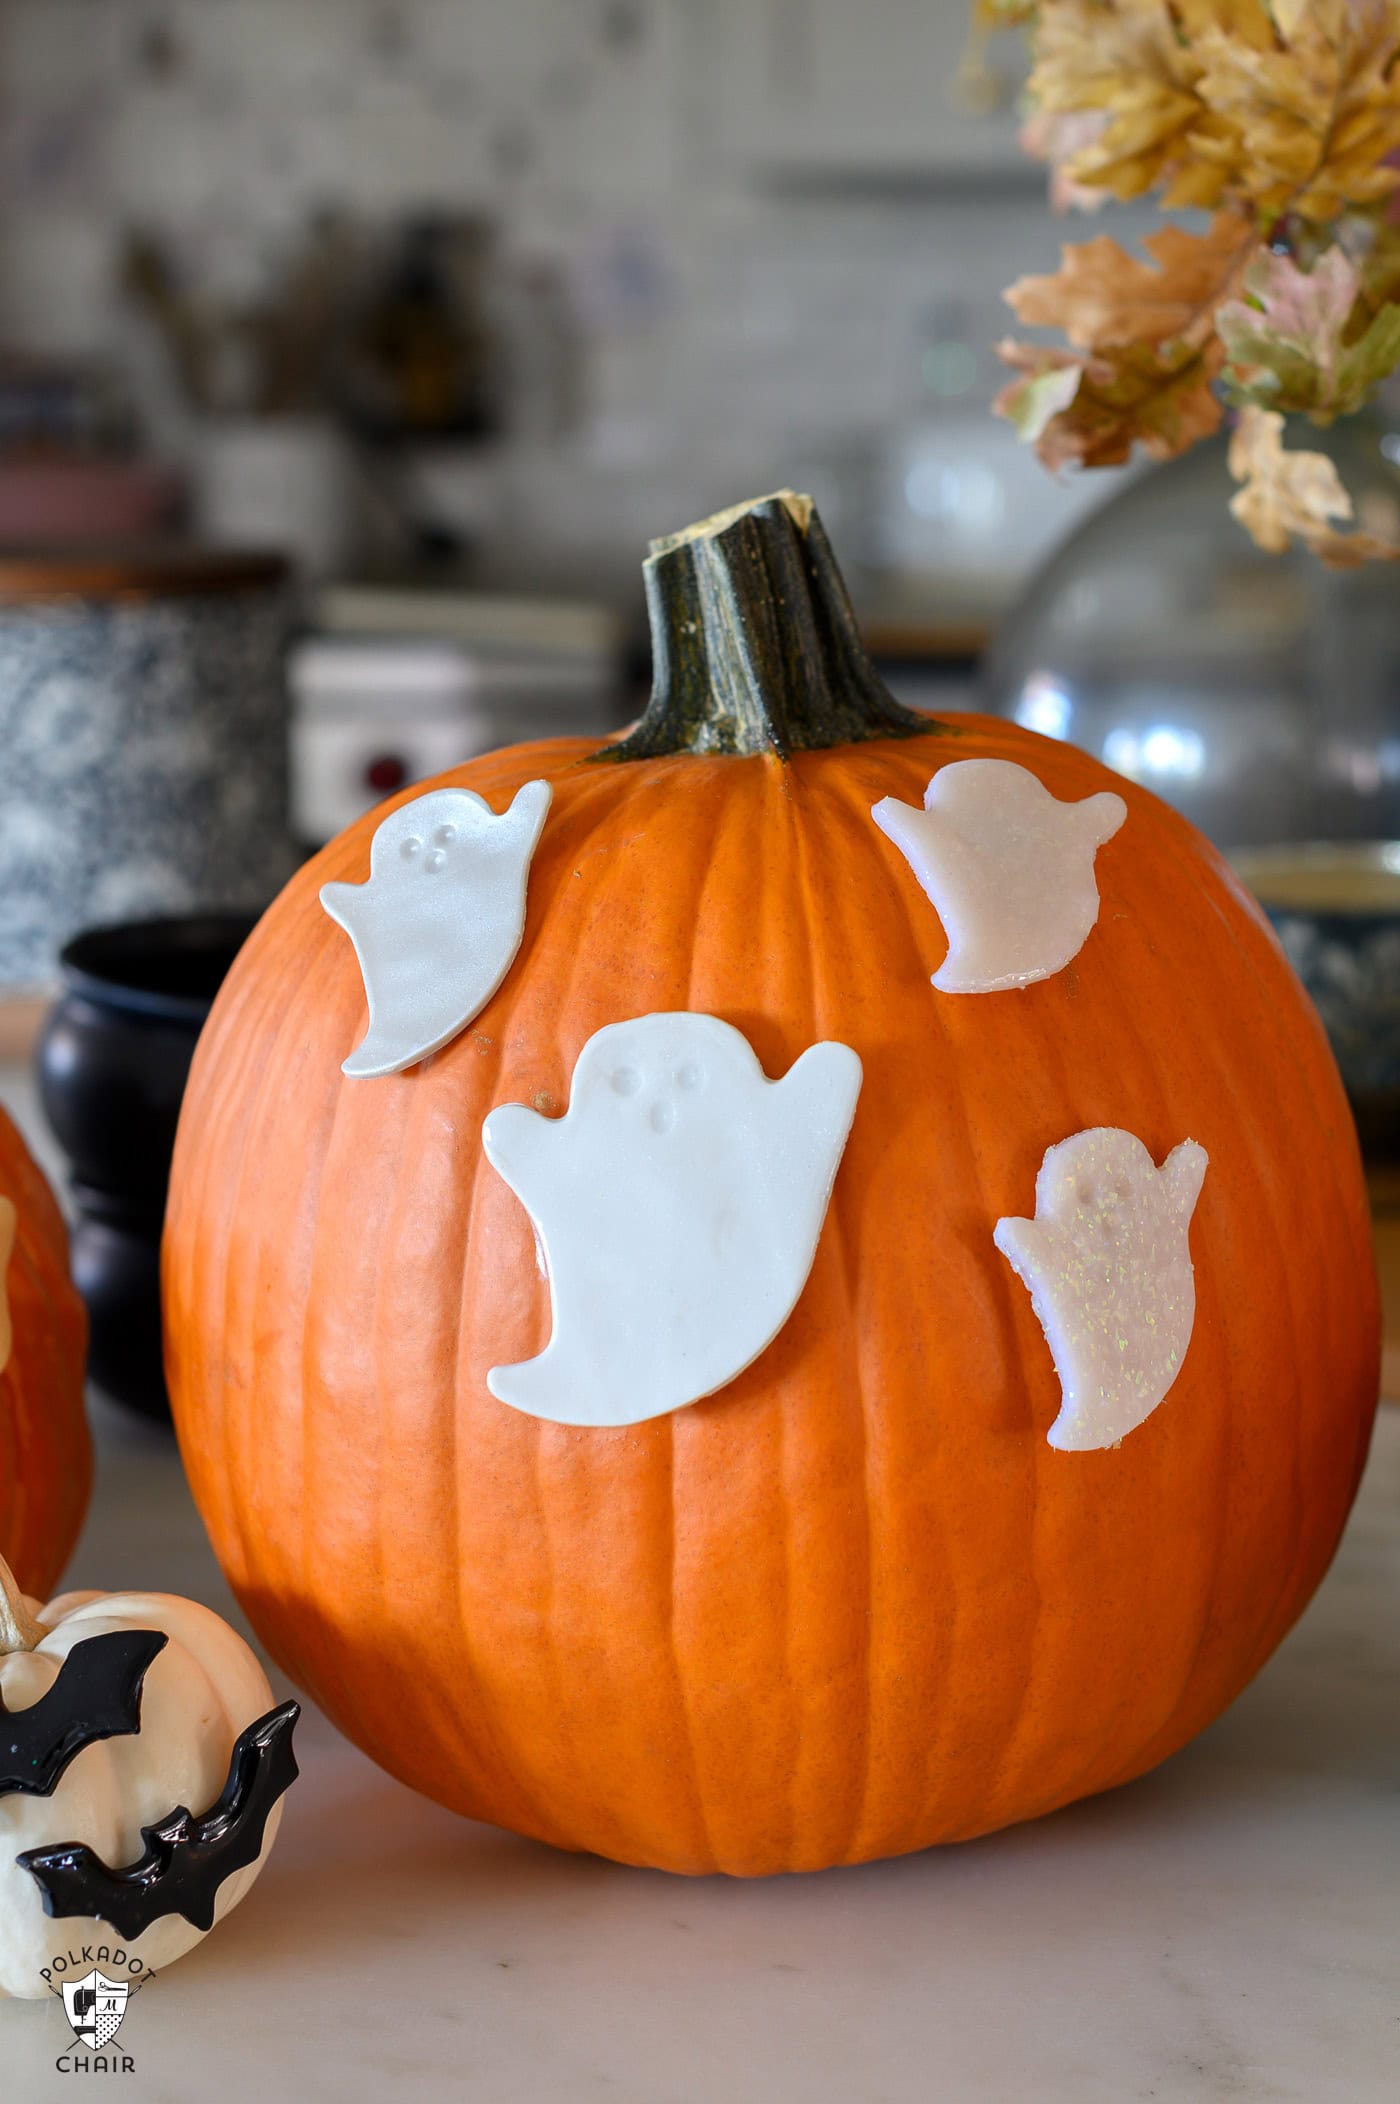
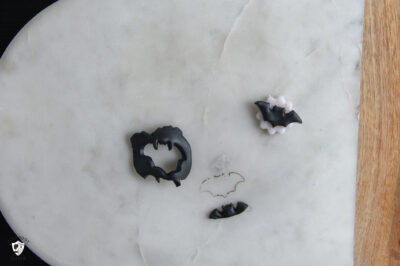
- To start, select your polymer clay color and the corresponding cookie cutter. For example, if you want to make a bat, you might want to start with black. Or, if you want a ghost, a white glow-in-the-dark, or glitter, these are fun options.

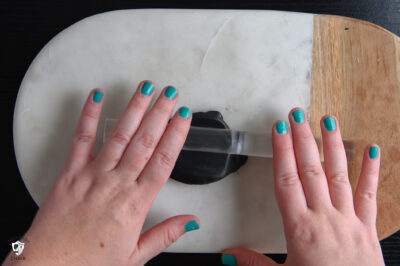
Step 2: Roll Out Clay
- Rolling out your clay thickness for this project is largely a matter of personal preference, but I tend to use about a ¼-inch thickness with my polymer clay.
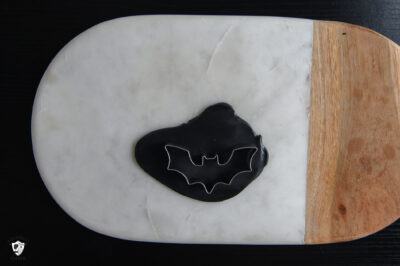
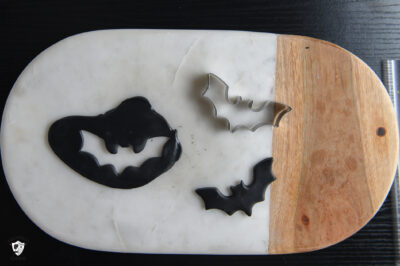
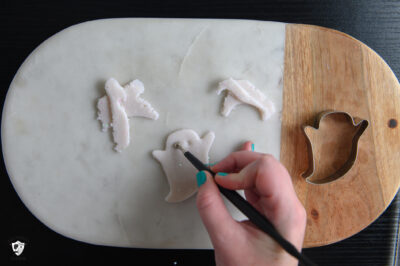
Step 3: Cut out Shapes
- Take your cookie cutter and cut out the clay. If you can get multiple cuts from your rolled-out slab of clay, I recommend doing so, so you don’t have to repeat step 2 more than necessary.
- Helpful tip: If you don’t get a super clean cut from the cookie cutter, use your finger to smooth out the edges and create a more uniform look.
- To add extra dimension to your pins, you can layer your clay cutouts on top of each other or use polymer clay tools to add texture and fine details.
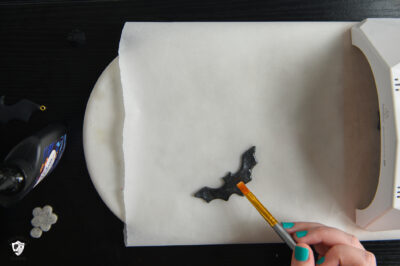
Step 4: Bake
- Cut out as many pieces as you like, repeating steps 1-3 until you have enough pieces. Place all of your cut-out pieces of clay on a cookie sheet. Then bake the clay according to the directions on the clay packaging.
Step 5: UV Coat
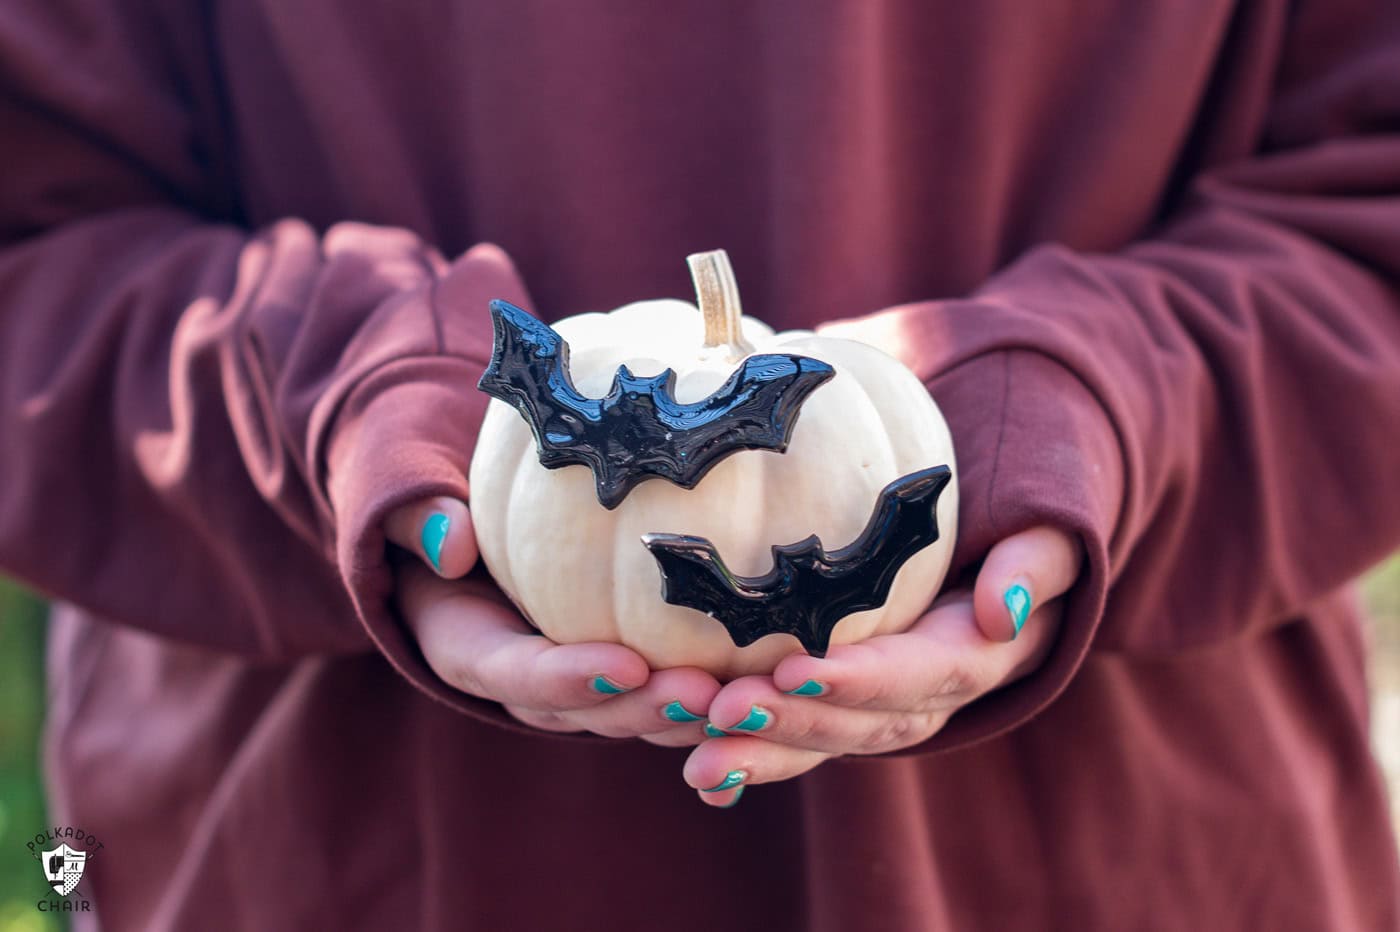
- Once your clay pieces have been baked and cooled, you can add an extra layer of shine by coating the tops with UV resin. To do this, simply apply the UV resin to the top of the cut-out clay piece, then cure it under UV light. This step is optional; however, if you prefer a satin or matte look, I recommend skipping it.
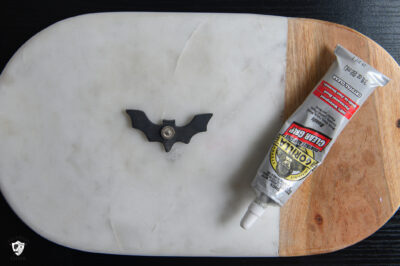
Step 6: Add Pins
- Take your glue and glue the pins to the back of the cut-out clay. If you opt for candle pins, I used flat-head earring studs (the same type you would use to make your own earrings).
- For pumpkins, you’ll want something sturdier. Upholstery pins worked well and come in several sizes and lengths. For mini pumpkins, I liked these smaller ones, and longer pins, like this, can be great for bigger/thicker pumpkins.
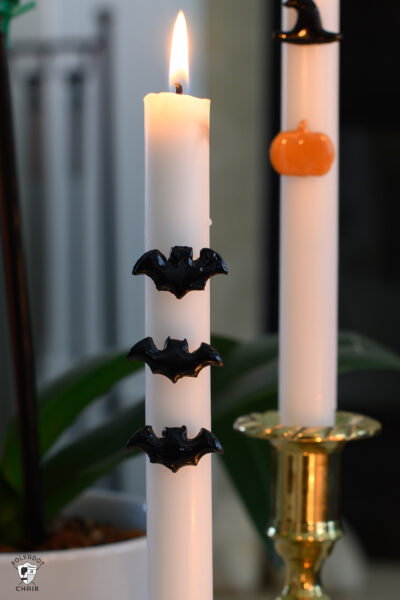
Step 7: Decorate!
- Once the glue has dried, your pins are ready for your pumpkins and candles! Simply place them where you want, and using light pressure in the center of the pin, press the piece into your candle or pumpkin for some adorable DIY Halloween decorations. The design arrangements are endless, so have fun with it!

If you loved this simple DIY Halloween pumpkin enhancement, you might also like these DIY Halloween decoration ideas.