• Skip to primary navigation
  • Skip to main content
  • Skip to primary sidebar

The Polka Dot Chair logo

  • SEWING
    • Free Sewing Patterns
    • Bag Patterns
    • Costumes
    • Apparel
    • Learn to Sew
    • Beginner Friendly
    • Embroidery Projects
    • Tips & Techniques
    • All Sewing
  • QUILTING
    • Quilt Blocks
    • Learn to Quilt
    • Free Patterns
    • Quilt Patterns
    • All Quilting
  • CRAFTS
    • Disney
    • Cricut
    • Printables
    • All Crafts
  • HOLIDAYS
    • Seasonal Projects
    • Valentine’s Day
    • Easter
    • 4th of July
    • Halloween
    • Thanksgiving
    • Christmas
    • All Holidays
  • TUTORIALS
  • ABOUT
    • About Me
    • My Fabric Collections
    • Published Books
    • Press
    • FAQ’s
    • Contact
  • SUBSCRIBE
  • SHOP
menu icon
go to homepage
  • SHOP
  • TUTORIALS
  • SEWING
  • QUILTING
  • SUBSCRIBE
  • CRAFTS
  • HOLIDAY PROJECTS
  • ABOUT
    • Published Books
    • My Fabric Collections
  • CONTACT
    • Facebook
    • Instagram
    • Pinterest
    • YouTube
  • subscribe
    search icon
    Homepage link
    • SHOP
    • TUTORIALS
    • SEWING
    • QUILTING
    • SUBSCRIBE
    • CRAFTS
    • HOLIDAY PROJECTS
    • ABOUT
      • Published Books
      • My Fabric Collections
    • CONTACT
    • Facebook
    • Instagram
    • Pinterest
    • YouTube
  • ×

    Home » Sewing

    Laminated Tablet Case Sewing Tutorial

    Updated: Feb 27, 2021 by Melissa Mortenson · This post may contain affiliate links · This blog generates income via ads · 52 Comments

    I got a Kindle a few years ago, and have loved it! When I saw they were coming out with a new one, I decided it was time to pass mine onto my daughter (less books to haul around at school).  

    The new one came this week and my old cover didn’t fit it. I knew very quickly that it would need a cover to survive bouncing around in the depths of my very unorganized purse!

    This project is a great scrap buster!  I used some fabric I had leftover from that sneak peek last week.

    It’s lined with fusible fleece and corduroy.  I wanted something soft but was not in to mood to work with Snuggles/Minke.  The corduroy gave it great softness without creating any bulk.

    To keep it from getting dirty, I laminated the fabric first. Now I can just wipe it clean.

    This case was created for a Kindle, however you can also use it as a case for any tablet or phone less than 5 ½″ x 8″. It would also be great to use as a notebook or jewelry travel case.

    Supplies

    • 2 pieces of fabric for the front and back, each 6″x8.5″. (I used home decor weight)
    • 2 pieces fusible fleece 6″ x 8.5″
    • 2 pieces iron-on vinyl (buy it in a roll at the fabric store next to the wonder under), 6″ x 8.5″
    • 2 pieces iron-on vinyl 4″ x 6″
    • 2 pieces fabric for flap 4″ x 6″
    • 2 pieces corduroy 6″ x 8.5″
    • 2 pieces 2″ wide ribbon 16″ long
    • Teflon foot. You MUST have this to sew on the iron-on vinyl. trust me 🙂

    **edited to add:.. As I’ve been using this I think the measurements are a bit snug, IF you line it with anything heavy (like Minke, Snuggle, or thick corduroy I would recommend increasing your measurements by ½″, so 6.5″ x 9″.

    **note: if I were to make this project again, I would use lightweight fusible interfacing on the back of the corduroy pieces.  They stretched a bit and could use some stabilization.

    ALL seams are ¼″ unless noted

    Instructions

    First apply the iron on vinyl to your front and back pieces and flap and flap lining pieces. To do this, peel the vinyl off of the paper. KEEP THE PAPER.

    Place the vinyl sticky side down onto the right side of the fabric.

    Place the paper (you just peeled off the vinyl) shiny down on top of the fabric/vinyl. You will have the grid side up. Make sure that the vinyl is completely covered (unless you want a mess on your iron!) and iron.

    KEEP your paper pieces, once I cut a 16×16 piece of iron-on vinyl and I kept the paper backing.  That way it’s a big enough piece to press your project when you are done. You CAN iron on the vinyl afterward, you just have to use the paper it came with to protect your iron!

    Take one of your pieces of ribbon and pin it to the long side of one of your flap pieces.  Stitch in place.

    Using a spool of thread, trace a curve onto the 2 bottom corners of your flap. Place your flap and flap lining pieces together, stitch with a ¼″ seam.  Clip your corners and turn right side out.  Press (remember to use your leftover paper).

    Top stitch the edges.  Set aside.

    Using your leftover paper from your vinyl, iron the fusible fleece onto the wrong side of your 2 outside pieces.

    Stitch your 2nd piece of ribbon onto your front piece. Stitch it 3″ in from the left edge (the edge the flap will be attached to) and centered.  Stitch one straight stitch, then zig zag over the raw edge of the ribbon.

    Fold the ribbon back and stitch in place. Make sure you back stitch.

    Place front and back pieces together, right sides together.  Round the 2 bottom corners as you did for your flap piece, and stitch a ¼″ seam around the 2 sides and the bottom, leaving the top open. Clip your curves.

    Stitch your 2 lining pieces together with ¼″ seam, clip curves turn RIGHT side out and press.

    Take your flap piece and slide it into your pouch.  You will want the right side of your flap facing the BACK side of your pouch. Stitch in place.

    Slide the lining piece into the pouch, the lining will be RIGHT side out and the pouch will be wrong side out. Pin well.

    Stitch around the top opening. Starting at one side seam around the back of the pouch (the part that the flap is sewn to) and ending at the other side seam. Make sure you backstitch. Do not sew the front.

    Turn right side out.

    To close the opening on the front of the pouch, turn under and pin. Then topstitch in place.

    Clip your strings and press! (remember to use your leftover paper piece, as long as you have that piece you can press out the wrinkles that will come as you sew)

    Enjoy! I think these would make fun and easy gifts at Christmas time!

    More Tablet Cases

    padded tablet case sewing pattern

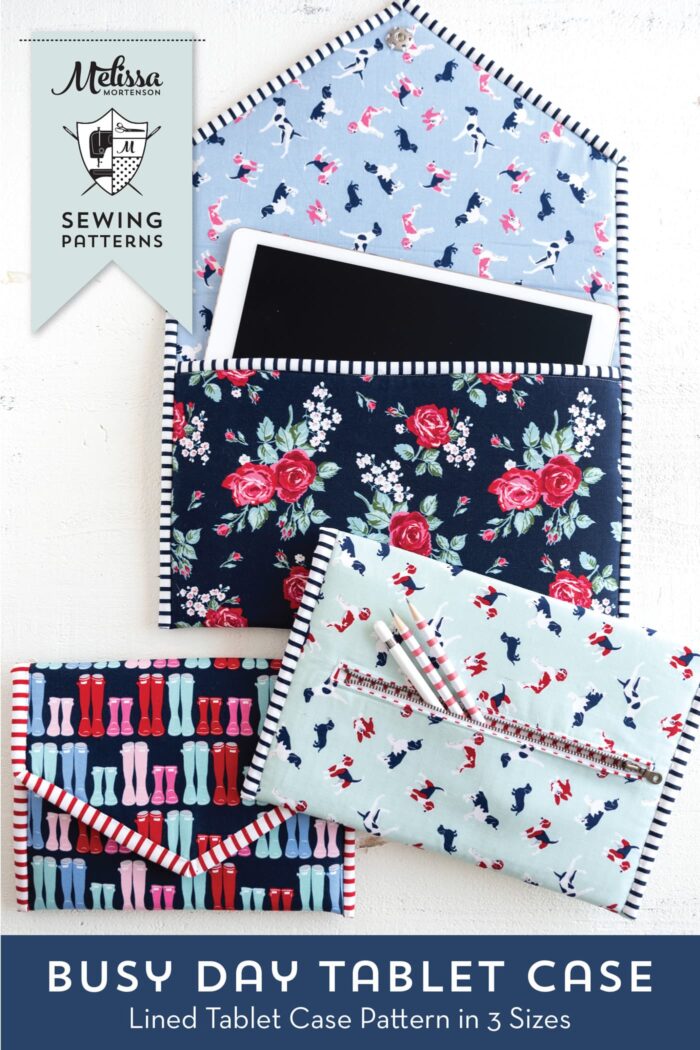
    If you’re looking for a larger tablet case, then you may like our Busy Day Tablet Case Pattern.

    More Projects You May Enjoy

    • New! All Ears Pouch Pattern & Sew Along
    • Sewing Machine Needles Explained & Printable Guide
    • Color Combination Ideas for your Next Quilt or Sewing Project
    • 25 Free Patchwork Quilted Pillow Patterns

    • Share
    • Email

    About Author

    Melissa Mortenson

    Melissa Mortenson is a blogger, designer, and content creator. She is the Polka Dot Chair blog founder and has been sharing fresh and creative ideas with readers since 2008. She is the author of “Project Teen, Handmade Gifts your Teen will Actually Love.” Her work and designs have been featured on HuffPost, TODAY, Pioneer Woman, HGTV, BuzzFeed, Better Homes & Gardens, and many other established publications. Her first fabric line, “Derby Style,” debuted in January 2015 through Riley Blake Designs.  Additional fabric collections have followed it in subsequent years. A mom of 3, she considers herself lucky to be living in Kentucky.

    Reader Interactions

    Comments

    1. Danielle @ Savvy Chic Home says

      September 03, 2010 at 9:02 am

      where’ve I been? iron on vinyl- amazing! No kindle here but this would be great for a diaper bag.

      Reply
    2. traci says

      September 03, 2010 at 9:23 am

      I will make the cover for a Kindle and just put it on the counter to show my husband – letting him know he just needs to provide the Kindle. Love the fabrics and the laminate.

      Reply
    3. Beth McC. says

      September 03, 2010 at 9:51 am

      Will the iPad fit in this because I need one of these so cute!!

      Reply
    4. Chris says

      September 03, 2010 at 10:31 am

      CUTE! What a fun project. I love the fabrics you chose, of course. The bow is my favorite touch.

      Reply
    5. casserole says

      September 03, 2010 at 10:07 pm

      What a cute case! I am sooo going to have to get some iron-on vinyl. It’s been on my list for a while, but I haven’t found a place locally that sells it. One day I’ll break down and order some.

      I linked to your tutorial on Craft Gossip Sewing:
      http://sewing.craftgossip.com/tutorial-make-a-kindle-keeper/2010/09/03/

      –Anne

      Reply
    6. Anna says

      September 04, 2010 at 9:07 am

      super cute! love that you used iron on vinyl, I really have to try that stuff out. 🙂

      Reply
    7. Denise says

      September 04, 2010 at 5:30 pm

      iron on vinyl?? My “new” thing to learn today.{{{grin}}}} Thanks for the great idea….There’s a Christmas gift in the making! Found you on Tatertot’s and Jello linkee. I’m your newest follower.
      Have a wonderful long weekend:)

      Reply
    8. Kara says

      September 04, 2010 at 10:08 pm

      I just love that bow! Gorgeous!

      Reply
    9. cindy says

      September 05, 2010 at 10:30 am

      Great tutorial! Love the cover. I can imagine a variety of uses for the cover.

      Reply
    10. HoopDeeDoo says

      September 05, 2010 at 7:39 pm

      love this! I think my MIL needs one for Christmas!

      Reply
    11. Rachel@oneprettything.com says

      September 05, 2010 at 7:51 pm

      That is SO CUTE! I love this and love the iron-on vinyl even more! Thanks so much, I’ll be linking to this.

      Reply
    12. Acemi hamarat says

      September 06, 2010 at 2:09 am

      This comment has been removed by the author.

      Reply
    13. Acemi hamarat says

      September 06, 2010 at 2:09 am

      IT’S SO CUTE! =)

      Reply
    14. { L } says

      September 06, 2010 at 11:59 am

      This is AWESOME! I don’t sew at all but I would love to have one. Do you sell these?

      lisanchris (at) gmail.com

      Reply
    15. Amber says

      September 07, 2010 at 2:19 pm

      I love it! I have been meaning to make something like this for my own kindle so this perfect!! Thanks for the tutorial and linking to Get Your Craft On Tuesday, I wouldn’t have found your blog otherwise 🙂

      Reply
    16. kelly says

      September 08, 2010 at 11:39 pm

      i just got the new kindle, i really need a cover, this is so cute! love the fabric!

      Reply
    17. Michelle@Somedaycrafts says

      September 09, 2010 at 10:16 pm

      LOVE that material!

      Reply
    18. Adrienne says

      October 25, 2010 at 12:11 pm

      Hi there — just found your blog by searching google for an iron on vinyl tutorial & am glad I did. Thanks so much for the tutorial & photos, they will work perfectly for the project I’m attempting, a laminated portfolio. Love your fabric choices too!

      Reply
    19. treppi says

      November 13, 2010 at 9:05 am

      Now I’m wondering – I have a laminating machine at work. Could I use the machine and the laminating material I have there to laminate fabric?
      Thank you for the tutorial, it’s opened up a whole new world for me.

      Reply
    20. siouxfairy says

      November 13, 2010 at 12:04 pm

      what a great idea to laminate the fabric. I really like this..will try it soon 🙂
      Thanks so much..:D

      Reply
    21. MG says

      November 22, 2010 at 11:40 am

      I just found out about this iron-on vinyl and was wondering if anybody had actually used it. Thanks for the great tutorial and the tips for working with the vinyl.

      Reply
    22. Tizz says

      January 27, 2011 at 12:30 am

      I just started sewing so I am definitely not up to making one quite as awesome as this, but I used this idea to make a less-fancy case for my boyfriend. I made sure to link you: http://www.tizzielizzie.com/?p=432
      Now I just need to make one for myself! Thanks for the tutorial! 🙂

      Reply
    23. Amanda says

      February 09, 2011 at 1:30 am

      This is an amazing project! I found your site through Tip Junkie. I will be coming back often!!

      Reply
    24. caileigh says

      March 22, 2011 at 4:46 pm

      I love it! As a suggestion for the vinyl, you can use a makeup brush to dust baby powder on the vinyl and then any foot will be easy to sew it with! It’s a true lifesaver.

      I’ll be making one soon! Thanks for the tutorial!

      Reply
    25. Sew Upscale says

      April 09, 2011 at 8:25 am

      This is so great! Glad I found your blog.

      Reply
    26. SewHappy says

      May 05, 2011 at 8:36 pm

      Iron on vinyl is great but laminated cotton works as well with less work. Give it a try.

      Reply
    27. Michele says

      June 03, 2011 at 9:35 pm

      I can’t wait to try this. I don’t own a kindle, but my best friend does and her birthday is coming up! I could easily whip one of these out for her and she’d love it! Thanks!

      http://maddashcreativity.blogspot.com/

      Reply
    28. Jennifer says

      July 11, 2011 at 2:42 pm

      My Mom has a Kindle and her birthday is coming up, so I thought I’d make this. I saw that you made this for your “new” Kindle – so does this cover fit the newest, small, version of Kindle? My Mom’s is the older, bigger one. Thanks for the great tutorial!!

      Reply
    29. BluBlusher says

      August 15, 2011 at 1:59 pm

      love this! where do i or can i find fusible fleece! i’ve seen this on a lot of tutorials and i have no idea where to find fusible fleece?

      is it just regular fleece sewn in? or is it something else?

      Reply
      • Sue says

        January 02, 2013 at 11:55 am

        Several fabric stores handle it…Hancocks, Joanne’s Fabrics and some of the Hobby Lobby stores.

        Reply
    30. Dane says

      August 20, 2011 at 7:45 am

      I just have to ask, are you LDS? I’m getting the vibes you are just from looking at your site! Cuz I am too, from Australia 🙂 Love Tahnee (this is my husbands account, incase you were thinking I had a man’s name!!)

      Reply
    31. Karen says

      August 16, 2012 at 11:08 am

      Love your Kindle cover! Wished I’d read this two days ago, could have saved the money I spent on a pattern (already cut out) to make a cover. I will check here first next time I need a pattern. Thanks.

      Reply
    32. Tiffinie says

      November 28, 2012 at 5:06 pm

      i was just wondering if this would work for a kindle fire i dont know what the size difference is. if there is a difference could u maybe help me figure out how to make it work for my kindle fire. Thanks

      Reply
      • Melissa Mortenson says

        December 04, 2012 at 12:12 pm

        I don’t think it will work for the kindle fire, most kindles are all different sizes. If I had a Kindle fire I’d be glad to measure it for you and make a suggestion… but I don’t…. I would recommend measuring your kindle then adding 1-2″ to the measurements for the size of your cut pieces.

        Reply
    33. Nikki says

      November 05, 2013 at 10:36 pm

      Thanks for the tutorial! I just bought a new Kindle, the basic $69 one, and this fit perfectly! I used regular fabric with no vinyl and felt as interfacing. The only minus is that I can’t get the bow to look nice. Otherwise, very happy with it!

      Reply
    34. download driver says

      May 16, 2017 at 2:41 am

      Hello there, You have done a great job. I will
      certainly digg it and personally recommend to my
      friends. I’m confident they’ll be benefited from this website.

      Reply

    Leave a Reply Cancel reply

    Your email address will not be published. Required fields are marked *

    This site uses Akismet to reduce spam. Learn how your comment data is processed.

    Primary Sidebar

    Hello! It’s nice to meet you.

    I’m Melissa. I like to design things, like fabric, printables, and projects.

    I’m also a Mom and a Maker. I am like most of you, just trying to do my best every day. Some days I succeed, many days I fail.  I find joy in creating, if you do too, then I hope that you find something here bring a little “happy” to your life.  Find out more about me here.

    COPYRIGHT POLICY

    All my images and text are copyrighted. You may NOT use any images from this site in any kind of Video (this includes YouTube). If you would like to feature my work, you may use ONE (1) NON-COLLAGED image and must “follow” link back to my original blog post. You may NOT edit, crop, or change my images in any way without written permission. You MAY NOT print out or copy and distribute any text, images or patterns from this site. All patterns, content, instructions, and templates are for personal use ONLY! Thank you! Violators will be reported.

    Footer

    ↑ back to top

    About

    • Privacy Policy
    • Disclaimers
    • About Melissa
    • Instagram
    • Facebook
    • YouTube
    • Pinterest

    Newsletter

    • Sign Up! for emails and updates

    Contact

    • Contact
    • FAQ
    • Press
    • Published Books
    • Fabric Collections

    Welcome to the Polka Dot Chair! Here you’ll find easy, step-by-step, sewing, quilting, and crafting projects. We design projects for Makers of all skill levels. Beginners are welcome!

    DISCLAIMER:

    While every effort has been made to ensure the accuracy of the content on this website, the information is made available without warranty of any kind. The Polka Dot Chair accepts no responsibility or liability, whether direct or indirect, as to the currency or accuracy of the information, nor any consequence of its uses. This website is not intended to substitute the advice of a professional.

    Copyright © 2022 Polka Dot Chair

    [ Placeholder content for popup link ] WordPress Download Manager - Best Download Management Plugin