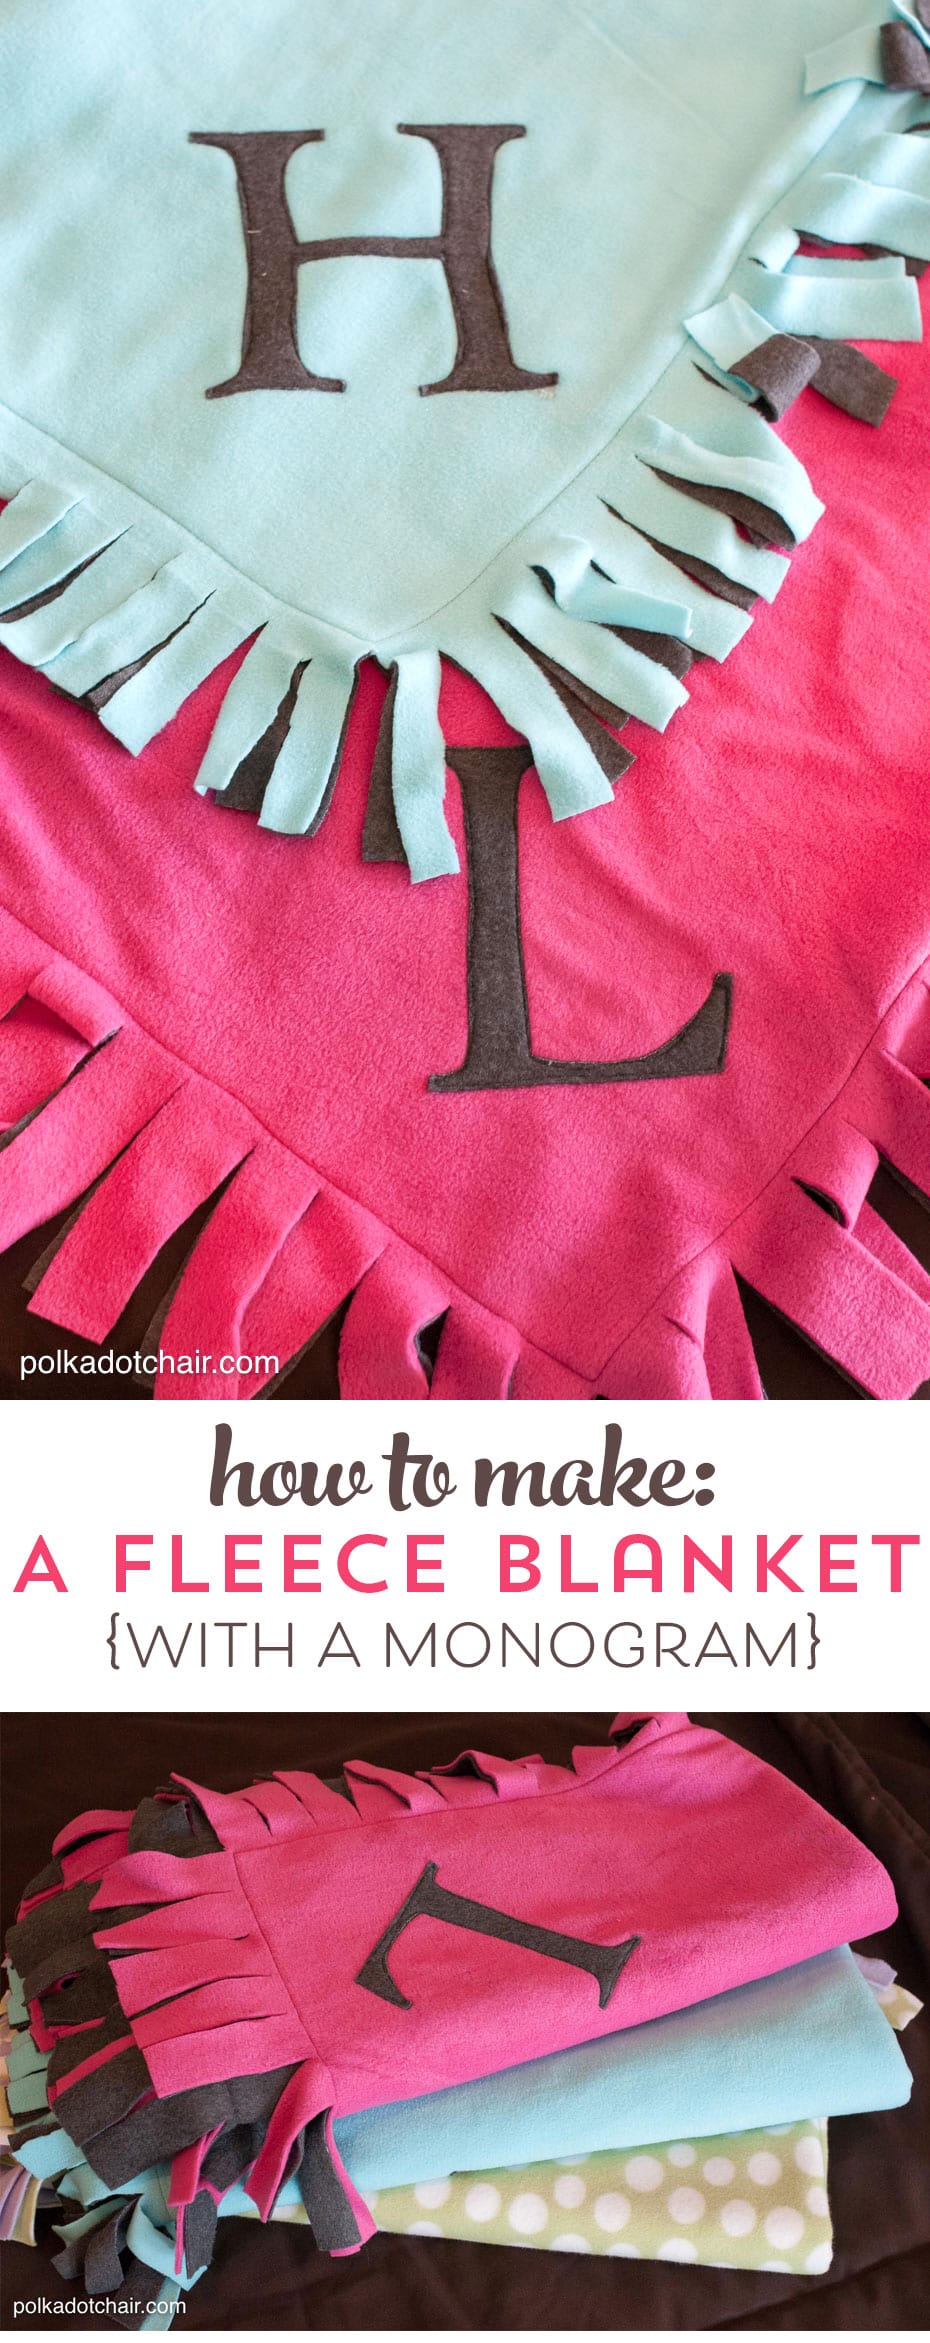
Easy No Tie Fleece Blanket Sewing Tutorial
If you are looking for a last-minute handmade gift, I’ve got an idea and tutorial for you. These no-tie polar fleece blankets are so easy that you can make them in an hour!
Not only are these blankets fast to make, but they also require only 3 yards of fleece (which you can frequently find on sale), so they are inexpensive!
You’ve got time to whip out a few before Christmas! They are also great if you want a project that your kids can make with you.
We made three of these on Friday night. My 10-year-old daughter ended up helping with everything except the sewing. It was great to have an extra set of hands to clip all the fringe.
Why Sew the Blankets Instead of Using Knots?
A few years ago, we made knotted fleece blankets. The only problem with them was that as you tied your knots, the blanket got all out of square and kind of wonky-looking. I was trying to think of a way to prevent this from happening and realized I could stitch a box into the center of the blanket to keep it squared up.
I made one of these last year for my husband (with University of Louisville fleece), and it’s been a great blanket. It was our “go-to” stadium blanket for football season.
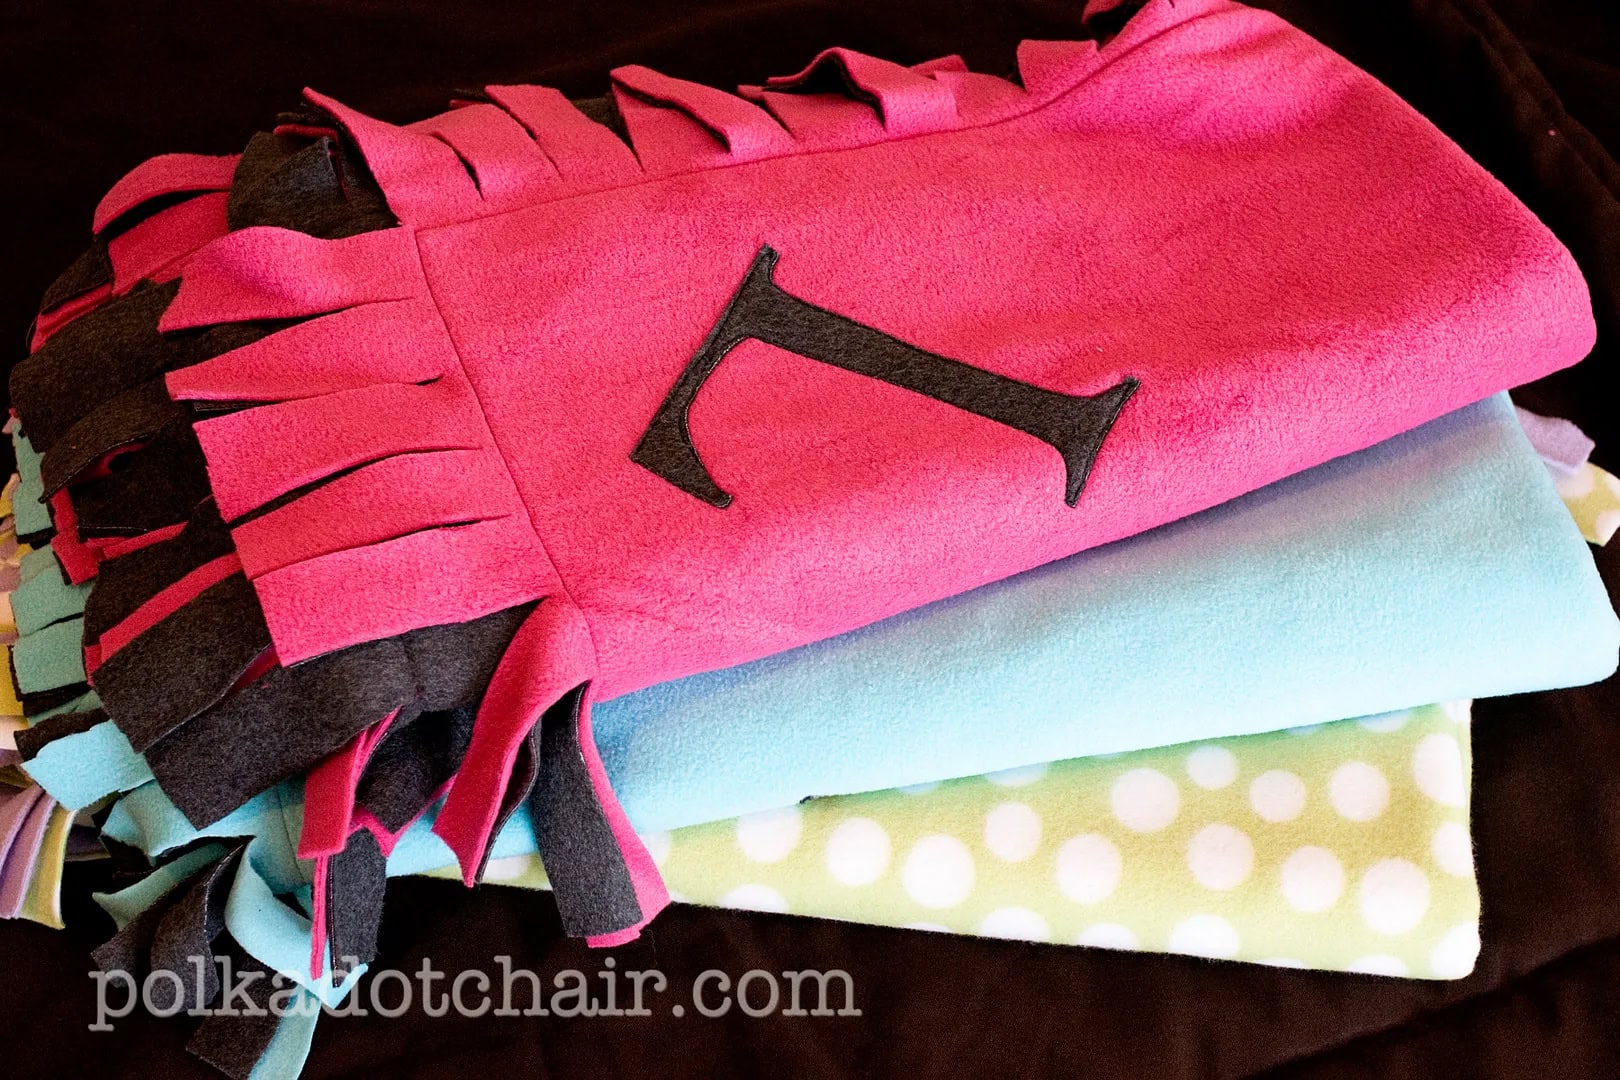
This year, I was making them for a few older girls. I went with solid colors and a simple dot, hoping for a more “grown-up” feel.
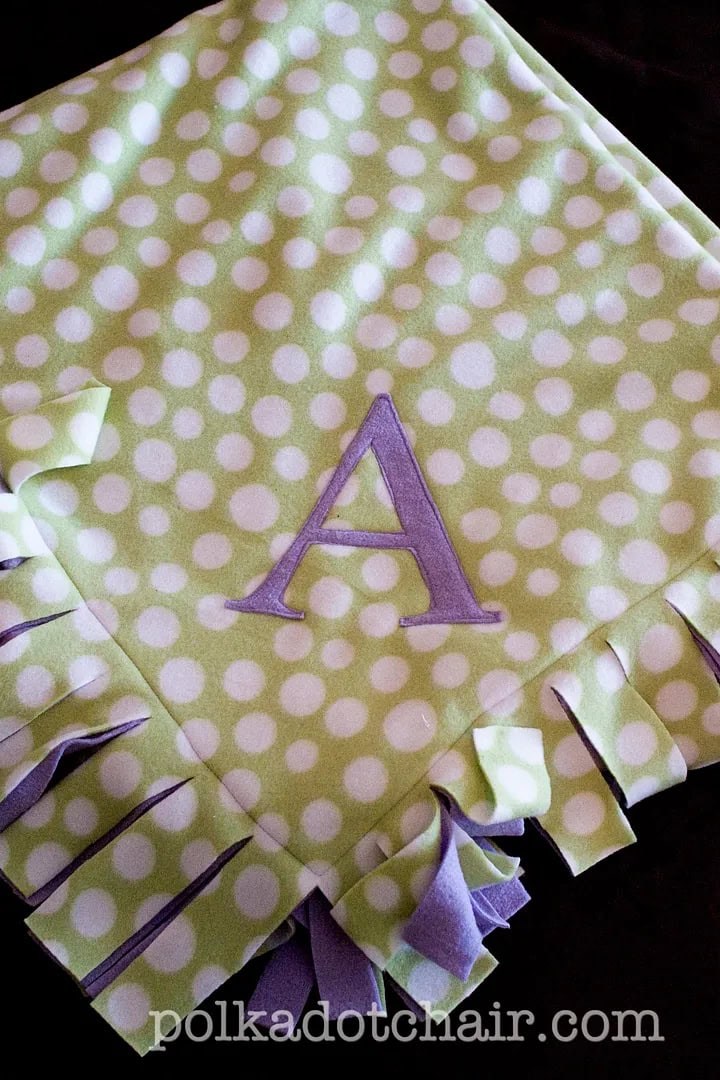
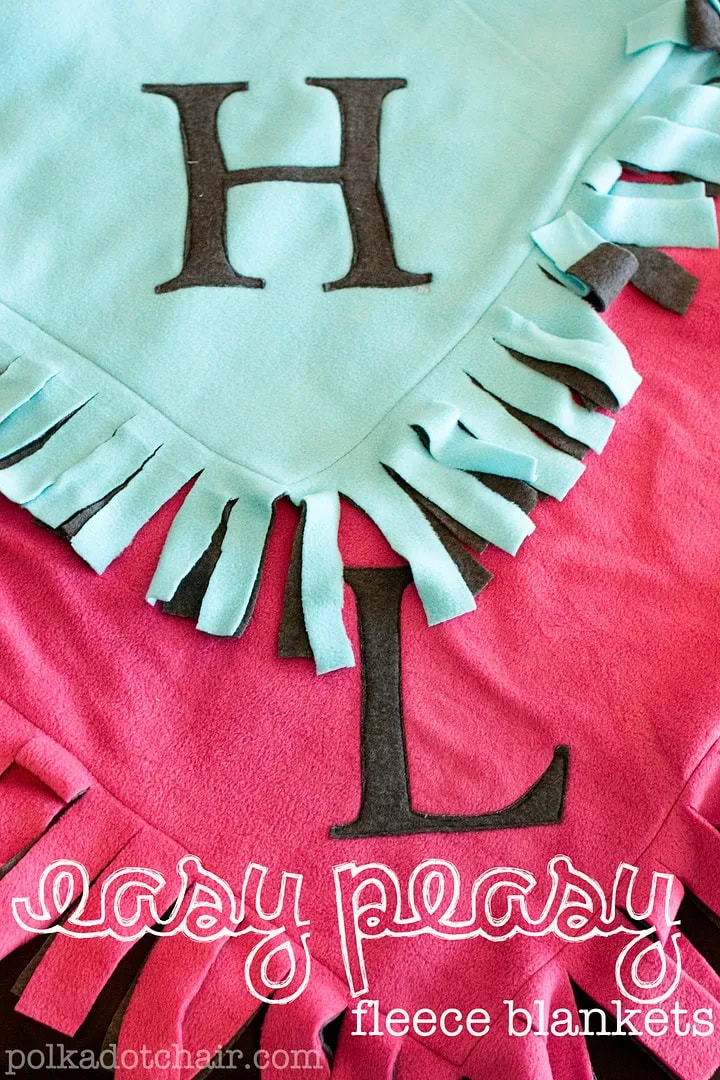
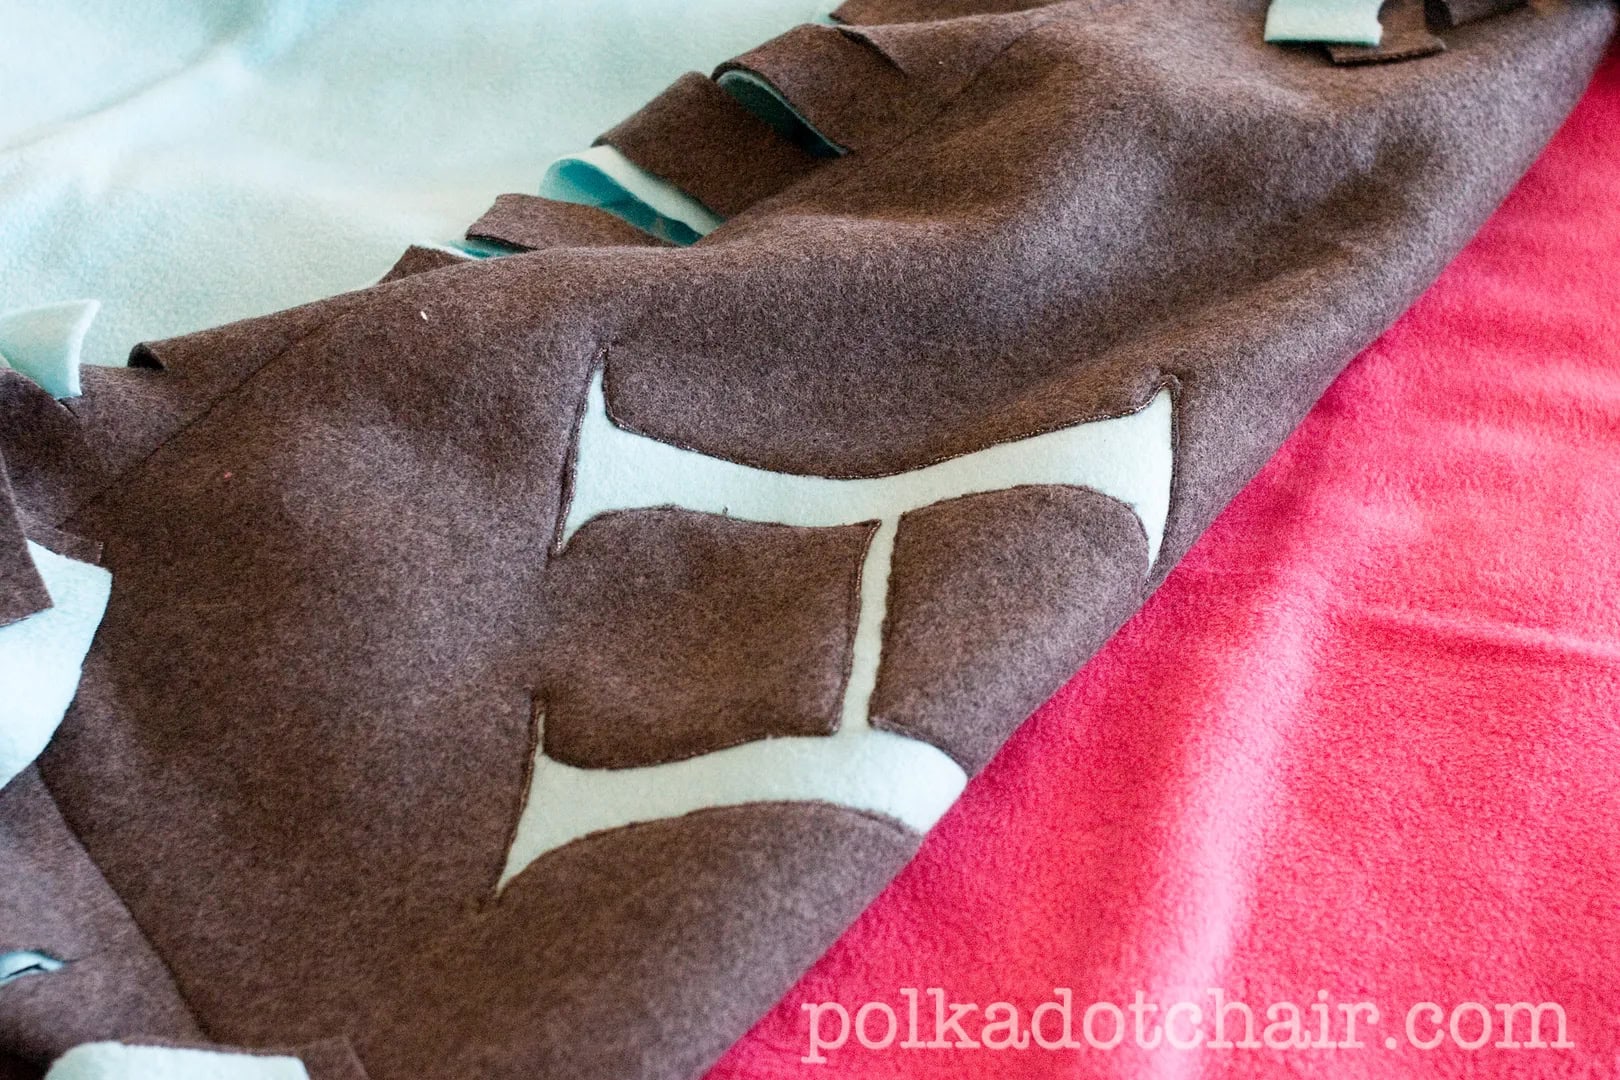
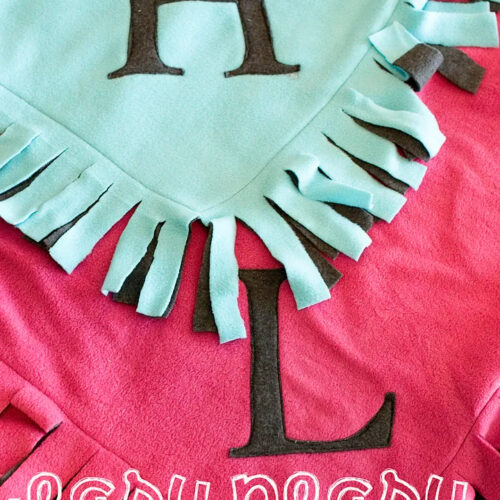
As a finishing touch, I added their initials with appliqué.
No-Tie Fleece Blanket Supplies
- 1 1/2 yards each of 2 colors of fleece.
- A scrap of fleece large enough for an initial – I just bought 1 3/4 yds of one color of fleece instead of 1 1/2
- Walking foot for your sewing machine
- Sharp Scissors
- Matching thread
- 5″ quilting ruler
- Heat n Bond Lite for the Applique
Easy No-Tie Fleece Blanket Sewing Tutorial
Equipment
- 5″ quilting ruler
supplies
- 1 1/2 yards each of 2 colors of fleece.
- A scrap of fleece large enough for an initial I just bought 1 3/4 yds of one color of fleece instead of 1 1/2
- Matching thread
- 1 package Heat n Bond Lite for the Applique
Instructions
Step One: Layer the Fleece
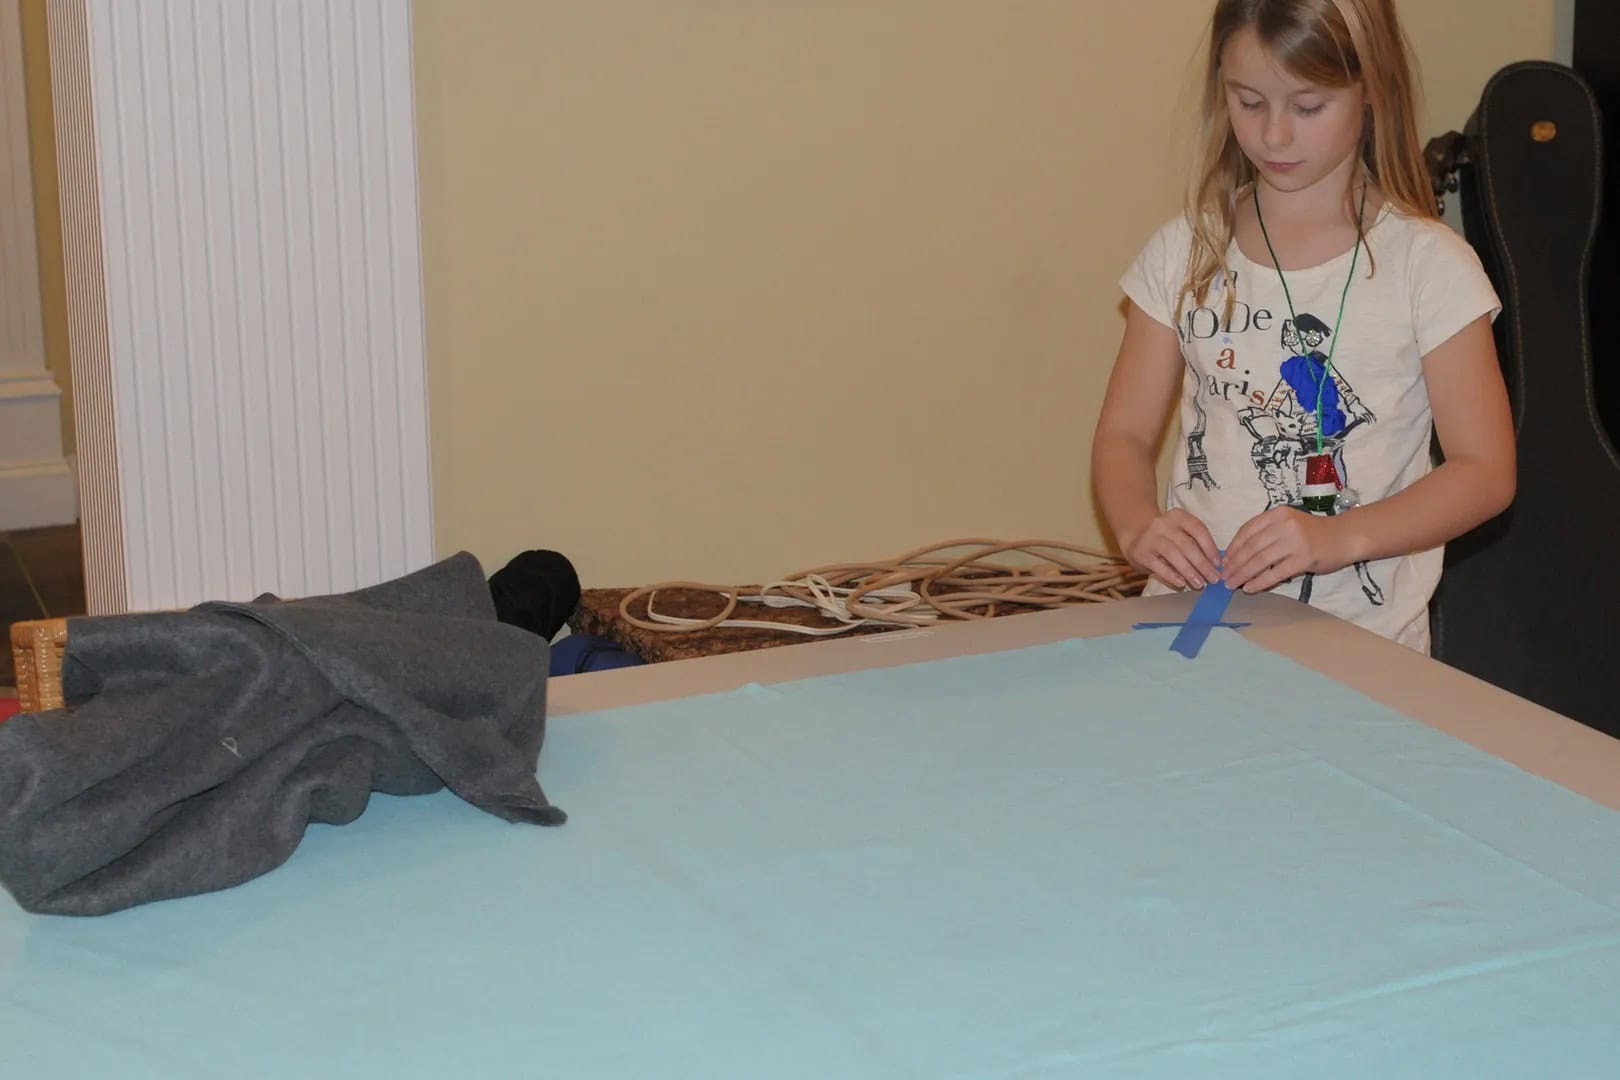
- Lay out one of your 1 1/2 yd fleece cuts on a large table or the floor. Tape down the corners. Get out all the wrinkles and puckers. (kids are good at helping with this part)
- If desired, spray a little spray basting in the center of the fleece.
- Lay down the second piece of fleece on top of the first. If you are using a fleece with a “side,” you will have the wrong sides together.
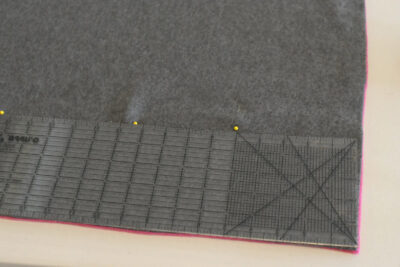
Step Two: Trim to Size
- Use your scissors to trim the selvage edges and ensure the 2 pieces of fleece are the same size.

- Using your quilting ruler, measure 5″ from each side of the blanket. Pin at 5″ in all around to give yourself a stitching line.
Step Three: Sew
- I recommend marking your stitching line with chalk if you are new to sewing.

- Using the walking foot on your machine, stitch around the entire blanket along the 5″ lines you just pinned. Try to keep the blanket as flat as possible as you stitch it.
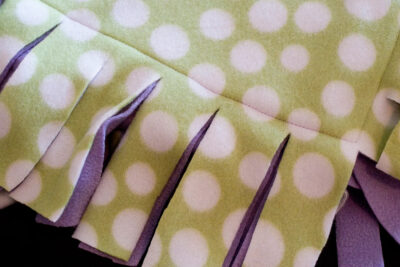
Step Four: Cut the Fringe
- Using scissors, trim the fringe approximately every 2″ around the entire blanket. Stop well short of your stitching line.
Step Five: Print the Applique Letter
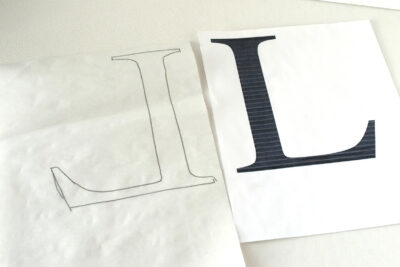
- To create a monogram appliqué with the fleece, print out your letter. I used Times New Roman font at 800 pts in Word.
- Lay your letter upside down and trace it onto your Heat n Bond Lite (use a light box or a bright window). Your letter will be reversed.
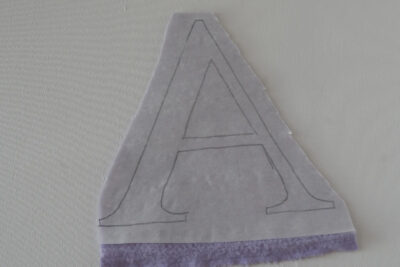
Step Six: Cut out the Applique
- Trim around your Heat ‘ N Bond Lite and, using a pressing cloth, iron onto your scrap fleece.
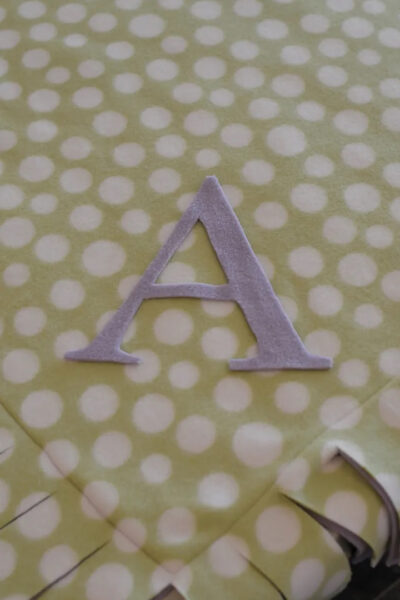
- Lay your letter on your blanket in the corner. Remove the backing from the Heat n Bond and press the letter onto the blanket using a pressing cloth.

- Stitch around the edge of the letter.
- If desired, use small scissors on the back of the blanket. Trim out the inside of the letter you just stitched. Cut out ONLY the back fabric of your blanket, leaving the top fabric showing through.

There’s going to be lots of toasty warm people in your life this Christmas. Love the idea of cutting out the reverse of the applique too
really cute! i did buy some fleece for my kids to get new blankets, but I wasn’t sure how I was going to finish them. This may just do the trick!
They turned out so awesome. I like them with out the fringes tied. I really like the initials on them.
This is brilliant, you make it look so easy!
Wow! I have got to try this! I’m not much of a sewer, but I think these would be so fun to make! 🙂 I always enjoy your tutorials, Melissa!!
I just featured this tonight–thanks for inspiring! 🙂 XO http://www.oopseydaisyblog.com/2012/01/wednesdays-wowzers-2-2.html
Love this! I just used your tutorial to make a blanket for a sweet little girl and a much smaller matching blanket for her American Girl Doll. 🙂 Thanks for the inspiration!
Thanks for this great project idea. I was looking for something easy to make for an outdoor movie night party, and these will be perfect. They look much sleeker than the tied blankets!
When you usually make tie blankets you cut the square out on each corner to keep it from bunching but it looks like you didn’t do that.Does sewing it eliminate the need to do this?
I really like the look of your blanket! It looks so neat and tidy with the cut edges and I think the reverse applique is brilliant!
Thank you for sharing!! 🙂
This is an easy tutorial for a Linus Blanket……..instead of the letter you can put a animal or a happy face on the blanket. The Linus foundation has a web site where anyone can make blankets for children in local hospitals. Everyone loves a snugly blanket when they feel ill. Just make sure the fabric you use is not too thin as some of the discount stores have inferior material. If every seamstress gave one blanket just think how many children would feel loved each night. I use permanent ink to draw the face on the animal…No buttons or items a child could remove. I even put special pockets on so that they can put their treasures in them.
Thank you for the tip. I didn’t realize it would work well for a Linus Blanket, I’ve heard of the foundation before, but haven’t read much about the requirements.
I didn’t see how you removed the corner pieces. Perhaps I didn’t understand that very well. I love having a blanket without the knots. It is much more comfortable especially for a small child. Thanks for your interesting blogs.
As you cut the strips the corners come off by themselves. Just do it, and it will make sense 🙂
I have to say that I thought I was the only one that didn’t tie my fleece blankets and sewed them just like you did. I thought the tied ones looked “wonky” too! I love how the blanket lays flat. They have so many fleece prints that the variety is endless. I even made one for my 25 year old nephew! I have enjoyed your blog…thank you for sharing your world 🙂
You really make it seem really easy together with your presentation however I find this topic
to be really one thing that I believe I might by no means understand.
It seems too complex and extremely large for me.
I am having a look forward to your next submit, I’ll attempt to
get the grasp of it!
I would like to get the letters to put in the corn or of the blanket I don’t no where thank you Sandy Mccrory
You just cut them out of the fleece. Just type the letter on your computer and print it out.
This is the method I use, I like stitching and cutting fringe, not tying knots,
so the blanket lays flat. I do a few stitches like 12 inches apart and about a half inch long, just to hold the two layers together and not bunch up.