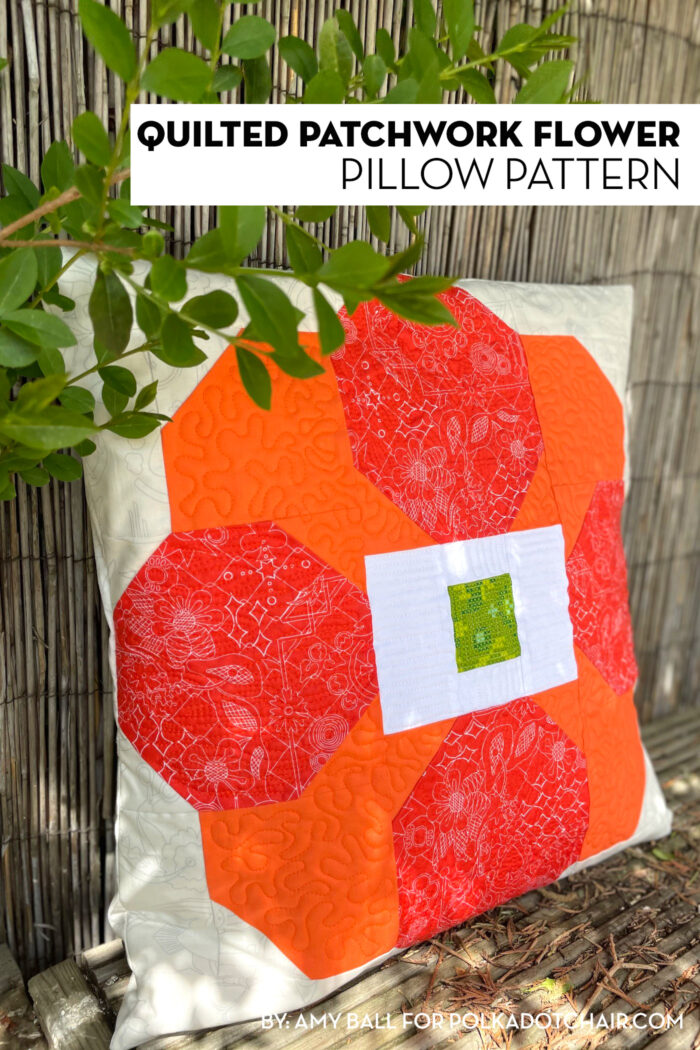
Quilted Patchwork Flower Pillow Tutorial
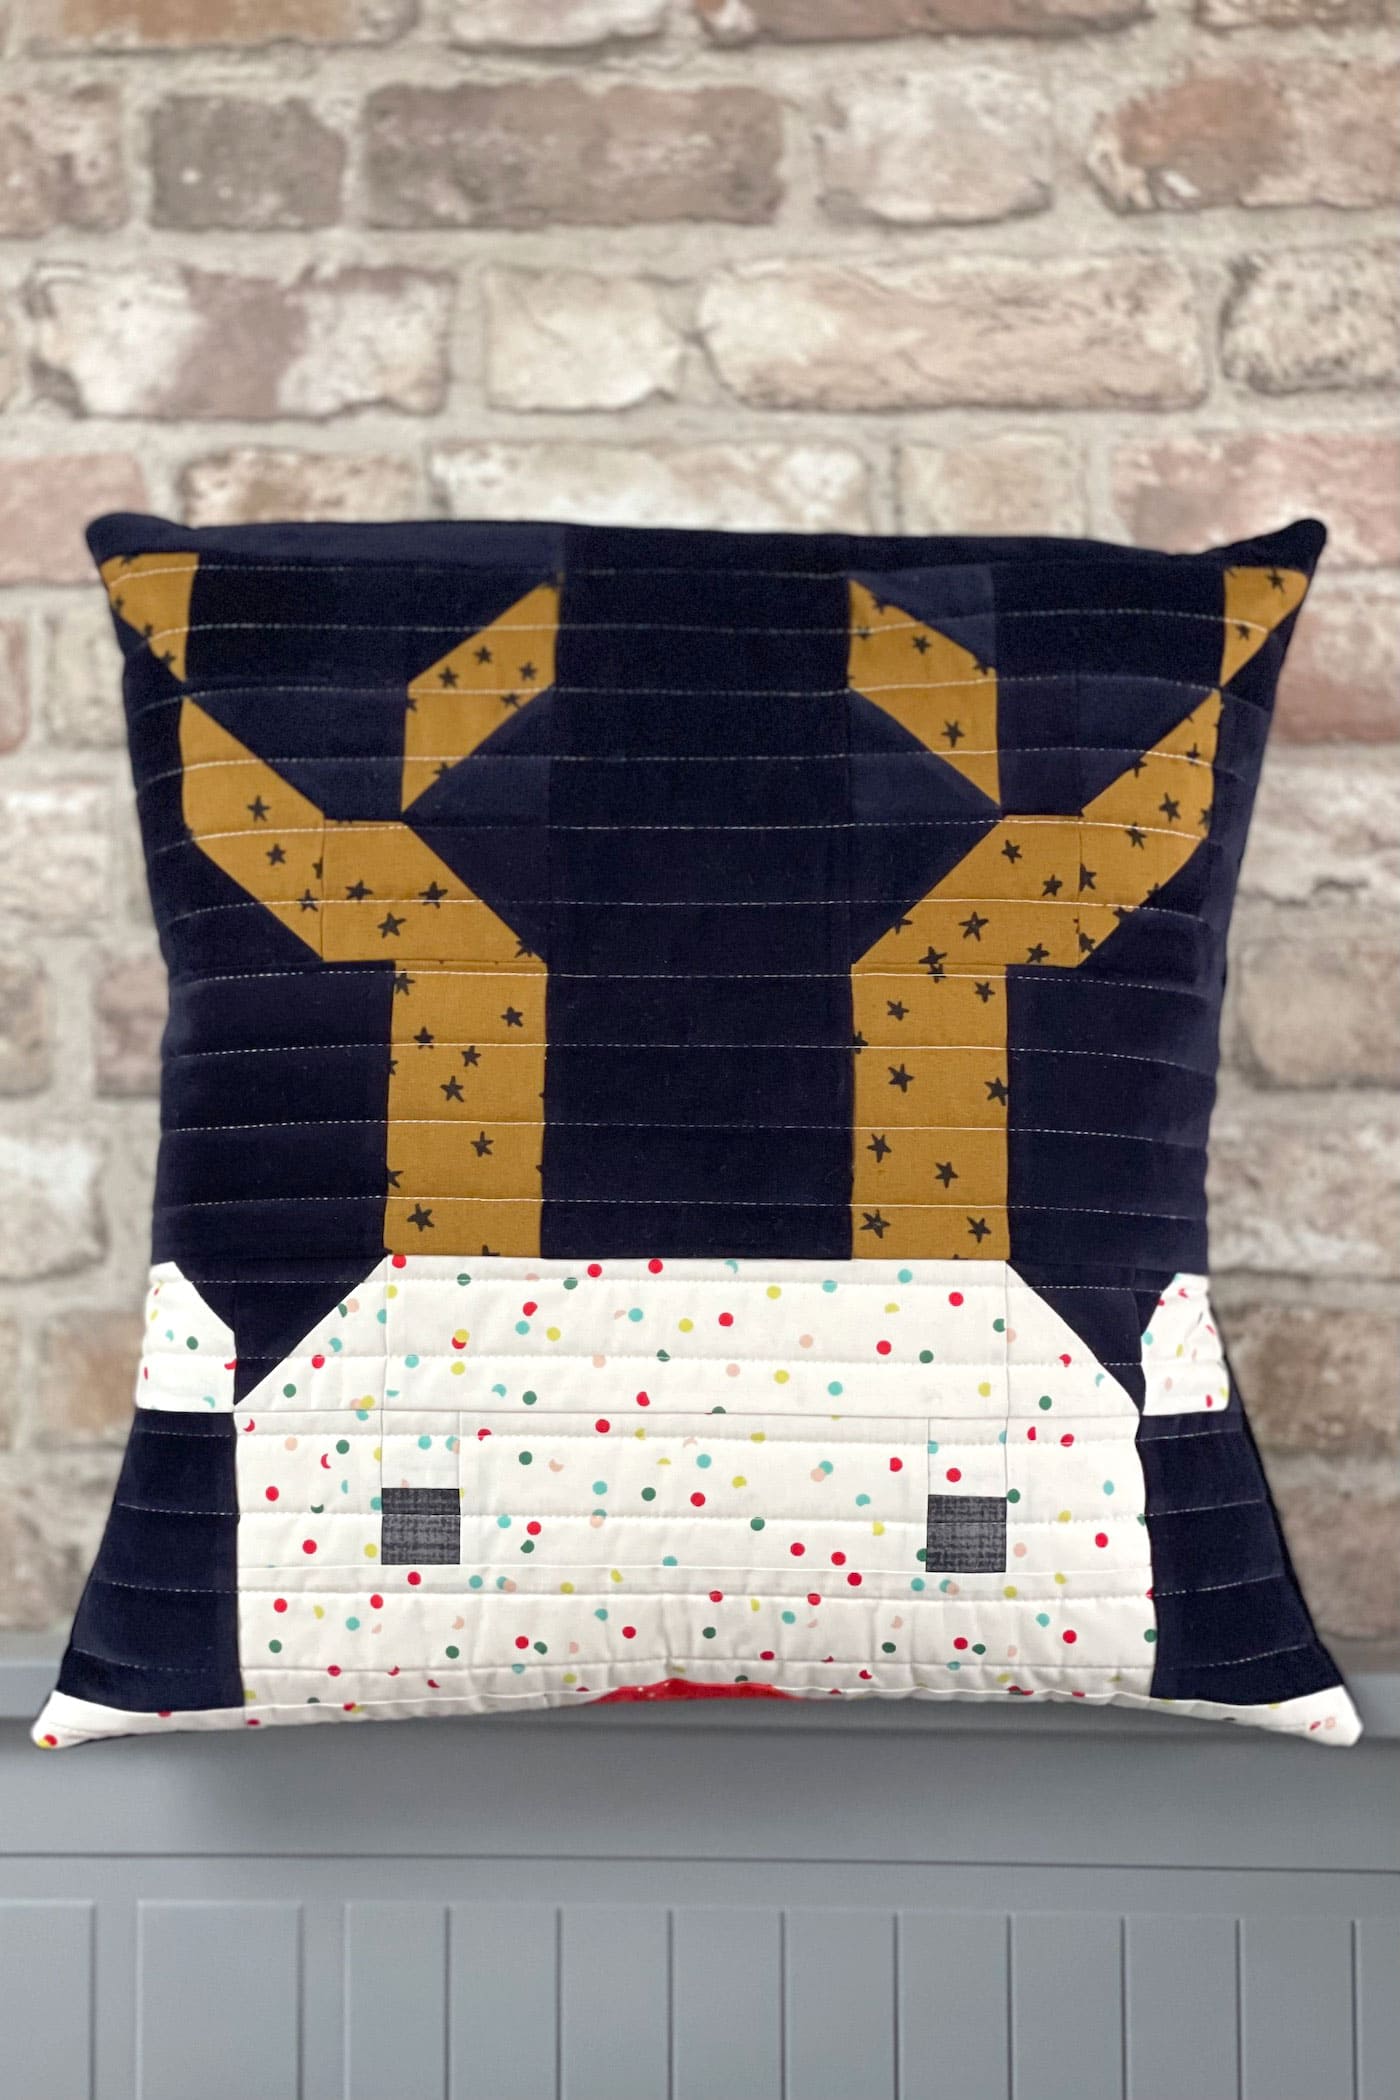
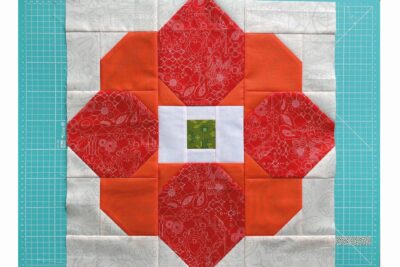
This patchwork quilted flower pillow tutorial allows you to showcase a variety of free-motion quilting techniques! Each portion of the flower is filled in with a different pattern. This gives the flower quilt block dimension and interest!
You can’t ever have enough cushions! I love to change mine with the seasons, and they are a great way to use up larger fabric scraps and experiment with different ideas like quilting techniques. This flower block patchwork cushion will brighten up any home during the summer months, or you could use a thicker canvas fabric for the back and take it out into the garden.
Note: The designer of this project, Amy Ball, is a resident of the UK. In the UK, they refer to throw pillows as “cushions.” You will see the term “pillow” & “cushion” used interchangeably in this post. They are both referring to the same item.
Quilted Flower Patchwork Pillow Cover Tutorial
Equipment
supplies
Fabrics:
- 1 Fat Quarter Main Petals orange print
- 1 Fat Eighth Secondary Petals neon orange solid
- 1 Scrap Flower Centre green print
- 1 Scrap Flower Centre Border white
- 1 Fat Quarter Background cream print
- Light backing fabric 19” x 19”
Interfacing & Other Materials
- Batting: 19” x 19”
- 1/2 Yard Cushion back fabric
- 1 18" Pillow Form
Instructions
Cutting:
- From Main Petals Fabric cut 6½” x 7½” (2) and 6½” square (2)
- From Secondary Petals Fabric cut 4½” square (4) and 2½” square (8)
- From Flower Centre Fabric cut 2½” square (1)
- From Flower Centre Border Fabric cut 2½” x 4½” (2) and 2½” x 1½” (2)
- From Background Fabric cut 6½” x 2½” (4), 2½” x 4½” (4) and 2½” square (12)
- From Cushion back fabric cut 18½” x 11½” (2)
Preparation:
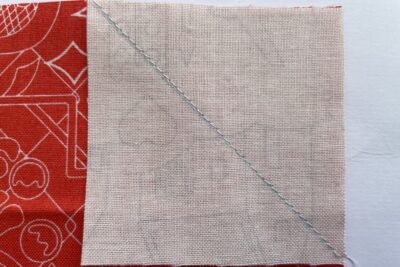
- Mark all the 2½” squares with a corner to corner diagonal line on the wrong side of the fabric.
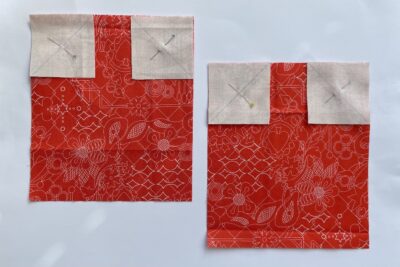
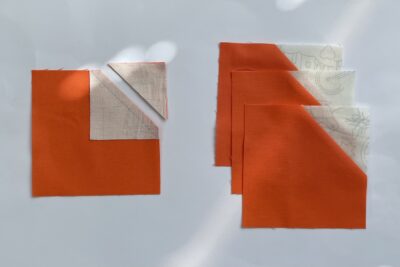
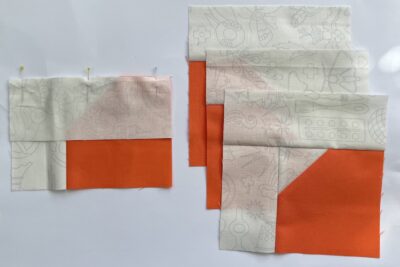
- Take one main petal 6½” x 7½” rectangle and pin two background 2½” squares to the two corners along the shorter edge, right sides together. Make sure the drawn diagonal lines match the orientation in the step photo.

- Sew a tiny bit above the drawn lines.
- Trim with ¼” seam allowance and press open.
- Repeat steps 1-4 for the second main petal 6½” x 7½” rectangle.
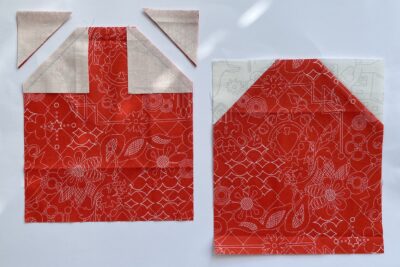
- Then repeat the whole process using secondary petal 2½” squares in the remaining corners.
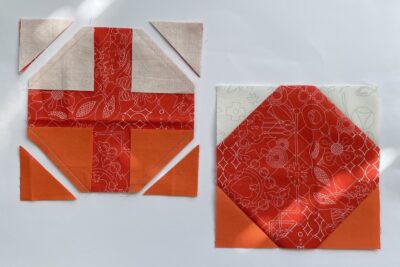
- Now repeat again with the main petals 6½” squares. Set these units aside until later.
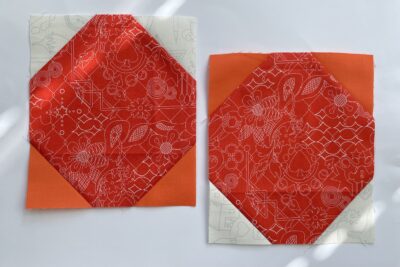
- Take one secondary petal 4½” square and pin one background 2½” square to the top right corner, matched the edges. Make sure the drawn diagonal line runs top left to bottom right.
- Sew a tiny bit above the drawn line, trim with ¼” seam allowance and press open.
- Repeat to make four in total.
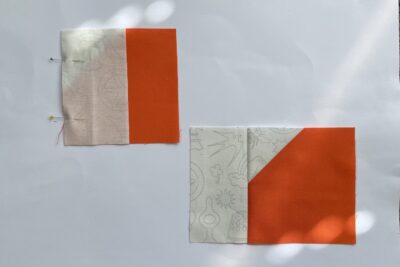
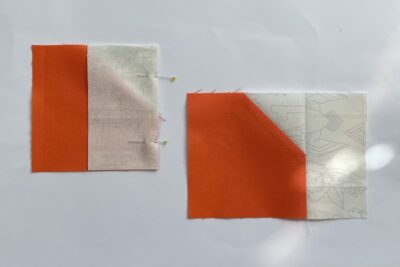
- Take two units from step 10 and position them so the background corner triangle is at the top left and sew a background 2½” x 4½” rectangle to the left edge of each.
- Now take the other two units from step 10 and position them so the background corner triangle is at the top right and sew a background 2½” x 4½” rectangle to the right edge of each.
- Sew background 6½” x 2½” rectangles to the top edge of units made in steps 11-12. Set these units aside until later.
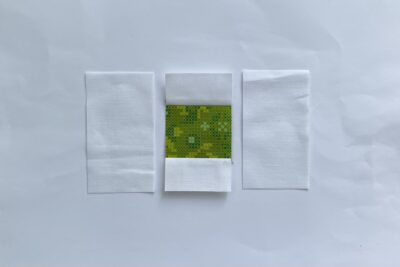
- Sew the two flower centre border 2½” x 1½” rectangles to the top and bottom edge of the flower centre 2½” square. Press. Then sew the background 2½” x 4½” rectangles to the sides and press.
Block Assembly:
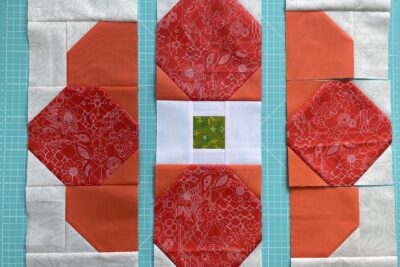
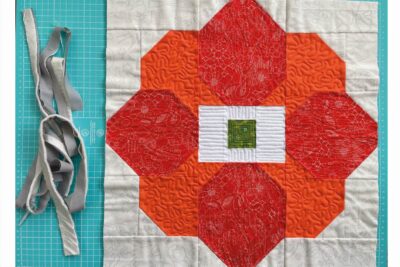
- Sew the units from all the previous steps together into three rows using the photo as a guide for orientation and position.
- Then sew the three rows together. Press well.
Quilting:
- Now it’s time to make a quilt sandwich. Place your light backing square (right side facing down) with your batting on top, then add the patchwork flower block with the right side facing towards you. Make sure all the layers are smooth and flat then baste the layers together using your preferred method.
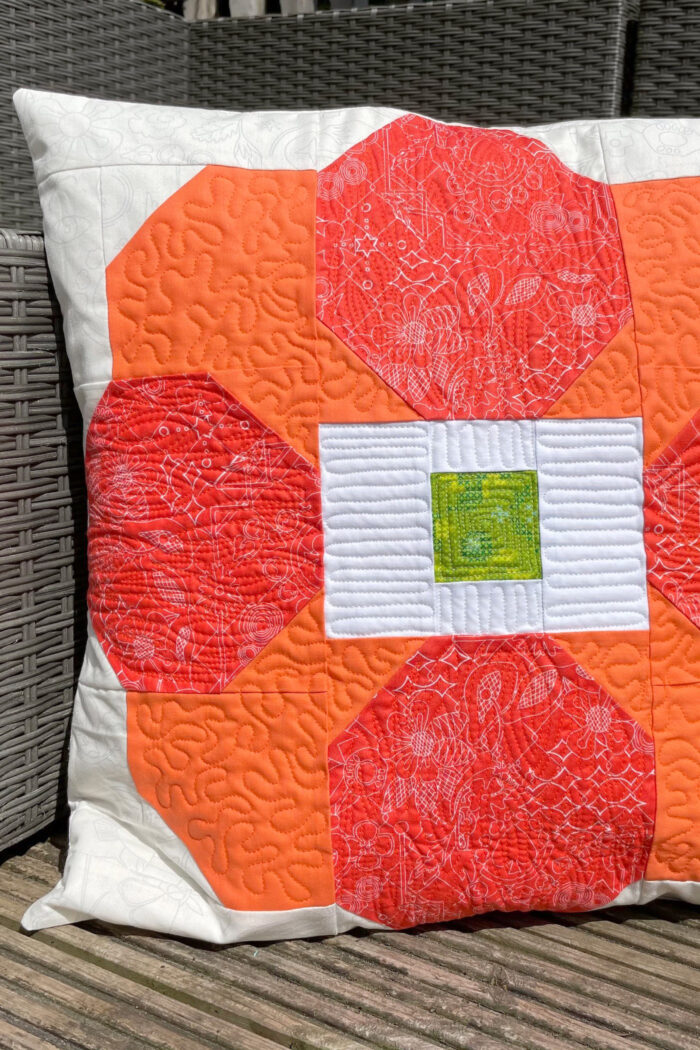
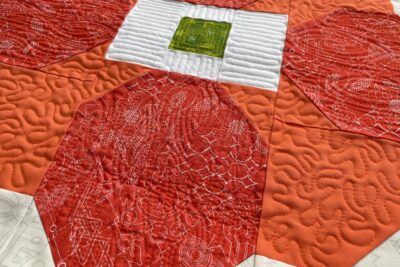
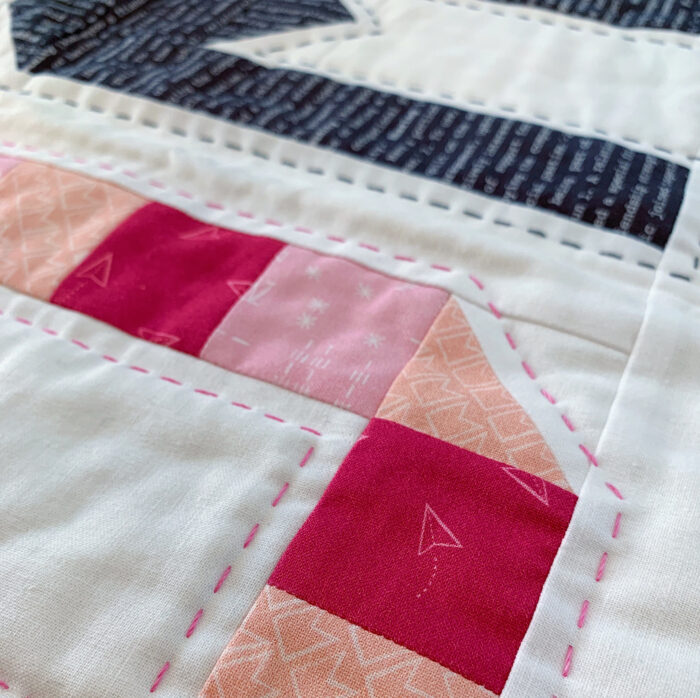
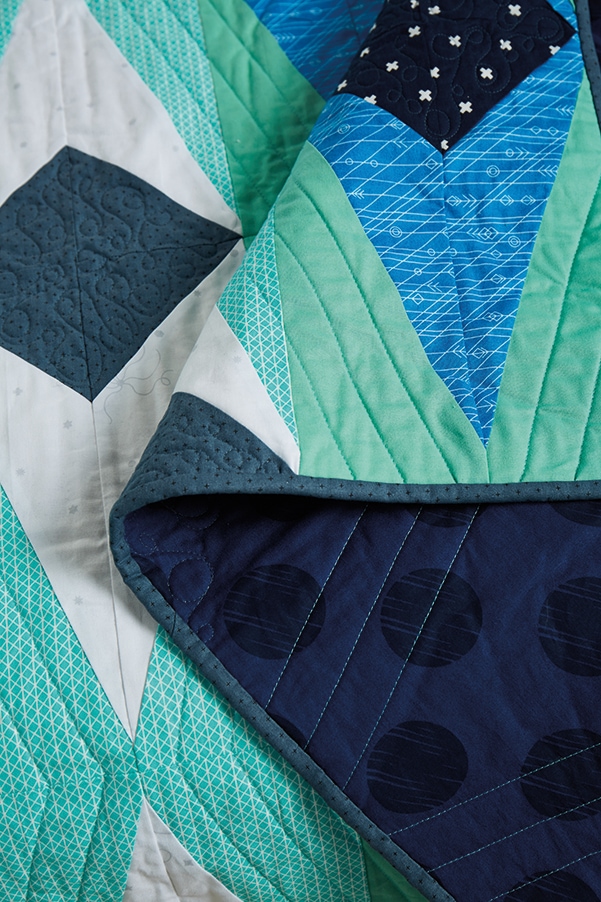
- Quilt as desired. I have used free motion quilting; a woodgrain motif on the main petals, a meander motif on the secondary petals, switchbacks in the centre border and finally a square spiral on the central square. Other quilting ideas; straight line quilted diagonal lines 3” spaced using the corners of the central square as your starting markers, or hand quilting just within the edges of the petals and following their shape.
- Once you have finished quilting, trim off excess backing fabric and batting and square up your cushion block if required.
Finishing:
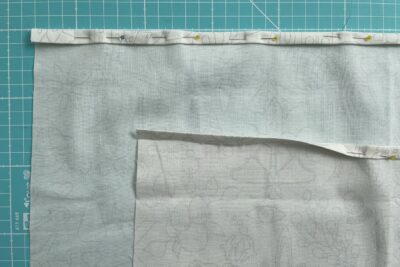
- Take the two cushion back 18½” x 11½” rectangles and hem one long edge of each by pressing the raw edge to the wrong size by ¼” then again by another ¼”. Press well and sew.
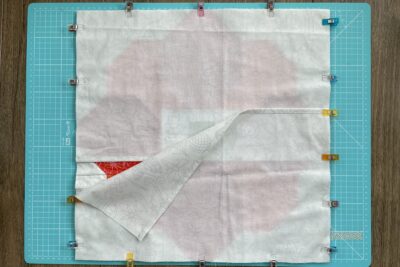
- Pin or clip to the quilted blocks, right sides together, all around the four side. Make sure the cushion back piece you want to appear upper-most once the cushion is turned right side out is underneath by the second back piece.
- Sew around all four edges using a ¼” seam allowance, securing the start and finish with some back-stitching.
- Trim the corners, turn the cushion cover the right way out, carefully poke out the four corners and then press.
- Stuff with an 18” cushion pad and enjoy your new flower block cushion!
About the Designer

Amy lives in the north of England with her husband and son. When she’s not sewing and quilting, Amy can usually be found baking or reading. You can find her on Instagram @amyatthegate
More Great Projects by Amy
Cleaning your sewing machine | Top Tips!
A Helping Hand for Hand Quilting
Straight Line Quilting | Not so straightforward…in a good way!