Tuesday Tutorial, Patchwork Skirt

It’s been a while since we’ve had a Tuesday Tutorial here, I think it’s about time for another one!

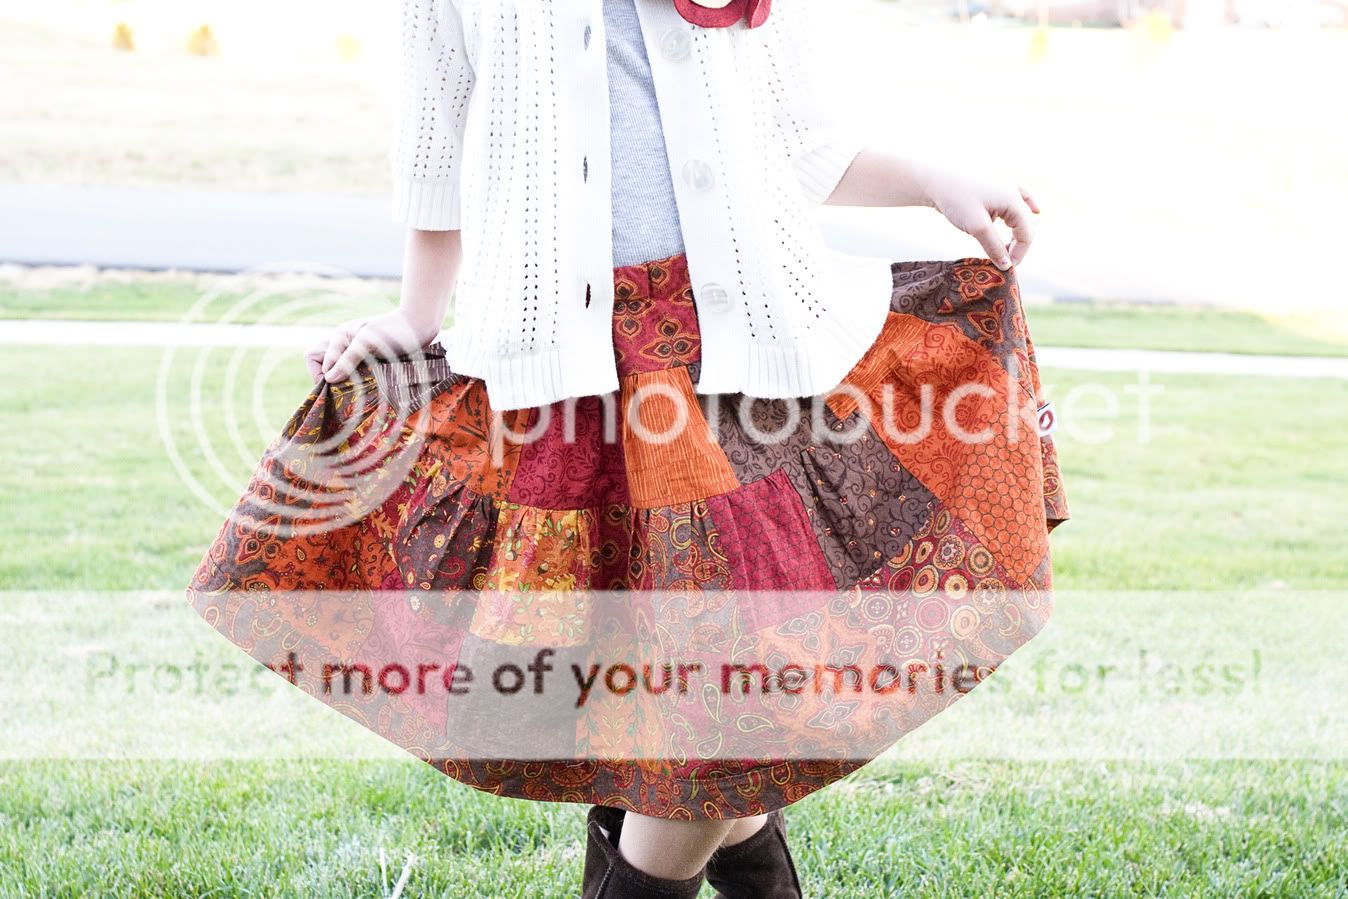
I’m excited to share with you this patchwork skirt I made for my daughter.  She had outgrown the last patchwork skirtI made her, and I thought this pattern was in need of an update for an older girl. So I came up with this new *updated* version of my Patchwork skirt!!

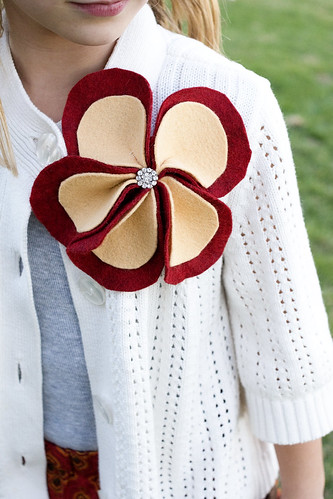
I made her this cute flower brooch to go with her skirt, you’ll have to wait a week or two for this tutorial, but it’s coming soon!

This skirt is very simple to construct! I made it in an afternoon (the day before Thanksgiving… don’t tell anyone- gotta love a last minute project… *ahem*)..
You will need:
1-2 Charm Packs. Charm packs are packets of fabric pre cut into 5″ squares. Many fabric companies sell them but Moda Fabrics has the most.  These fabrics are Pumpkin & Spice by Deb Strain.
This skirt is approx a size 8 – 10 and you will need 48 charm squares. It could work as small as a size 6 but will be more gathered around the waistband. I  recommend buying 2 charm packs because there may be some prints you don’t want to use.
1/4 yd fabric for waistband  – cut 2 pieces 6″ wide by 16″ long
1/4 yd fabric for skirt band – cut 2 pieces 4″ wide by width of your fabric
1″ wide elastic

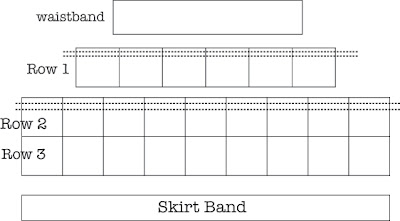
This is a diagram of how this skirt is constructed.  Each side (front and back) of the skirt will look like this when finished. The dotted lines indicate gathering stitches.

Okay to begin:

1- Sew 6 charm squares together to make skirt front row one. Press seams to one side. Repeat for skirt back row one. Set aside

2- Sew 9 charm squares together for skirt front row 2.  Press seams to one side.

3- Sew 9 charm squares together for skirt front row 3. Press seams to one side, the opposite way to pressed row 2.

4- Sew row 2 to row 3. Press.

Repeat steps 2-4 for skirt back.

5-  Sew skirt band to row 3 of skirt.  Match right sides together and place skirt band over the top of row 3.   After stitching fold down and press seam towards skirt band. Repeat for skirt back.

6- Run 2 rows of gathering stitches in the top of row 2.  Pull up on gathering stitches and sew so that the top of row 2 matches the bottom of row 1. Stitch together row 1 to row 2, right sides together.  You do NOT want any puckers or gathers in the bottom of row 1, only the top of row 2.

7- Matching side seams, sew skirt front to skirt back. Make some kind of mark so that you know which seams are your side seams, this will be important later.

8- Sew your 2 waistband pieces together at short sides. Press seams open.

9- Zig zag or serge the 2 longs sides of your waistband.

10- Run 2 rows of gathering stitches on the top of row 1.  Pull up on gathering stitches until row 1 matches up with your waistband piece.  Pin skirt to waistband, right sides together and matching side seams.  Stitch.

11- On your waistband piece, fold the top down 1 1/4″. You are folding with wrong sides together.  Stitch in place leaving a 1″ opening to feed your elastic through.

12- Cut your elastic to size and feed through the casing you just made.  When finished stitch elastic together and close the opening in the casing.

To finish bottom edge of skirt:
13- Fold under raw edge of skirt band 1/4″ and press.
14. Fold skirt band so that folded edge lines up with the seam between the skirt band & skirt.  Pin in place well.
15. On the right side of skirt band top stitch to hold the skirt band in place. You are going to be top stitching as close to the seam between the skirt band/skirt as possible.  There is more explanation of this technique here, if you need some extra instructions. (it’s the same method I used to attach the band to the bottom of the pillowcase shirt.(
Clip strings, press and enjoy!!

Similar Posts

16 Comments

  1. I love this skirt! Is it possible to get an explanation of how to resize? My daughter is about to be a year old so this would be way too big! Thank you bunches!

  2. How gorgeous! I just love your fabric selection, such a beautiful warm feel to it!
    Thanks for adding yet another project to my list ( two more sydney skirts to finish first though!)

  3. do you have a pattern similar to this for a child jumper dress? I saw one it was cute would love to try and make for summer. I can’t find one anywhere. I do love this skirt! The colors are fabulous.

  4. Hi. I used your tutorial to make a skirt for myself, larger squares, and right to the floor. Your instructions were perfect. I had no trouble following along and it turned out beautifully. Thank you!

Leave a Reply

Your email address will not be published. Required fields are marked *

This site uses Akismet to reduce spam. Learn how your comment data is processed.