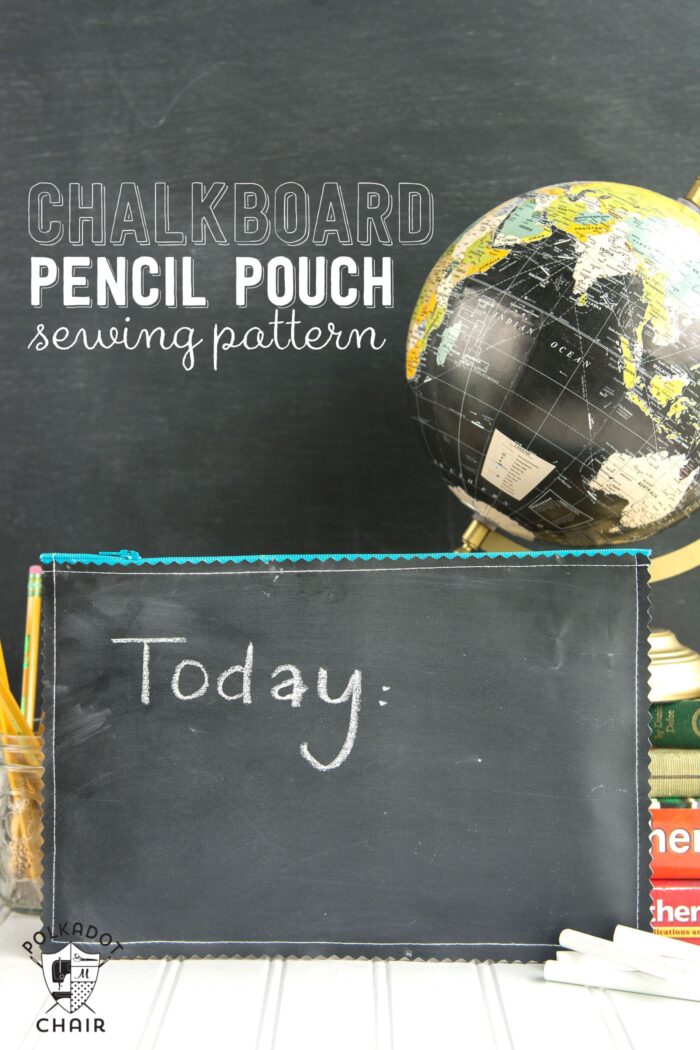
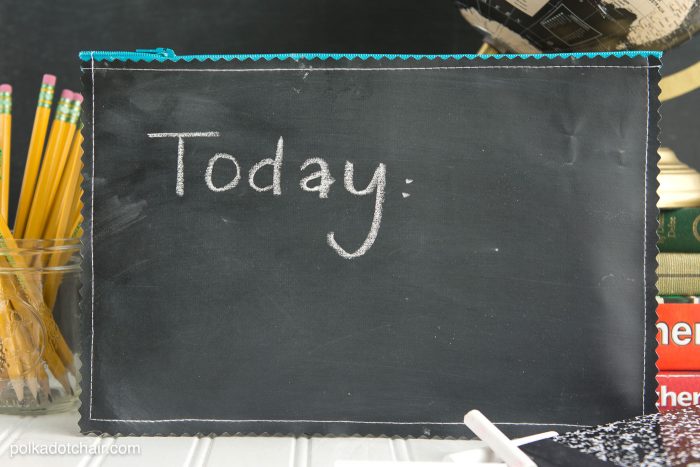
Chalkboard Fabric Pencil Pouch Sewing Pattern
Within the next few weeks, all 3 of my kids will be going back to school. In honor of this annual ritual, I’ve got a trio of back-to-school projects to share with you this week and next. First up is a sewing tutorial for a chalkboard fabric pencil pouch! Keep an eye out for a few more back-to-school sewing projects next week, including one I wrote for BERNINA that I think is one of my new favorite tutorials.
A few years ago, I picked up a couple of yards of chalkboard vinyl at a local sewing shop. I kind of forgot that I had it until I moved my sewing room last winter. I put it on a table out in the open to remind myself to do something with it. Today I’m sharing the first of 3 projects featuring this chalk cloth. I still have some of the stuff leftover, so I anticipate that a few more projects will pop up featuring it in the next few months.

My daughter is headed to high school this year, and I thought that she might like a unique and fun pencil pouch to take with her. I’m always jotting down notes to myself on scraps of paper. I pinned the scrap paper to my zippered pouch and thought, “Why don’t I just write on the pouch?” and the idea was hatched.
This pencil pouch can be made any size that you want and features an oilcloth lining. If you’ve ever made a pencil pouch before, you should know that this one is constructed in a slightly different way than a typical zippered pouch. It’s actually quite a bit easier to sew, and zip pouches are simple, so this one is crazy easy to make.

Chalkboard Fabric Pencil Pouch Tutorial
Chalkboard Fabric Pencil Pouch Sewing Pattern
Equipment
- Binding Clips I used both small and large clips
- quilting ruler
- Teflon Foot for Sewing Machine
supplies
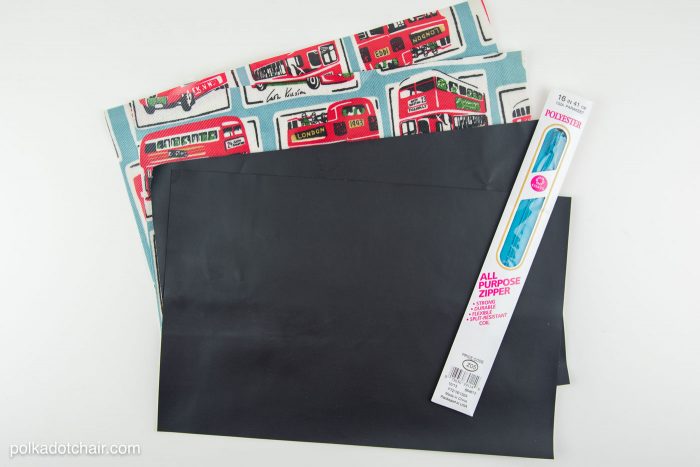
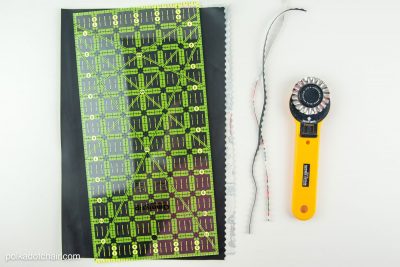
- 2 pieces chalkboard vinyl each 8″ x 12″
- 2 pieces oilcloth each 8″ x 12″
- 12″ or larger polyester zipper
Instructions
- If you’ve never sewn with vinyl or oilcloth before, you can read directions for sewing with these types of fabrics in this post.
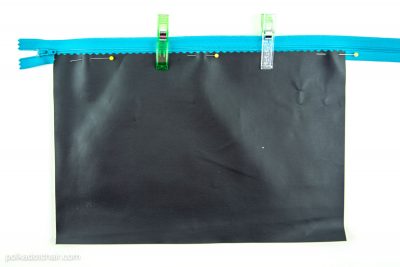
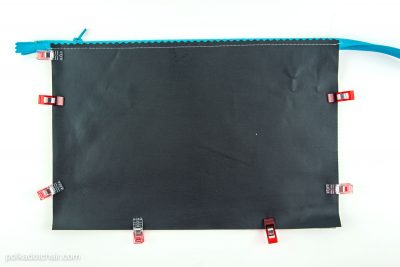
- Begin by using the pinking blade on your rotary cutter and a ruler to cut off a scant 1/4″ from the top edge of the two chalkboard vinyl pieces. You get one shot at this cut, so you might want to practice on a scrap first.

- Next, pin the pinked edge of the chalk cloth to the right side of the zipper. Don’t worry if the zipper is longer than the piece; you’ll just cut it later. Make sure that the edge of the chalk cloth won’t catch in the zipper (don’t get it too close). Now use your binding clips and attach the lining to the back of the zipper. You’re making a zipper sandwich – The wrong side of the lining will be facing the wrong side of the zipper. Again, make sure that the lining piece is clear of the zipper.
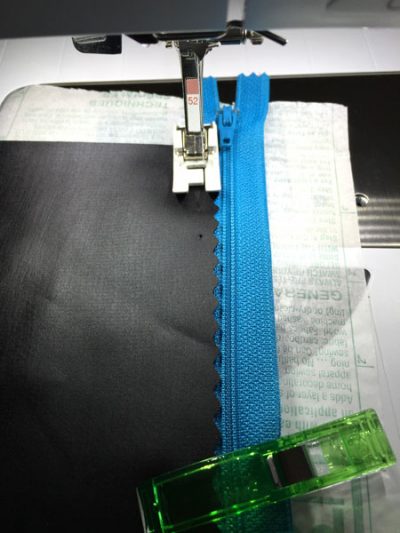
- Now you are going to stitch through all of the layers. However, since you have coated fabrics on both the top and bottom, using a Teflon foot by itself won’t ensure that your project feeds properly through your sewing machine. The teflon foot will feed the top layer through smoothly. To get the bottom layer to feed smoothly, you need a piece of tissue paper. Place the tissue paper (I use leftover scraps from interfacing) between the oilcloth and the feed dogs on your sewing machine.

- Adjust your needle to the right so that your seam is next to the pinked edge of your fabric, and set your stitch length to somewhere between 3.5 and 4.0. Stitch. Remove the tissue paper when you’re done. I’d recommend practicing on a scrap of fabric first, as you can’t unpick it without leaving a lot of holes. Check that your sewing machine is set properly before you begin.
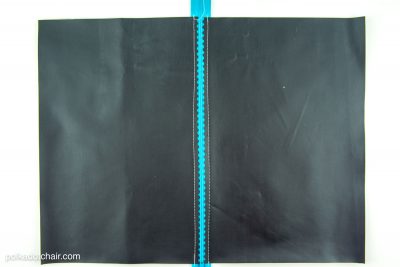
- Repeat for the other side of the zipper. Your piece will look like this.
- Bring the layers together, with the right sides of the lining facing, as they will be when the pouch is finished (all edges are even).
- Clip with binding clips to secure in place.
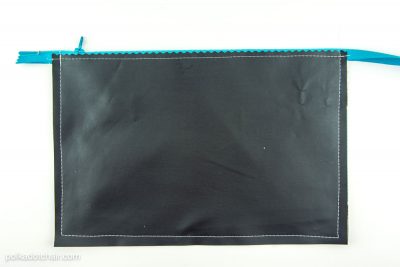
- Stitch around 3 edges of the pouch with a large 5/8″ seam allowance. Please backstitch and sew over the top of the zipper.
- Cut off the excess zipper.
- Use your pinking rotary cutter again and trim all 3 edges of the pouch.
- That’s it, you’re done! You can also use this technique with oilcloth, but we will talk more about that next week!
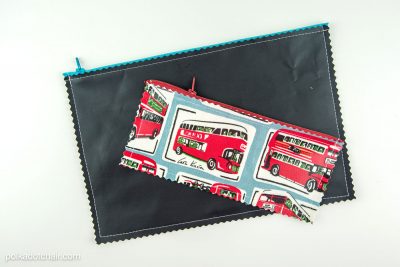
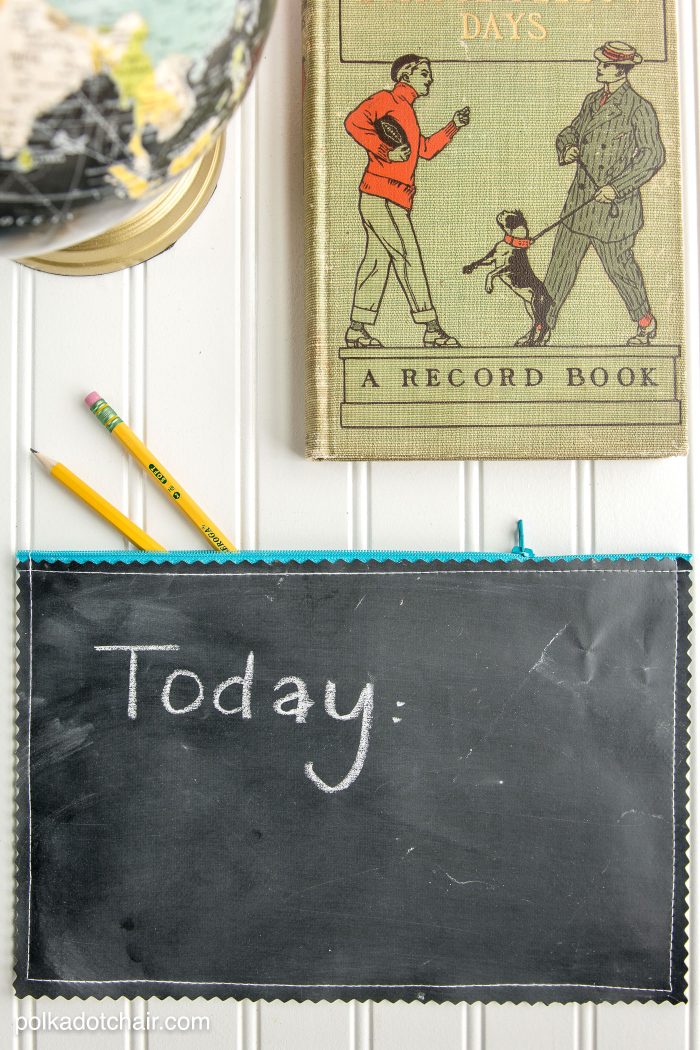
Use it to take notes in class, make to-do lists, or just doodle if you’re bored.

You create environment where learning feels natural and comfortable for all
What a great idea! Chalkboard fabric on a pencil case, and then maybe you can keep some chalk inside. How awesome is that. 🙂
We wanted to tell you we featured your idea on our blog today! We love your idea!
A real fun project with instant results! I like it!
Thanks for the great idea! I, too, have a yard of chalkboard cloth that I bought over 10 years ago! Now is the time to use it!