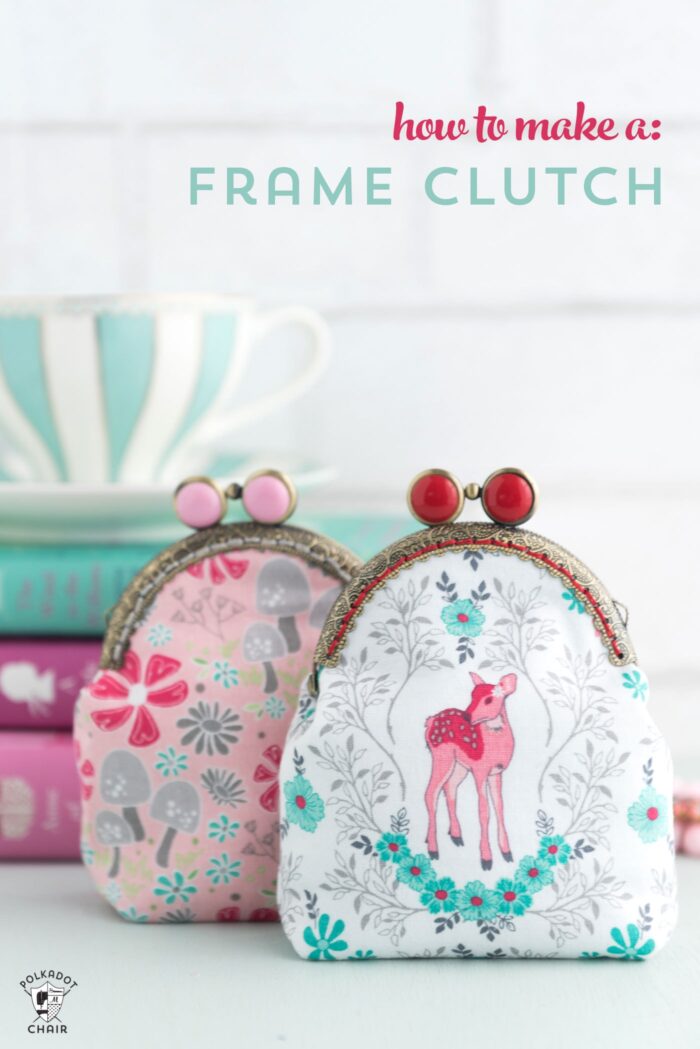
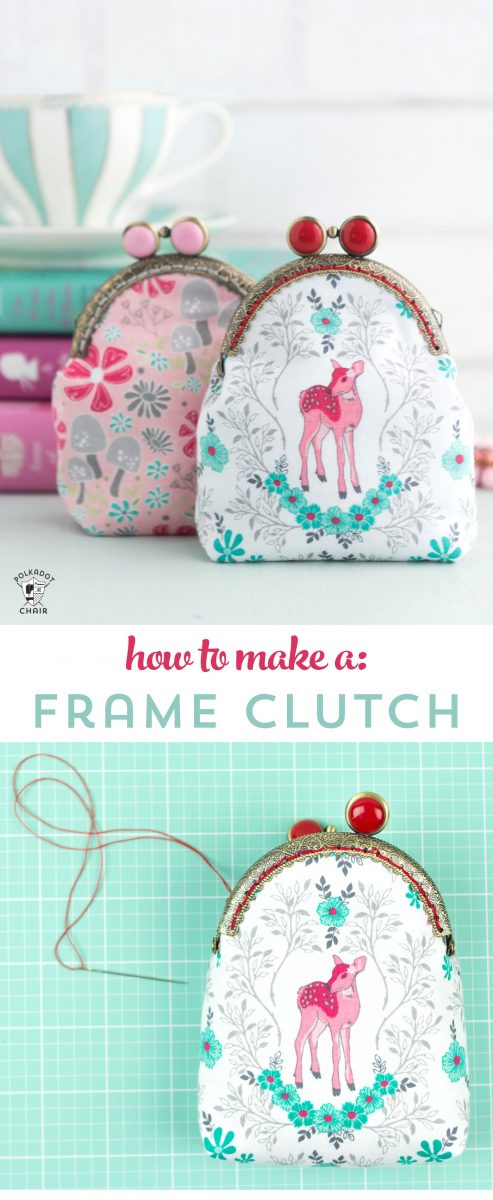
How to Make a Coin Purse with a Metal Frame
Metal frame coin pouches are easier to make than you think and make great gifts! Learn how to draft a custom pattern for a simple frame clutch with this metal frame coin purse tutorial.
Whether you’re an experienced sewing enthusiast or a newcomer seeking a fulfilling project, our detailed step-by-step instructions will walk you through all of the steps to create an adorable fabric coin purse with a metal frame.
Since I’m always looking for simple handmade gift ideas, I thought it would be fun to show you how to make a frame clutch.
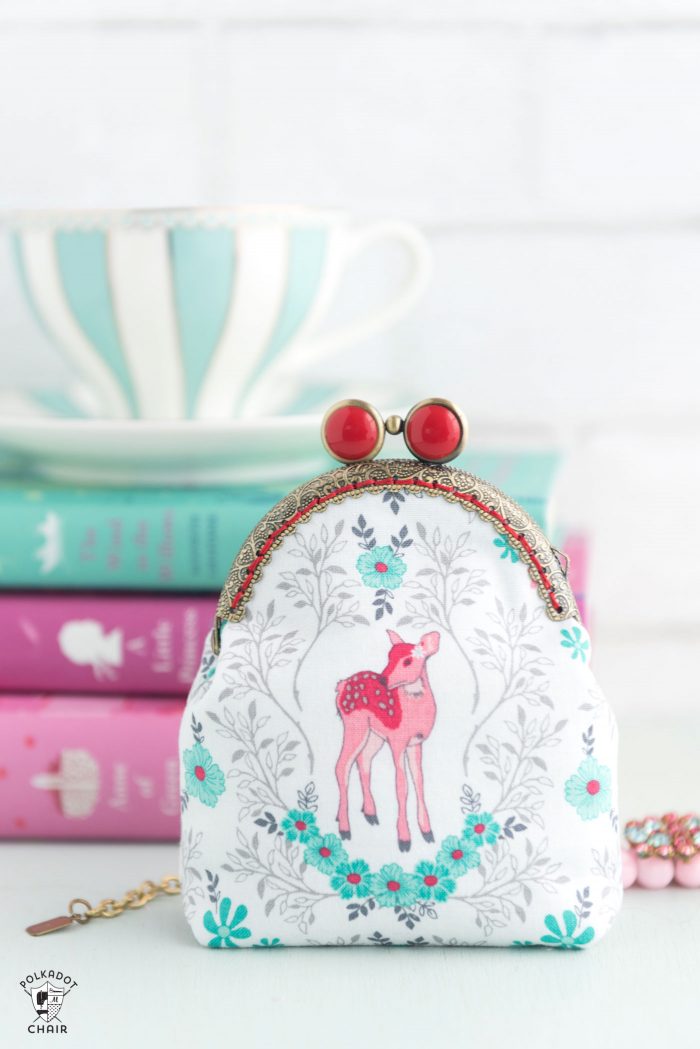
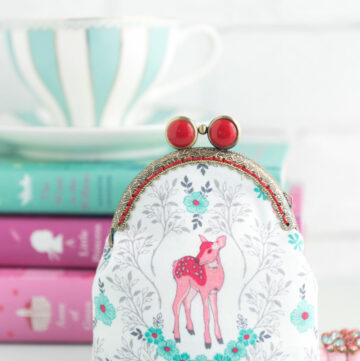
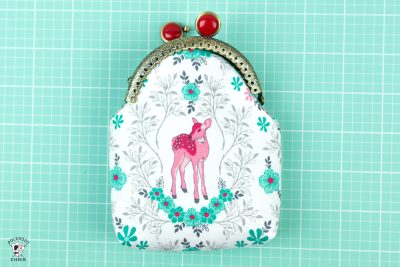
The tutorial for these metal frame coin purses can be made in ANY SIZE! The ones I made are small, but the tutorial will teach you to make them any way that you’d like.
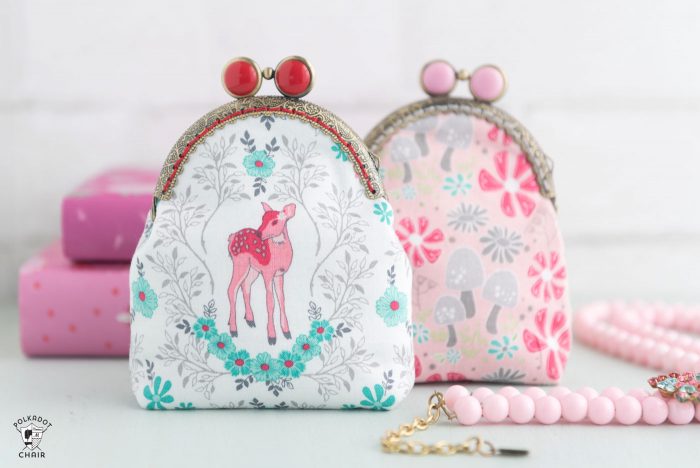
If you’re wondering what in the world I’m talking about. It’s these small metal frames that you attach the fabric to in order to make a purse (or coin purse, in this case).
They come in many sizes and many finishes. You may have seen them in stores and wondered what in the world you did with them. You might have also wondered how you’d ever figure out how to make a purse the right side to fit them.
There are two basic ways to attach a frame clutch to a bag:
1- To stitch it on – clutches like this will have holes in them (like the ones in the photos above)
2- To glue it. I’ve made frame clutches with the “glue on” frames before. You can see those clutches in this article from the archives.
The ones we are going to work with today are the stitch-on kind. I picked them up on Etsy.
So, let’s get down to the tutorial, shall we?
Metal Frame Purse Supplies:
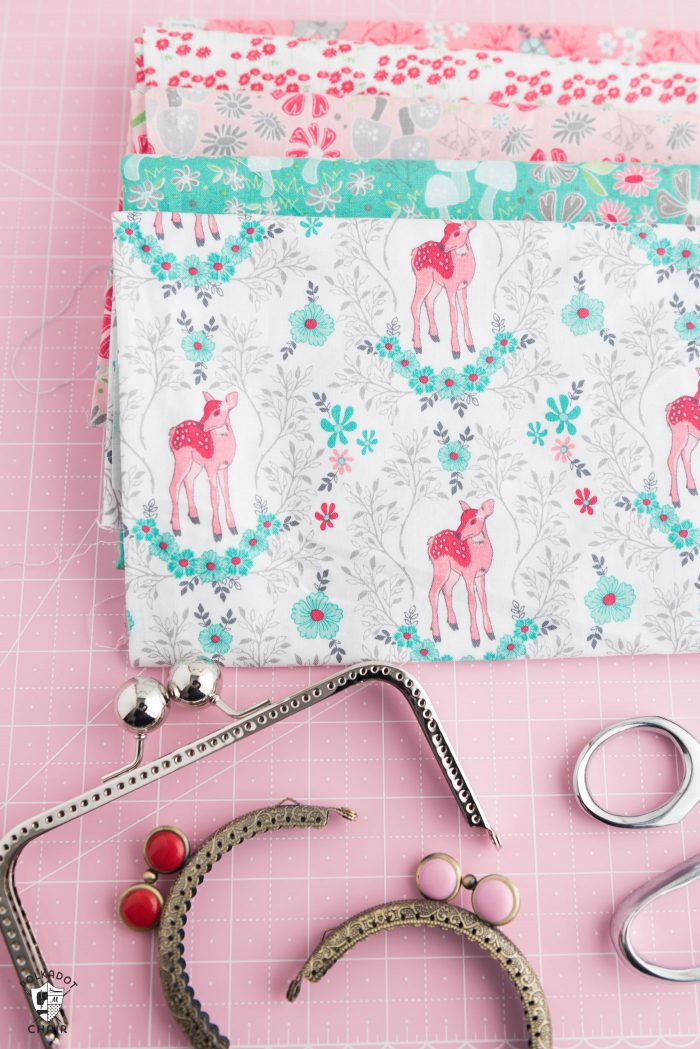
- Frame clutch in any size. Mine was purchased here.
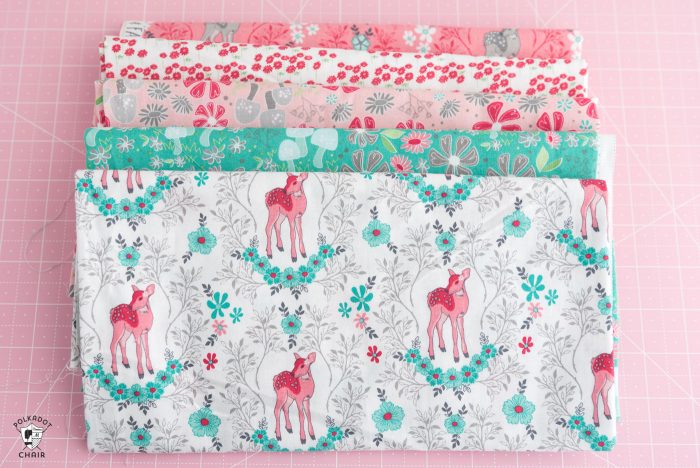
- Fat Quarter of fabric for the front and one for the lining – I used Flora and Fawn fabric. It is out of print now, but you can find a similar fabric.
- Fusible Fleece
- Topstitch thread
- Two pencils (you’ll see why in a minute)
- Washi Tape (or masking tape)
- Paper (graph paper is recommended)
- Ruler
- Basic sewing supplies
Instructions
{this post has been updated from a previous version to include additional instructions}
How to Make a Fabric Coin Purse with a Metal Frame
Equipment
supplies
- 1 Frame clutch in any size. I purchased mine on Etsy.
- 2 Fat Quarters Fabric One for the front and one for the lining – I used Flora and Fawn fabric (it is out of print but you can find similar online).
- 1 large piece Fusible Fleece
- 1 spool Topstitch thread
- 1 spool Washi Tape or masking tape
- 1 piece Paper graph paper is recommended
Instructions
Step One: Draft a Pattern Piece
- Okay, the “general” idea of what we are doing is drafting a pattern so that the fabric curves into the frame and “poofs” out a bit at the sides and bottom. You can control the amount of “poof” – we will discuss that in a minute. You can also control the height of the clutch.

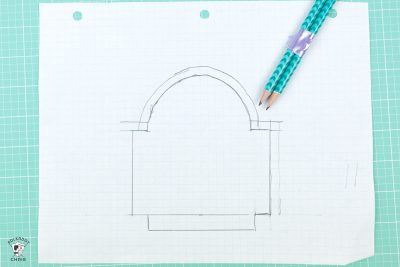
- On your graph paper, trace the outside of the top of your frame clutch. (it doesn’t matter if it is curved or straight).
- Next, note where the bottom of the metal is on the frame – I recommend marking just below the last “hole” left open for stitching. I should have brought mine up a bit in the photo above.
- Now measure out ½″ from this point horizontally. Draw a line.
- Decide how tall you’d like your clutch to be (the height the fabric part will be will stand when sitting on a table). Measure down this far from the top of the center of the frame. Draw a straight line horizontally on your paper at this point.
- Using your ruler, connect the line you drew at the bottom of the frame with the line you drew for the height of the clutch. At this point, your photo will look like a curve with a rectangle underneath.
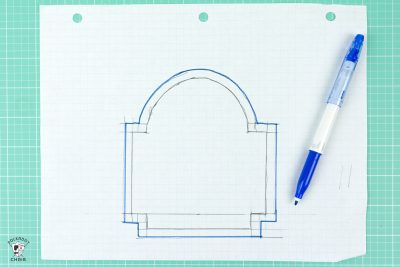
- Measure in ½ ” (horizontally) from the bottom corners of the rectangle and place a mark. Measure down ½″ from the bottom of the clutch and draw a line.
- Now, draw two lines to connect the bottom line to the bottom of the rectangle. You are pretty much just drawing a smaller rectangle UNDER the rectangle you just drew. The 2nd rectangle is ½″ tall and comes in ½″ on both sides from the larger rectangle.
- Add Seam Allowance:
- Now you have a pattern shape but no seam allowance! So, let’s add some seam allowance.
- Tape your two pencils together. When you draw with both pencils simultaneously, they should be about ¼″ apart.
- Using the pencils taped together, trace along the curve you drew for the top of the clutch. Now trace around the entire perimeter of the clutch.
- After you’ve completed this step, trace around the entire piece with a marker so you don’t get confused as to which line to cut on.
- Cut the piece out. Fold it in half to make sure it’s symmetrical. Adjust if necessary.
- Okay, remember how we said we could change the ‘poof’ of the clutch? If you want it more ‘poofy,” you can change the amount it comes out from the side of the clutch.
- We were using ½″ measurements, but you can use 1″ or even bigger if you like. Just make sure that whatever amount you measure out from the side of the frame, you measure the same amount out (and down) on the bottom of the frame.

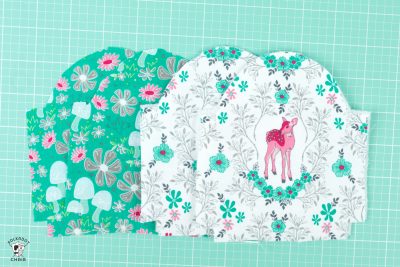
Step Two: Cut out the Fabric
- Next, cut out two pieces of fabric for the front of the clutch and two pieces for the clutch lining.
- Also, cut out two pieces of fusible fleece. Fuse them to the wrong side of your clutch outside pieces.
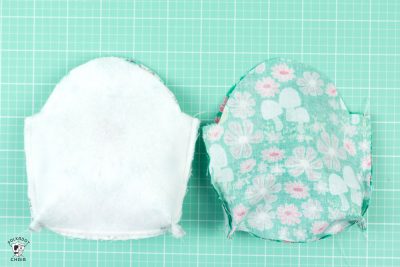
Step Three: Sew the Front and Back Pieces
- Stitch your two clutch outside pieces together along the side seams and bottom seam. “Pinch” the bottom corners and stitch. Make sure you are using a ¼″ seam allowance for all pieces.
- Repeat for the clutch lining pieces. Leave a 2″ opening in the bottom of the clutch lining piece.
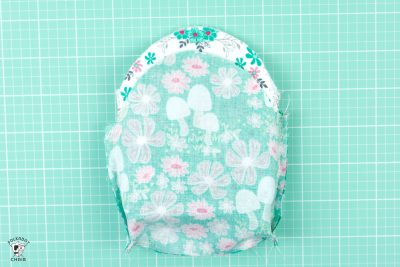
- Turn the clutch outside piece right side out. Slip it into the clutch lining piece, right sides facing. Match seams and raw edges. Stitch around the top edge.
- Clip curves, turn right side out, and press.
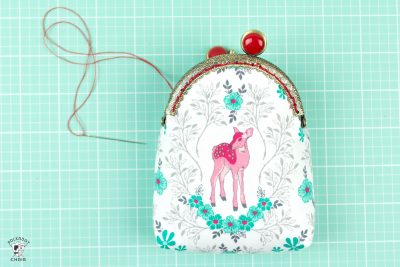
Step Four: Attach the purse to the Metal Frame
- Turn the clutch right side out using the hole you left in the lining. Slip the clutch into the frame and line it up the best that you can.
- If you can, match the clutch's center with the fabric clutch's center. Use a couple of pins to hold it in place as you work.
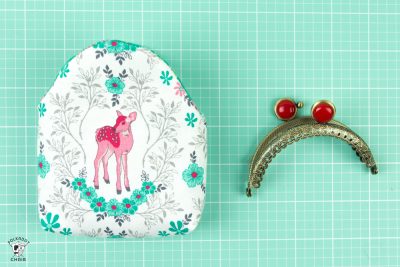
Finishing:
- Using two strands of topstitch thread topstitch to the fabric. You can “try” to hide the stitches on the back, but it’s hard. Instead, just use a thread you don’t mind seeing on the lining of the clutch.
- That’s it! To finish it up, hand stitch the opening in the lining closed. Also, fold the center seams UNDER the hinge on the frame. I like to press it a bit to get the pleat to stay.
- As I said, you use this technique to make a clutch in any size!
You May Also Like:
This is adorable! Which frame did you purchase? I went to the link, but maybe it’s just me but I don’t see the ones with the colored clasp. thank you
I got mine several years ago, there should be an etsy seller with a similar one available.
I made a coin purse using your instructions and it turned out great. Your instructions were very well written and easy to follow. Thank you so much for sharing. I wish I could show you a picture of how mine turned out.
Definitely doing this again
I have 6 frames that I bought in Korea and I have wondering what I was going to do with them. I have some scrap silk and I think I will crazy quilt the scraps into fabric and then create my clutches. Yeah that will work.
Adorable! I can’t wait to try my hand at this! Thanks for the easy-to-follow instructions.
Theresa
Loved it! You made it look so easy. I always wanted to make a frame purse, but not sure about the frames.
Thank you so much for sharing , ,
Never had the nerve to try before – but now that you’ve shown how it works, I might just have a go now. Many thanks!
Cheers, Kerry
You’re right Melissa, perfect time of year for this tutorial! I was just thinking about using a couple of frames I picked up on sale, but wasn’t sure where to start. Thanks so much!
Very cute and fairly easy. What a unique gift they will make.
OH! Thank you so much for this tute — I have a few pieces of precious fabric that I didn’t know what to make for my sister. I also happen to have a frame from a project I never stitched together. Perfecto!