Thanksgiving Advent Calendar Tutorial
The tutorial for my Thanksgiving Advent Calendar originally appeared on Moda Bake Shop. I am reposting it here to make it easier for my readers to find the tutorial (too many emails, “where can I find your advent calendar?” *wink*).
Enjoy!
Want to know WHAT to put in the pockets of the Advent Calendar? Click here for a great round up of ideas!
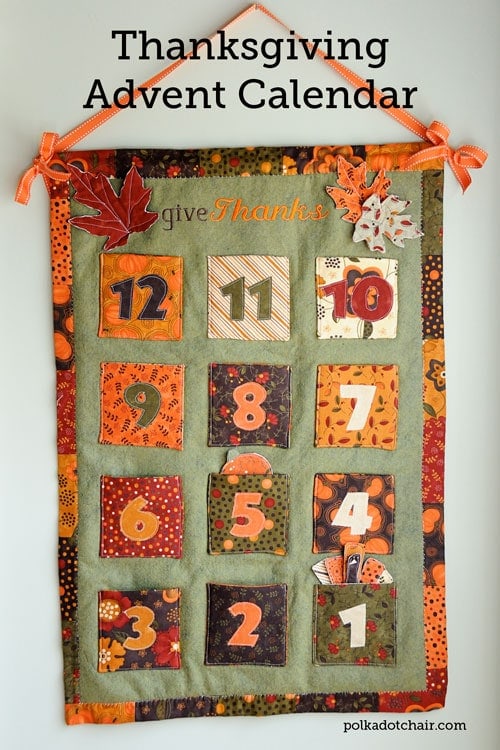
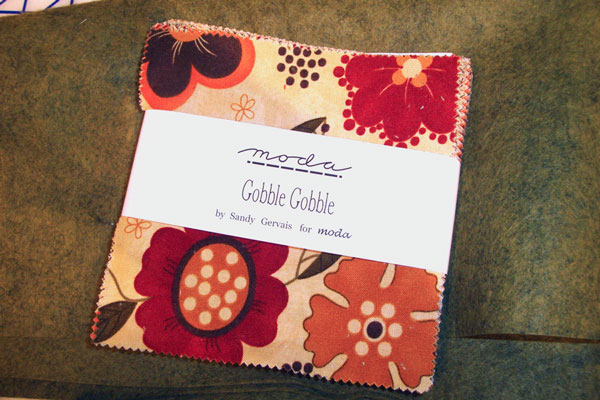
Some friends and I have had the idea to make a Thanksgiving Advent Calendar for a few years. When I saw the Gobble Gobble charm pack, I knew that it would be perfect for this! Here is a fun project for a Thanksgiving countdown calendar. Instead of the 12 days of Christmas, why not the 12 days of Thanksgiving?
In each pocket, you could put a treat, a quote, or a small activity for your family to do to prepare for the holiday.
Thanksgiving Advent Calendar Tutorial
supplies
- 2 Gobble Gobble Charm Packs
- 1 20"×30" piece of wool felt
- fabric for backing
- Fusible fleece or Warm & Natural Batting
- Ribbon
- Wooden dowel
- Heat and Bond Light or your favorite fusible
Instructions
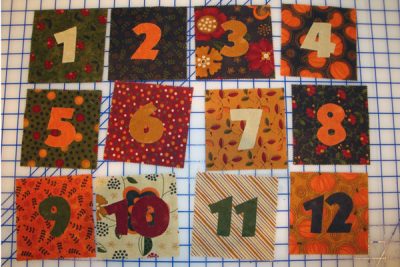
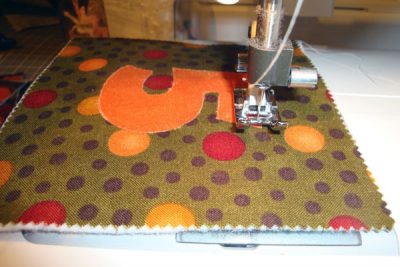
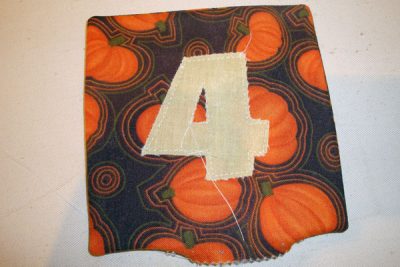
- To begin, pick out your favorite 12 prints from your charm pack. Using your favorite applique method and font, cut out and adhere the numbers 1-12 to these charm pieces. If you have questions about doing this, check out my method in a previous tutorial here.

- Cut out 12 pieces of fusible fleece to 5×5 (the same size as your charm pieces).
- Adhere these pieces of fleece to the backs of the squares.
- Sew around the number through all layers of fabric and fleece. I like to use a straight stitch, but use your favorite one for appliqué.
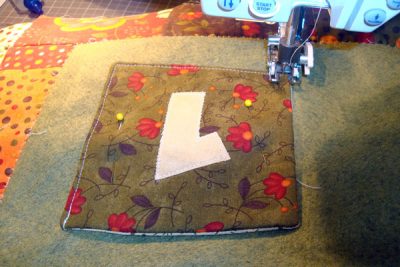
- Pick out 12 more charm pieces. These will become the backs of your pockets. Sew around the 4 sides of the pocket, leaving a 2″ hole in the bottom to turn it right side out.
- Clip the corners of the pocket.
- Turn the pocket right side out.
- Press.
- Tuck the unsewn portion of the pocket in and press. If it won’t stay, use a bit of iron-on seam tape to keep it closed.
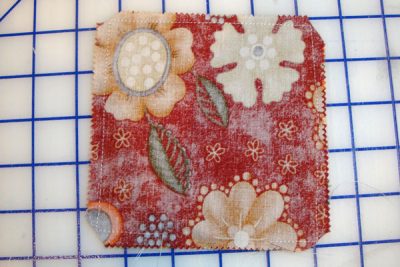
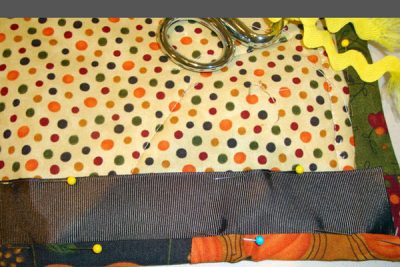
- Pick out 12 more charm pieces. I chose to keep them in the green/brown/red/orange family.
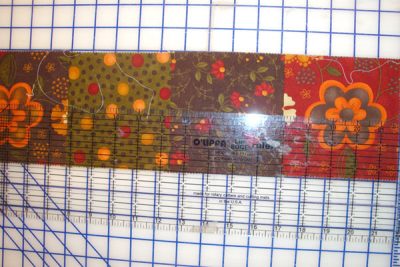
- Alternating colors and patterns, sew these 12 pieces together, using 1/4″ seams, into one long piece. Press seams all to one side.
- Cut the strip of charm pieces in half lengthwise to make 2 strips, each 2 1/2″ wide.
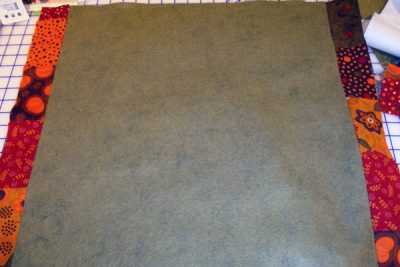
- Attach one strip to each long side of your piece of felt, then cut off the extra and save it.
- Attach the saved strips to the top and bottom (short sides) of the felt.
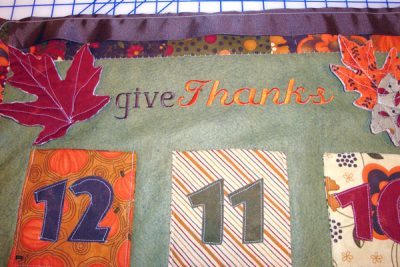
- I chose to embroider “Give Thanks” on the top of my Advent Calendar. Don’t worry if you don’t have an embroidery machine. If you want to “give Thanks” on your calendar, use your extra charm pieces and the same applique technique used on the pockets.
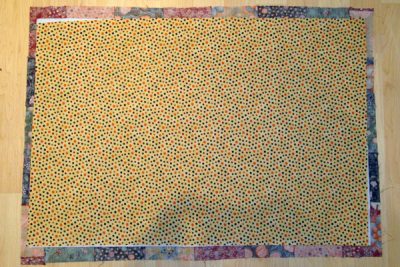
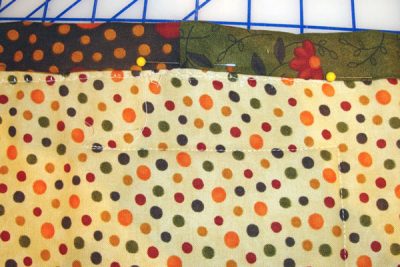
- Cut a piece of fusible fleece smaller than the calendar piece. You will want to leave a 1 1/2″ – 2″ border around the fusible fleece piece. Put the “sticky” side of the fusible fleece down towards the calendar front.
- Cut a piece of backing the same size.
- Turn over and, using safety pins, secure all layers together.
- Press the fusible fleece to the felt piece.
- Using your walking foot, stitch around the entire border (in the seam between the felt and the charm border). I used a blanket stitch, but you could also use a straight stitch or any decorative stitch you like.
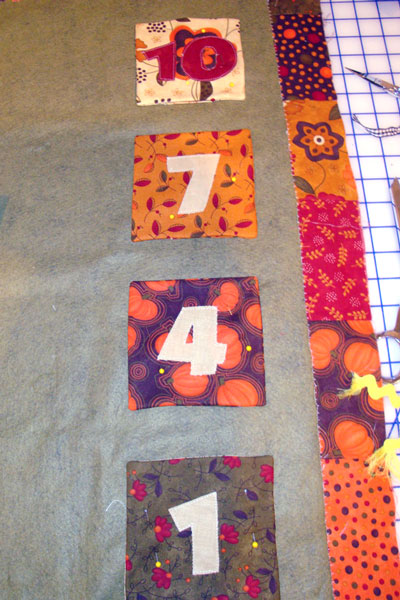
- Next, you are going to lay out your pocket pieces.
- I found it helpful to first lay out all of my pocket pieces to “eyeball” where I wanted them to go and get a good idea of spacing. After this, I pulled off all but one row.

- Working from the left side, one row at a time, pin the pocket pieces to the front of the calendar. Use a ruler to make sure the pieces are lined up properly. My pieces ended up being 1 1/2″ from the side and 1 1/2″ apart. In case your pockets have “curved” in at the centers, measure from the corners to ensure proper placement. Pin WELL.
- Making sure to backstitch at the top of each pocket sew, using your walking foot, around each pocket, doing your best to keep your layers flat. Sew around the 3 sides of your pocket, leaving the top open.
- When you finish the 1st row, pin on the 2nd row and sew it. When you finish the 2nd row, sew the 3rd row.
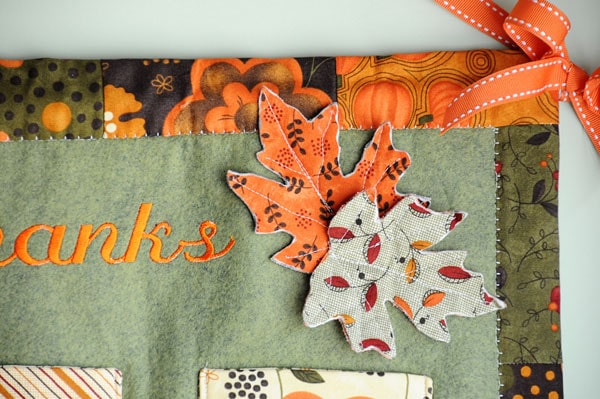
- Using 6 charm pieces, make 3 leaves using the technique outlined here: (it is the same method I used to make the bird). I just traced 3 leaves from my yard, but if you’d like the pattern I used for my leaves, you can get it here.
- Sew “veins” into your leaves, then crinkle them up in your hands to give them some dimension.
- Pin the leaves onto your calendar, sewing through all layers, and sew the leaves to the calendar.
- To make a pocket to hang a calendar from:
- Sew a 2″-wide piece of ribbon to the top of the calendar. (You are going to sew the ribbon to the fabric border piece; it will be as wide as the felt.) Put a bit of fray check on the ends of the ribbon.
- Press and turn towards the back.
- Pin in place.
- Hand sews ribbon through along the top AND the bottom.
- To finish the sides and the bottom of the calendar.
- Turn the calendar over. Turn the border under 1/4″, then turn it under again and pin in place. Turn your calendar over and double-check that the border is even all the way around; if not, adjust it on the back. Hand-sewn in place.


I love this Thanksgiving advent calendar. I would love it if you would make me one to buy for my grandchildren for next Thanksgiving. It’s awesome!
I loved advent calendars when I was growing up so much. I’d never thought about doing one for Thanksgiving! I will definitely be keeping this in mind.