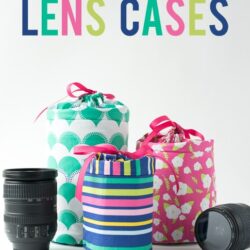
DIY Padded Camera Lens Case
Keep your camera lenses safe on the go with these DIY padded camera lens cases. This sewing tutorial will walk you through making the lens cases step by step. If you like this project, you may also like this Lens Cap Keeper Sewing Tutorial.
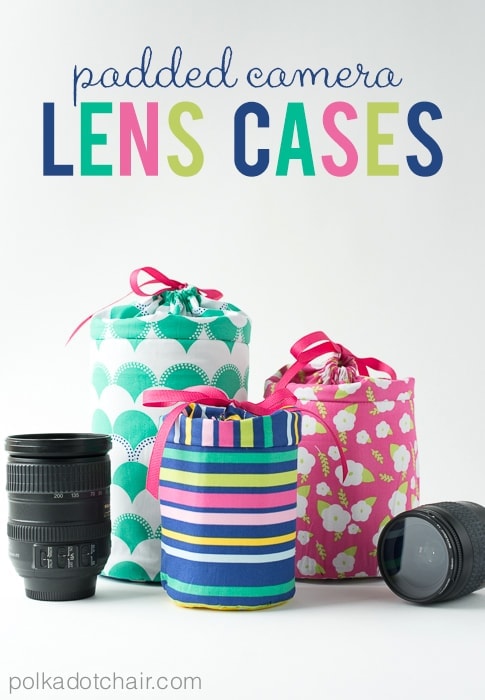
Sometimes when I travel, I like to carry my camera around my neck and an extra lens in my purse/backpack instead of carrying my large camera bag around with me. The only issue is that the lenses can sometimes get jostled around and need protection. I’ve had these padded camera lens cases on my “to make” list for a while now, and finally sat down and made some for my upcoming London trip.
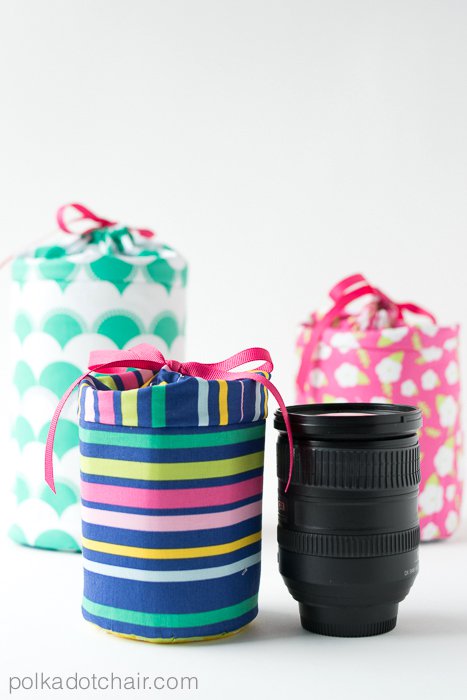
I designed them in 3 sizes: small, medium, and large. The large case I made for my zoom lens and the small one fit my 35 mm lens quite well. The medium one was designed for my 18-200 mm lens ,but it also fits snugly in the small case. You can pick and choose which size you’d like to make based on which lenses you have.
Okay, ready to make a lens case for yourself? Here’s how.
Camera Lens Case Sewing Tutorial:
DIY Padded Camera Lens Case
Equipment
supplies
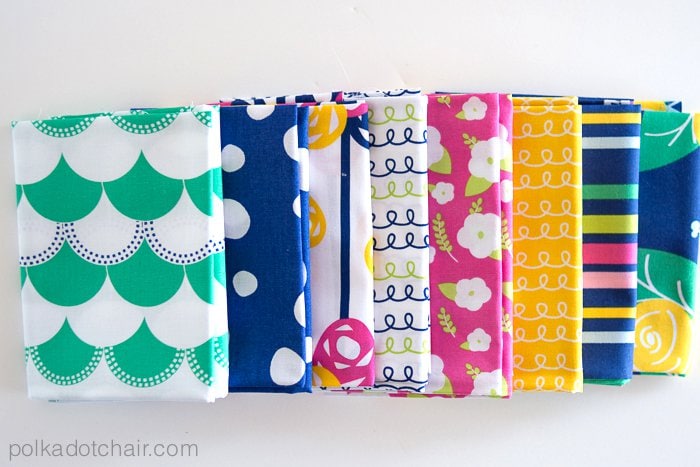
- 2 Fat Quarters per case
- 1/4" Foam
- 1/4" Wide ribbon
- Extra-wide double-fold bias tape
Instructions
Large Case Cutting Instructions:
- From the 1/4″ foam cut:
- 5″ diameter circles
- One piece 17″ x 8″
- From the outside fabric cut:
- 5″ diameter circle
- 2 pieces 17″ x 8″ (I cut one for each with the stripes going a different direction to add variety)
- From the lining fabric cut:
- 5″ diameter circle
- 1 piece 17″ x 8″
Medium Case Cutting Instructions:
- From the 1/4″ foam cut:
- 5″ diameter circle
- 1 piece 17″ x 6″
- From the outside fabric cut:
- 5″ diameter circle
- 1 piece 17″ x 6″
- 1 piece 17″ x 8″
- From the lining fabric cut:
- 5″ diameter circle
- 1 piece 17″ x 6″
Small Case Cutting Instructions:
- From the 1/4″ foam cut:
- 4″ diameter circle
- 1 piece 13.5″ x 5″
- From the outside fabric cut:
- 4″ diameter circle
- 1 piece 13.5″ x 5″
- 1 piece 13.5″ x 8″
- From the lining fabric cut:
- 4″ diameter circle
- 1 piece 13.5″ x 5″
Step One:
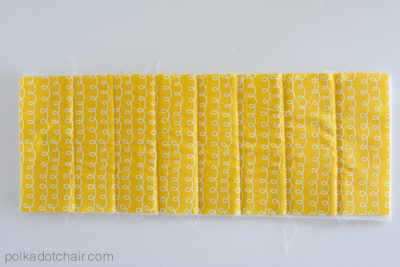
- Assembly instructions are the same for all three sizes of the case. The small case is used as an example for instructions. For each case, the 8″ tall pieces are for the gathered part at the top. All seam allowances are 1/2″ unless otherwise stated.
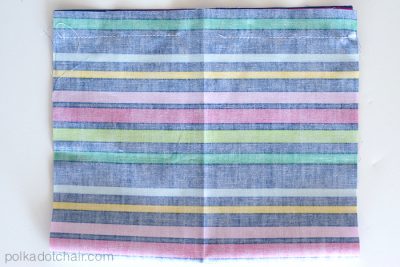
- Begin by sewing the 13.5″ x 5″ outside piece right sides together along the 5″ side. Press the seam open.
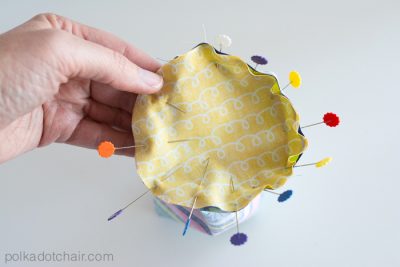
- Pin this piece to the 4″ circle piece. (Just a note, I used the lining circle here for contrast.) Use lots of pins and go slow. Depending on how you pin and the size of your seam allowance, it may not match the circle. If it doesn’t, adjust the seam on the outside piece until it fits. If you change this seam allowance, make sure you adjust it also for the lining piece (the next steps).

- Stitch the circle to the case. You may get a few gathers, but that’s okay. If you get a large pucker, unpick it and flatten it out. Set aside.
Step Two:
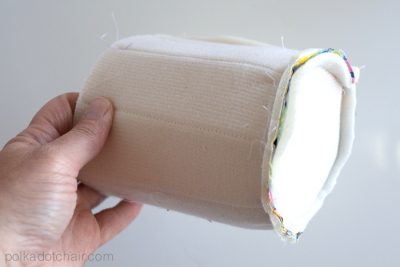
- Using the walking foot on your sewing machine, stitch the lining piece to the foam piece at regular intervals. This will help the lining from shifting around as you sew.
- Sew this piece together as you did for the outside piece. Place the foam circle on the wrong side of the fabric circle piece. Sew this piece to the circle the same way you did in step one.
- Trim all seam allowances down to 1/8″ – 1/4″.
Step Three:
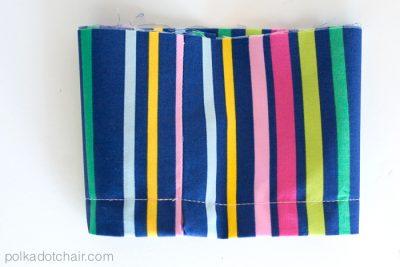
- With the wrong sides facing, slip the case outside over the case lining. Pin in place.
- Press the 13.5″ x 8″ piece in half lengthwise with wrong sides together. Unfold. Stitch along the 8″ side, leaving a 1″ hole in the center (1/2″ on each side of the fold you made). Be sure to back-stitch.
- Refold the piece.
- Create a casing by sewing 1/2″ down from the fold.
- Slip it over the case with the raw edges facing. Stitch in place very close to the edge. Using a walking foot for this step may help feed the fabric more evenly.
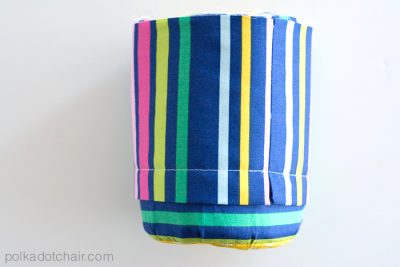
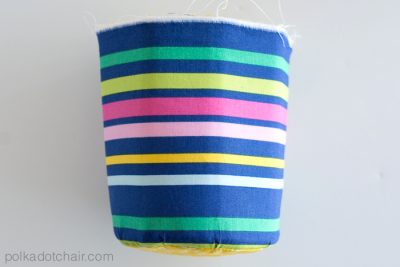
Finishing:
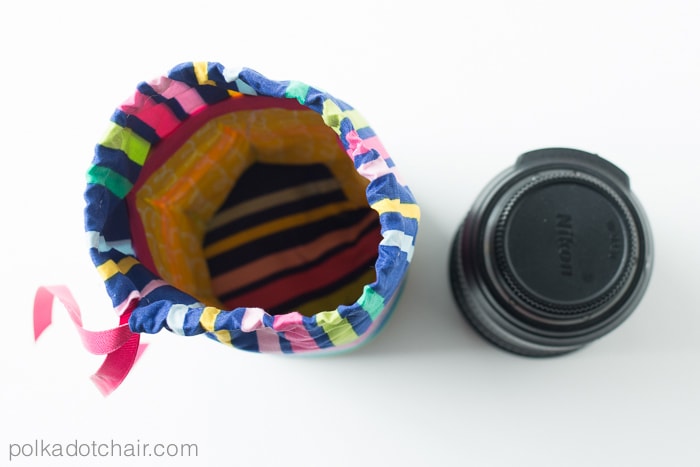
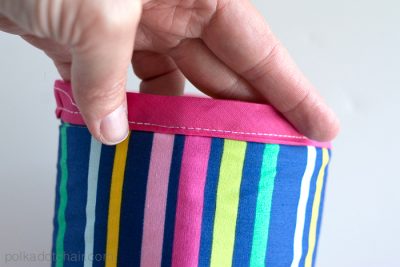
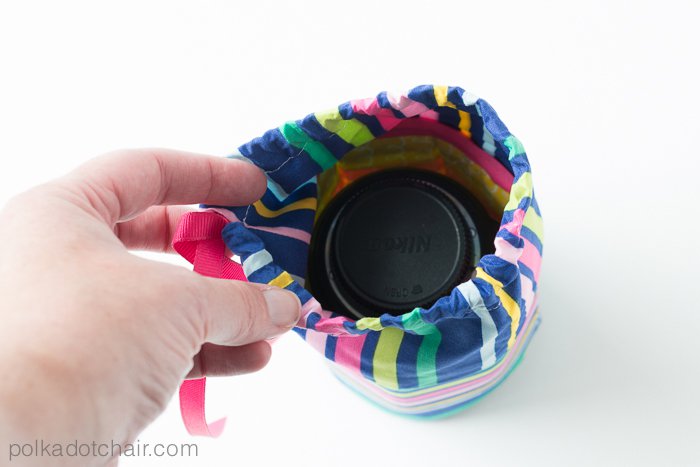
- Finish the raw edge with bias tape. For a tutorial on how to sew with bias tape, click here. Flip this piece up and insert ribbon in the casing to create the gathered top of the case.
- Feed ribbon through the casing and pull on the strings!

More Sewing Tutorials:
DIY Earbuds Case Sewing Tutorial


I am so confused on step 3 with the the casing and the folding. I’ve tried the directions ten different ways and can’t figure it out and I’ve had three other people try to understand it as well. Can you please clarify the steps with more exact pictures that go with the directions. Thank you!
The fold is the edge of the casing. You stitch the line with the sewing machine to make the casing.
Thanks very much for the tutorial. Had a bit of trouble particularly the last section, but after reading the comments and your replies it made more sense. Excellent way to make custom cases and stop the lenses being thrown around in the standard market size ones!
I like these and will make them for a friend for Christmas. I may add a D loop to each side of a case so that I can add an optional shoulder strap for ease of carrying on a day out.
I’m a brand new beginner sewer and looking for a first big project. Is the walking foot actually necessary? I have a good basic sewing machine but no specialized tools. Is this a good 1st project for someone who has never sewn circles or worked with foam before or is it a bit ambitious? (I don’t mind coming back to this if there is something else you’d recommend trying as a first project.) Thanks.
So I tried to make one of these today and I definitely have a tube-shaped bag with a drawstring but thats where the similarities end. I wish I could send a picture of how it turned out. The bag is MUCH bigger than the lens I made it for. I wasn’t sure where the bias tape went so it ended up around the middle of the outside connecting the top and bottom. Basically I searched for “easy sewing projects” on Pinterest and this one came up. As a complete novice, the directions were very difficult to understand. I wish there were a video or more pictures. I’m sure it would have turned out better if I had more experience.
The bias tape is used to cover the seam between the drawstring top and the padded case. It goes on the inside, my guess is that you have it on the outside of the case. Slip the top over the foam padded part of the case with the right sides facing each other. Then add the bias tape and “flip” up the drawstring part. There are 3 sizes for the lens case, one is very large and meant to be used with zoom lenses. I use the smallest size of case the most.
If you’re stuck the best advice I can give you is to go really slowly and read the directions thru a few times before you start. Sewing can be hard when you start but I promise that it gets easier!! A few more projects and you’ll be an expert in no time.