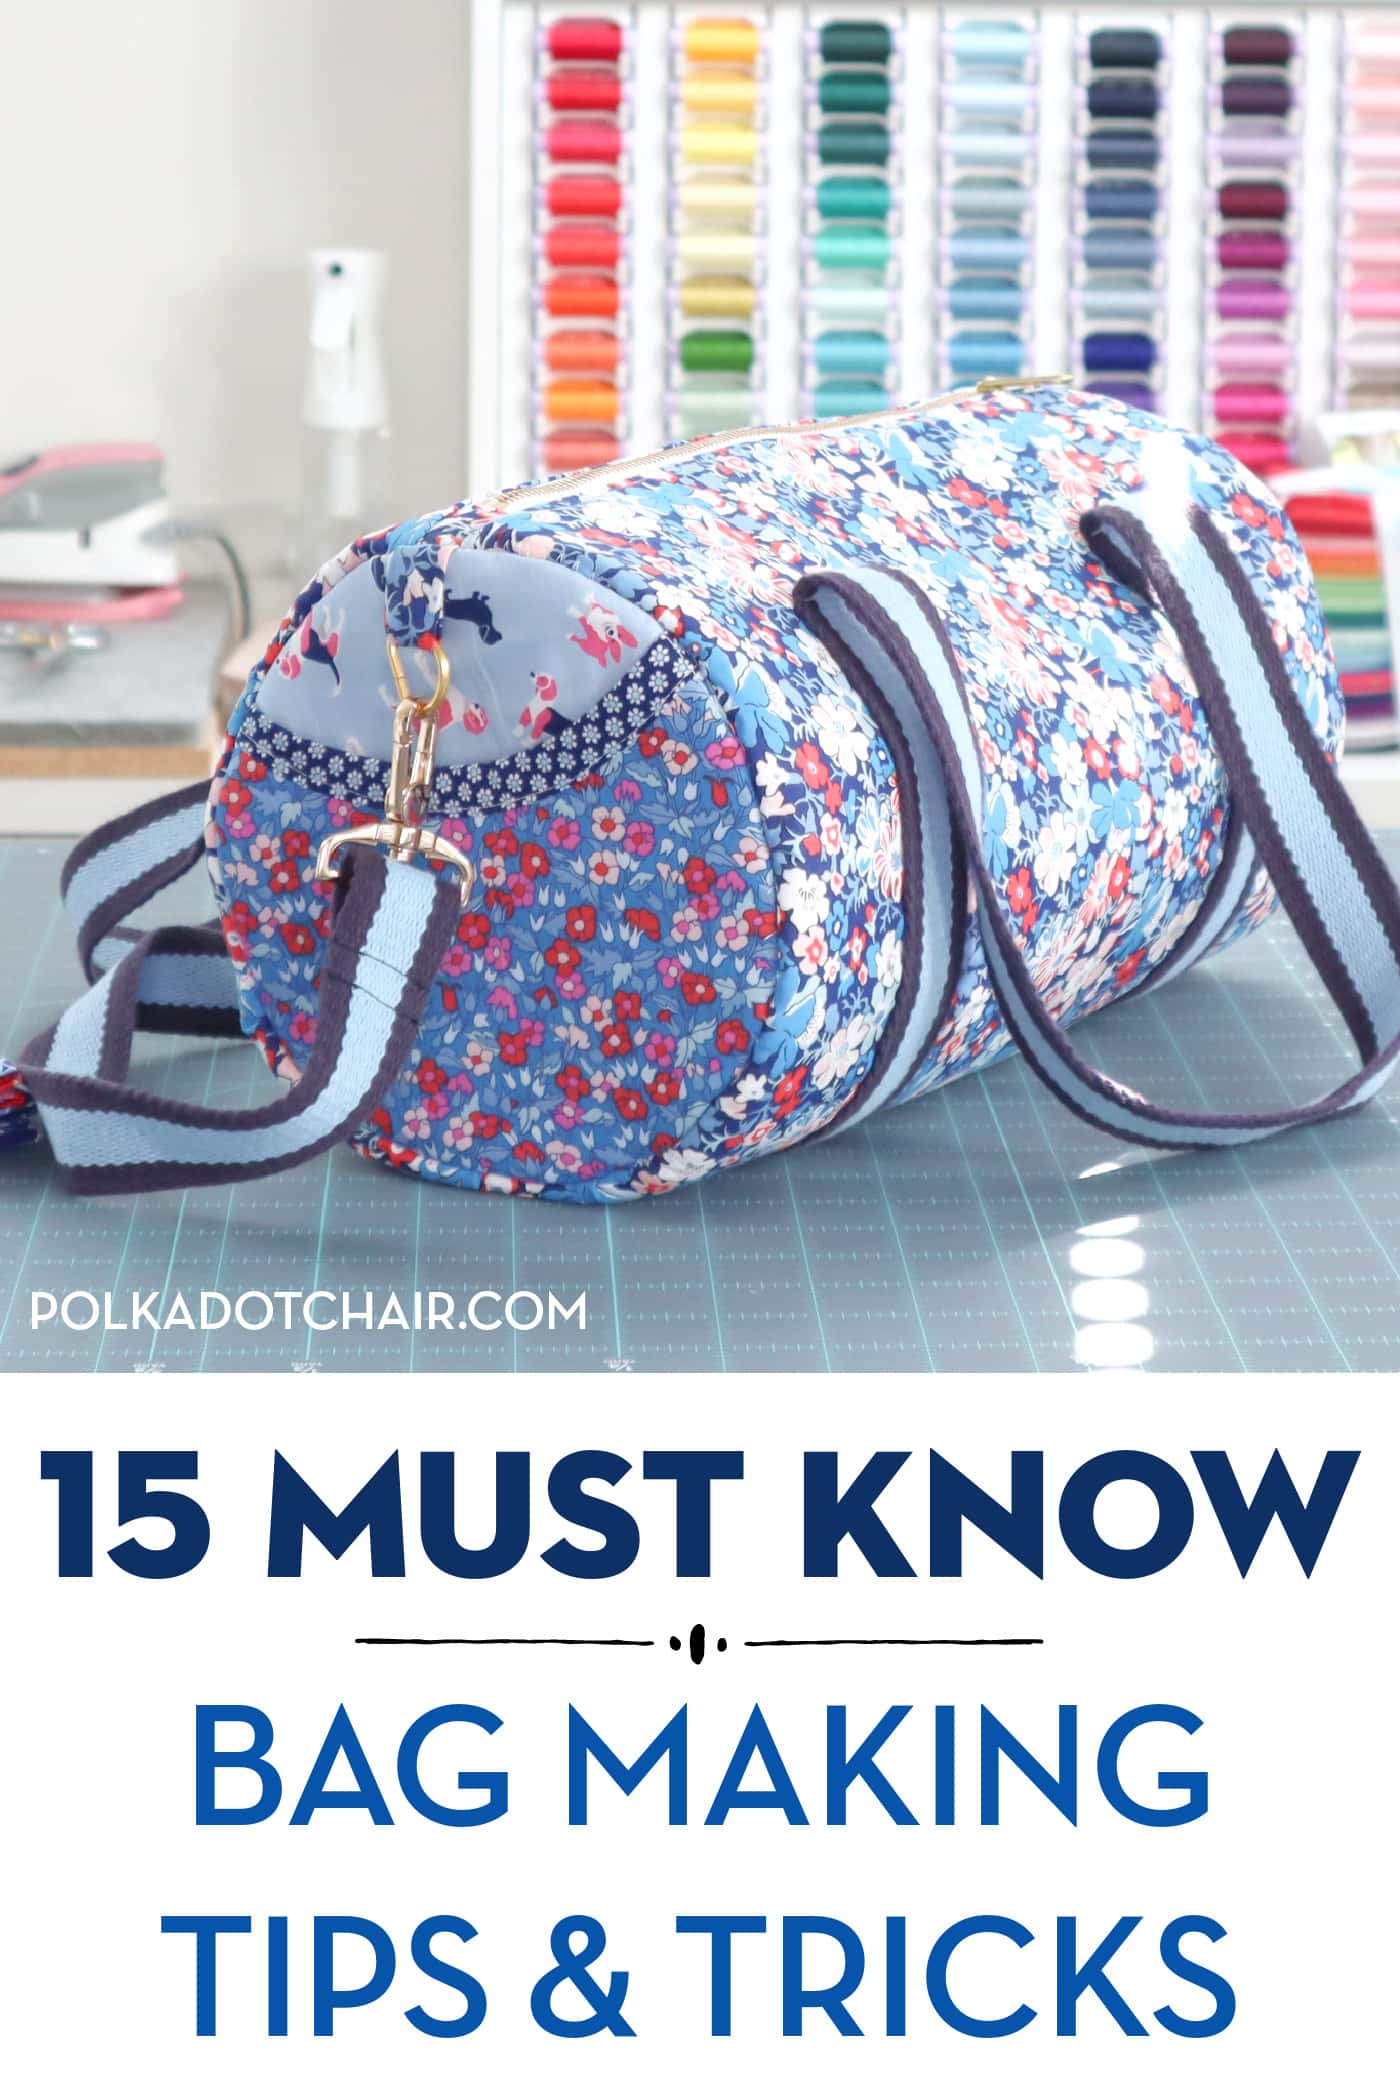
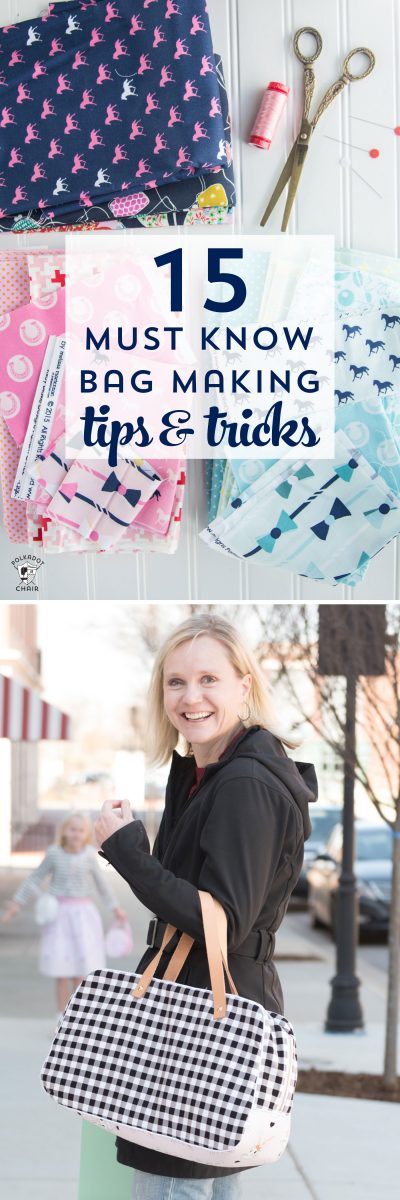
15 Must Know Bag Making Tips and Tricks
Here are 15 of my favorite bag-making tips and tricks! If you have a tip of your own, be sure to leave it in the comments section so that other people can benefit from your knowledge!
When my children were little I used to LOVE to sew clothing for them. I especially loved sewing for Halloween and Easter. I’d always start planning out my projects months in advance.
As my children got older and didn’t want me to make them Easter dresses anymore, I noticed that I wasn’t sewing as much. Around this time, I made a tote bag on a whim.
The pattern was extra simple, and I’m sure I made a million mistakes, but something made sense in my head, and I was instantly hooked! I think the love of bag-making led to this blog in the first place!
Since then, I’ve made hundreds of bags and even branched out to create my own line of bag sewing patterns. Over the years, I’ve picked up quite a few tricks.
I hate nothing more than getting excited about a project, then not having it turn out the way I thought it would in my head. I’m here to help you avoid that feeling when sewing tote bags and purses!
Bag Making Video Series
Recently we announced a new Bag Making Series for our Saturday Duffle bag pattern. You can find all of the instructional videos on our YouTube channel. Four videos are posted one week apart, guiding you through the steps to create the duffle bag.
In light of the new bag sew along, I thought it would be a good time to revisit and update some of our best bag-making tips & tricks.
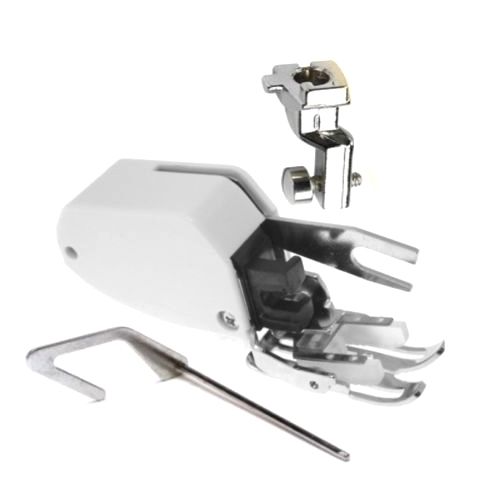
1. Use a Walking Foot
Many people associate walking feet for sewing machines with machine quilting; however, I find that they are useful for many other projects besides just making a quilt.
A walking foot is an attachment for your sewing machine that allows the top of the fabric to be fed through the machine the same way the machine feed dogs move the fabric’s bottom through the machine.
Anytime you are sewing through multiple layers of fabric (i.e., fabric, fabric linings, interfacing), I recommend using a walking foot if you have one. I recommend it if you are top-stitching around the top edge of a bag. It helps the fabric to feed more evenly through the machine and gives you a better result overall.
Walking feet are machine-specific; check with your machine’s owner’s manual to see which one you need.
2. Use Binding Clips
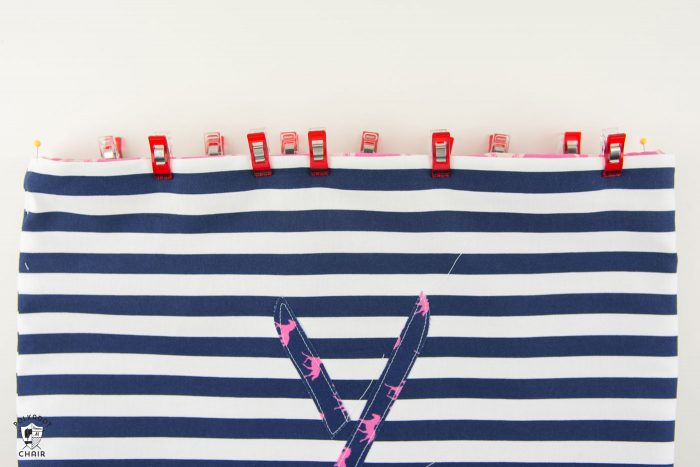
Binding clips are another quilting supply that carries well over to bag making. When you are sewing bags, you often work with multiple layers of fabric. Those layers can get pretty thick, and it may be hard to get a pin through it. Additionally, if you are sewing with a coated fabric, like an oilcloth, you want to avoid pinning the fabric as much as possible.
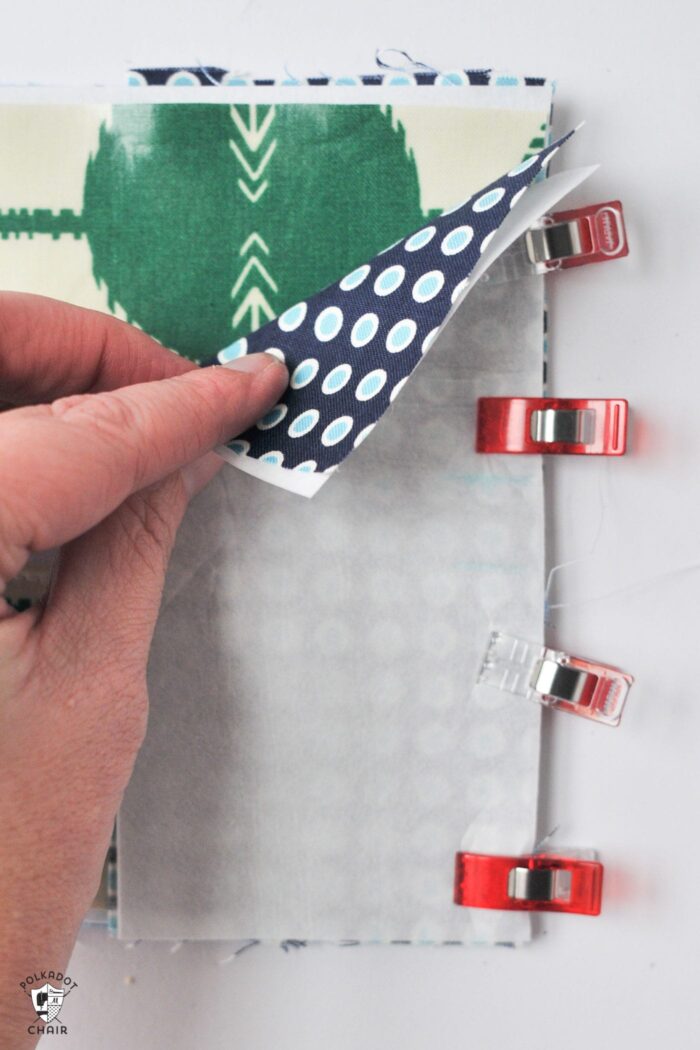
Binding clips work wonderfully for holding thick layers of fabric together.
These clips are from Clover, come in two sizes, jumbo and regular (pictured), and can be purchased on Amazon.
3. Trim
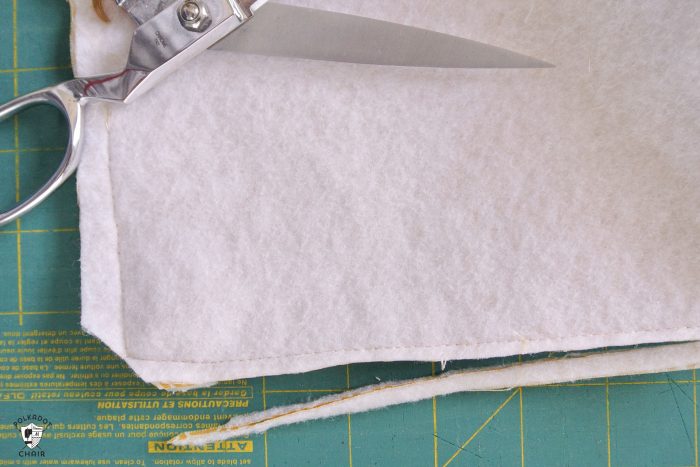
It is essential when you are constructing bags to reduce the bulk in the seam allowances. If you have a lot of bulk in your seam allowances, you will not get a smooth finish outside your bag.
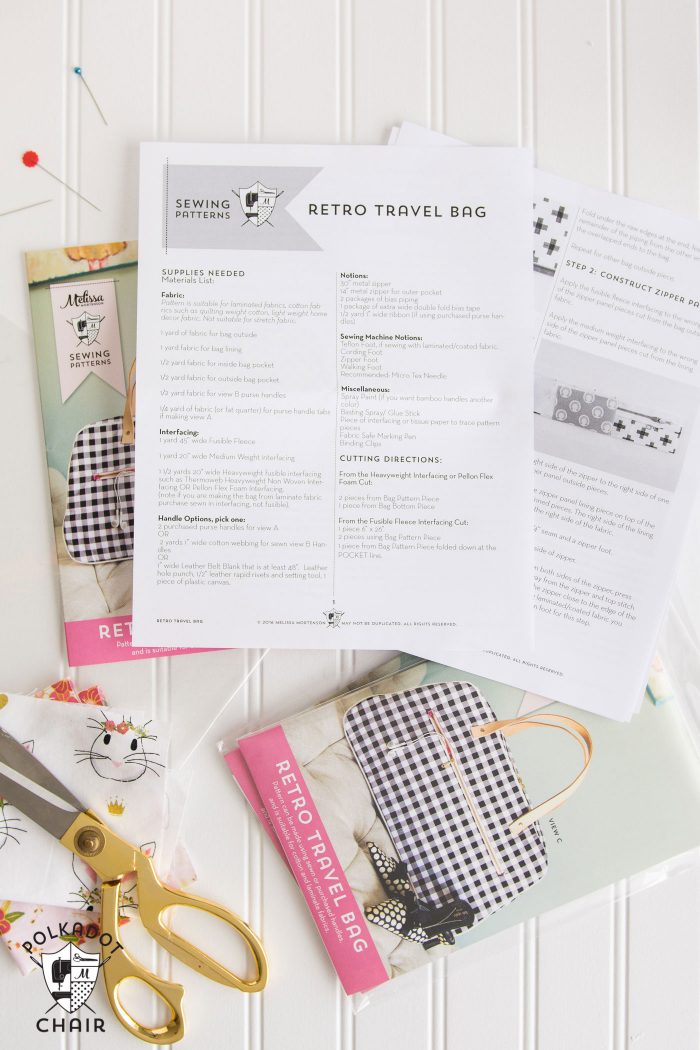
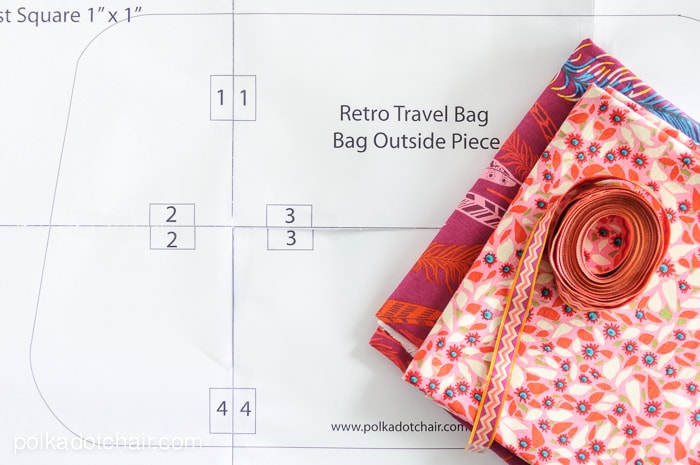
I almost always trim my seam allowances and interfacings all the way up to the edge of my seam. Before trimming your seam allowance, make sure that you will not need it later! In my Retro Travel Bag Pattern, I trim only the interfacing down (2nd photo above). I do not trim down the fabric part of the seam allowance.
If I trimmed all of the seam allowances, I would not have had anything to sew the rest of the bag too! Most of the time, the pattern’s author will direct you when it’s a good time to trim down your seam allowance.
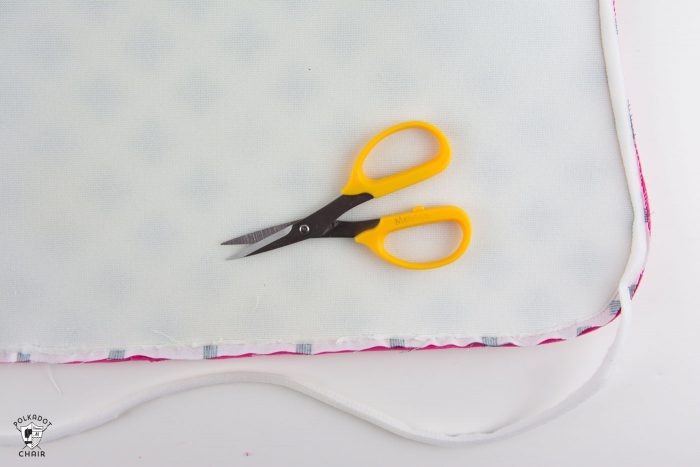
4. Clip Curves
If your bag project has a curved seam, you want to clip that seam. I like cutting tiny V-shaped notches along the curve along the seam allowance. If you do this, be careful not to cut into the seam allowance.
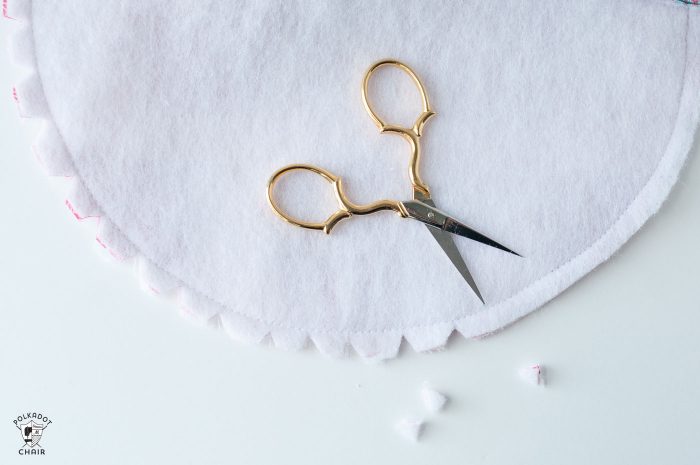
5. Clip and Push out Corners
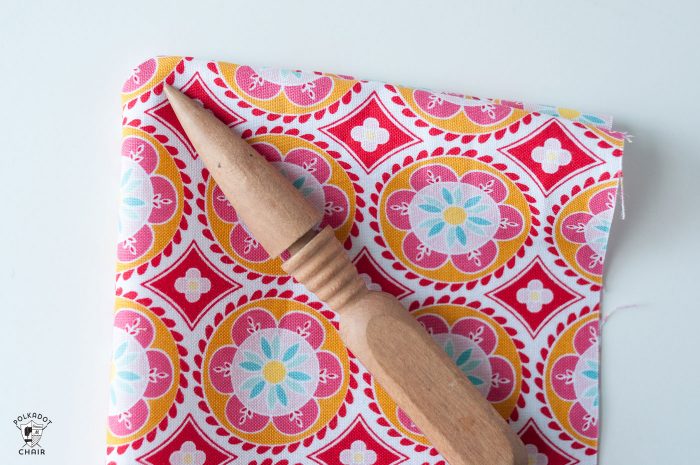
Just as you want to clip curves on a bag, you also want to clip the corners. I always cut my corners at a 45-degree angle to the corner. I then use a 2 point turner, Hera tool or other “pointy” object to push the corner out to be friendly and crisp. You can purchase a 2 point turner tool on Amazon HERE.
6. Use your Iron
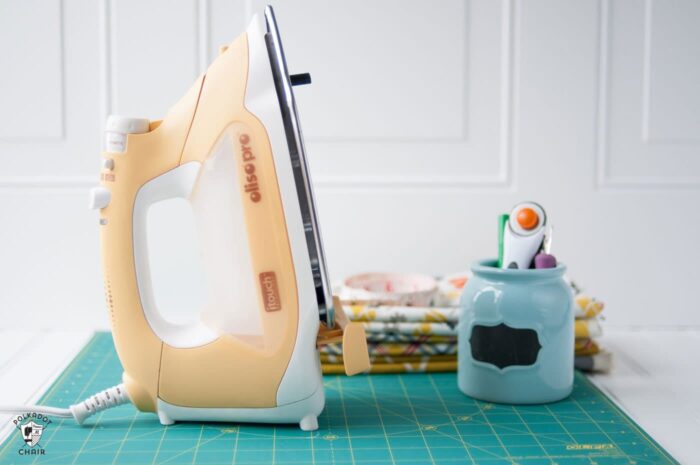
Manipulate and shape the fabric using a steam iron. If you’ve ever taken a quilting class, then you know that you DO NOT ever want to distort your fabric or your seams while you are pressing.
Well, I’m here to tell you that making your fabric move when you’re sewing a bag is OK! After I’m done with a bag, it will often look lopsided or not quite crisp enough. When this happens, I load up my iron with water and steam the bag until I get the shape I want.
After you’ve sewn your bag, the very last step should always be to STEAM it to get all of your fabrics flat and seams crisp.
7. Read all the directions FIRST!
Don’t just start sewing. Take a minute and read the directions before starting the bag. You may find that you need to complete extra steps or do a bit of extra prep depending on the fabric or bag style you’re making. You’ll save yourself loads of time and frustration if you just READ it all first.
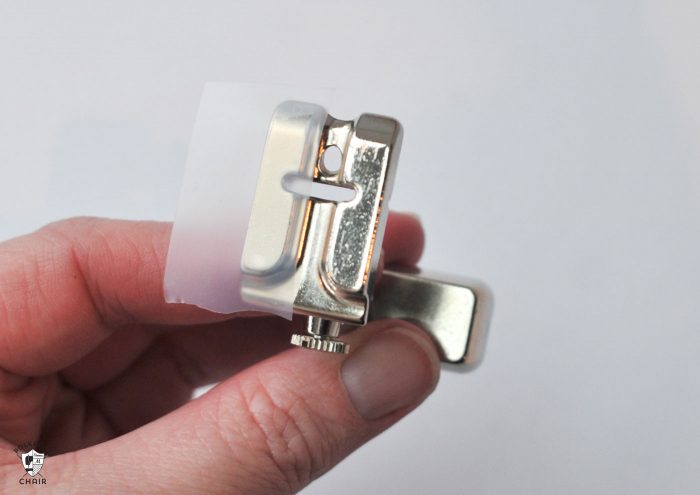
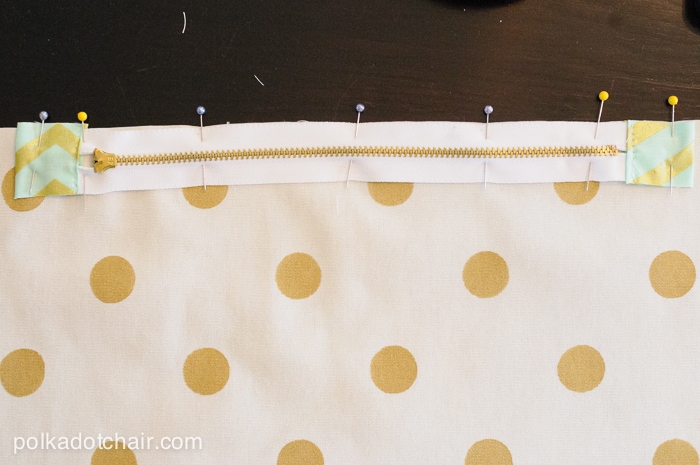
8. Reinforce Snaps
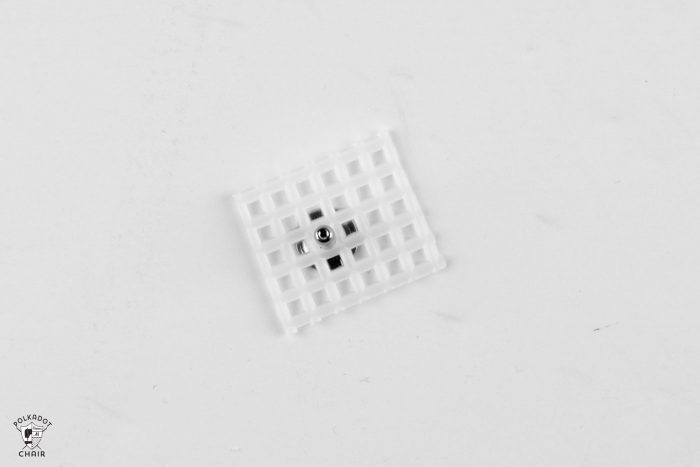
This is one of the biggest tips I can give you. Many years ago, after I first discovered magnetic snaps, I was adding them to everything. However, I found that they poked holes in my fabric over time. I tried all different kinds of interfacing but still had the same problem!
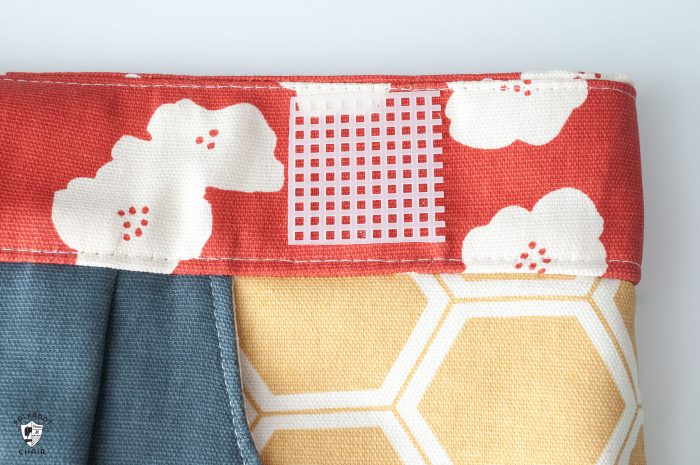
Then one day, I spotted some plastic canvas at the craft store. Voila! An idea was born. I tried it, and it worked like a charm! I now use it to reinforce bag bottoms, rivets set in straps, and magnetic snaps.
Just cut a small square slightly larger than your snap and hide the canvas inside the bag lining while sewing. You can hand stitch it in place, then remove the stitches after the bag is sewn. I also use plastic canvas to reinforce rivets and bag feet.
9. Use Scotch Tape
If you are making a bag out of a coated fabric like oilcloth or laminate fabric, place a bit of scotch tape on the bottom of your presser foot, and it will glide over the top of the fabric with ease!
10. Use a Microtex needle
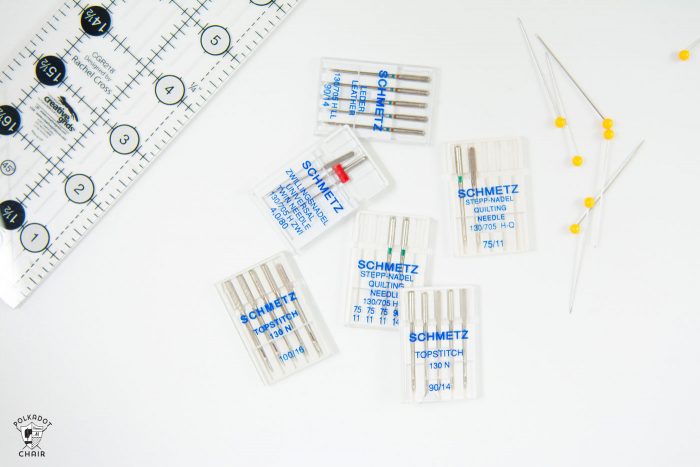
Microtex needles are SUPER sharp and will pierce through multiple layers of fabric with ease! I love to use them anytime I’m sewing a bag or working with multiple layers of fabric.
They fit in your machine the same as your regular sewing machine needles. You can pick up a pack on Amazon.
11. Know your Fabrics
Before starting your project, read the directions and see what the pattern author recommends for fabric type. Do they want a heavyweight fabric? Lightweight cotton? Is the pattern suitable for leather or vinyl?
Most bags can be sewn with mid and lightweight cotton fabrics. Be aware, though, if the fabric is too lightweight, it will not hold up well when the bag is used; if it’s too heavy, it will be too difficult for the machine to stitch together.
Also, make sure the fabric has no stretch. Most bag patterns are not suitable for stretchy fabrics.
12. Trim polyester zippers
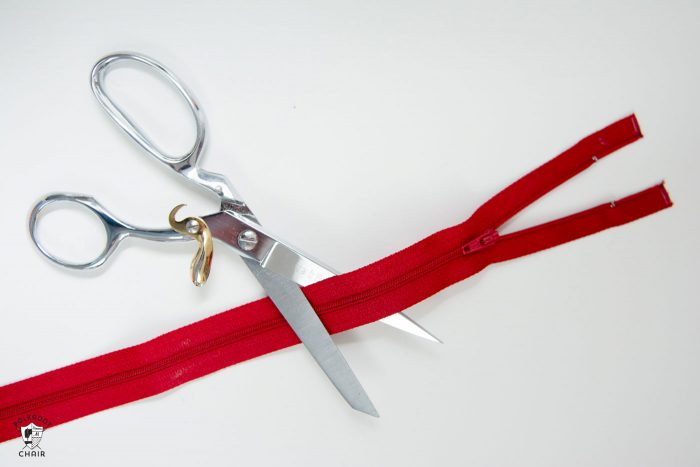
Need a 10″ zipper but only have a 16″ zipper? If you’ve got a polyester zipper, did you know you can just cut it to the size you want?
Yep, easy peasy… do ever try this with a metal zipper, and be sure not to unzip the zipper until it’s sewn into the finished bag.
13. Be Wary of Metal when Pressing
Speaking of zippers, if you are sewing with metal zippers, watch out! They get very hot when they are pressed! Trust me, I’ve learned this the hard way.
Also, if you’re looking for various zipper colors and bag-making styles, I get all of my zippers from ZipIT on Etsy.
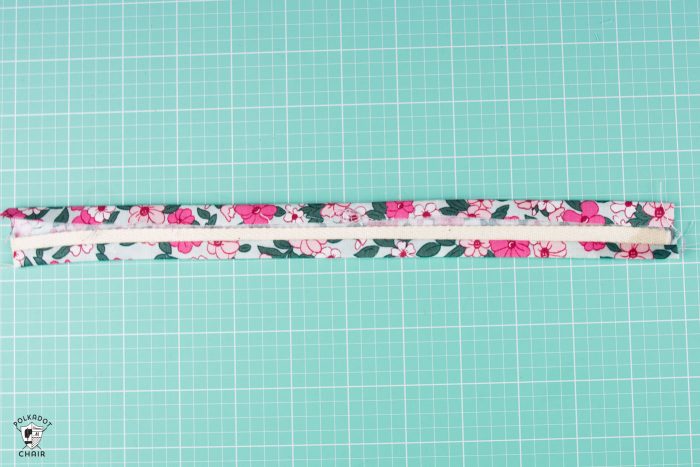
14. Make your own piping
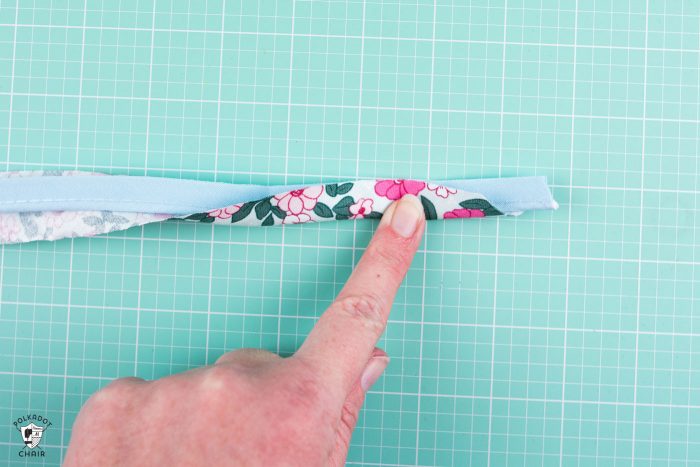
If you are sewing a bag and can not find a color of piping that matches your fabric, buy a light color and cover it. Don’t know how? I will teach you how to in my sewing lesson all about piping!
Just cut your fabric twice as wide as your piping and on the bias, and stitch it right over the top of the store-bought stuff. Easy peasy!
15. Cover cotton webbing with fabric.
Confession, I used to HATE making bag straps. They were just too hard to get straight, and I always ended up with a bit of fabric poking out where it was not supposed to.
Then someone told me to cover cotton webbing with fabric, and a light bulb went off.
How to Do it:
- Buy cotton webbing in the width you need and cut your fabric to double the width of the fabric plus 3/4″.
- Stitch the webbing to the right side of the fabric using a 1/4″ seam allowance, flip the fabric over the webbing, fold under the raw edge and stitch down.
- Top stitch down the other side of the strap.
If you like making bags, you may like some of the patterns I offer in my shop. There are all sizes and types of bags, some are great for beginners, and others are perfect if you’re ready to kick up your bag, making a notch!
Bag Sewing Patterns with Easy to Follow Instructions
VISIT MY SHOP to see our full line of Bag sewing patterns. Here are just a few of my favorites!

- Retro Travel Bag Pattern
- The June Bag
- Mickey Ears version of Alice Bag Pattern
- Ruby Lou Bag Pattern
- March Bag Pattern
Thank you for your great tips, Melissa
Have made lots of bags (Fun, right?) The tip about using plastic canvas as stabilizer was new to me. All of your tips were spot on! I have one more tip-I could not sew a bag without my stiletto. A huge help for bindings, piping, guiding layers of fabric-well everything. Mine is from ByAnnie.
Thanks for all of your great ideas. Thanks for all that you do for us out here.
That’s a great tip! Thanks for sharing
Great article and Awesome Tips from everyone!
Love your 15 tips for making bags article
I can’t visualize how to use the plastic canvas when using magnetic fasteners
Is it possible to show how in a picture?
great tips and I will try the mesh for magnetic snaps!
Do you prefer a specific size Microtex needle when making bags? I usually apply fusible foam to give my bags body, as well as fusible fleece to the lining, so they tend to be fairly thick. I find I have to go over my seams several times to make sure they are secure. Thanks.
I’ve always just bought the size Microtex needle that was available at my local shop. I don’t think there are a lot of different sizes of Microtex needles.
I’m about to embark on making my first bag so this article was SO helpful!
Thanks so much for this post Melissa. I was looking for help with attaching bag handles and you have provided me with some useful tips. I’ll be keeping up with your latest news.
These are all great tips! Another suggestion for bag straps or handles is to use Beta Biothane which has a leather look and feel to it and comes in black, brown and many other colors and in many widths. It is used in horse tack and dog leashes as well due to its strength and no care attributes. Stick with the 520 type as the HD stuff is too thick for home machines and use thicker thread as well. I use it for the handles on my bags and customers love it! I have used it with rivets, Chicago screws, as well as just sewing it in place.
That’s a great tip! Thank you!
Question, WHY would you advise never to cut down metal zippers for use in bag making? I owned a sewing and alterations business for over 20 years and cutting metal zips only requires one extra step. You pull the teeth that will be in the seam area with a pair of pliers. I use metal zippers almost exclusively when bag making, because they stand up better than nylon ones.
Because I have found that most people, when following directions on the internet, do not read all the directions, and I didn’t want an email from someone telling me they ruined their scissors trying to cut a metal zipper.
This may sound like a dumb question what is cotton webbing?
It’s what bag straps are made from. You can get it in Nylon or Cotton.