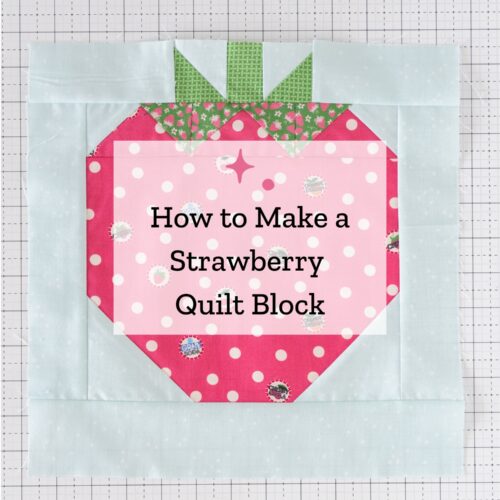
Berry Sweet! A Free Strawberry Quilt Block Pattern
Sweet, colorful quilt blocks are always in season, and a strawberry quilt block is a fun way to add a bit of summer to your sewing. It’s perfect for a seasonal quilt, a cheerful table runner, or a set of quilted pillows. This free 12″ Strawberry Quilt Block pattern is an easy project that works beautifully on its own or combined with other fruit and garden-inspired blocks.
A Fresh Take on a Classic Summer Motif
Strawberries have long been a favorite quilting motif thanks to their simple shape and bright colors. This 12″ finished quilt block combines classic patchwork with easy piecing to create a bold strawberry design that stands out without requiring complicated techniques. It’s a great block for confident beginners and experienced quilters alike.
Because the block finishes at 12″, it pairs easily with many traditional quilt blocks. Mix several strawberry blocks together for a playful summer quilt, or combine them with floral, gingham, or picnic-inspired prints.
Fabric Suggestions
My original block is created from my Summer Picnic collection with Riley Blake Designs. Unfortunately, the fabric is now out of print, but don’t worry; I’ve got a few good fabric suggestions for this block for you!
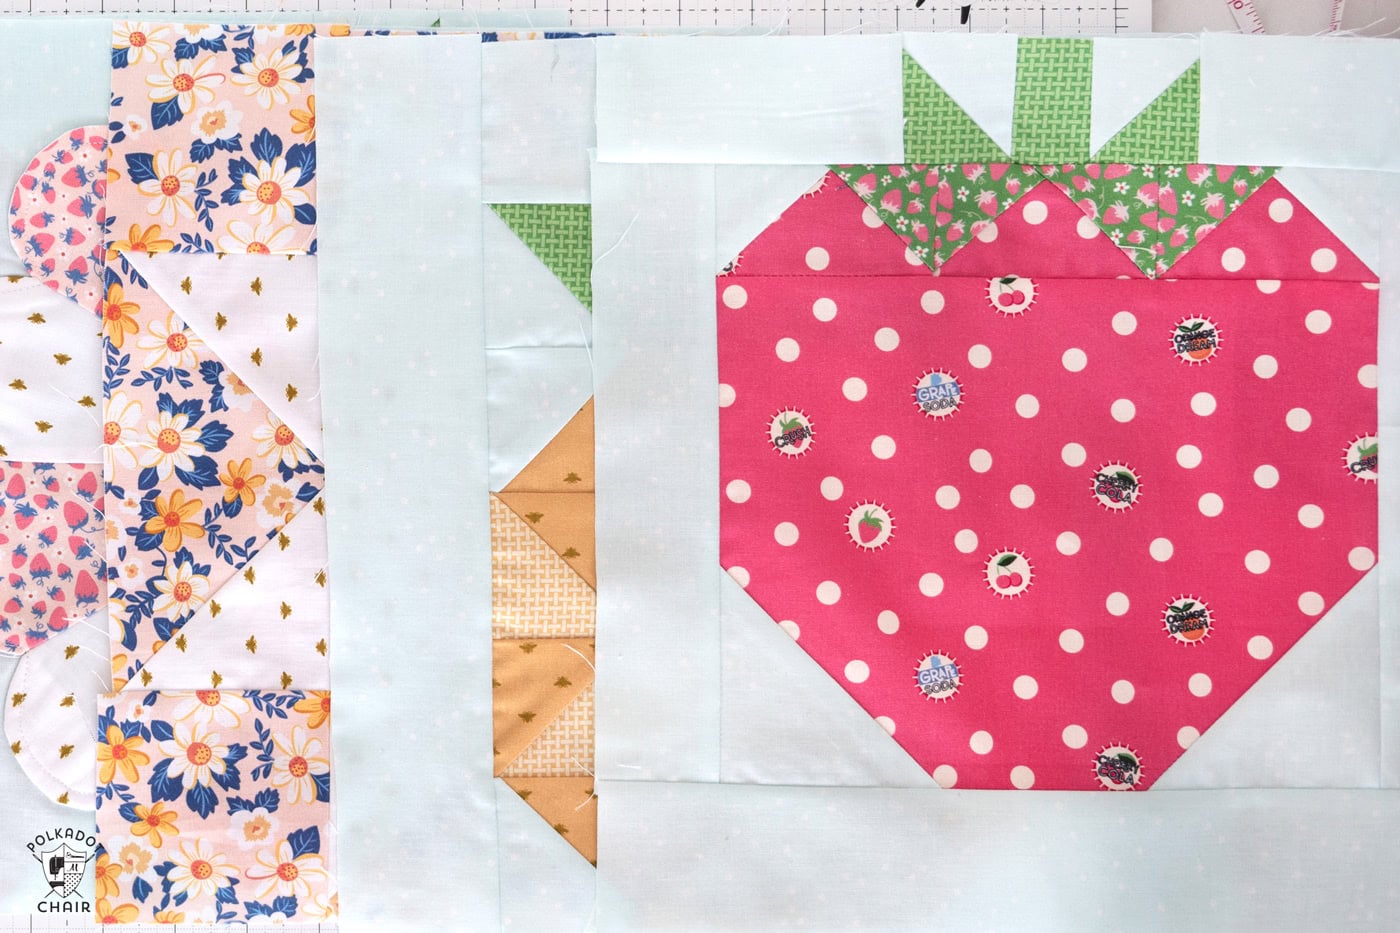
A variety of red or pink prints adds plenty of dimension to the strawberry, while a fresh green print makes the leafy top pop against the background.
For the background, choose a low-volume print in a pale color (mine is Bleached Denim by Riley Blake Designs) or a crisp white fabric to help the strawberry become the focal point. If you’re making multiple blocks, consider changing the berry fabrics from block to block for a charming scrappy look.
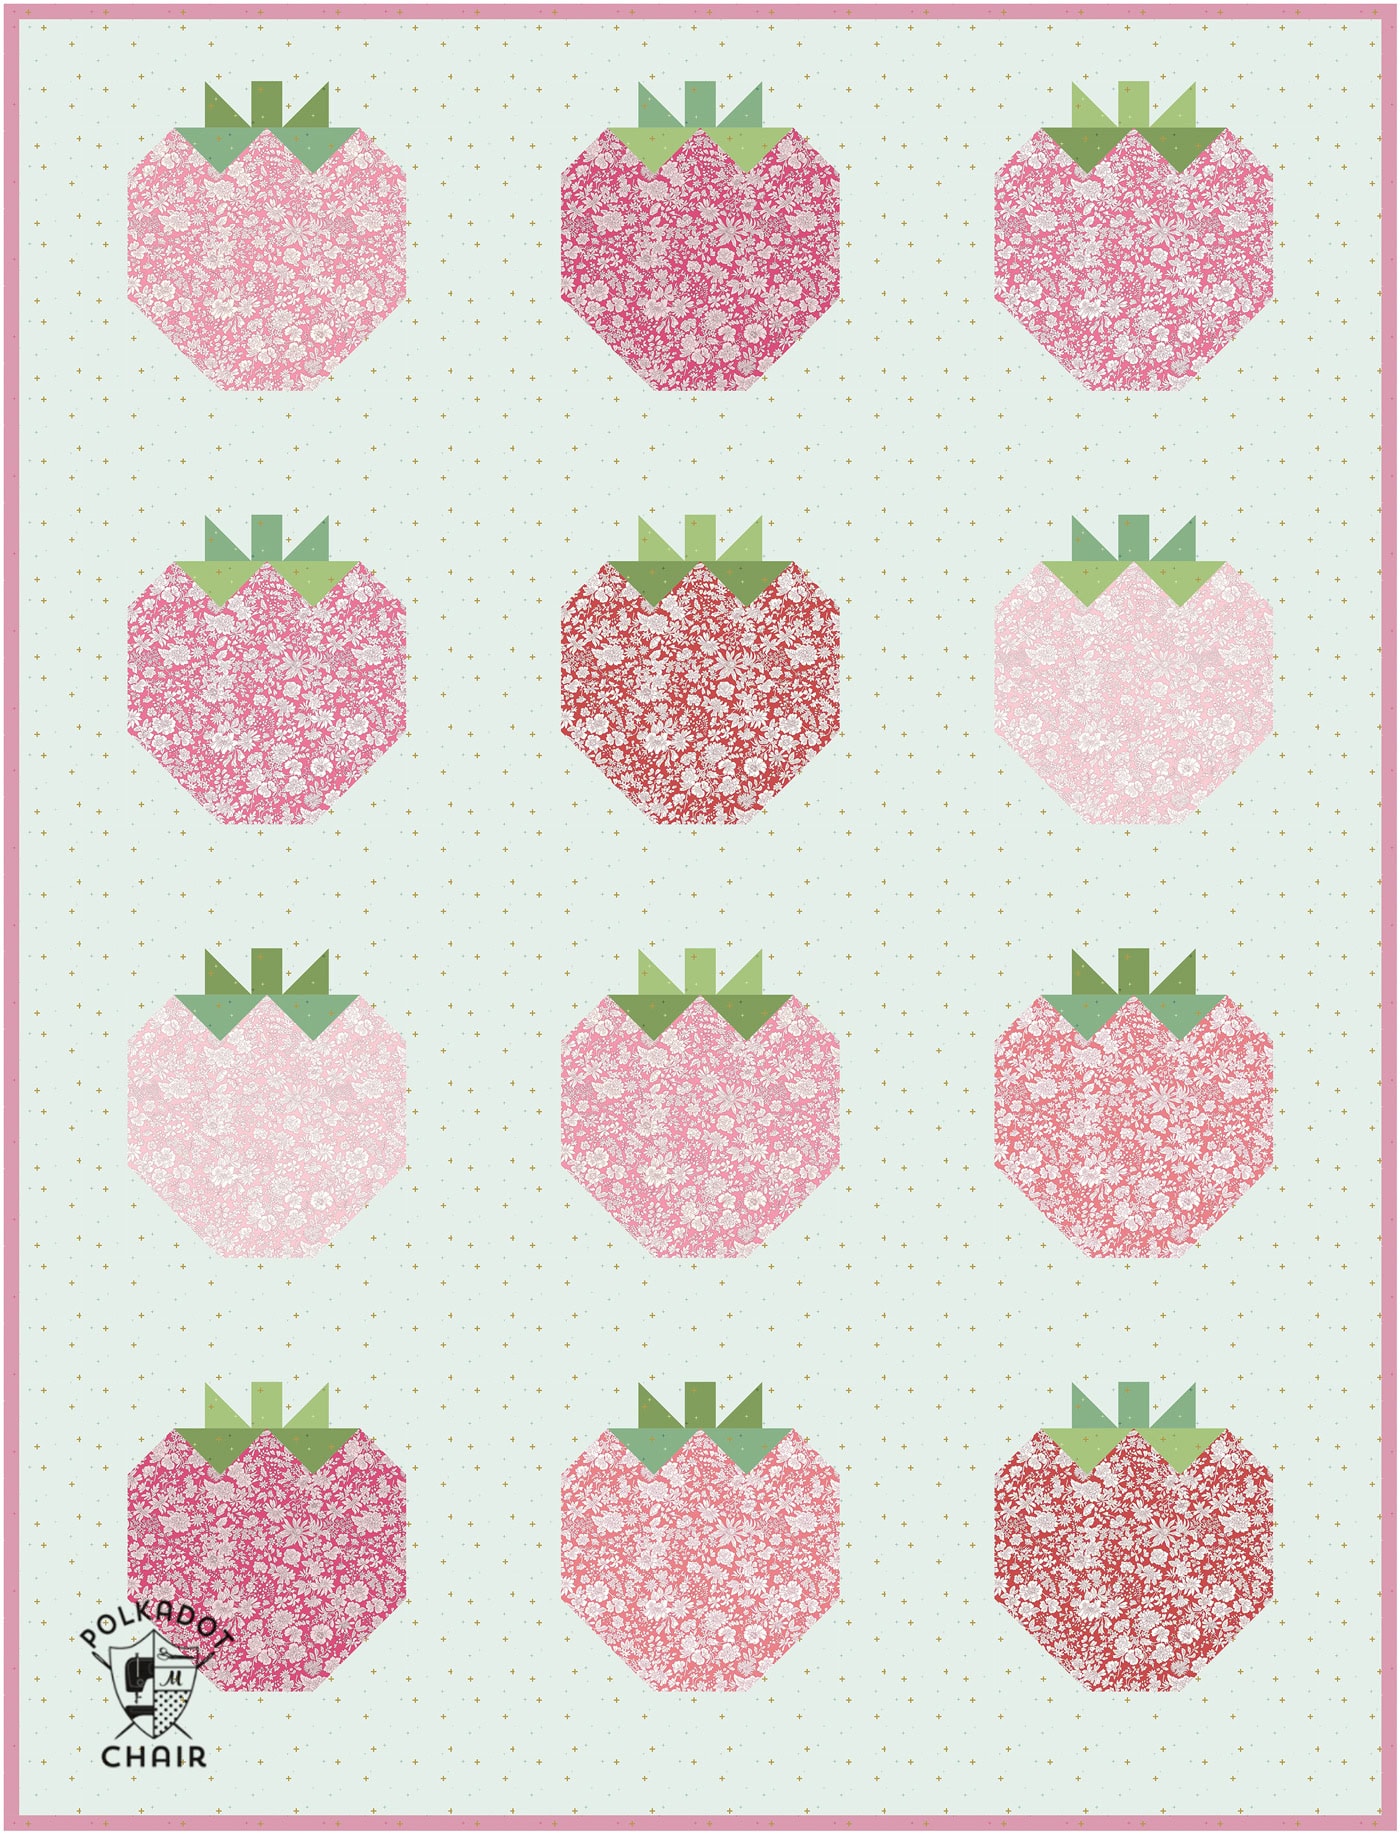
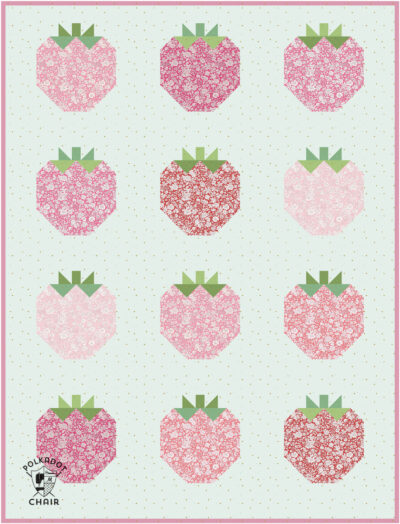
Since I always think everything is better with Liberty fabric, I mocked up a quick quilt using the Liberty Emily Belle Fabric collection (it’s a basics collection by Liberty).
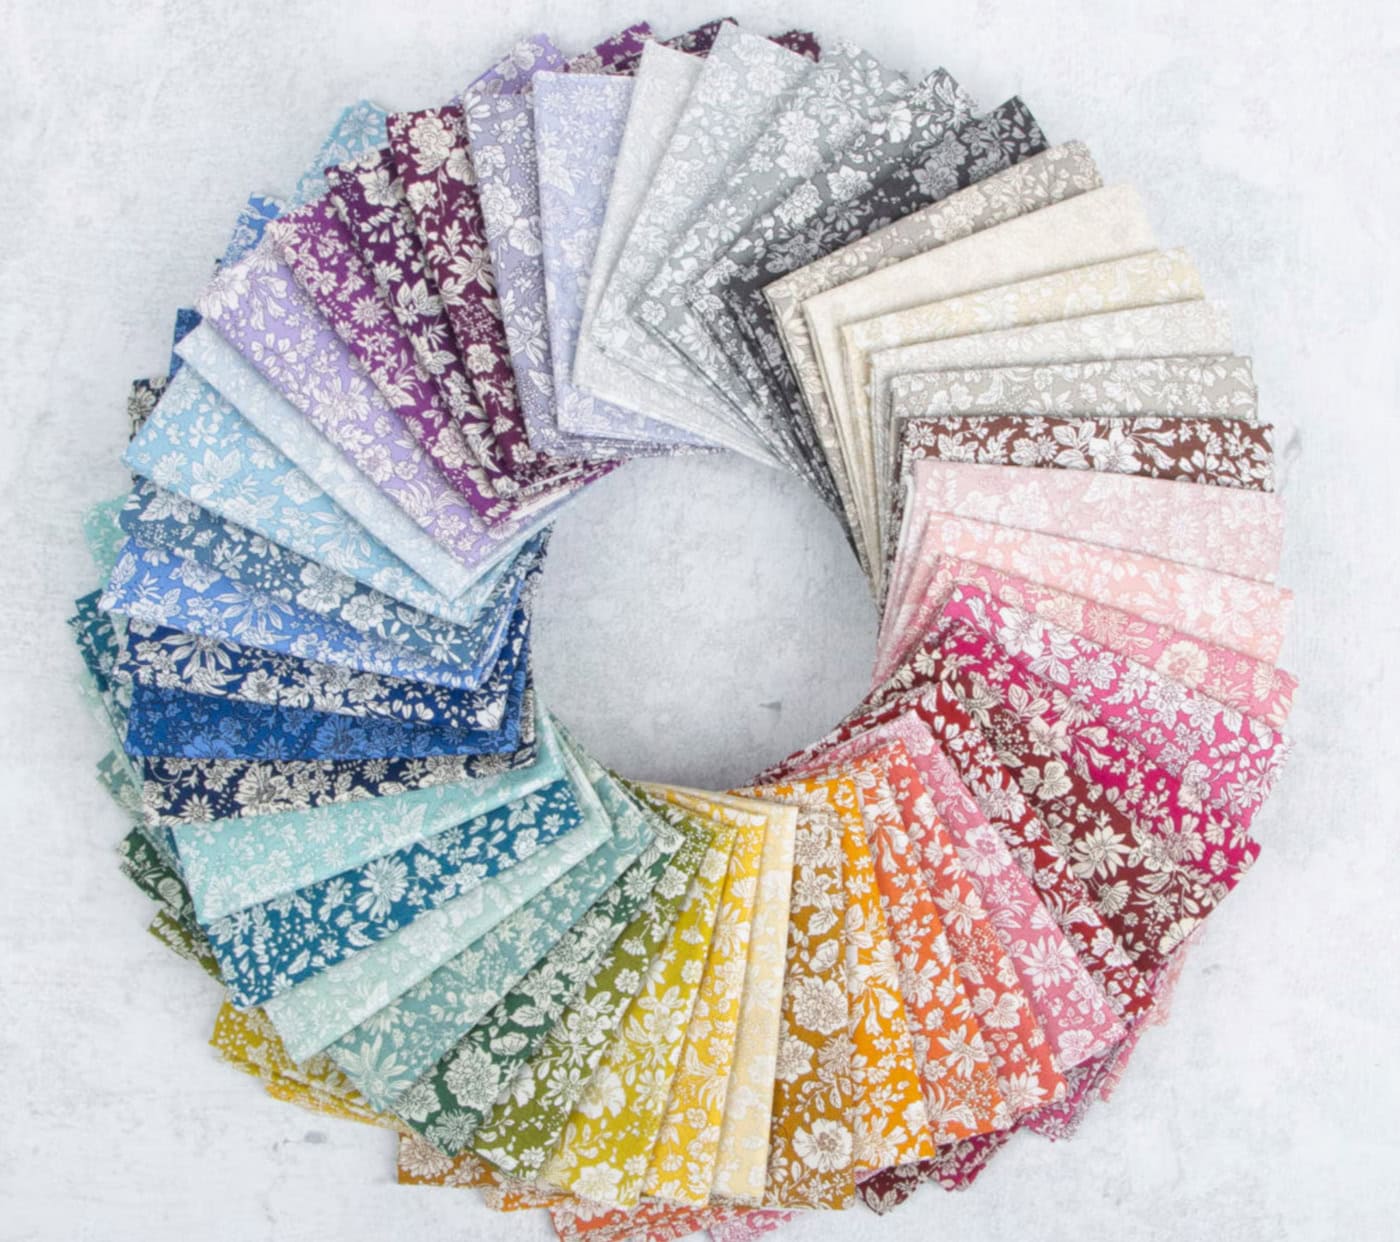
I used four different shades of Emily Belle fabric for the strawberries, then used Sparkler in Clover, Riley Green & Alpine Green for the stems and leaves.
The background fabric shown is Sparkler in Bleached Denim!
Mocked Up Strawberry Quilt Details
I don’t have a full quilt pattern for this strawberry block, but if you’re feeling ambitious, I’ve done a lot of the math for you if you’d like to turn this block into a quilt!
- Size: 44″ x 58″
- Twelve 12″ Strawberry Quilt Blocks (in 4 rows with 3 blocks in each row) made from Liberty Emily Belle reds and pinks.
- 2 1/2″ Sashing Strips, Bleached Denim Sparkler (that finish at 2″) between blocks and around the outside of the quilt.
- For the sashing, you will need to cut 14 strip(s) that are the width of the fabric in length and 2 1/2 inches in width.
- You will need a total of 1 yard of sashing fabric.
- You will need a total of 2 yards (including the sashing) of background fabric for the entire quilt.
- You will need 1/2 yard of binding for the quilt (Rose Sparkler is shown).
Twelve Inch Strawberry Quilt Block Tutorial
Equipment
supplies
- 1 Fat Quarter Background Fabric
- 1 Fat Quarter Red Fabric For Strawberry
- 1 Fat Eighth Green Fabric #1
- 1 Fat Eighth Green Fabric #2
Instructions
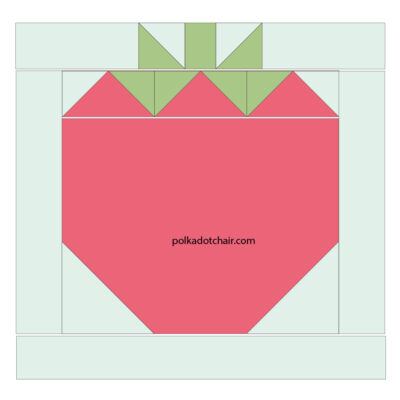
Cut for ONE Block:
- Background Fabric: 1 piece 2 1/2” x 12 1/2”, 2 pieces 2” x 2”, 2 pieces 2“ x 9”, 2 pieces 4 1/2” x 2”, 2 pieces 2” x 2”, 1 piece 2 1/2“ x 2 1/2”, 2 pieces 3 1/2“ x 3 1/2”
- Red Fabric (for Strawberry) 1 piece 7 1/2” x 9 1/2”, 3 pieces 2” x 3 1/2”
- Green Leaves & Stem: 1 piece 1 1/2” x 2”, 1 piece 2 1/2” x 2 1/2”
- Green Print for Leaves on Strawberries: 4 pieces 2“ x 2”
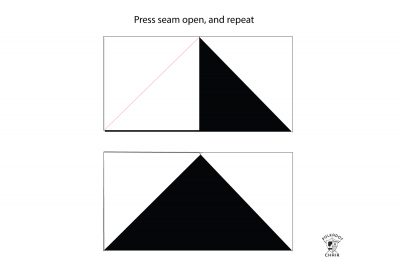
How to Make a Flying Geese Block
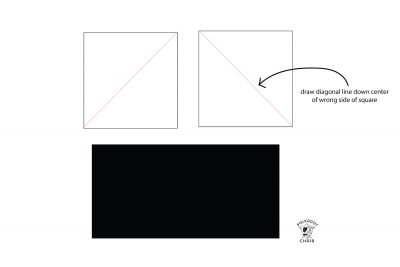
- Flying Geese Quilt blocks are made from 3 pieces of fabric.
- Two squares, which are referred to as the “sky,” and one rectangle, which is referred to as the “geese or goose”. Hence the name.
- Step 1: On the wrong side of two “sky” squares, draw a diagonal line down the center.

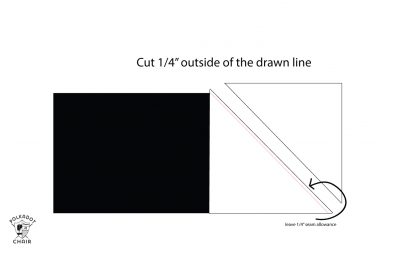
- Step 2: Layer one “sky” square on top of the “geese” rectangle, right sides facing, and stitch on the line you just drew.
- Step 3: Next, cut 1/4” on the OUTSIDE of that line. Flip the square piece up and press.
- Step 4: Repeat with the other square on the other side of the “geese” rectangle.
Step One: Flying Geese
- Flying Geese Unit A: Create one flying geese block using one of the 2” x 3 1/2” prints of red fabric, one 2” square of background fabric, and one 2” square of green print #3 fabric.

- Flying Geese Unit B: Repeat, but this time make the flying geese block a mirror image of the first block. Refer to the diagram as necessary.
- Flying Geese Unit C: Create one flying geese block using one of the 2” x 3 1/2” prints of red fabric, and the two 2” squares of green print #3 fabric.
- Sew the 3 flying geese units together along the short sides as shown in the Step 4 diagram.
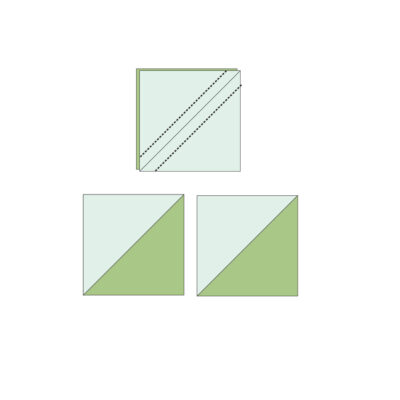
Step Two: Create Half Square Triangles
- Using the 2 1/2” square of green print #2 fabric and the 2 1/2” square of background fabric, create two Half Square Triangles. Draw a diagonal line in the wrong side of the 2 1/2" square of background fabric, layer it right sides facing with the 2 1/2" square of green fabric. Sew 1/4" on each side of the line you drew.Cut apart along the line. Open up and press. Trim and square up to 2” x 2”.

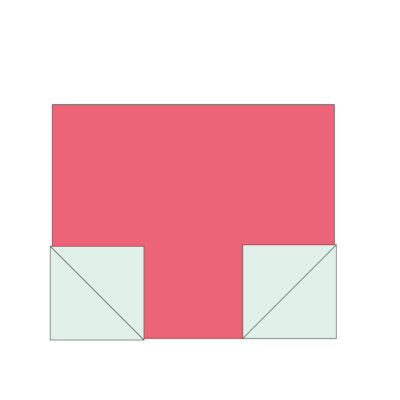
Step Three: Snowball Corners
- Draw a diagonal line on the wrong side of the 3 1/2” x 3 1/2” squares of background fabric.
- Place one piece, right sides facing, along the bottom corner of the 7 1/2” x 9 1/2” Red Fabric. Stitch along the line you just drew. Trim this piece 1/4” on the OUTSIDE of the stitching line. Flip the piece up and press in place.
- Repeat with the second 3 1/2” square on the other bottom corner of the Red Fabric.
Step Four: Assemble Block
- Sew the following pieces together as shown in the diagram to create ROW 12” x 4 1/2” piece background fabric2” x 2” sewn HST1 1/2” x 2” piece green fabric2” x 2” sewn HST2” x 4 1/2” piece of background fabric
- Sew the row of flying geese blocks to the top of the 7 1/2” x 9 1/2” piece of red fabric.
- Sew one 2” x 9” piece of background fabric to each side of this piece.
- Sew the 2 1/2” x 12 1/2” piece of background fabric to the bottom of this piece.
- Sew the ROW 1 to the top of this piece to complete your block.
- Mockup of quilt with 12 blocks and 2" finished width sashing strips.

Fruit Quilt Pattern

If you like this block, then you may like our Summer Sugar Quilt Pattern. It features not only a Strawberry block, but a Pineapple, Apple, Cherry & Bee Blocks!