70’s Inspired Embroidered Linen Tunic
I created a linen tunic with 70’s inspired trim and hand embroidery to enter the Project Sewn completion. Please keep reading to find out which womens’ sewing pattern I used to create my tunic.
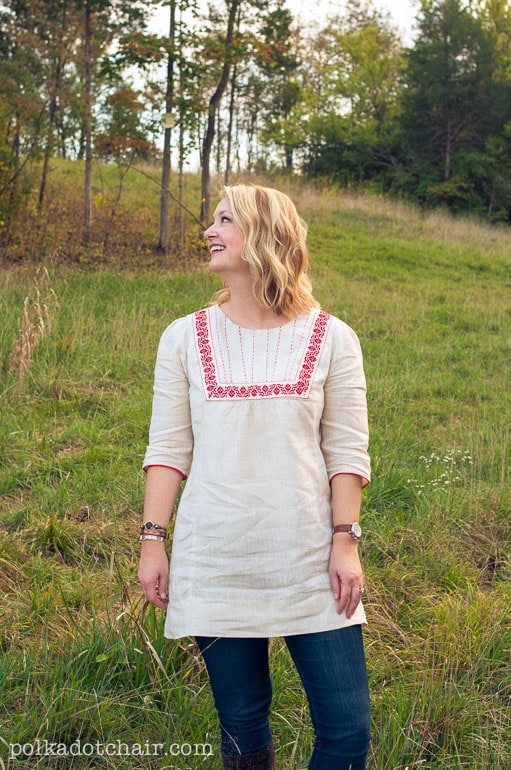
Hey hey hey, it’s week two of Project Sewn. Thanks for your votes; I made it through to week 2. The challenge this week was Eras. You pick an Era (like the ’40s, 50’s, etc..) and make an outfit inspired by that Era. I decided to make an Embroidered Linen Tunic.
I surprised even myself by choosing the 70’s my inspiration Era. Normally you can count me as a pretty classic late 50’s early 60’s girl when it comes to clothing inspiration. However, the gorgeous fall that’s on its way to Kentucky changed my mind. You should see how bright the leaves here are in the Fall, gorgeous deep reds, oranges, and yellows.
About My Tunic
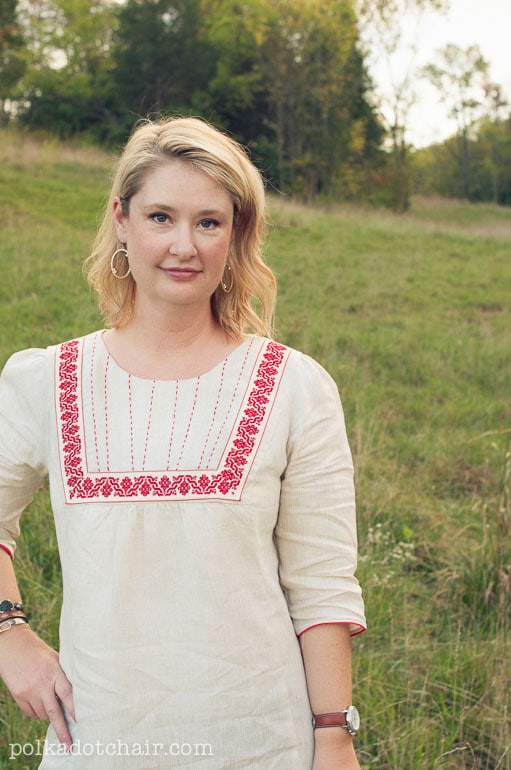
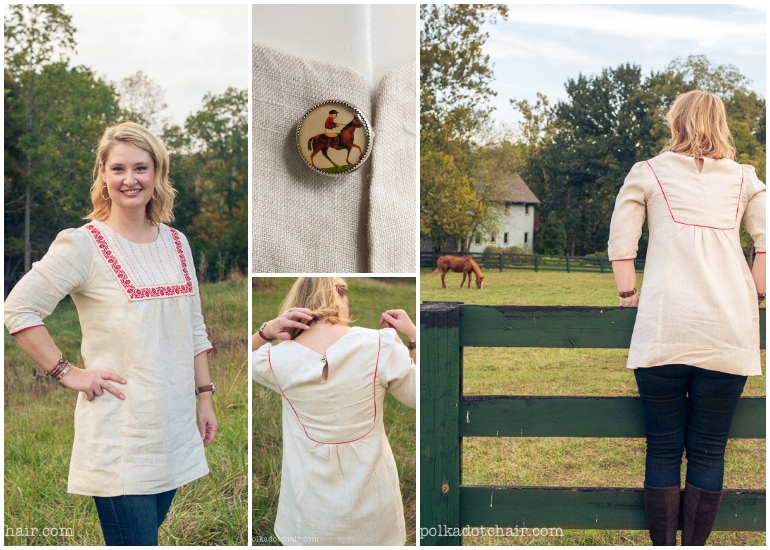
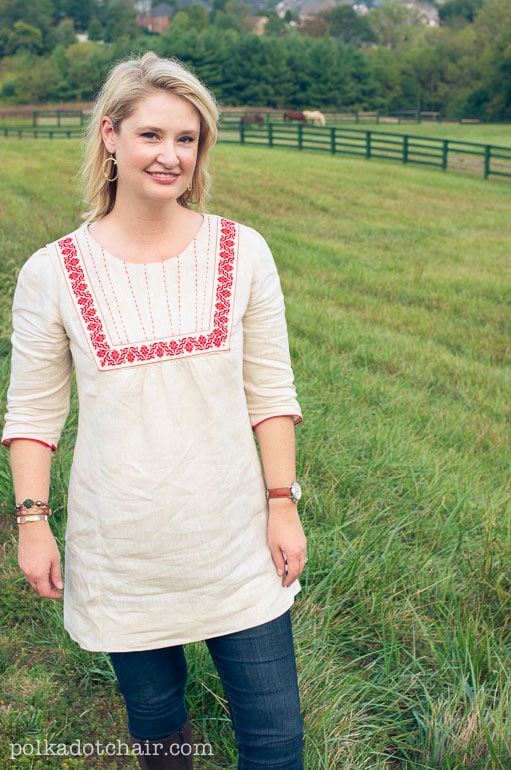
I picked up the red trim on this project on my trip to NYC last May and haven’t been able to stop thinking about it since then. It reminded me so much of all of the gorgeous embroidery you used to see on Caftans and Tunics from the ’70s.
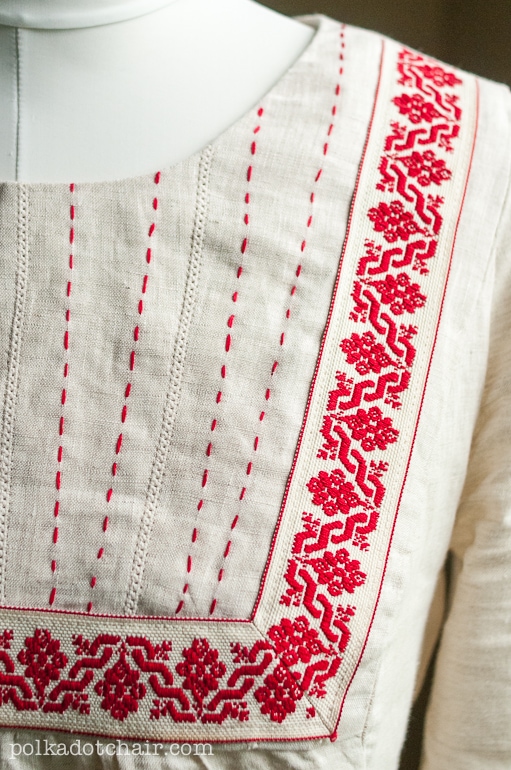
Using the trim as my main inspiration, I decided to make the ’70s inspired Linen Tunic for my project, trying to pull in a little Boho inspiration from that Era. I used the trim to frame out the neckline of the Tunic, then added entredeux stitching over the seams on the front using a wing needle.
To add a bit more red, I hand-stitched lines using 2 strands of red embroidery floss.
Tunic Sewing Pattern
The pattern is Anna Maria Horner’s Painted Portrait Dress, and it’s made from 100% Linen. I picked up the Linen from Michael Levine, it’s the Italian Linen, and it was dreamy to work with.
For a bit more detail, I added piping to the back seams and sleeve hems. The last touch was a horse button that I picked up this summer. I didn’t change much on the pattern other than taking in the front about 2” (there was a bit too much fullness for me built into the pattern) and adding darts to the back seams to pull it in a bit to give it a more flattering shape.
Fit Adjustments
I’ve decided that sewing clothes for yourself are a bit of a catch 22… the upside you can make it fit you perfectly, — the downside, you can make it fit you perfectly. I got a little nit-picky with the fit with this one, kept going back and tweaking the seams around the waistline. I didn’t want to be mistaken for a pregnant lady! In the end, I made myself STOP adjusting the seams, and I’m thrilled now with how it fits.
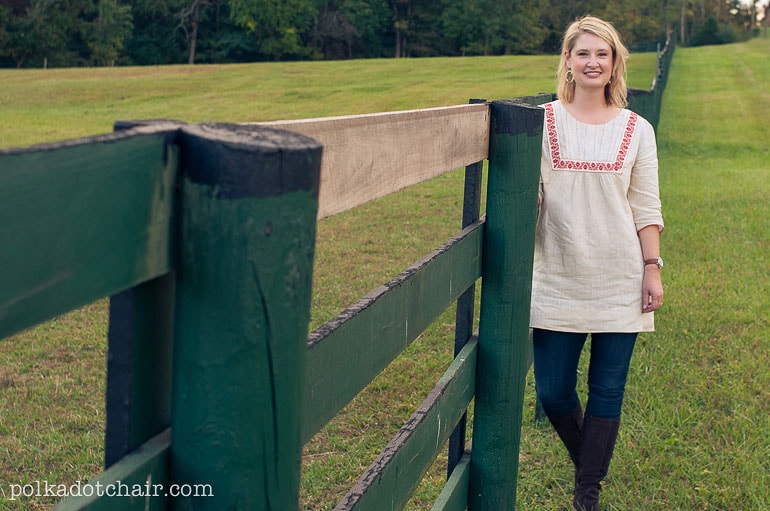
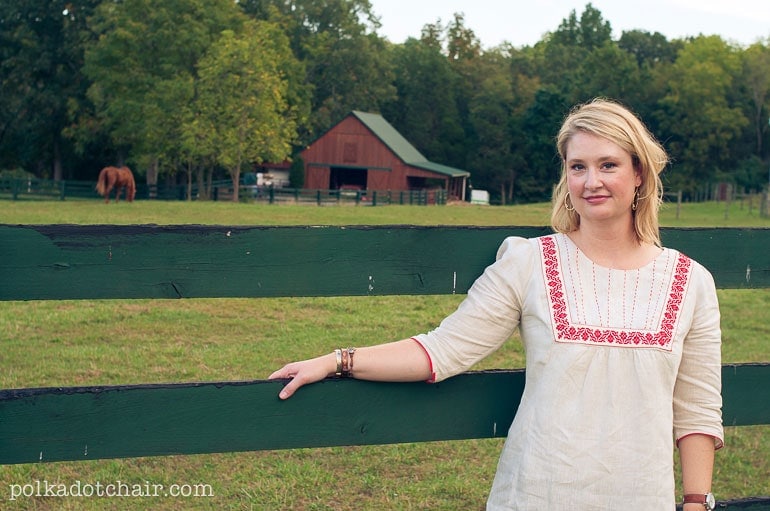
I kept an eye out for good photoshoot locations since I agreed to do Project Sewn (I normally don’t photograph clothing made for adults) and remembered this horse farm behind my house. If you watch the news, you may have noticed that Louisville received a record rainfall last weekend. I knew it was going to rain, but I wasn’t sure of how much, so we planned a photoshoot early on Friday afternoon just in case. Good thing we did; it rained for 48 hrs straight! Even though the rain wasn’t here yet, it was the HOTTEST most HUMID day we’d had in years. The camera lens kept fogging up from the humidity!
On the upside, the linen didn’t wrinkle, but I was wearing jeans and suede boots! I couldn’t stop sweating and realized 5 minutes in that I had totally wasted all of that time curling my hair. It went flat 5 minutes in. You should seriously see some of the outtakes from this photoshoot— hilarious… So much for a dreamy fall photoshoot near a horse farm…. my husband kept saying, “smile, you look really uncomfortable right now”… luckily, he took lots of photos and got a few that I’m happy with.