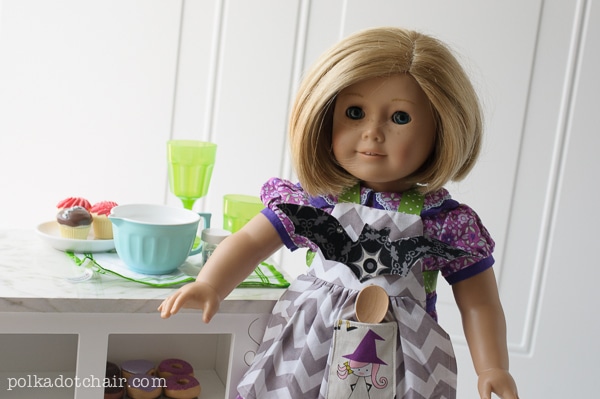
Halloween Doll Apron Tutorial
Today, I’m excited to share with you a free sewing pattern for a Halloween American Girl Doll Apron. It’s a quick, easy sewing tutorial that can be customized for any season!
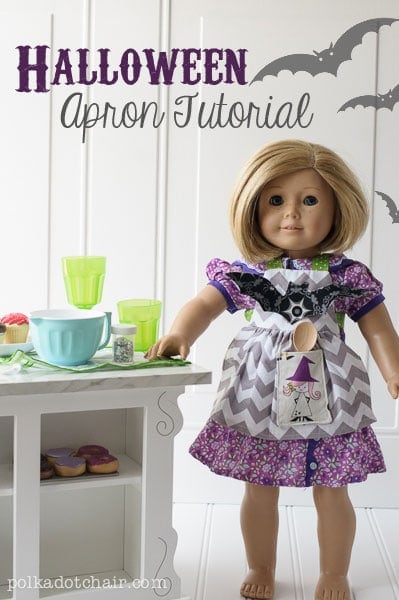
I’m so excited to share a tutorial with you today for this American Girl Doll Sewing Pattern: a Halloween Apron. I made it for Halloween with some of the Riley Blake Fabrics, Too Cute to Spook fabric line. This apron also coordinates beautifully with my Very Batty Halloween Apron from last year!
Halloween Doll Apron Tutorial
Today, I’m excited to share with you a free sewing pattern for a Halloween American Girl Doll Apron. It’s a quick, easy sewing tutorial that can be customized for any season!
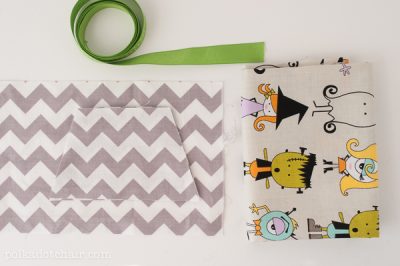
supplies
- 1 Fat Quarter for the Apron
- 1 Fat Quarter for the Pocket
- 40” of ribbon
- Bat Applique Pattern can be downloaded here
- Paper Backed Fusible Webbing
Instructions
Cutting Guides:
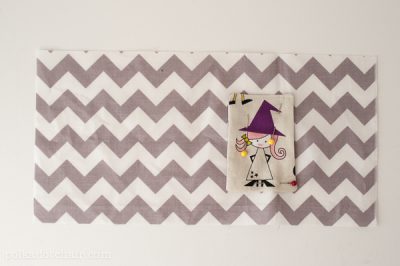
- 2 pieces 3” x 5′ for apron
- 1 piece 5” x 10” for apron skirt
- 2 pieces 3 1/2” x 2 1/2” for pocket (you’ll want to fussy cut these pieces)

- On the 2 3” x 5” apron pieces, mark in 1” from each top corner. Draw a line from the bottom corner of the piece to the point you marked. Cut off the extra fabric. Do this on both sides to end up with a trapezoid.

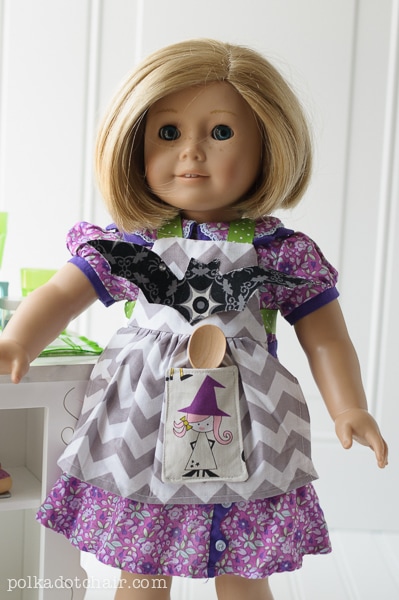
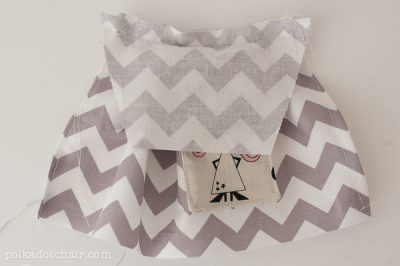
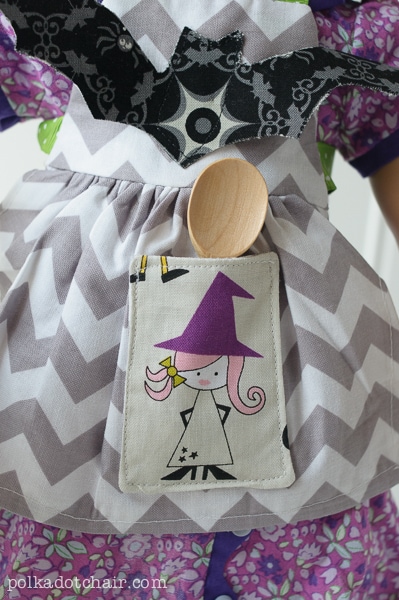
- Sew the 2 pocket pieces right sides together, leaving an opening in the bottom of the pocket. Clip the corners and turn the pocket right side out—Topstitch along the top of the pocket.
- Pin the pocket to the skirt piece just off the center. Sew the pocket in place.
- Turn under the sides of the skirt piece 1/4” and press. Stitch.
- Run two rows of gathering stitches across the top of the skirt.
- Pull up on the gathering stitches until the skirt fits the bottom of the apron top piece. Pin in place and stitch with a 1/4” seam.
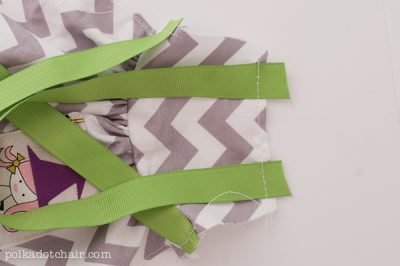
- Cut 2 pieces of ribbon, 8” each for the neck and 2 pieces of ribbon, 15” each for the skirt. Sew to the apron top piece.
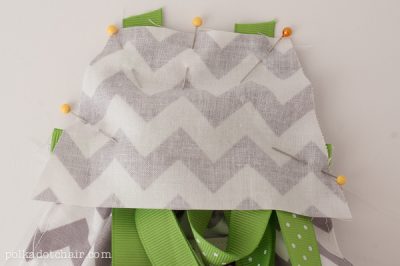
- Pin the 2nd apron top piece to the apron piece, right sides together. Stitch with a 1/4” seam. Turn right side out. Hand stitch in place on the wrong side of the apron. Hem the apron with a 1/4” seam.


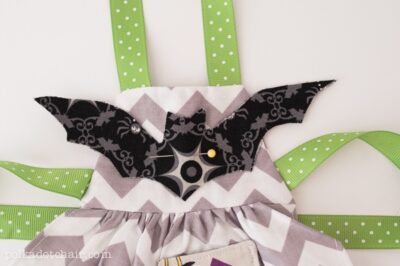
To make the bat for the apron top:
- Trace the bat shape onto a piece of paper-backed fusible web.
- Iron onto the wrong side of the black fabric
- Cut out precisely
- Peel off the backing and iron onto another piece of black fabric (also ironing onto the wrong side of the fabric).
- Cut out the bat.
- Stitch to the front of the apron using black thread.
Love this tutorial? Get the behind the scenes on Instagram
I don’t even know how I ended up here, but I thought this post was great.
I do not know who you are but definitely you are going to a famous
blogger if you aren’t already 😉 Cheers!
Just adorable and so creative!!! Great fabrics!
Cute!!! I’ve linked to your tutorial over at Craft Gossip:
http://sewing.craftgossip.com/tutorial-halloween-apron-for-an-18-doll/2013/10/07/
–Anne
Thank you Anne!!!