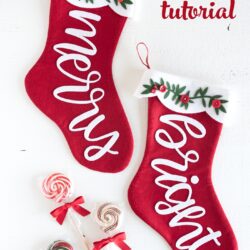
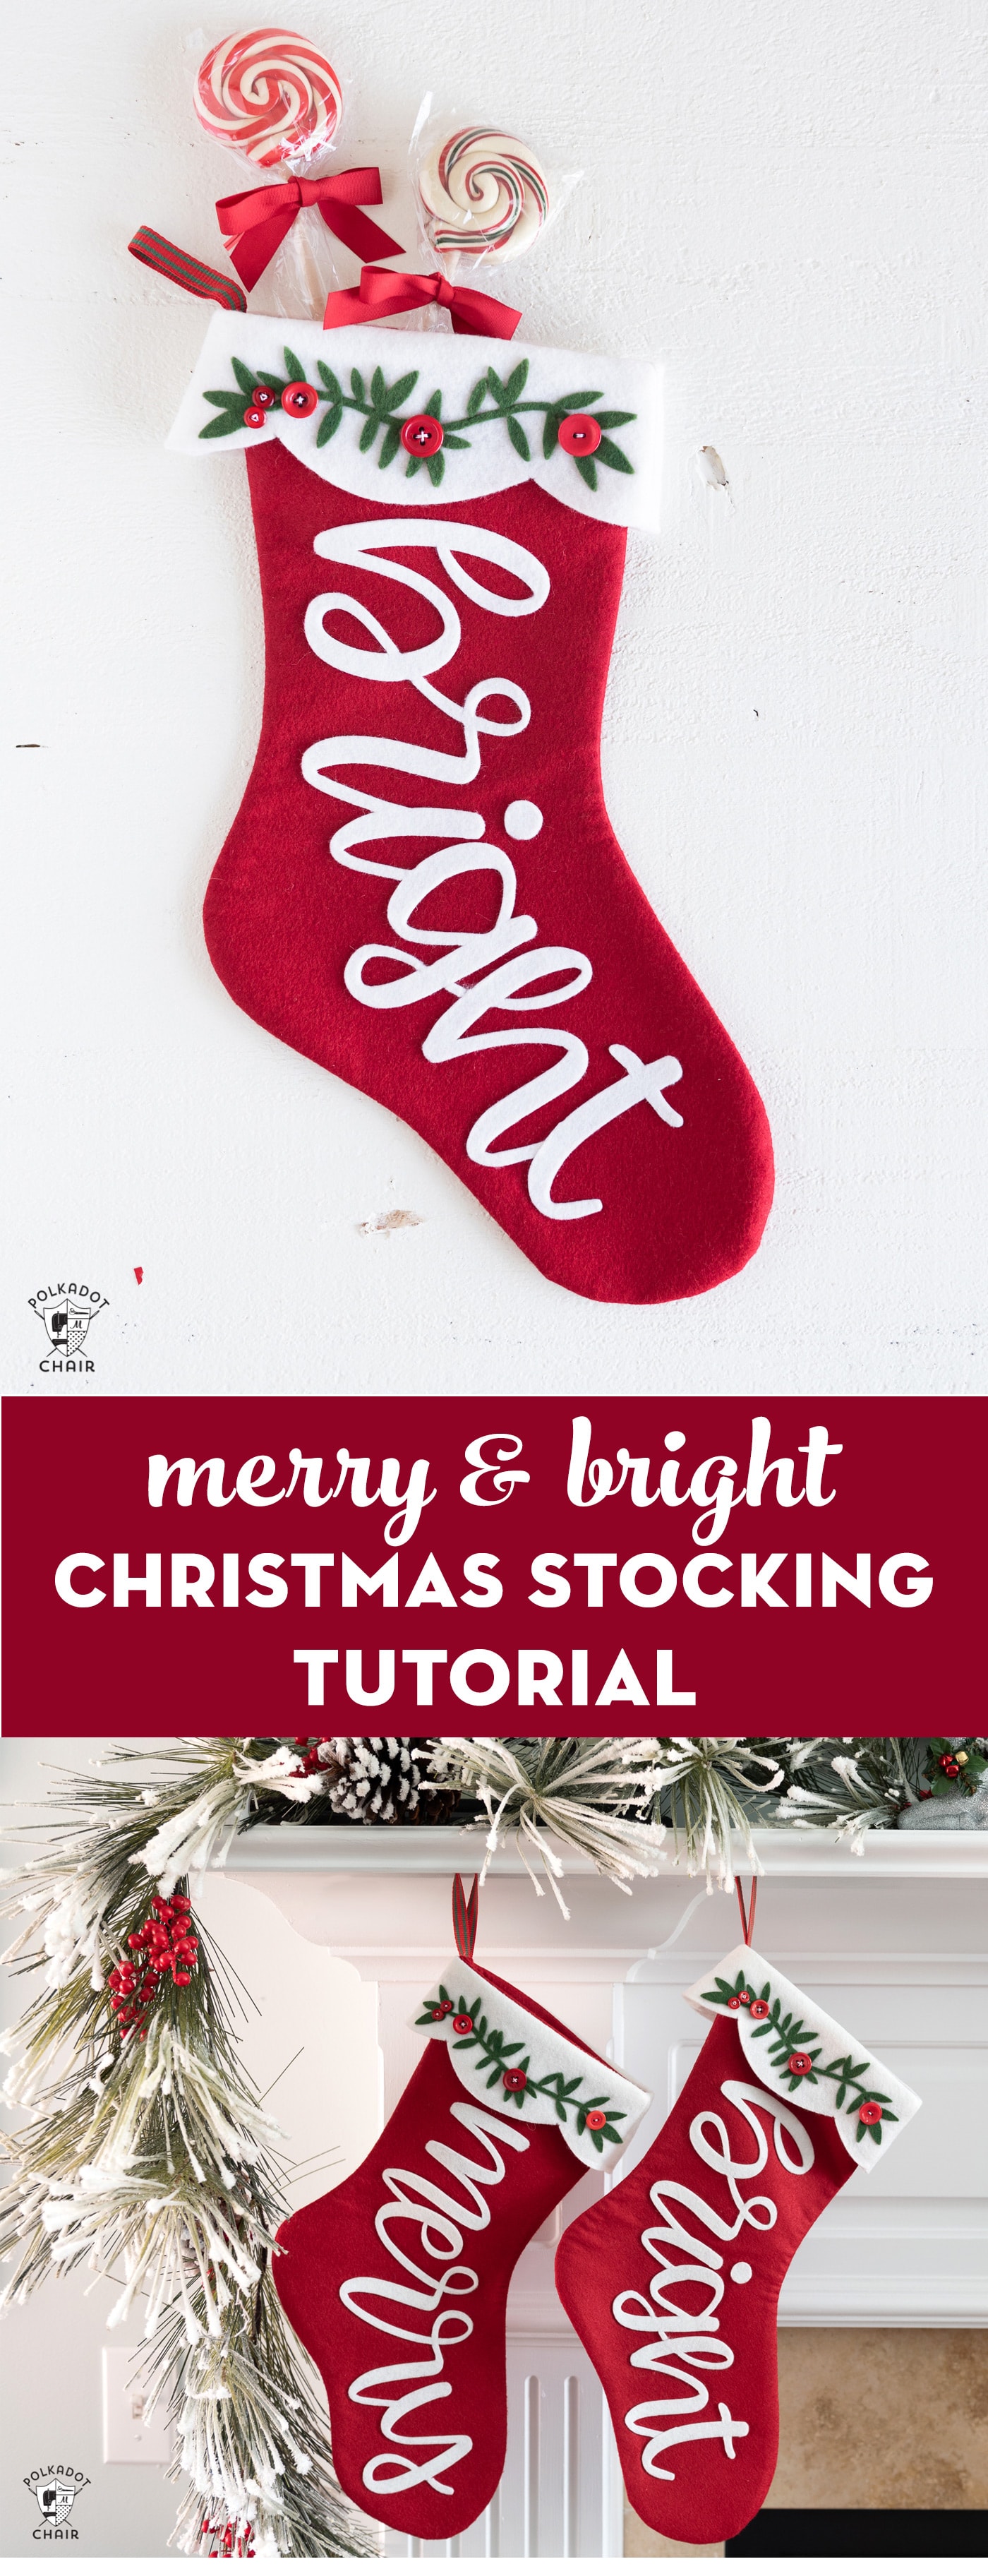
Merry & Bright Christmas Stocking Pattern a Cricut Maker Project
Craft a festive and cozy wool Christmas stocking using your Cricut Maker! This step-by-step project guide will help you create a personalized stocking that adds holiday cheer to your home decor.
I work as a Brand Ambassador for Cricut, and this is sponsored content.
The Cricut Maker machine made cutting out the felt pieces a breeze. This guide includes instructions for using the Cricut machine and a free Christmas Stocking pattern.
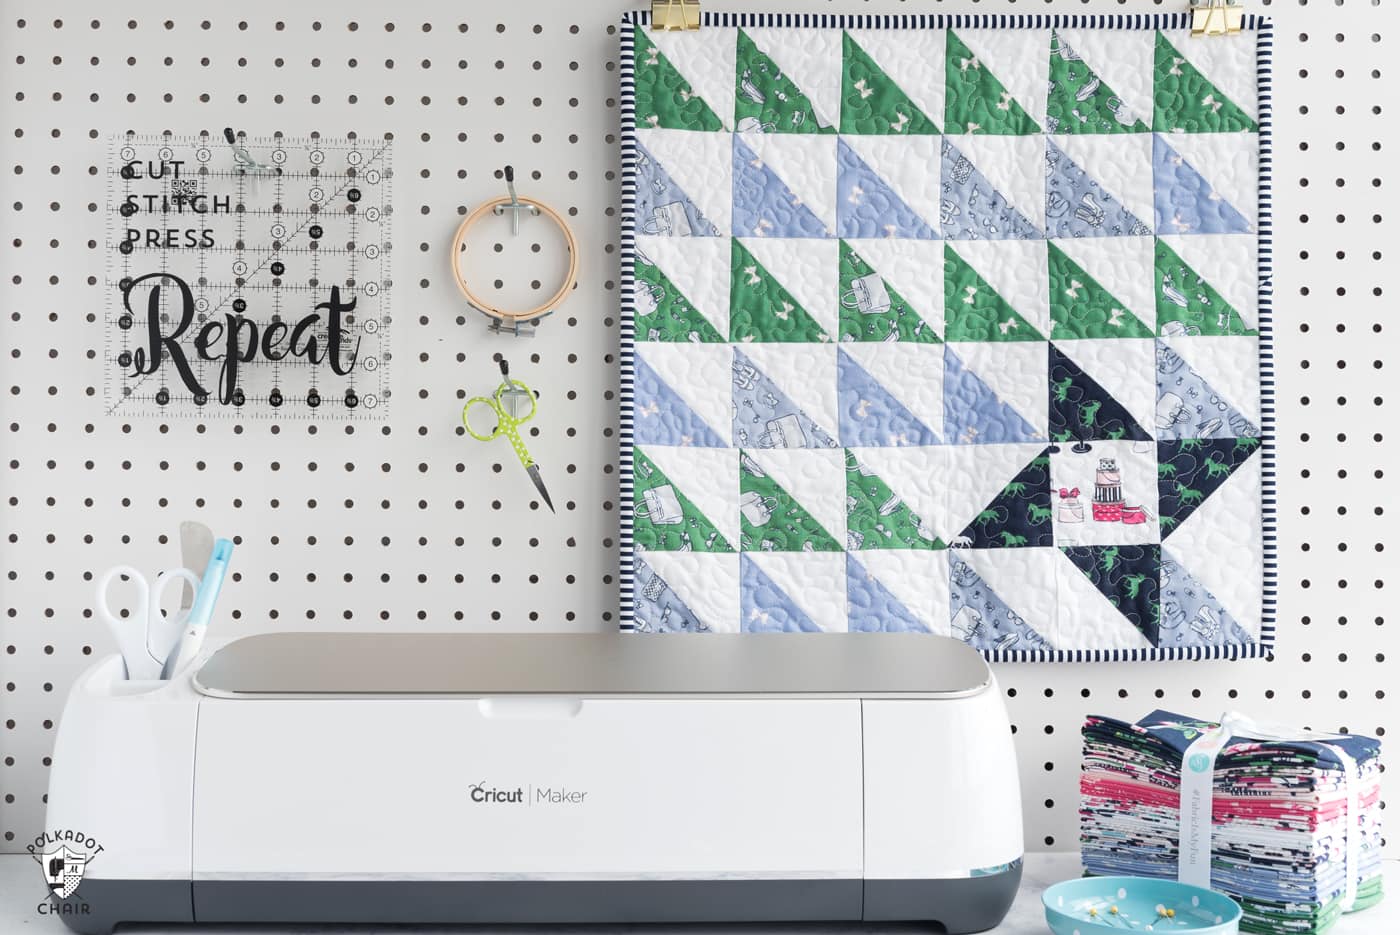
When the Cricut Maker was first announced, one of the things I was the most excited to try with it was cutting felt. I love the look of felt on projects but am not always patient. Usually, I felt projects require a lot of cutting, so I tended to avoid them.
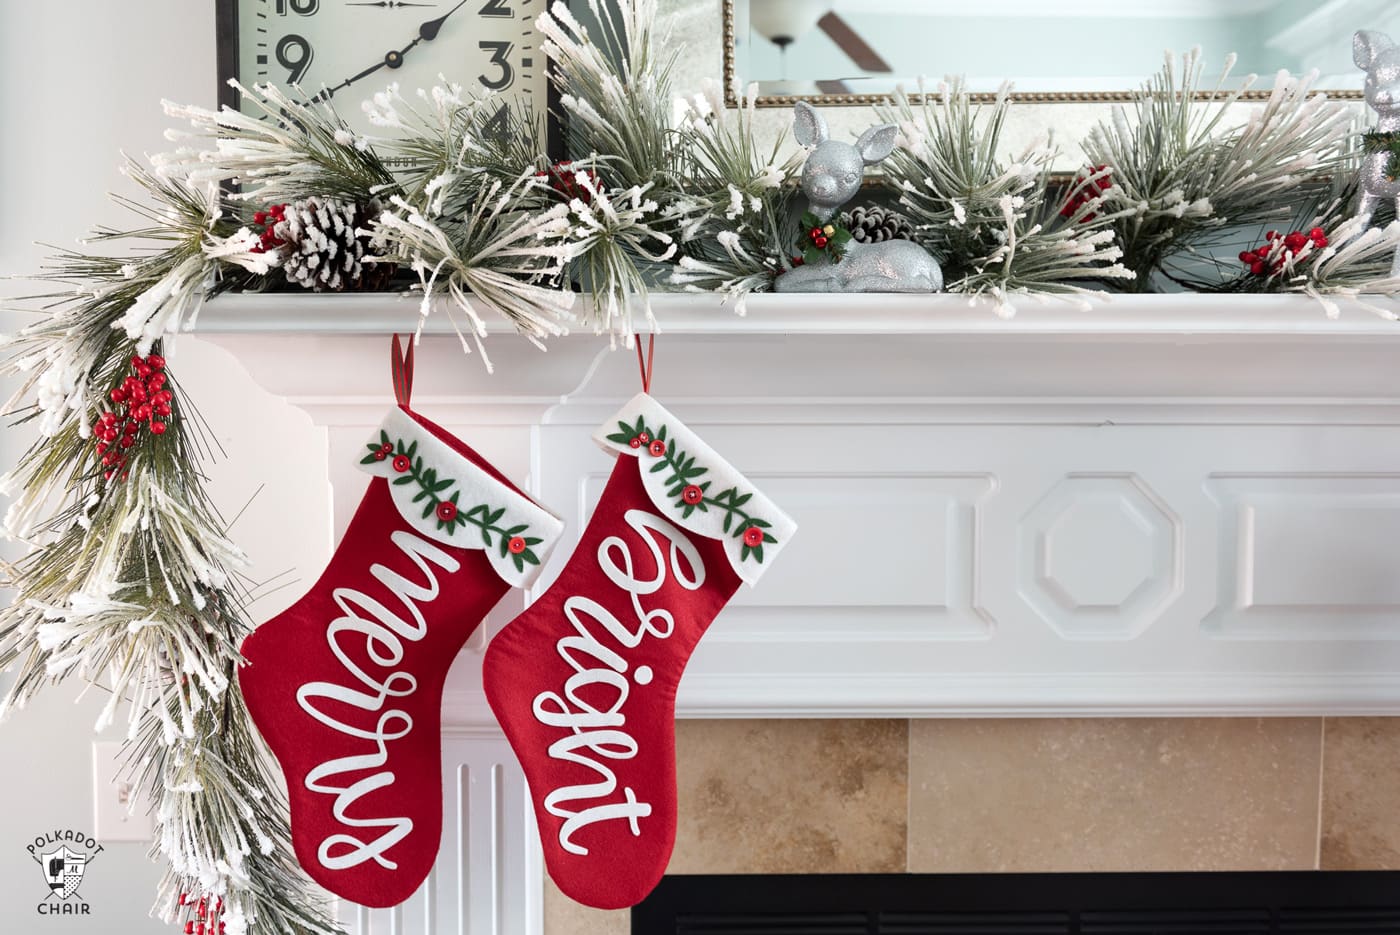
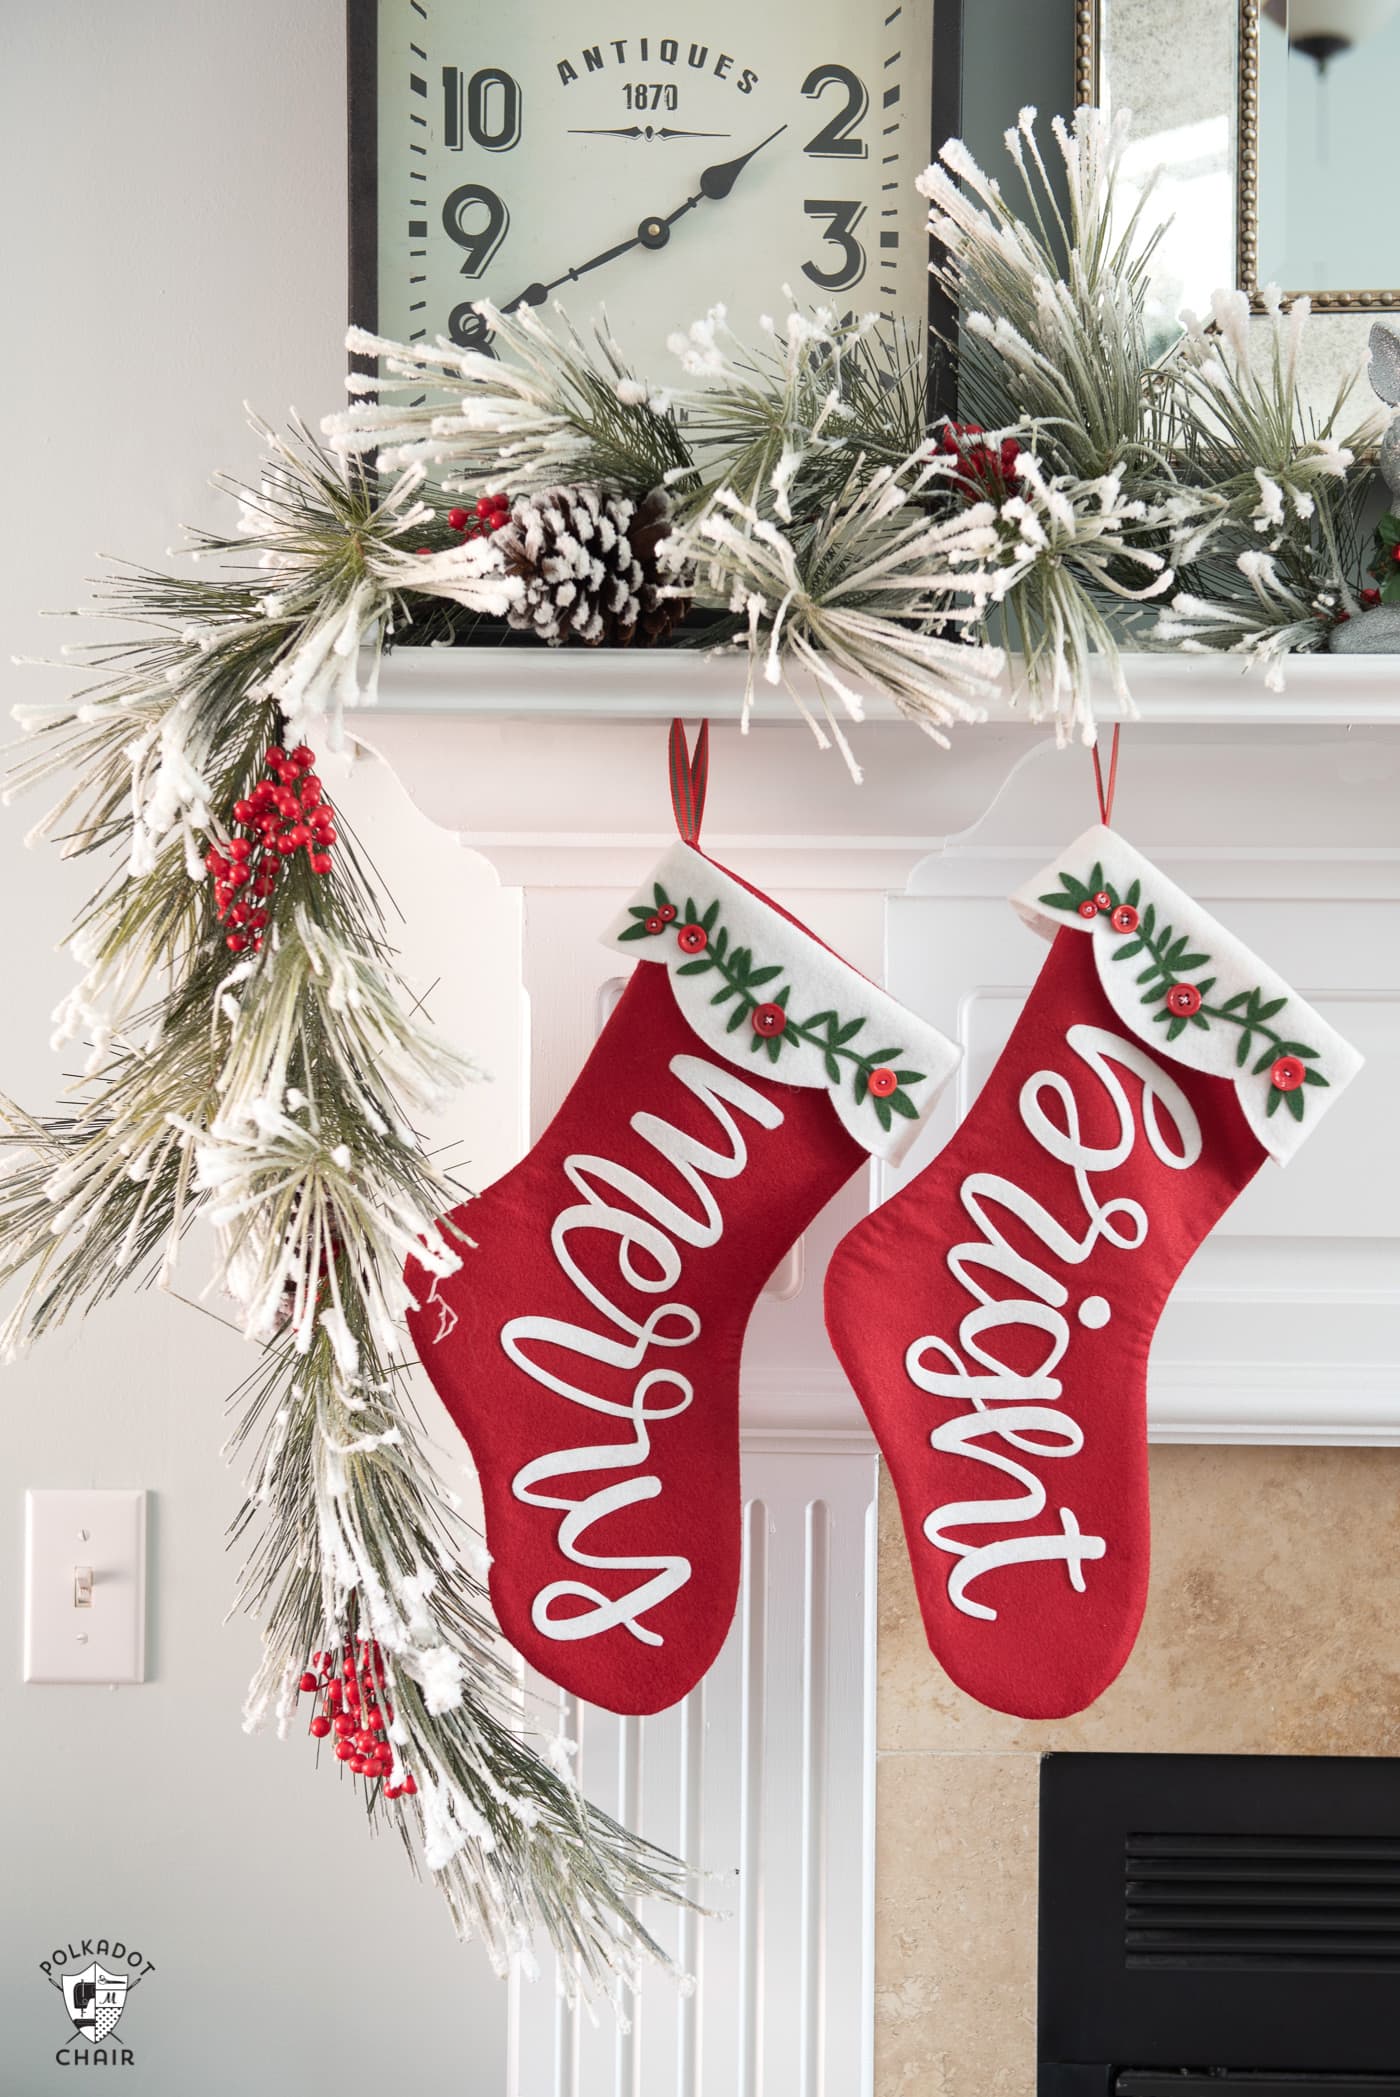
With Christmas approaching, I knew I wanted to make some fun Christmas stockings for our mantel. I decided it was time to figure out how to cut felt with the Cricut Maker, and after a bit of experimenting, I think I found a method that works really well.
Cricut Maker Christmas Stocking Details
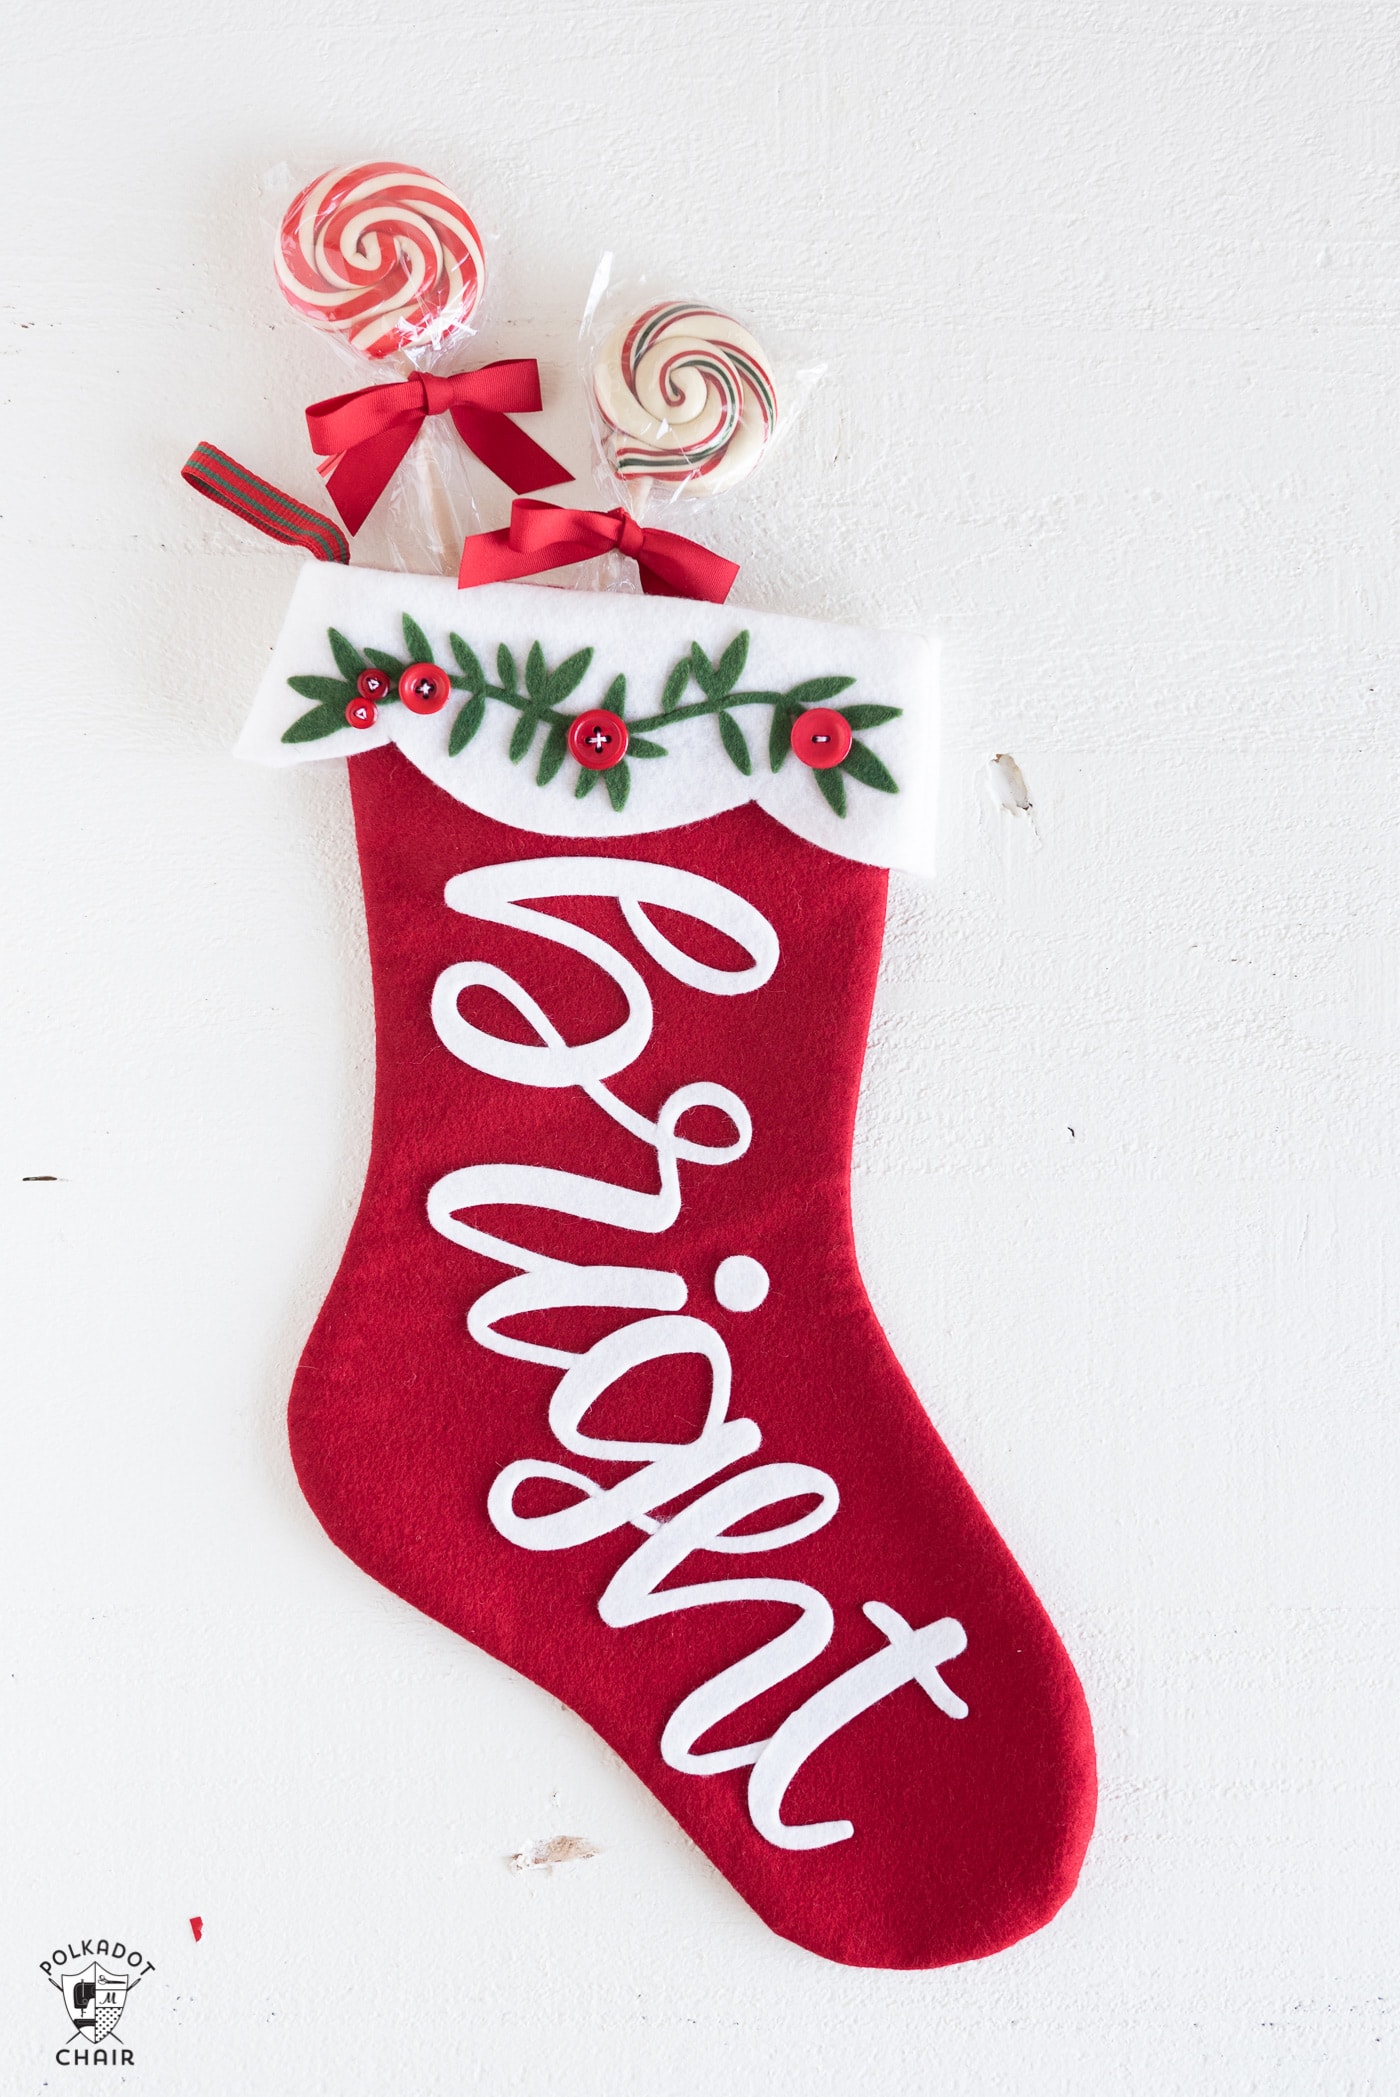
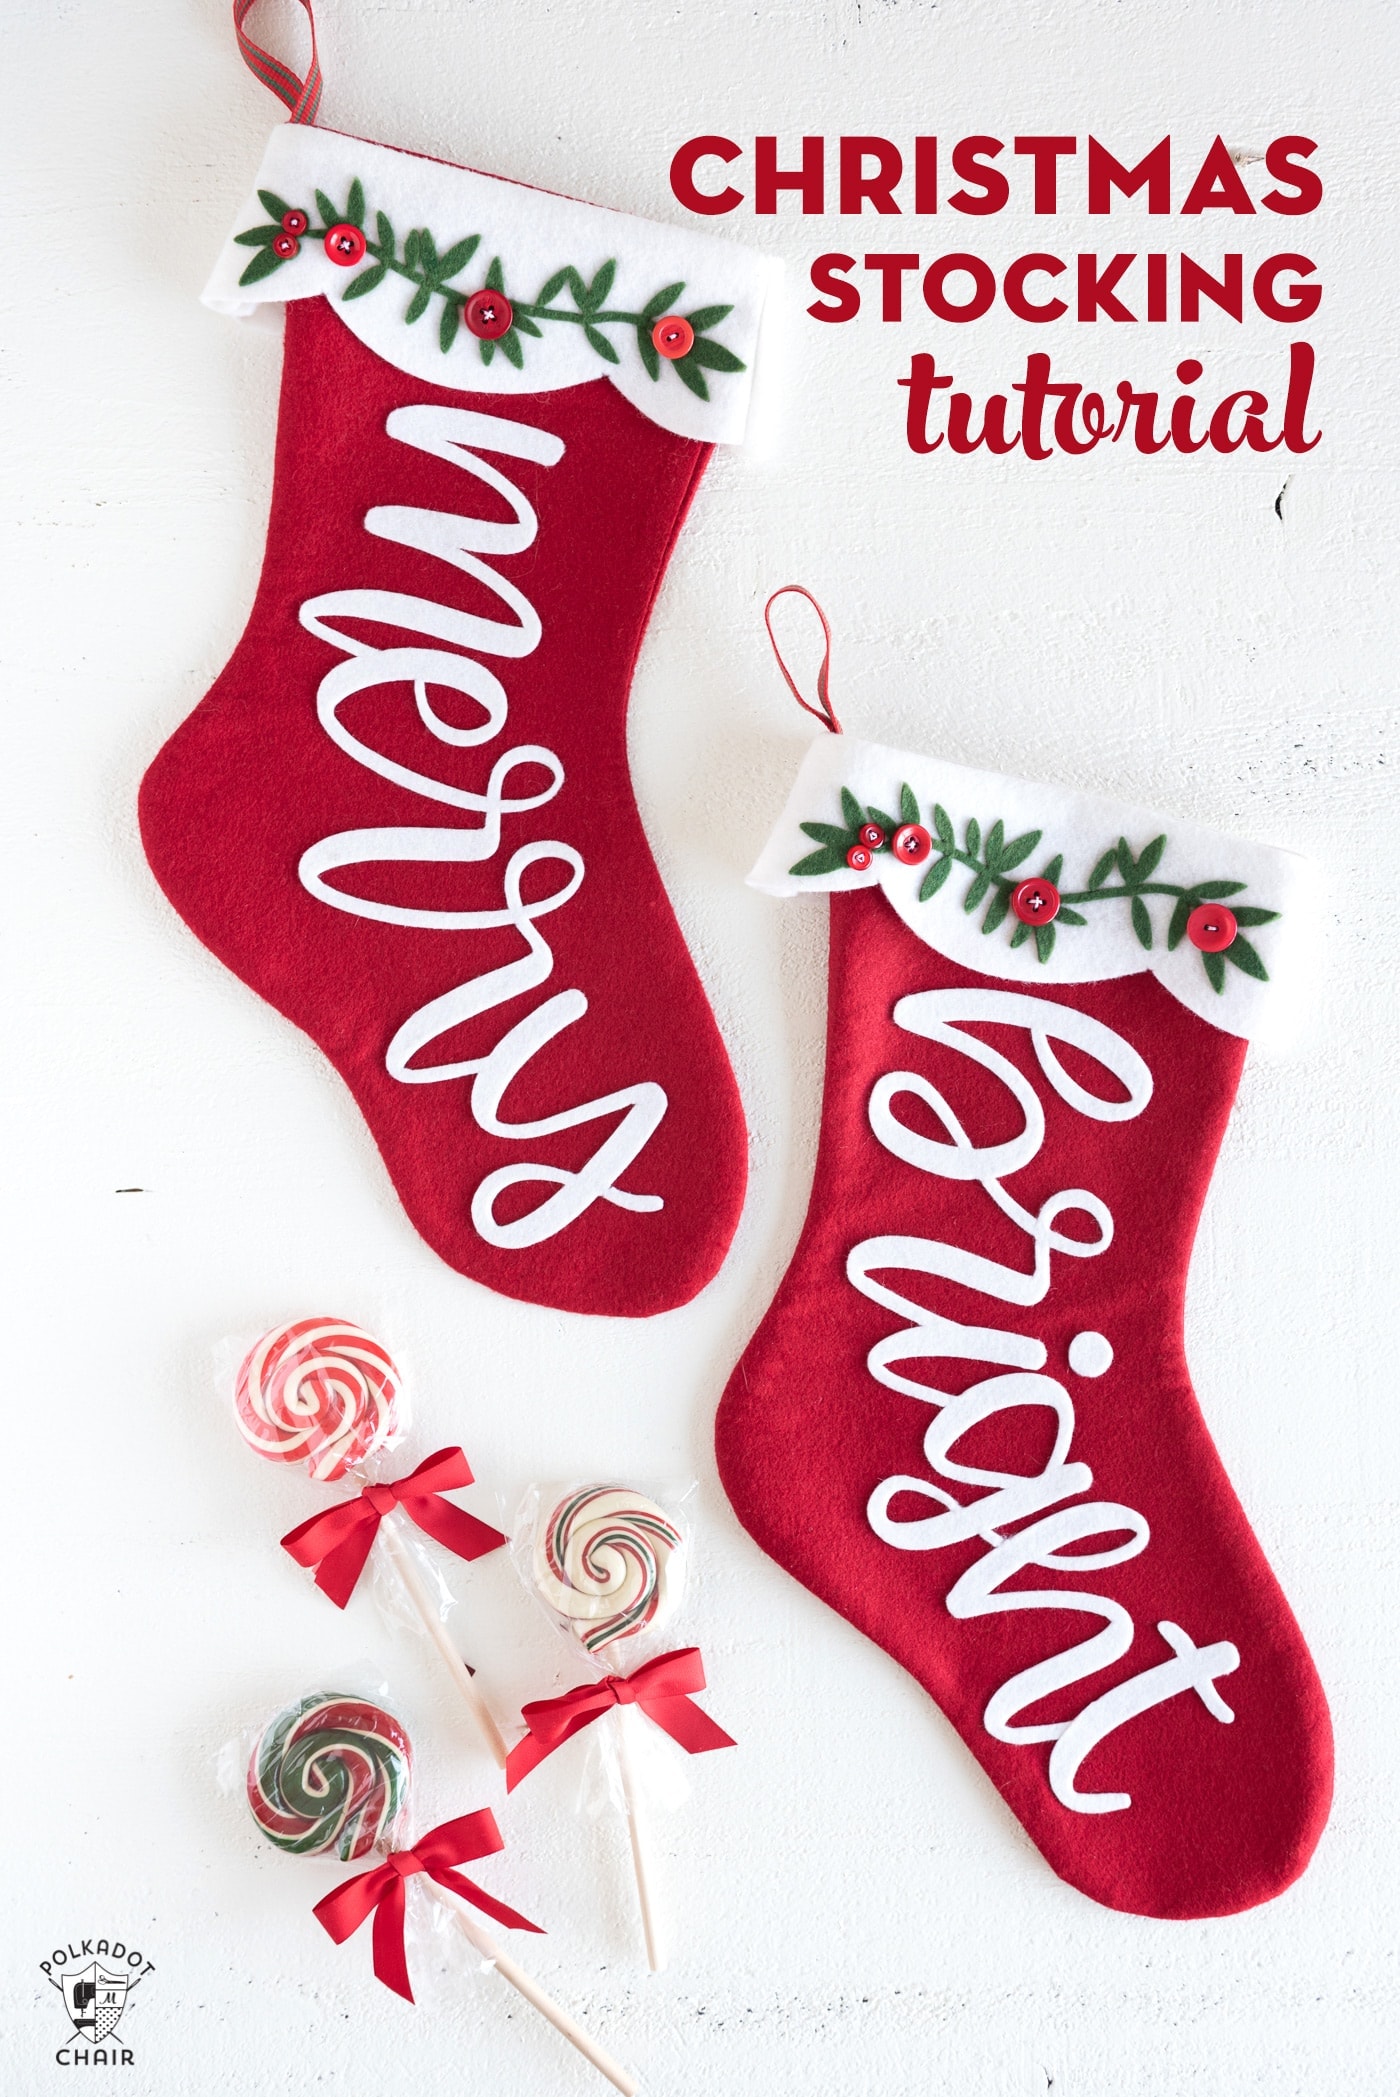
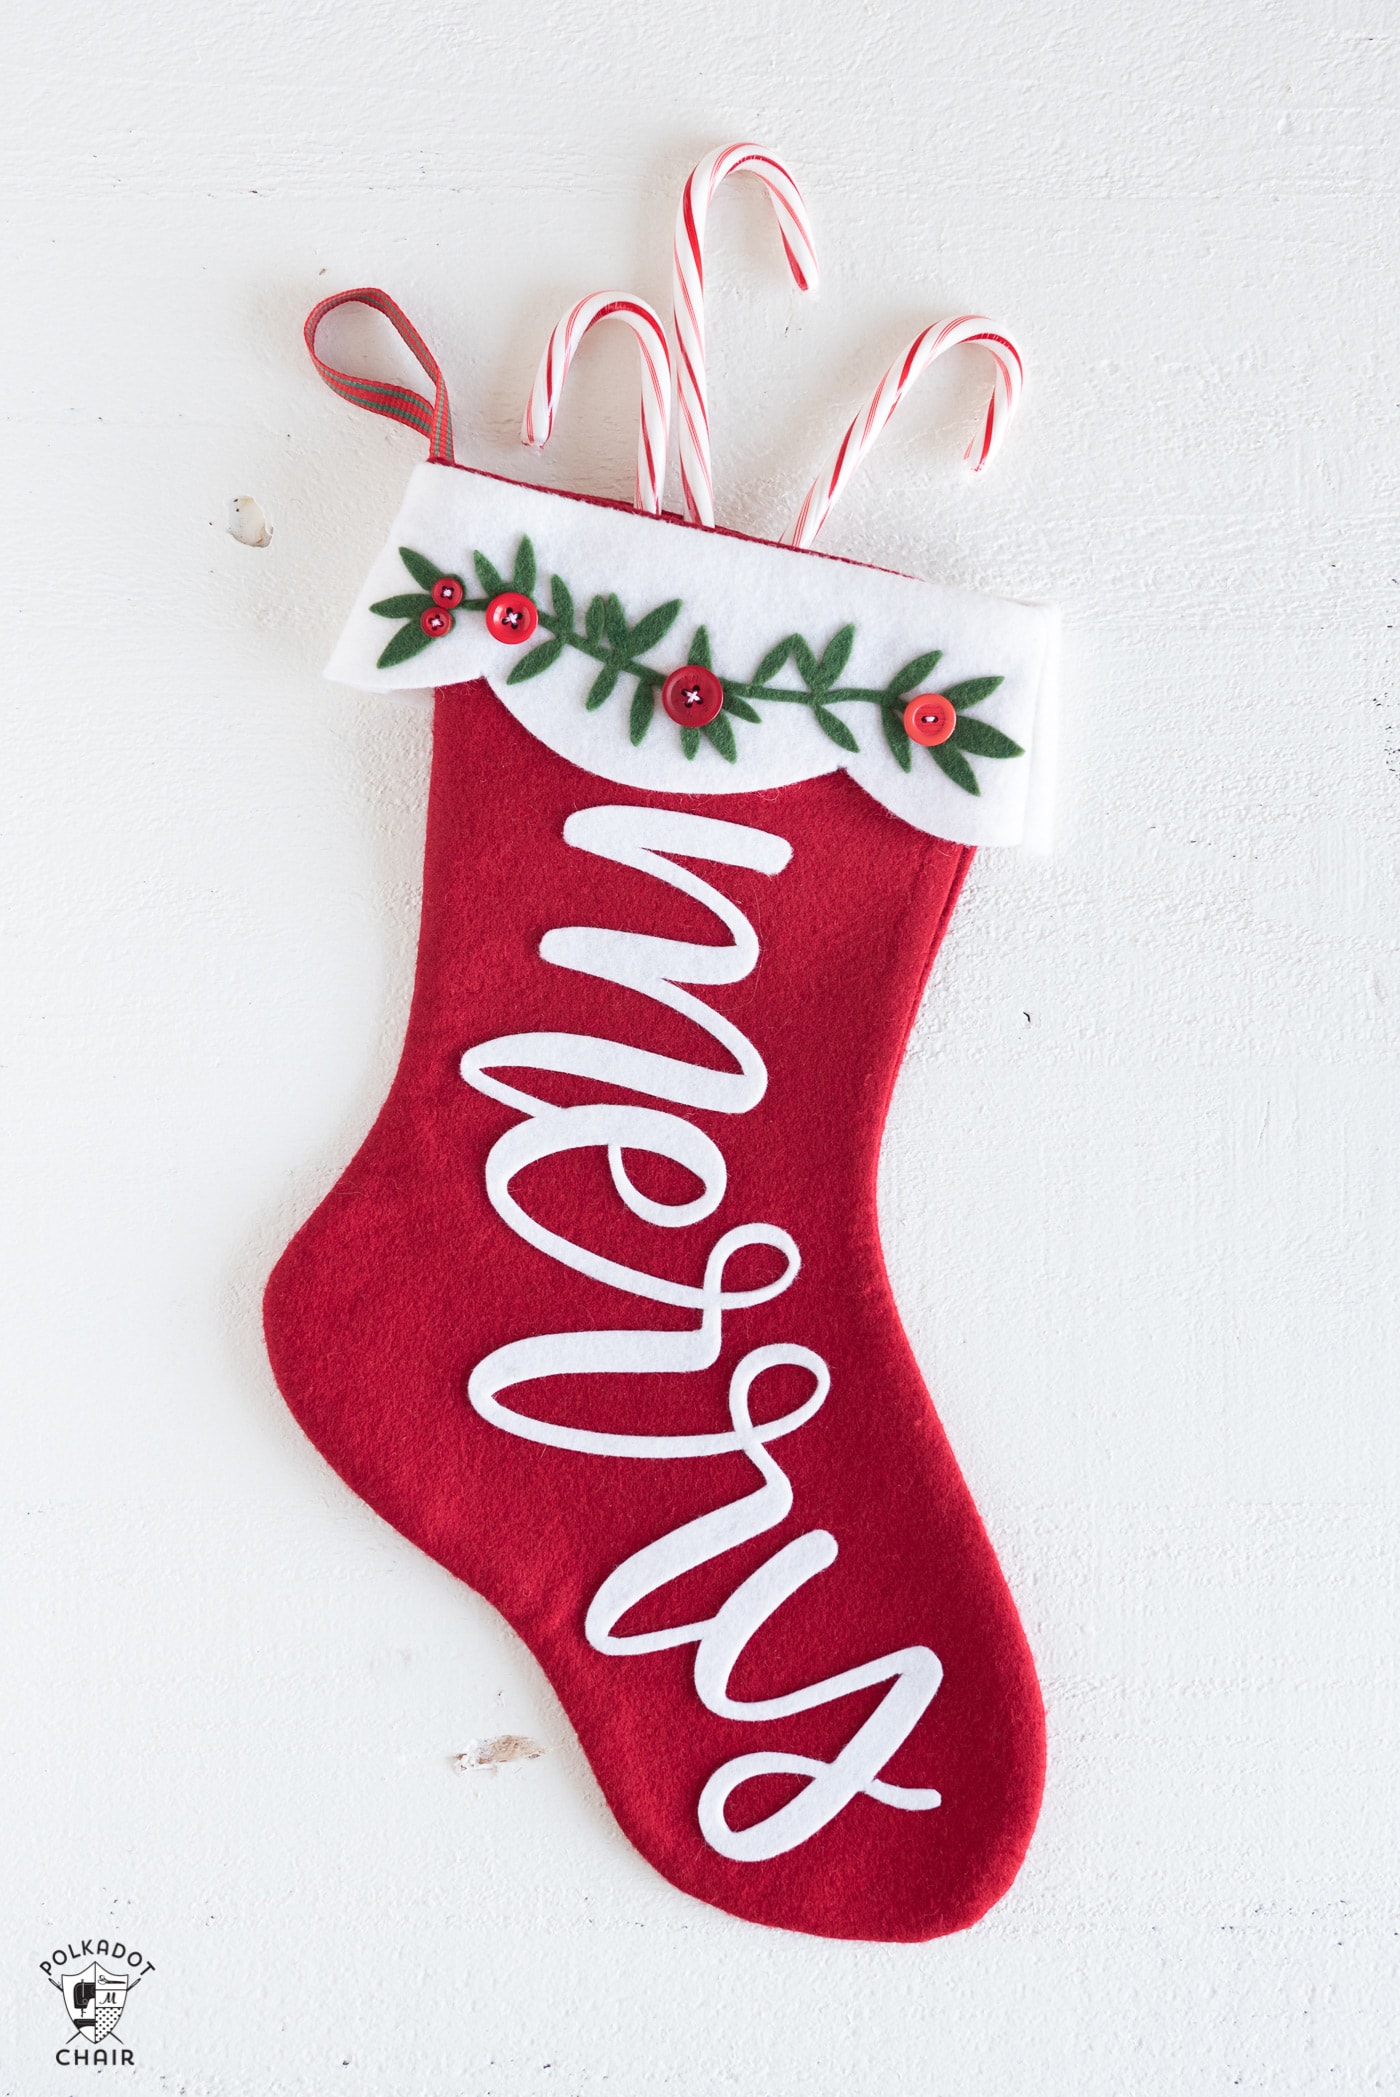
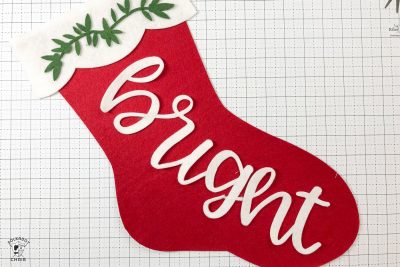
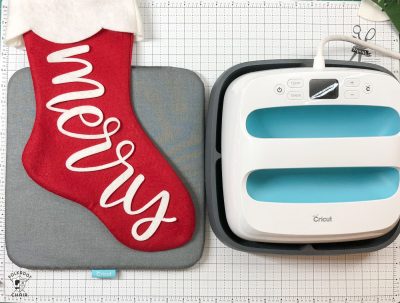
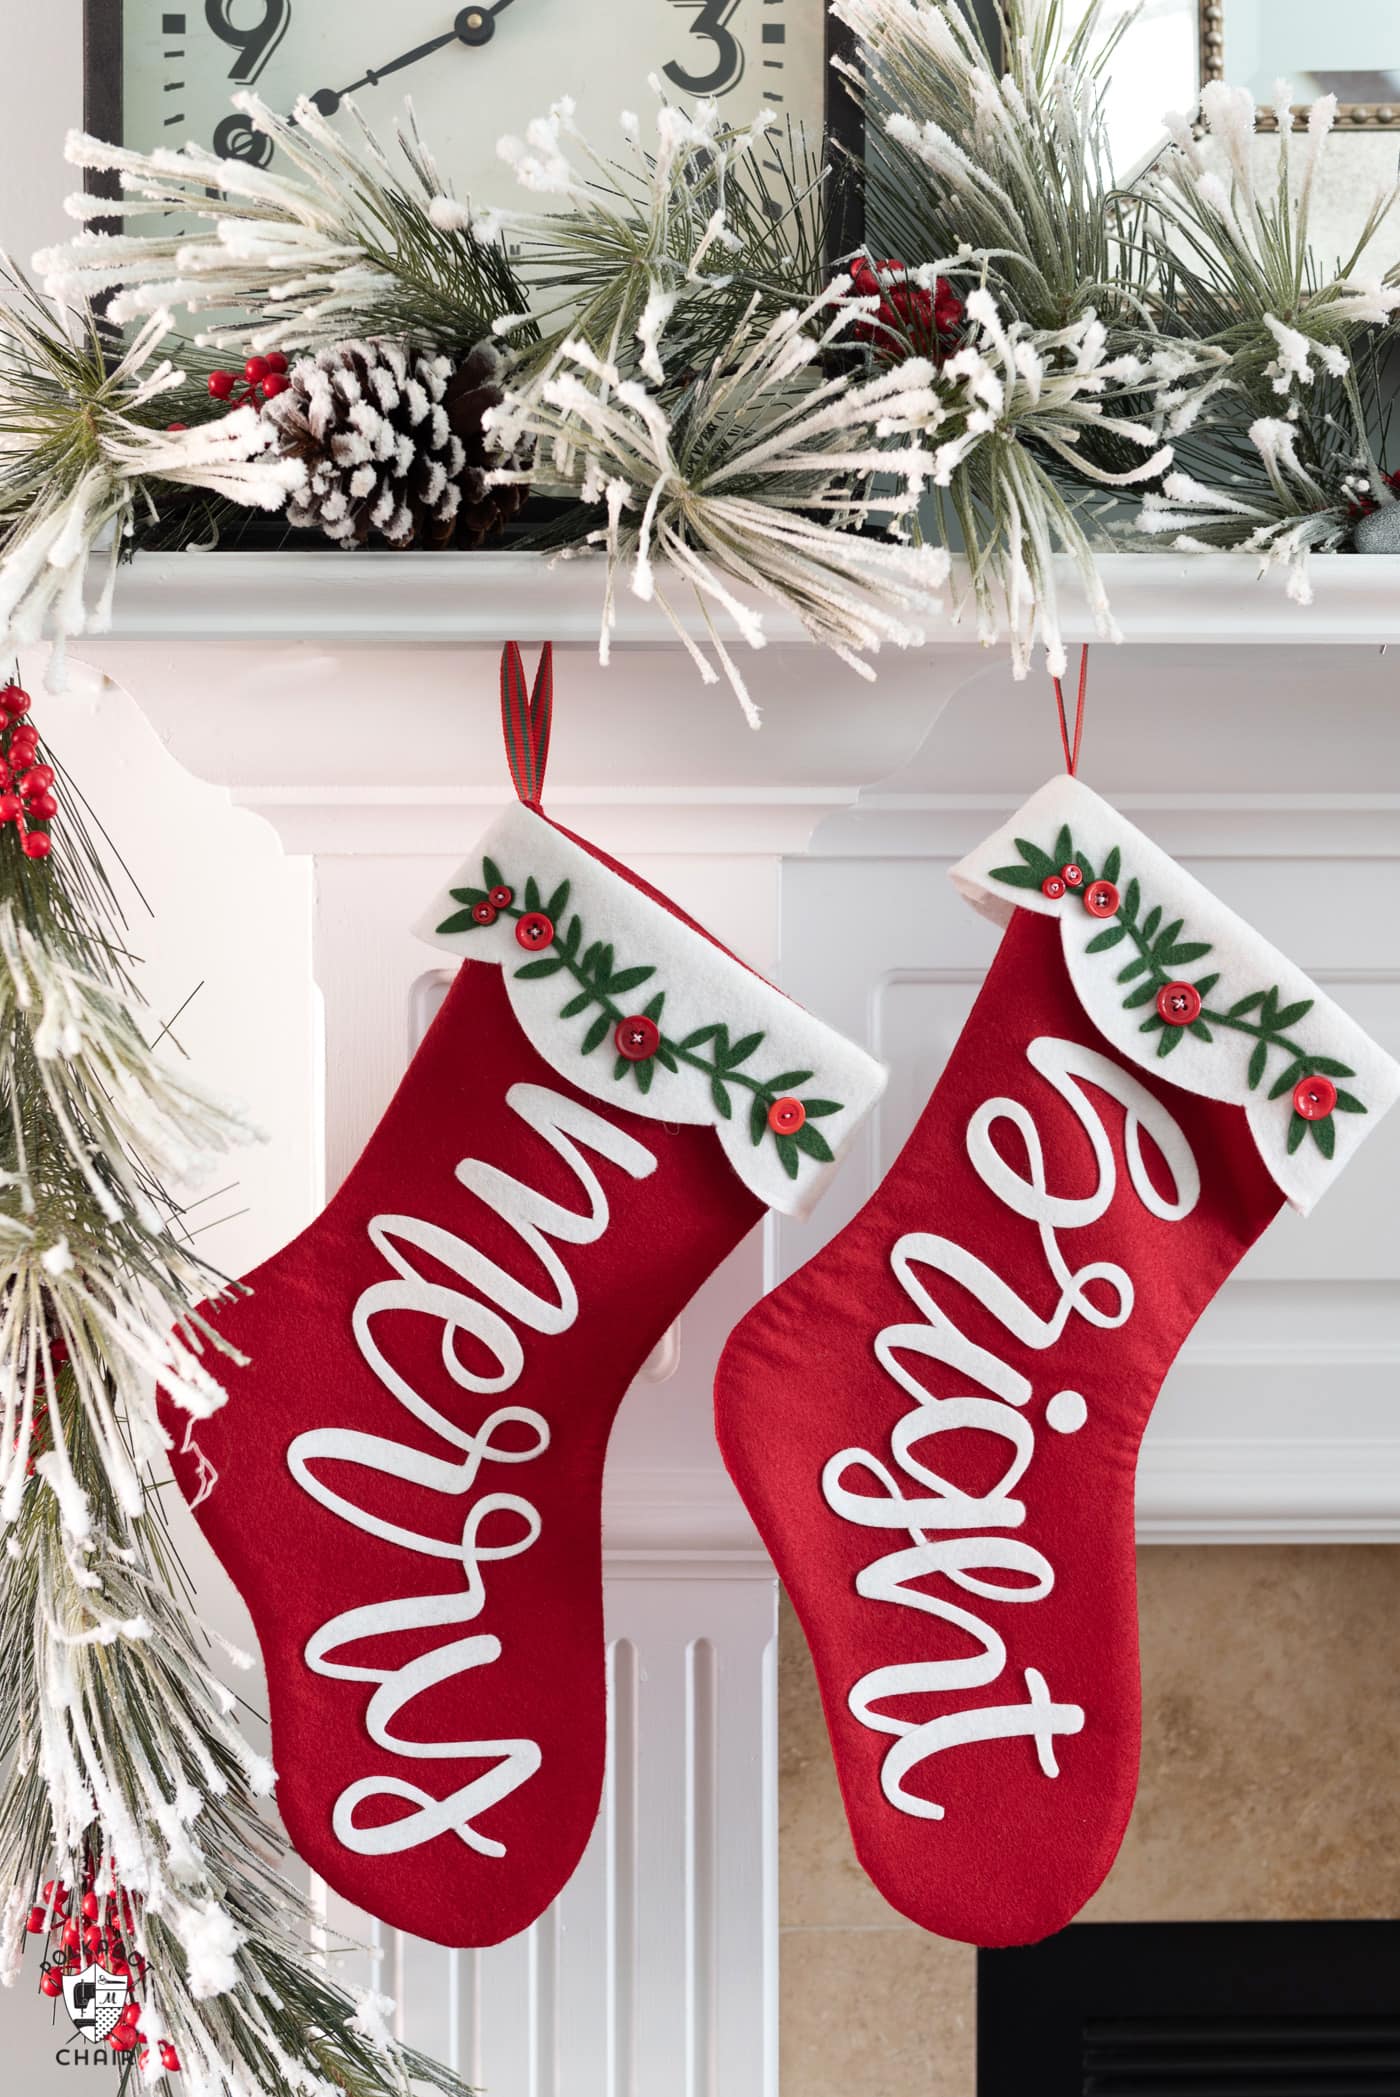
I love the hand lettering trend that’s been trending around the blogosphere lately and thought it would be fun to incorporate that trend into my Christmas stockings. I found so many cute hand-lettering images in the Cricut Design space that I had a hard time choosing just one, so I chose two.
These stockings turned out a bit better than I expected (which is nice; I usually have the opposite problem)! I think I will make three more so we have a matching set for our family (there are five of us).
Today, I will share with you how I made them and cut the felt on the Cricut Maker.
How to Cut Felt with the Cricut Maker
The Problem with Cutting Felt with a Cricut
As many of you may know, the Cricut machines use a sticky mat to hold materials while cutting. You don’t get a clean cut if the materials don’t stick to the mat.
The problem I had when I was trying to cut felt was that the felt was fuzzy so that it would stick to the mat the first time. But if I try to cut again, the fuzz sticks to the mat, and the mats are no longer sticky. This is not great because I’m not buying a new mat each time I want to cut felt.
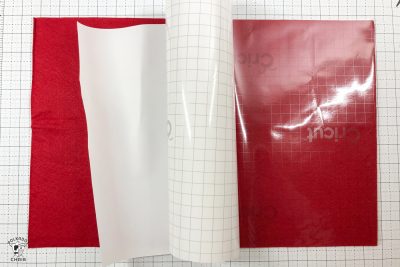
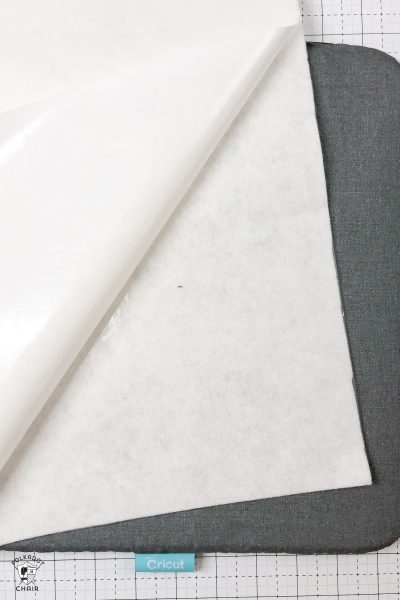
I realized there needed to be a barrier between the felt and the mat. Each piece of felt I cut had a fusible web bonded to one side or Cricut transfer tape.

The Secret to Cutting Felt with a Cricut
Using the Cricut Transfer tape, I cut non-bonded felt without leaving a fuzzy residue on my mat. Plus, the transfer tape is offered in bulk and is pretty inexpensive.
My project features both ironed-on and sewn felt. I didn’t want to put fusible on the felt that I was sewing (the stocking pieces), and I was so excited to find that the transfer tape worked so well!

Step by Step Directions to Cut Felt
- Use Standard Grip Mat
- Apply Cricut Transfer Tape to the Felt Piece
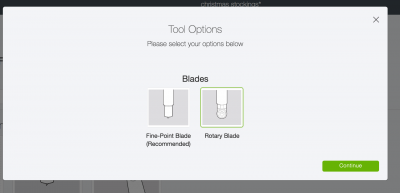
- Use Rotary Blade
- Use Felt Bonded Setting on the Machine
I used a standard grip mat, Cricut transfer tape, the Cricut rotary blade, and the “Felt Bonded” setting on the machine to cut the felt. It worked well, even on the holly garland pieces, which, in retrospect, may have been too detailed to cut with the rotary blade, but hey, it did work!
Things to Keep in Mind
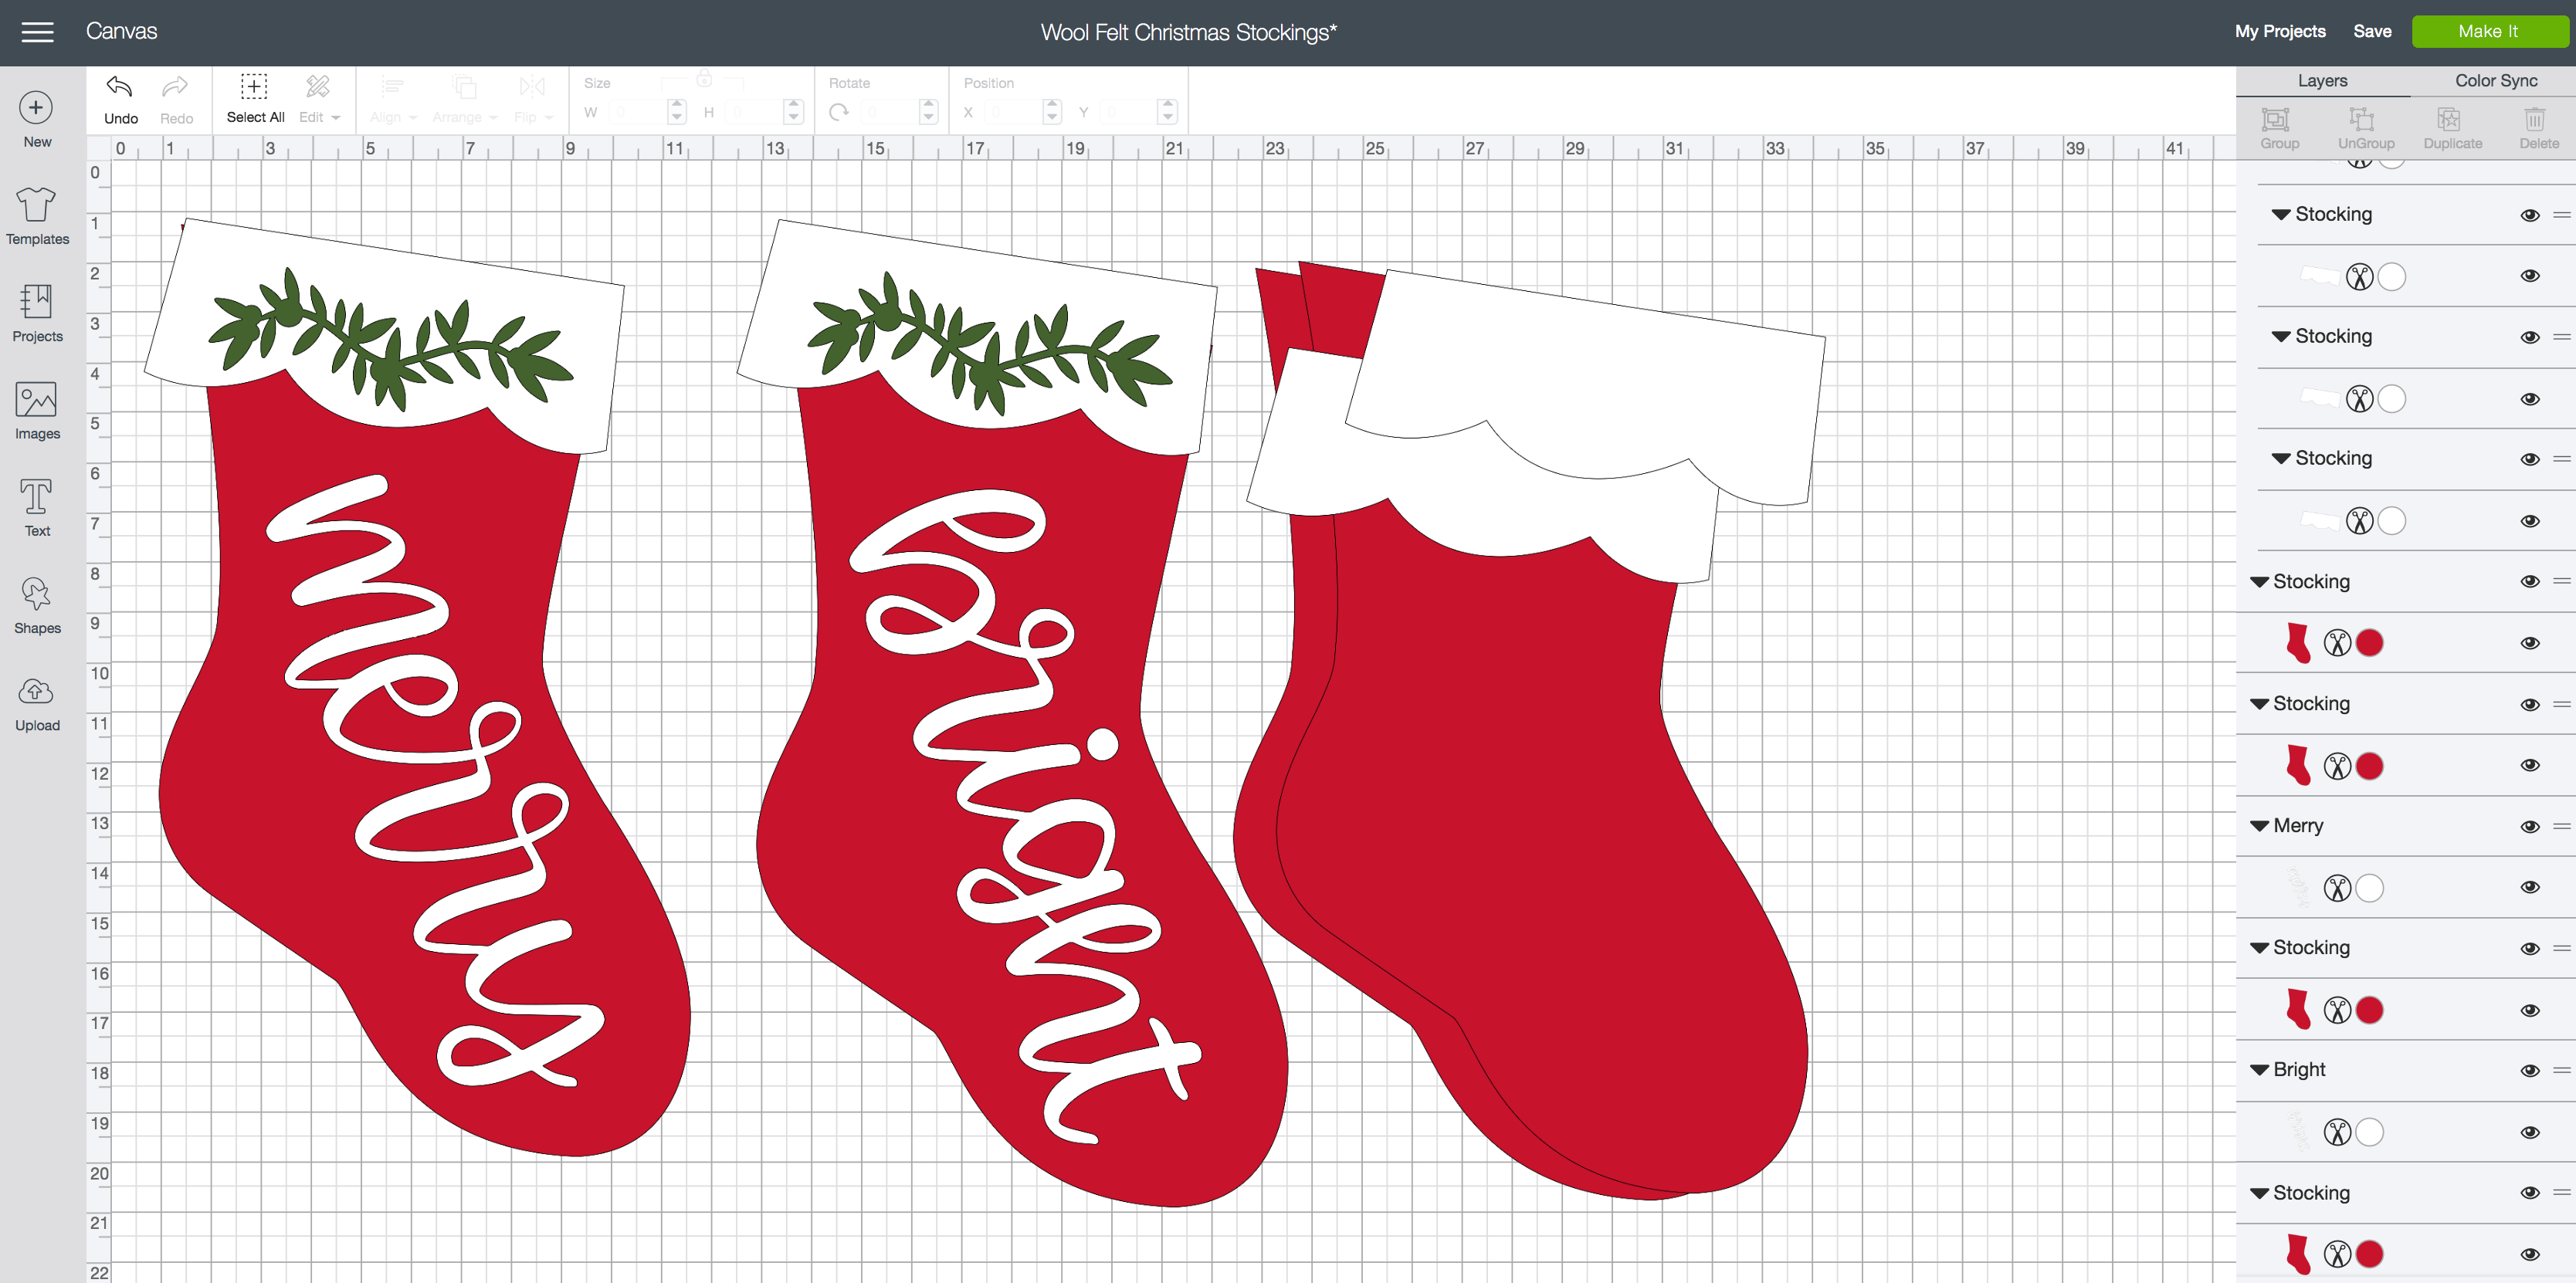
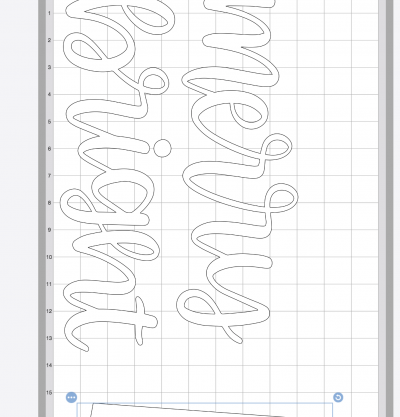
- I’ve already created the design for you, including four different images from Design Space: the stocking, the holly branch, and both words.
- You can hop over to Design Space and find my project HERE. It’s ready for you to use.
- The stockings are about 18″ tall. You can make them smaller if you like; that’s the beauty of using a pattern like this: it’s easily resizable.
- When you click MAKE IT, you will notice that the pieces are automatically separated onto mats by color.
Cutting Felt with a Cricut Cheat Sheet

Merry and Bright Christmas Stocking Pattern for Cricut Maker
Equipment
- Cricut Maker 3 (you can get great deals on machine bundles on Cricut.com)
- 12×24 Cutting Mat (Standard or Light Grip)
- Cricut EasyPress (I like the large size the best): Make sure you get the EasyPress mat as well.)
- EasyPress Mat
- Cricut Transfer Tape
- Christmas Stocking Cut Images in Design Space
supplies
- Paper Backed Fusible Web
- 3/4 yard Wool Felt per stocking
- 1/4 yard Wool Felt for stocking top
- 1/2 yard Ribbon
- A large square of wool felt for holly garland
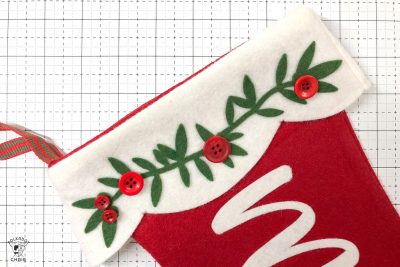
- An assortment of small red buttons
Instructions
Step One: Cricut Design Space
- Open design space and size your stockings accordingly. If you want them smaller, make sure you select ALL the pieces at the same time so they resize together.
- Click Make IT.
- On this screen, note where your images are sitting on the mats. You can nudge things around as you like. Also, note what size you need to cut your felt for each color and piece.
Step Two: Prepare your Mats
- Cut four pieces of red felt 12″ x 19″ (4 if making two stockings, you need two pieces per stocking).

- Transfer tape to one side of all the pieces, then load them onto the standard grip 12×24 mat. If you have more than one 12×24 mat, this will go quickly since you can prepare one mat while the other is being cut.
- Apply transfer tape to one side of the stocking & stocking cuff pieces. Apply paper-backed fusible web to the back of the word and holly pieces.
- The Cricut EasyPress is a dream to use when attaching fusible web. I usually can’t get it to stick with my iron. I played around a bit and discovered that 20 seconds at 250 degrees adhered the web to the felt.
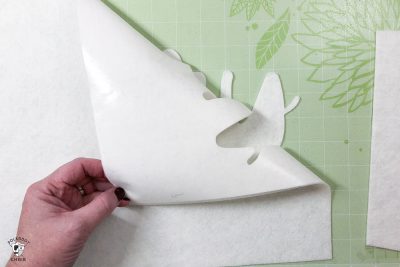
- After the fusible web is cool, peel off the paper backing.


Step Three: Cut out the Felt Pieces
- Since the “merry” and “bright” words must be cut from webbing fused felt, and the stocking top pieces do not, you’ll need to load two felt pieces onto your cutting mat.

- From the image in the design space, you can see that the letters come down to about 14″, and the stocking tops start just below 15. I nudged my stocking top pieces down a bit to give myself more space on the mat.
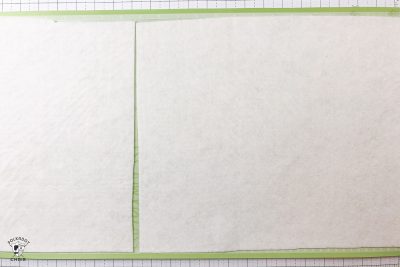
- Load the two white pieces of felt onto the Cricut mat. The fusible side/transfer tape side is down.
- I would not do this with a brand-new standard cutting mat. It’s just a bit too sticky, and the felt is fragile when peeling it up. I’d use a more used cutting mat or the light grip mat instead.
- Click next in Cricut Design Space.
- Set the material to FELT BONDED. Then click EDIT TOOLS and change from the fine-cut blade to the rotary cutter.

- Load your mat, install the rotary blade, click the Cricut button, and cut.
- When you’re done, gently remove the extra felt, words, and stocking tops from your mat. I like to use the Cricut spatula for this part; it helps pull the letters off gently.
- Keep cutting and loading mats as prompted in Design Space.
- When you’re done, you should have per stocking:
- 2 Stocking Pieces
- 2 Stocking Top Pieces
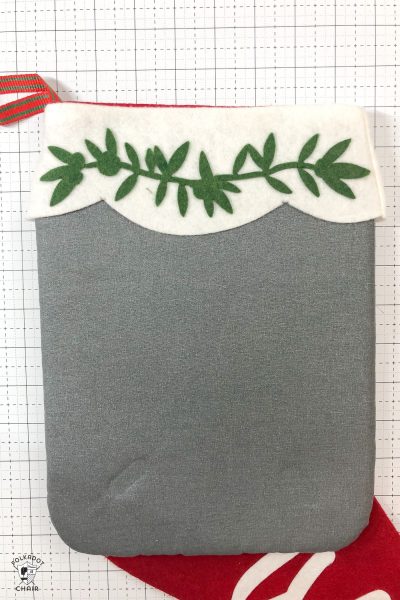
- 1 Holly Garland
- 1 Word

Step Four: Sew the Stockings
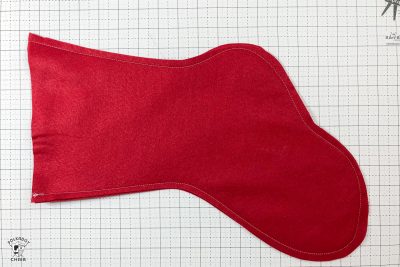
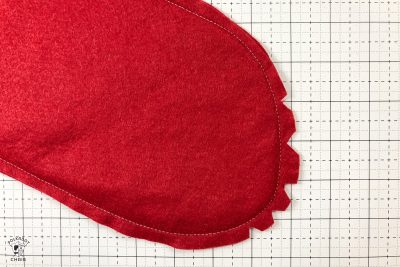
- Pin two stocking pieces together and stitch along the outside edge with a 1/4″ seam allowance.
- Pin two stocking top pieces together and stitch together along the sides only with a 1/4″ seam allowance.
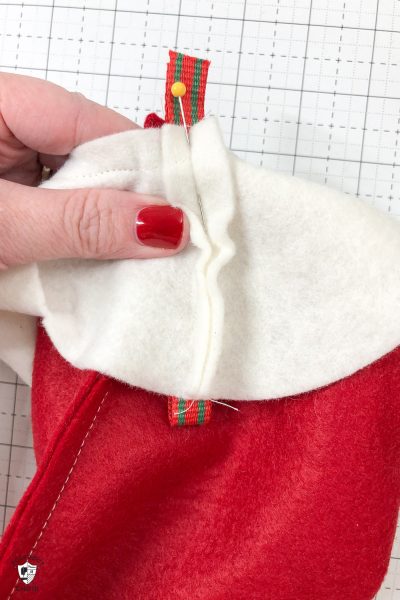
- Cut a piece of ribbon 6″ long, fold it over, and place it on top of the back seam of the sewn stocking piece.
- Pin the stocking top piece on top of the stocking piece. The right side of the stocking top will be facing the wrong side of the stocking. Stitch along the top edge with a 1/4″ seam allowance.
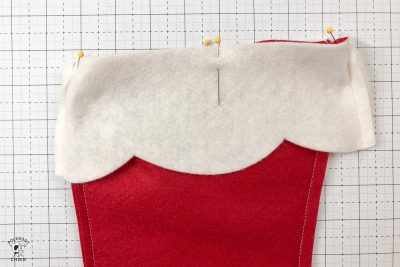
- Clip the curves along the bottom and side of the stocking. Make sure you don’t clip into the seam allowance.
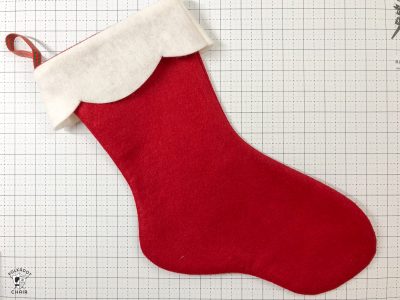
- Turn the stocking on the right side out and press.

- When the stocking is done and pressed well, you’re ready to attach your word appliques.
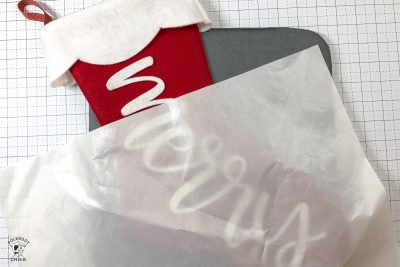
Step Five: Attach the Appliques
- I’m going to use the EasyPress to attach the appliques. It provides consistent and even heat, which is great for this purpose.

- Place the applique where you’d like it on the stocking. You can clip the letters in the word apart a bit to curve the word to the stocking.
- When it’s in place, put the stocking on top of the EasyPress mat and cover it with a silicone pressing sheet (you need to protect the felt from the high heat of the EasyPress).
- Since the piece was under the pressing sheet, I noticed that I needed to use a bit higher heat than before. I set my EasyPress on 350 for 30 seconds, and it worked great.
- Repeat with the holly piece at the top of the stocking. I was able to fit the small EasyPress mat under the stocking’s cuff.
- The last step is to sew the buttons on the holly garland.

More Cricut Maker Projects:
Fabric Basket Sewing Patter for the Cricut Maker
How to make Disney Family Shirts
This is a sponsored conversation I wrote on behalf of Cricut. The opinions and text are all mine.


Good morning – thanks for a gorgeous stocking! Just to let you know that none of the Cricut links appear to be working (I’m a Cricut Access user in the UK). Do you have the image number at all? Thank you for your lovely projects!
I’ll see what I can find! Sorry about that.
Love the scalloped top on the Merry & Bright stocking! But, sadly I don’t have the Cricut Maker, mine machines are Cricut Joy & Explore Air 2. Would it be appropriate to use you pattern & cut it by hand? Still use either machine to cut Merry & Bright.
Enjoy reading blog/newsletter., too.
You could try it with the Explore Air 2 and the deep cut blade, just make sure your iron on interfacing is well attached to the felt before you start.
Super cute and cheerful! When I go to design space and click make it, it is asking for money. Just wondering if this is correct, as you did not mention this. Thank you.
It depends on the Cricut plan you have. Some are free with Cricut Access. I used existing images in Cricut Design space, so that is why.