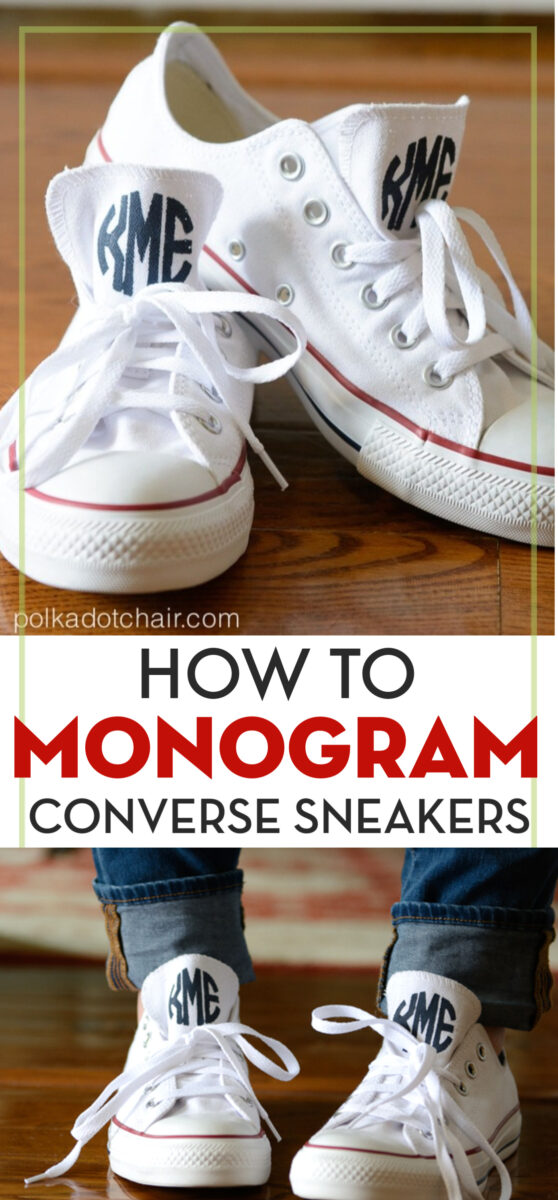
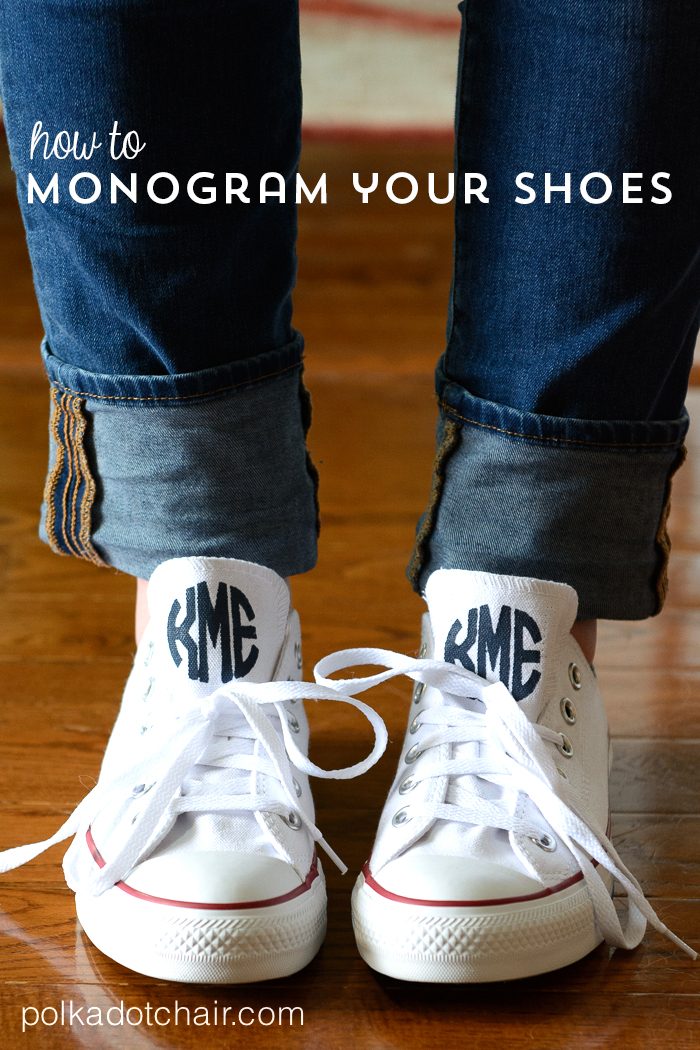
How to Monogram Your Converse Sneakers Using a Cricut Machine

It’s easier than you think to add a Monogram to your Converse (or other sneakers). All you need is a bit of freezer paper and paint! This project uses a Cricut machine to save time cutting out letters, but you can also make it using just a craft knife.
It’s January so I guess it’s time to get back into the swing of things. I admit that I’ve done a lot of nothing in the last few weeks.
My daughter was home from college and most of my extended family has been out-of-town all month, so things have been really quiet around here. I seem to function well on “momentum” and I just lost some of that mid-December. Plus we don’t need to talk about the whole “move all of your craft supplies up two flights of stairs” experience. It’s still a mess, hopefully, I’ll have photos to share with you sometime this millennium.

While my daughter was home we finally got around to a DIY project that she wanted to do FOREVER! What’s that saying about the cobblers kids??? Well, this one’s kid wanted monogrammed Converse, and she finally got them.
I’ve seen these Chuck Taylors popping up online a lot lately. I can’t tell you who thought of the idea in the first place, but I can tell you that if you don’t want to DIY them, you can buy them on Etsy—just do a search.
How to Monogram Converse Sneakers:
We usually DIY rather than buy, so for better or worse, this project sat on the back burner for a few months. The project only took about 15 minutes and was super duper easy. You do need some sort of e-cutting machine. I used my Cricut, but you can use an Exacto knife if you’ve got exacto skills. Just trace and cut out.
Supplies to Monogram your Shoes with a Cricut Machine:
Okay, so now, onto the how-to. You’re going to need (contains affiliate links):
-Converse Tennis Shoes, you can pick them up here
-Cricut Machine
-Colored craft paint
-Fabric Medium for craft paint
-Iron
-Monogram Font – mine is purchased from Font Brothers, you can find free ones online if you look.
Favorite Cricut Supplies
- Cricut Maker 3 (you can get great deals on machine bundles on Cricut.com)
- Roll Holder for Maker 3
- Cricut EasyPress (I like the large size the best): Make sure you get the EasyPress mat as well.
- Cricut Weeding Tools: (I use the small hook tool ALL the time, making weeding vinyl so much easier).
- Cricut BrightPad: A cordless, flat, bright lightbox. I use it to weed Cricut vinyl and use it all the time to trace applique shapes for sewing & quilting.
- Cricut Iron On Vinyl
- Cricut Permanent Vinyl
Step One: Design the Files in Cricut Design Space
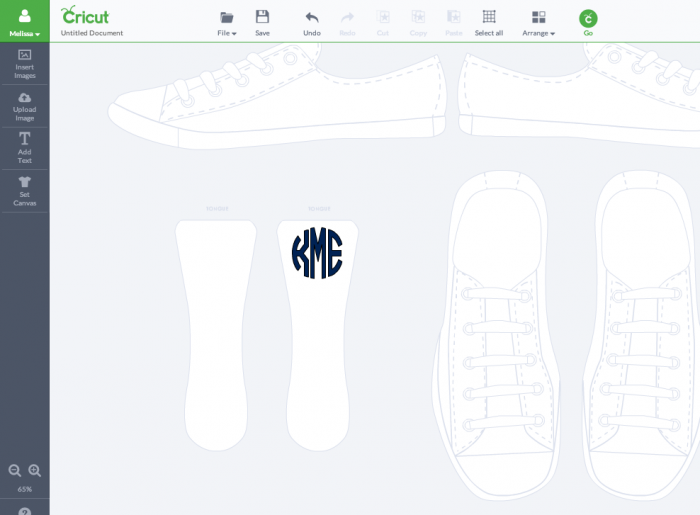
I started by opening the Cricut Design software and choosing “converse size 7” as my canvas. Then I used my fonts to design the monogram I wanted. (make sure that you “attach” the letters to each other on the software). Since the canvas was set to Converse, I knew the monogram would fit on the tongue of the shoes.
Note: You may need to manually resize the letters individually to make them look like a cohesive monogram.
UPDATE: Cricut doesn’t have this feature easily available anymore. Instead, just measure the tongue of your shoes and size the monogram accordingly.
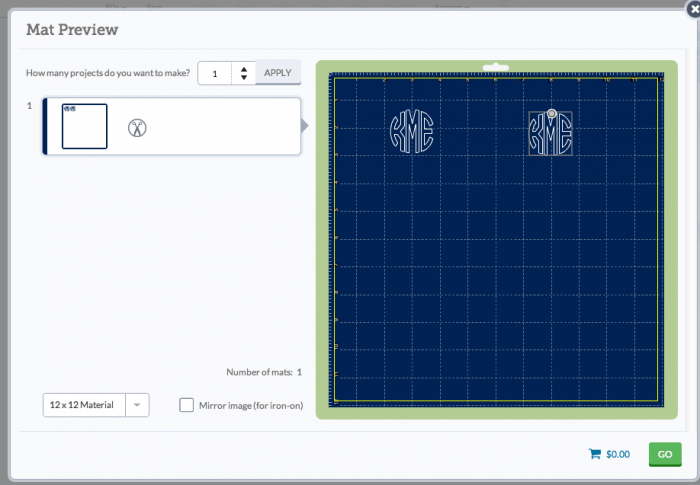
Next, hit Cut, then use your mouse to move the monograms a little bit away from each other (you need freezer paper around the monogram to work as a mask), and click MIRROR IMAGE.
Step Two: Cut the Freezer Paper
Next, place your freezer paper shiny side UP on the mat and cut using a paper setting. You need the shiny side up because it’s slippery, and you won’t get a clean cut if you have it facing the mat.
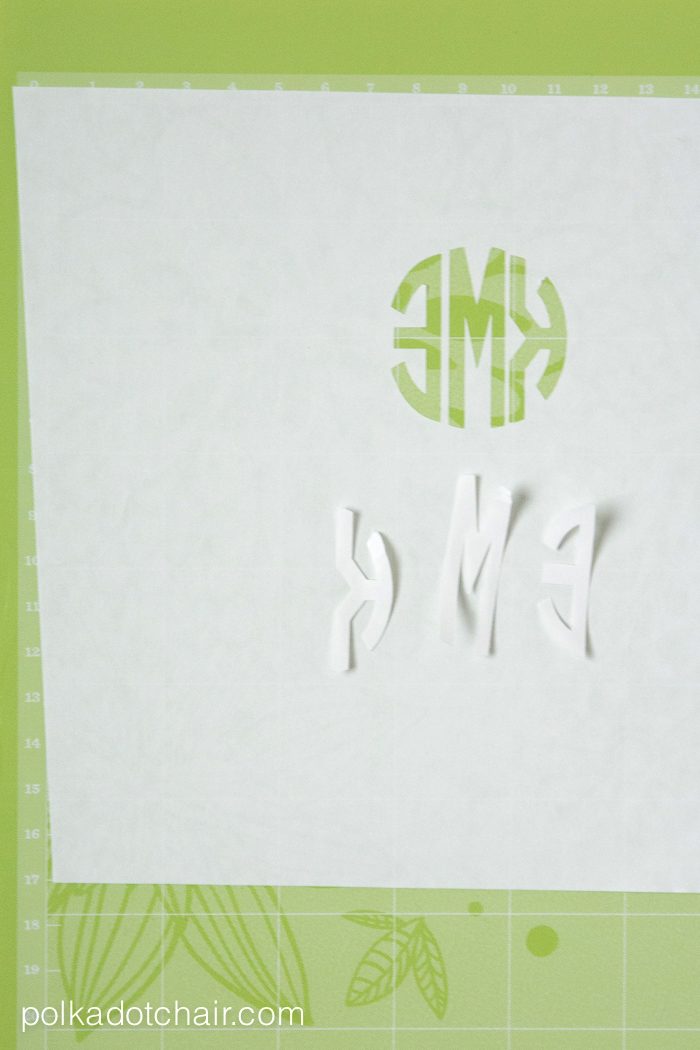
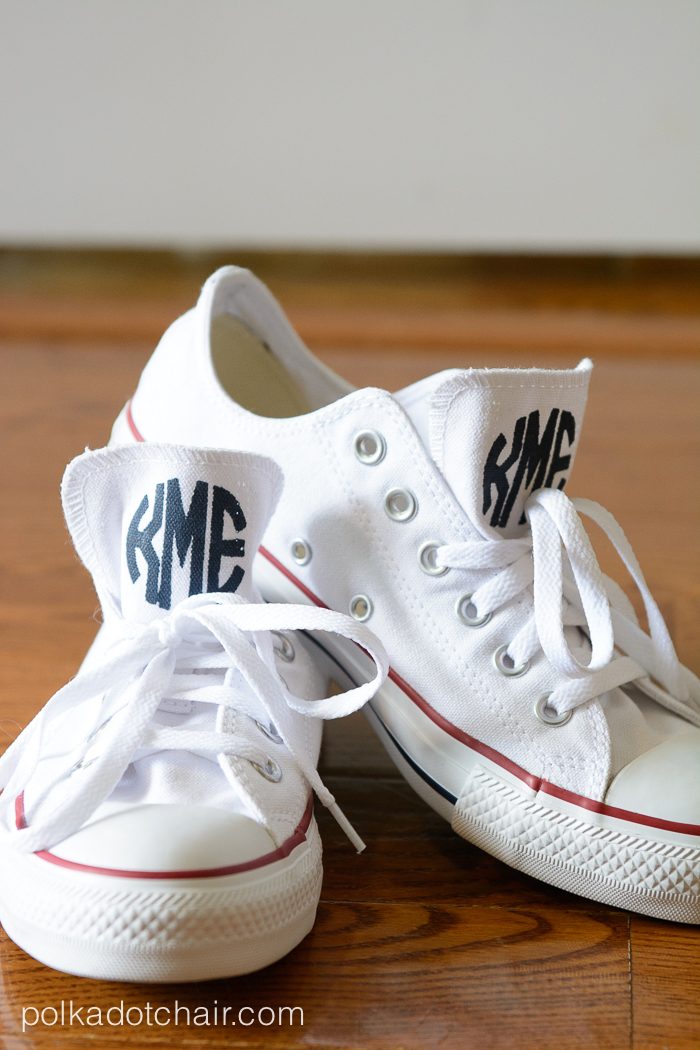
After it’s cut, discard the letters (if you have A, R, Q, O, etc. Save the inside of the letter; you’ll need it). Then, cut out the newly made stencil to the size of the shoe’s tongue.
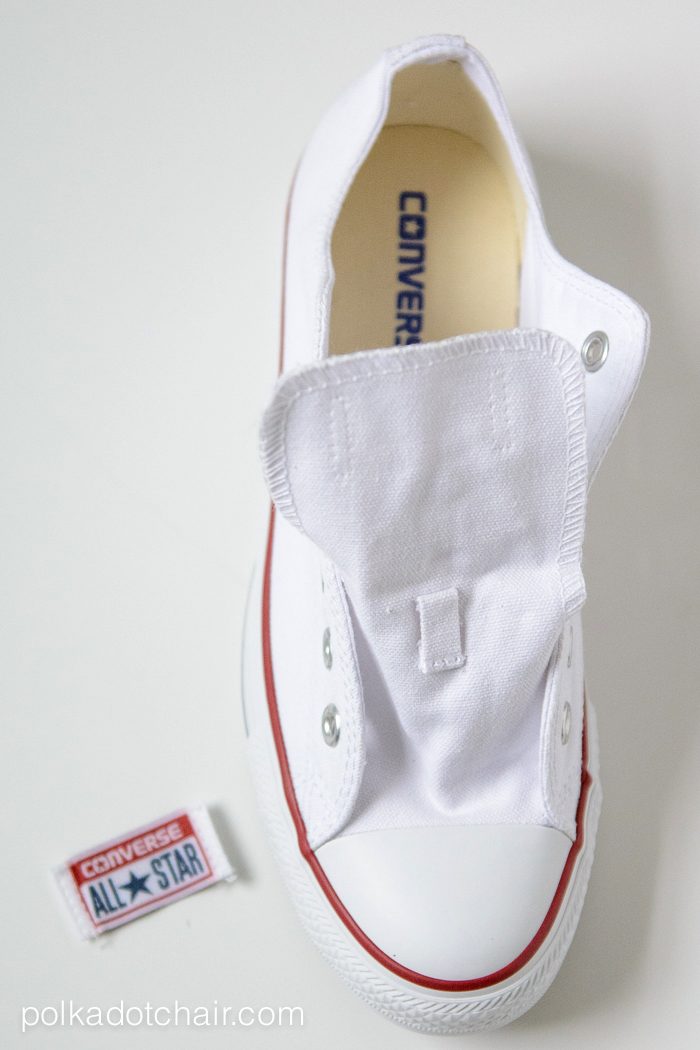
Step Three: Add Freezer Paper to the Shoes
Unpick the Converse logo from the tongue and take out the laces.
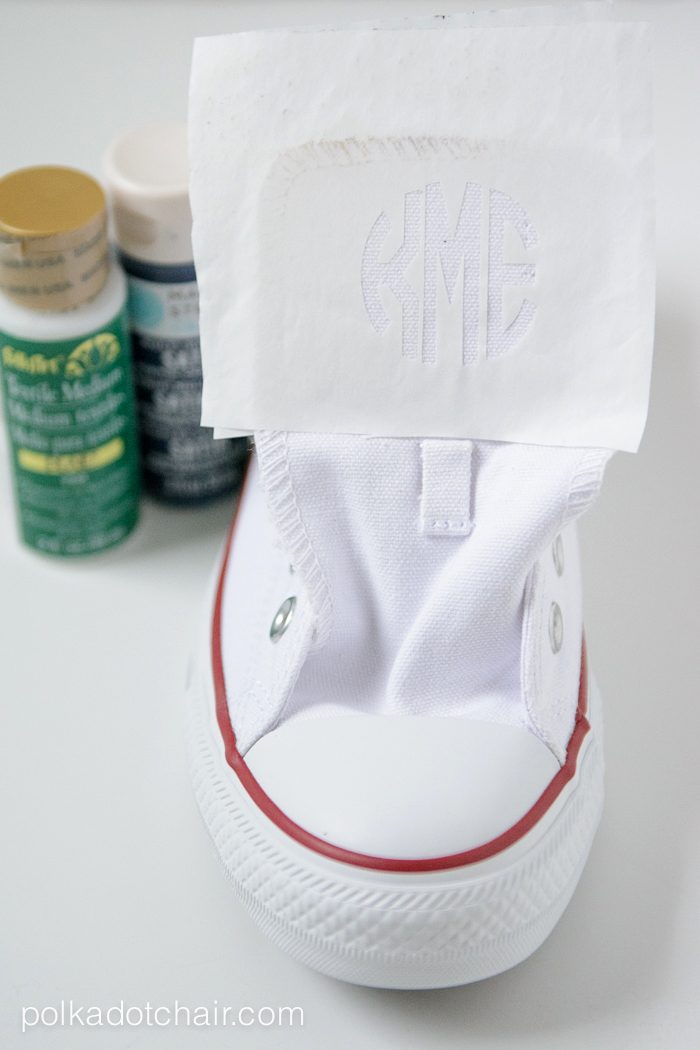
Iron the stencil onto the shoe’s shiny side down. Make sure it’s centered. If you have letters with insides (O, R, A, etc), iron the inside of the letter in the proper place on the monogram. Iron another piece of freezer paper to the back of the tongue. Let cool.
Step Four: Add the Paint
Mix the acrylic paint and fabric medium according to the package directions. Then using a sponge brush VERY LIGHTLY dab the paint over the stencil. You only need one thin coat.
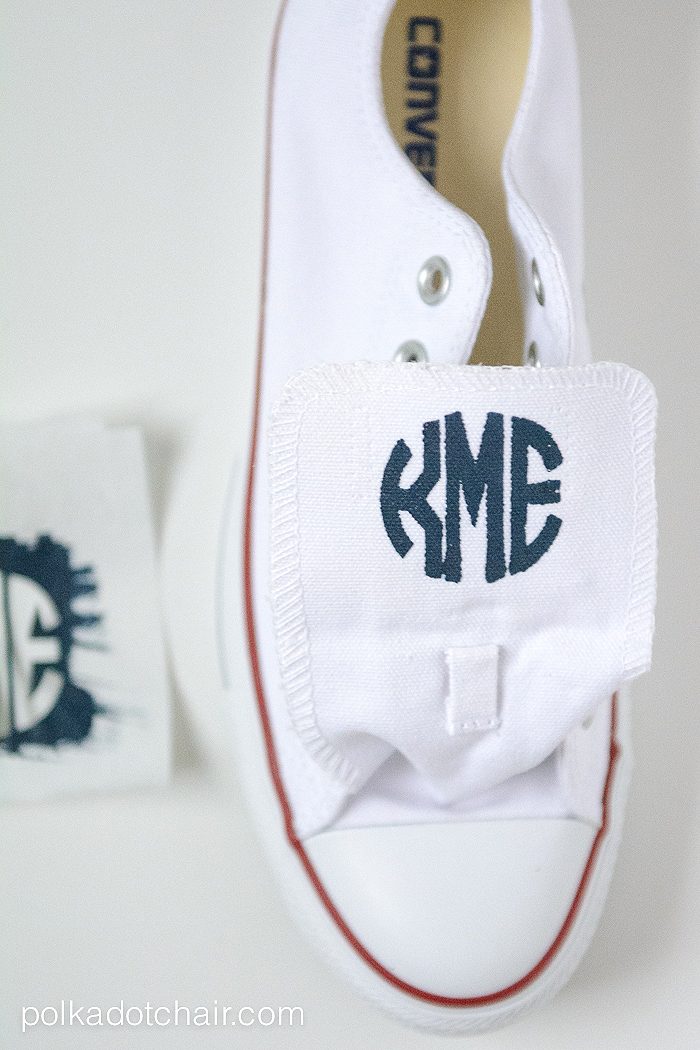
Let it dry, and peel off the freezer paper. Press the tongue with an iron one more time to set the ink.
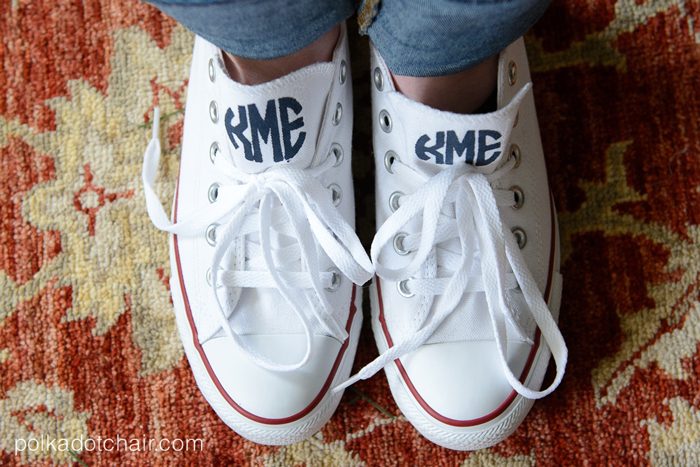
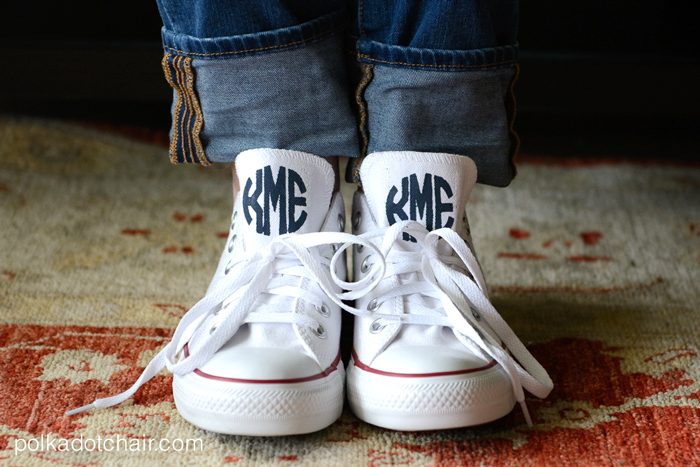
Replace, and you’re done!!
You might want to spray them with stain block before you wear them to keep them nice and white. I’m not sure how well the monogram would hold up in the wash.
If you’d like more information about a Cricut, click here to read my full review.

If you enjoyed this project, you may also enjoy the projects in the book!
More Fun Fashion DIY’s:
How to cover Converse with Fabric
Scallop Neck T-Shirt Refashion