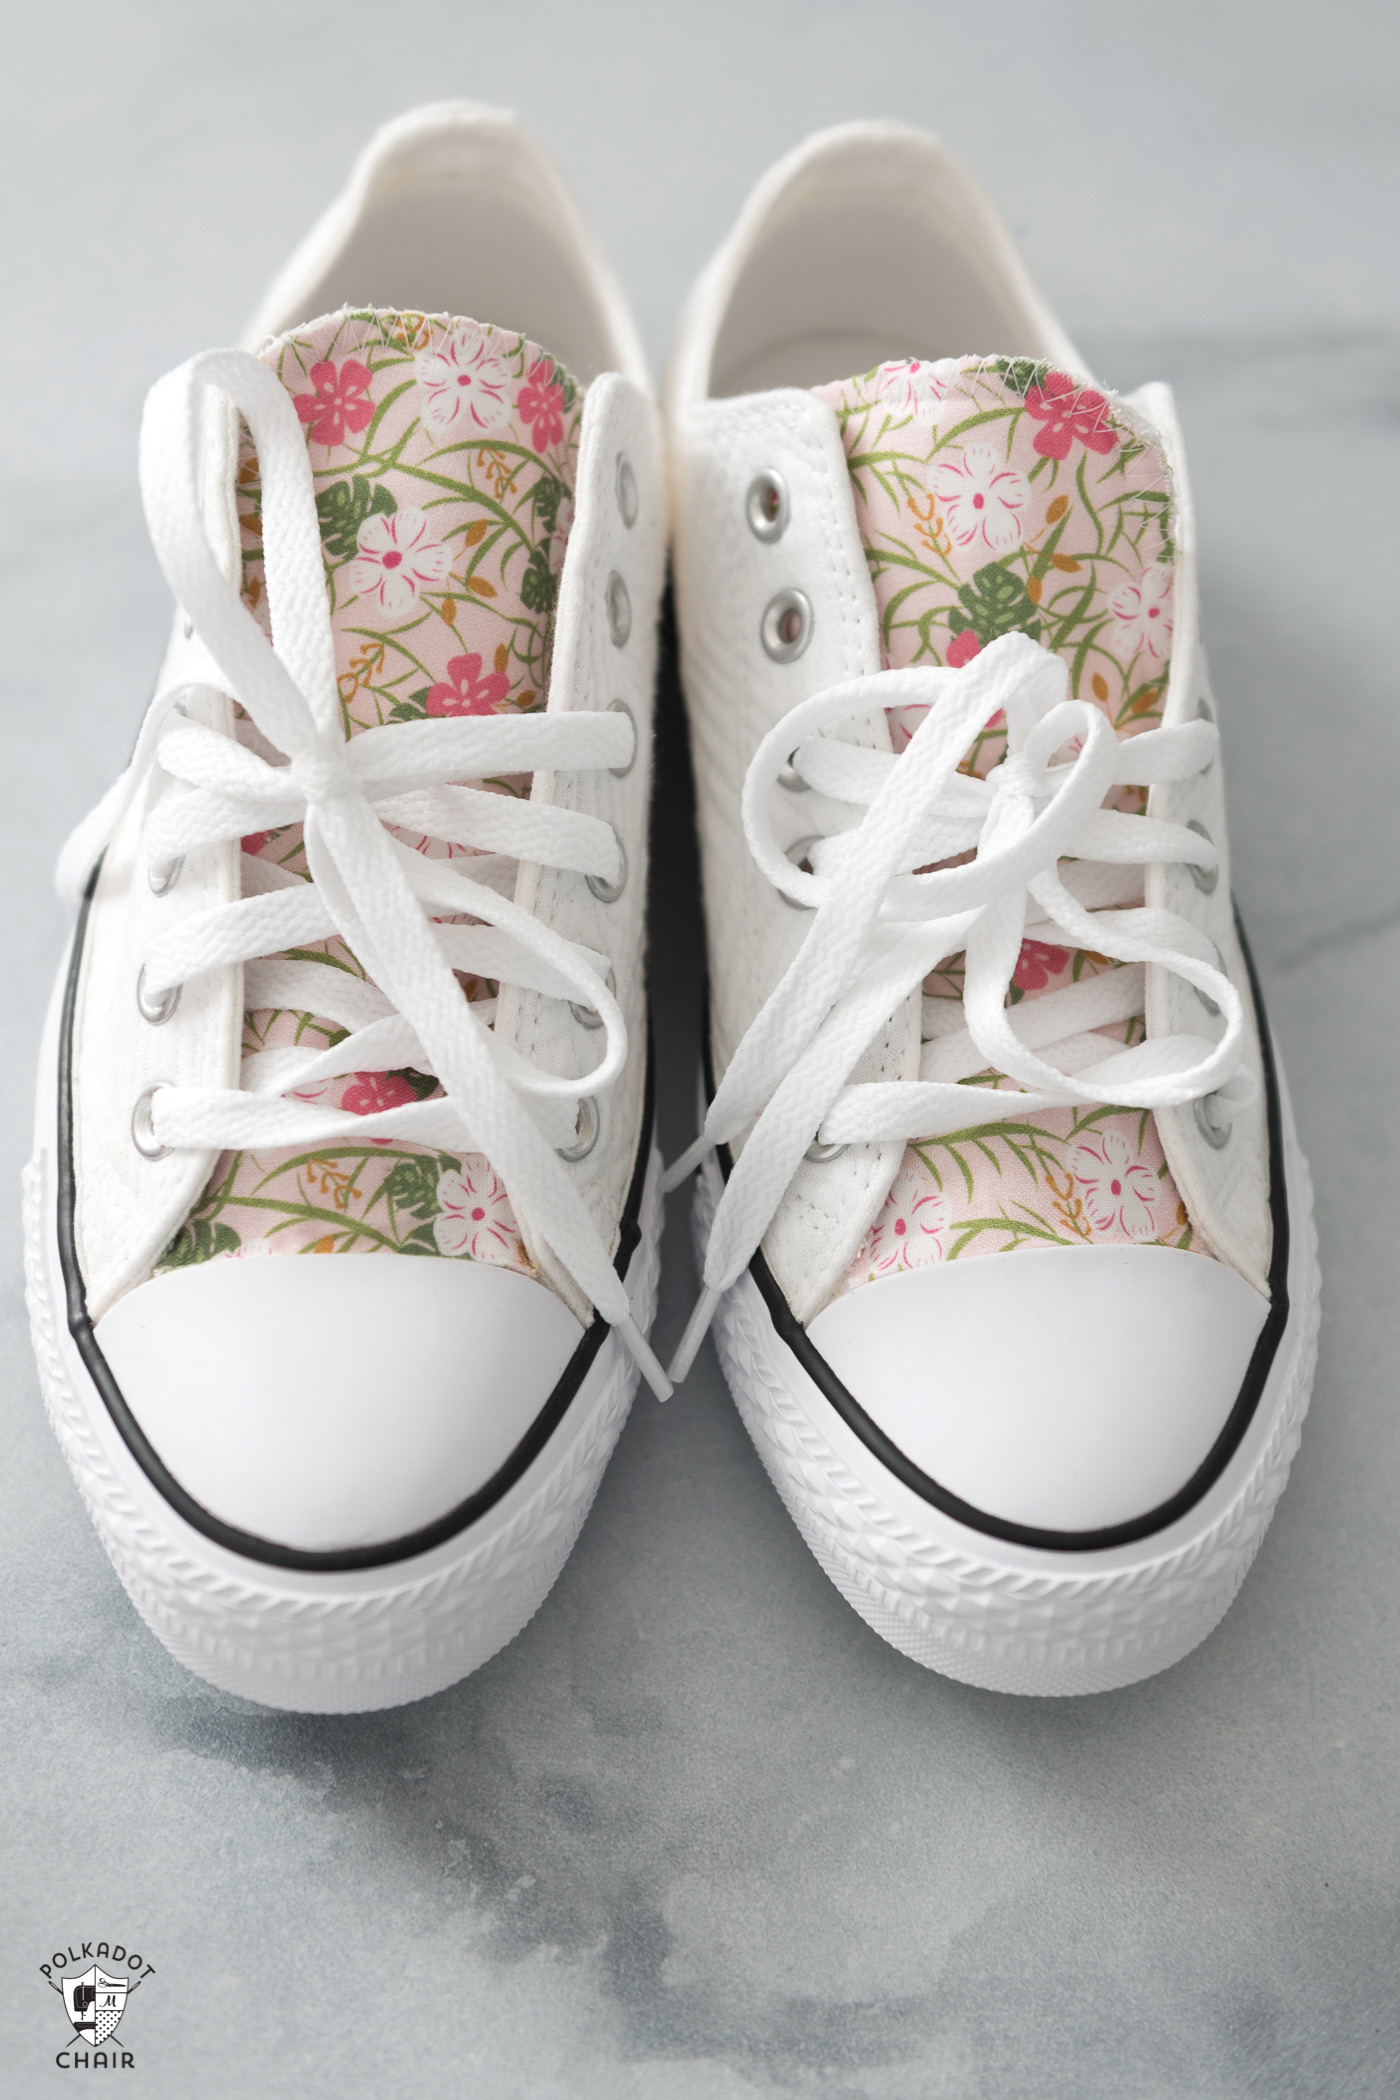
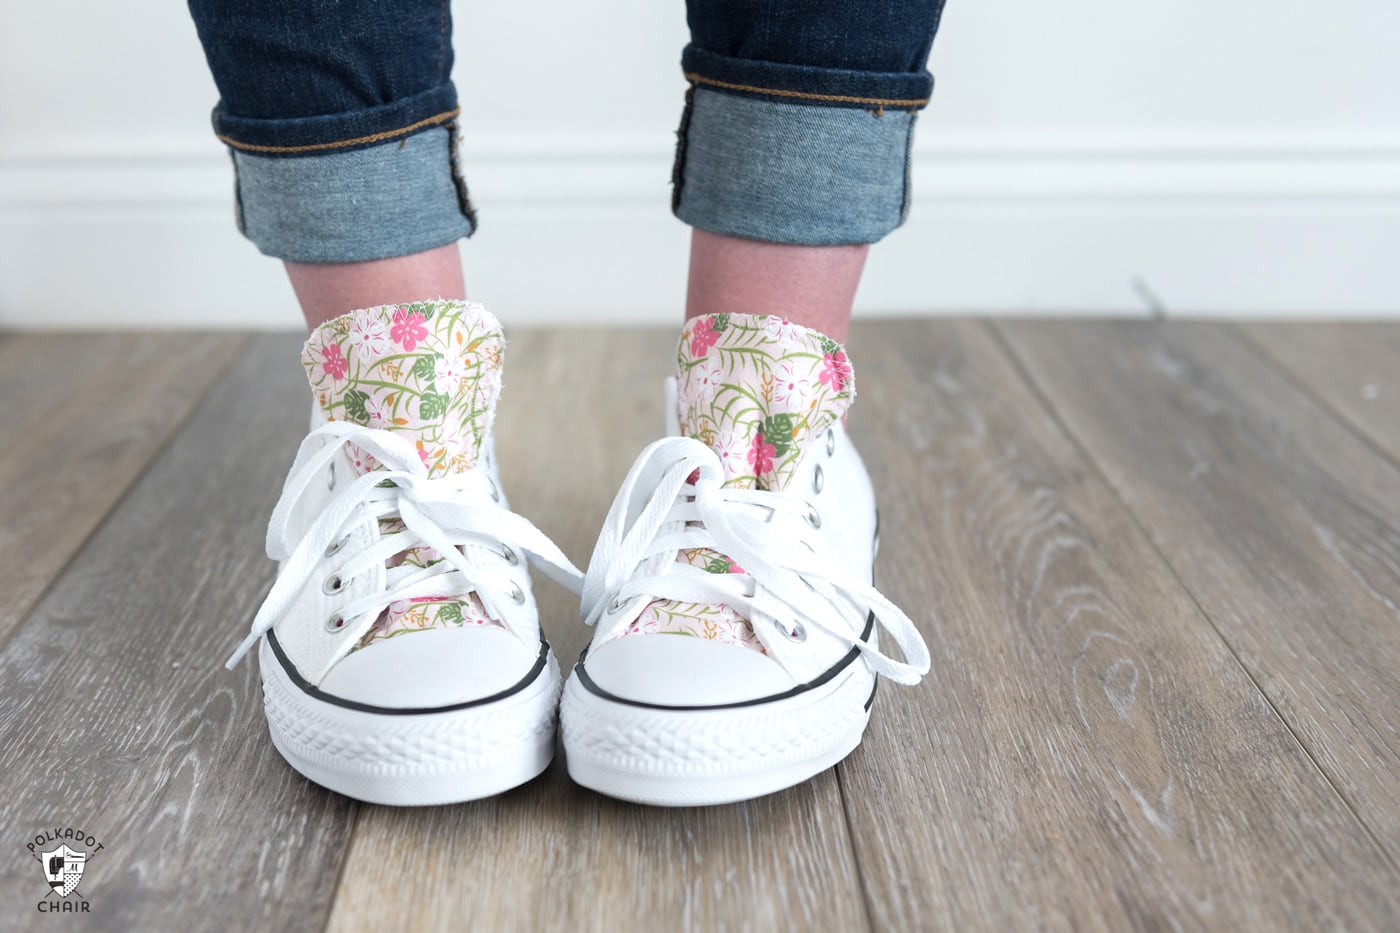
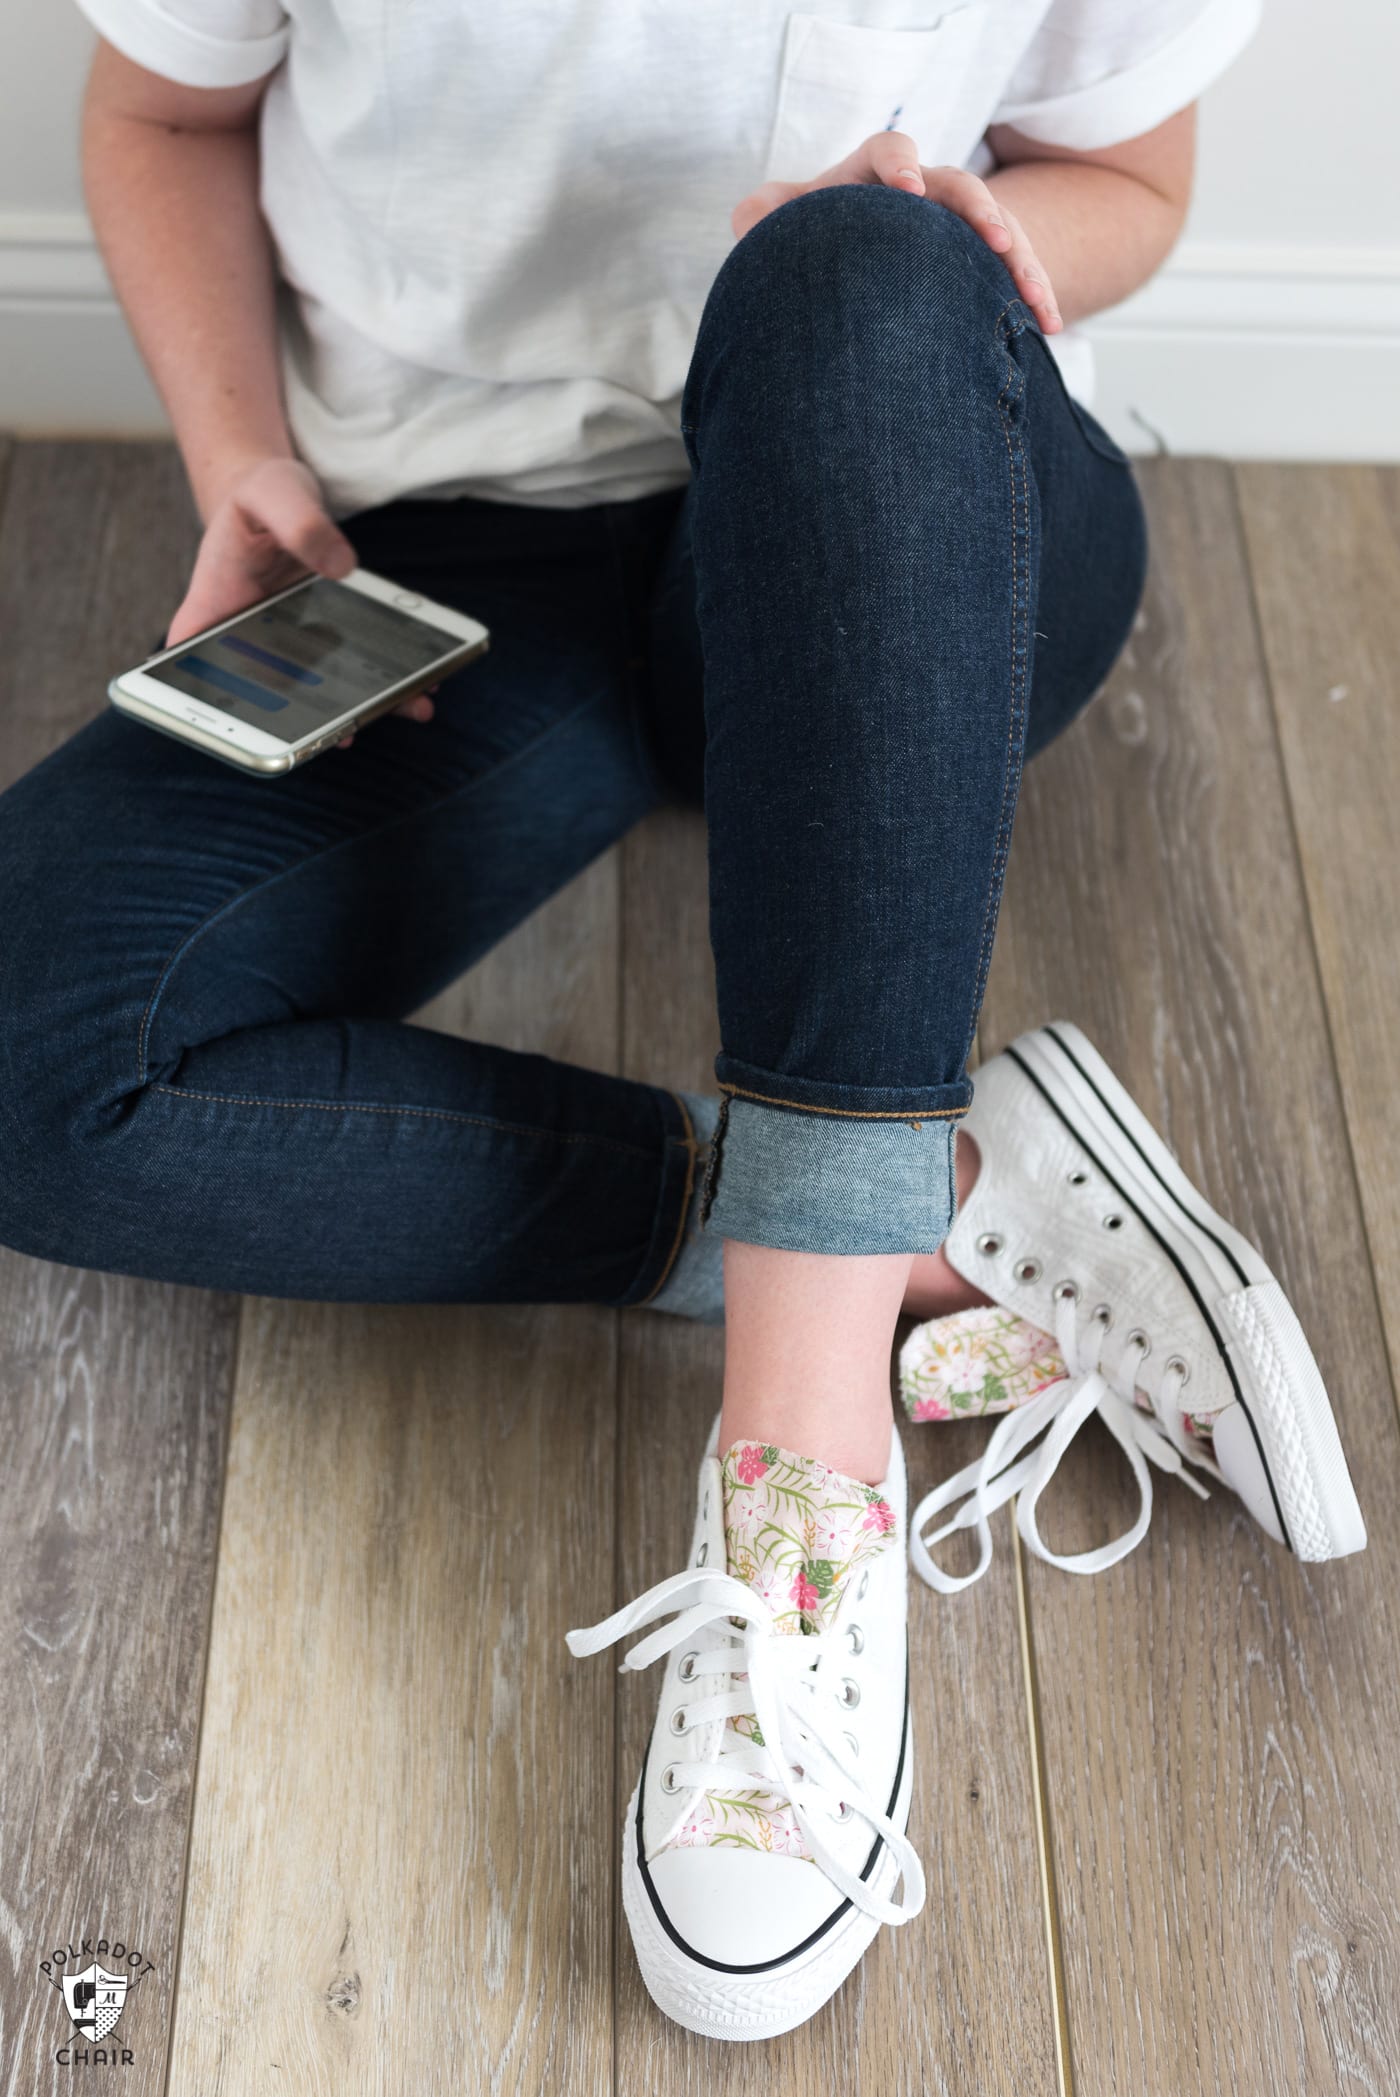
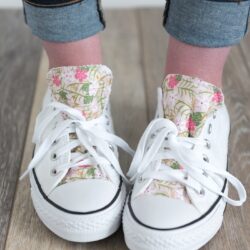
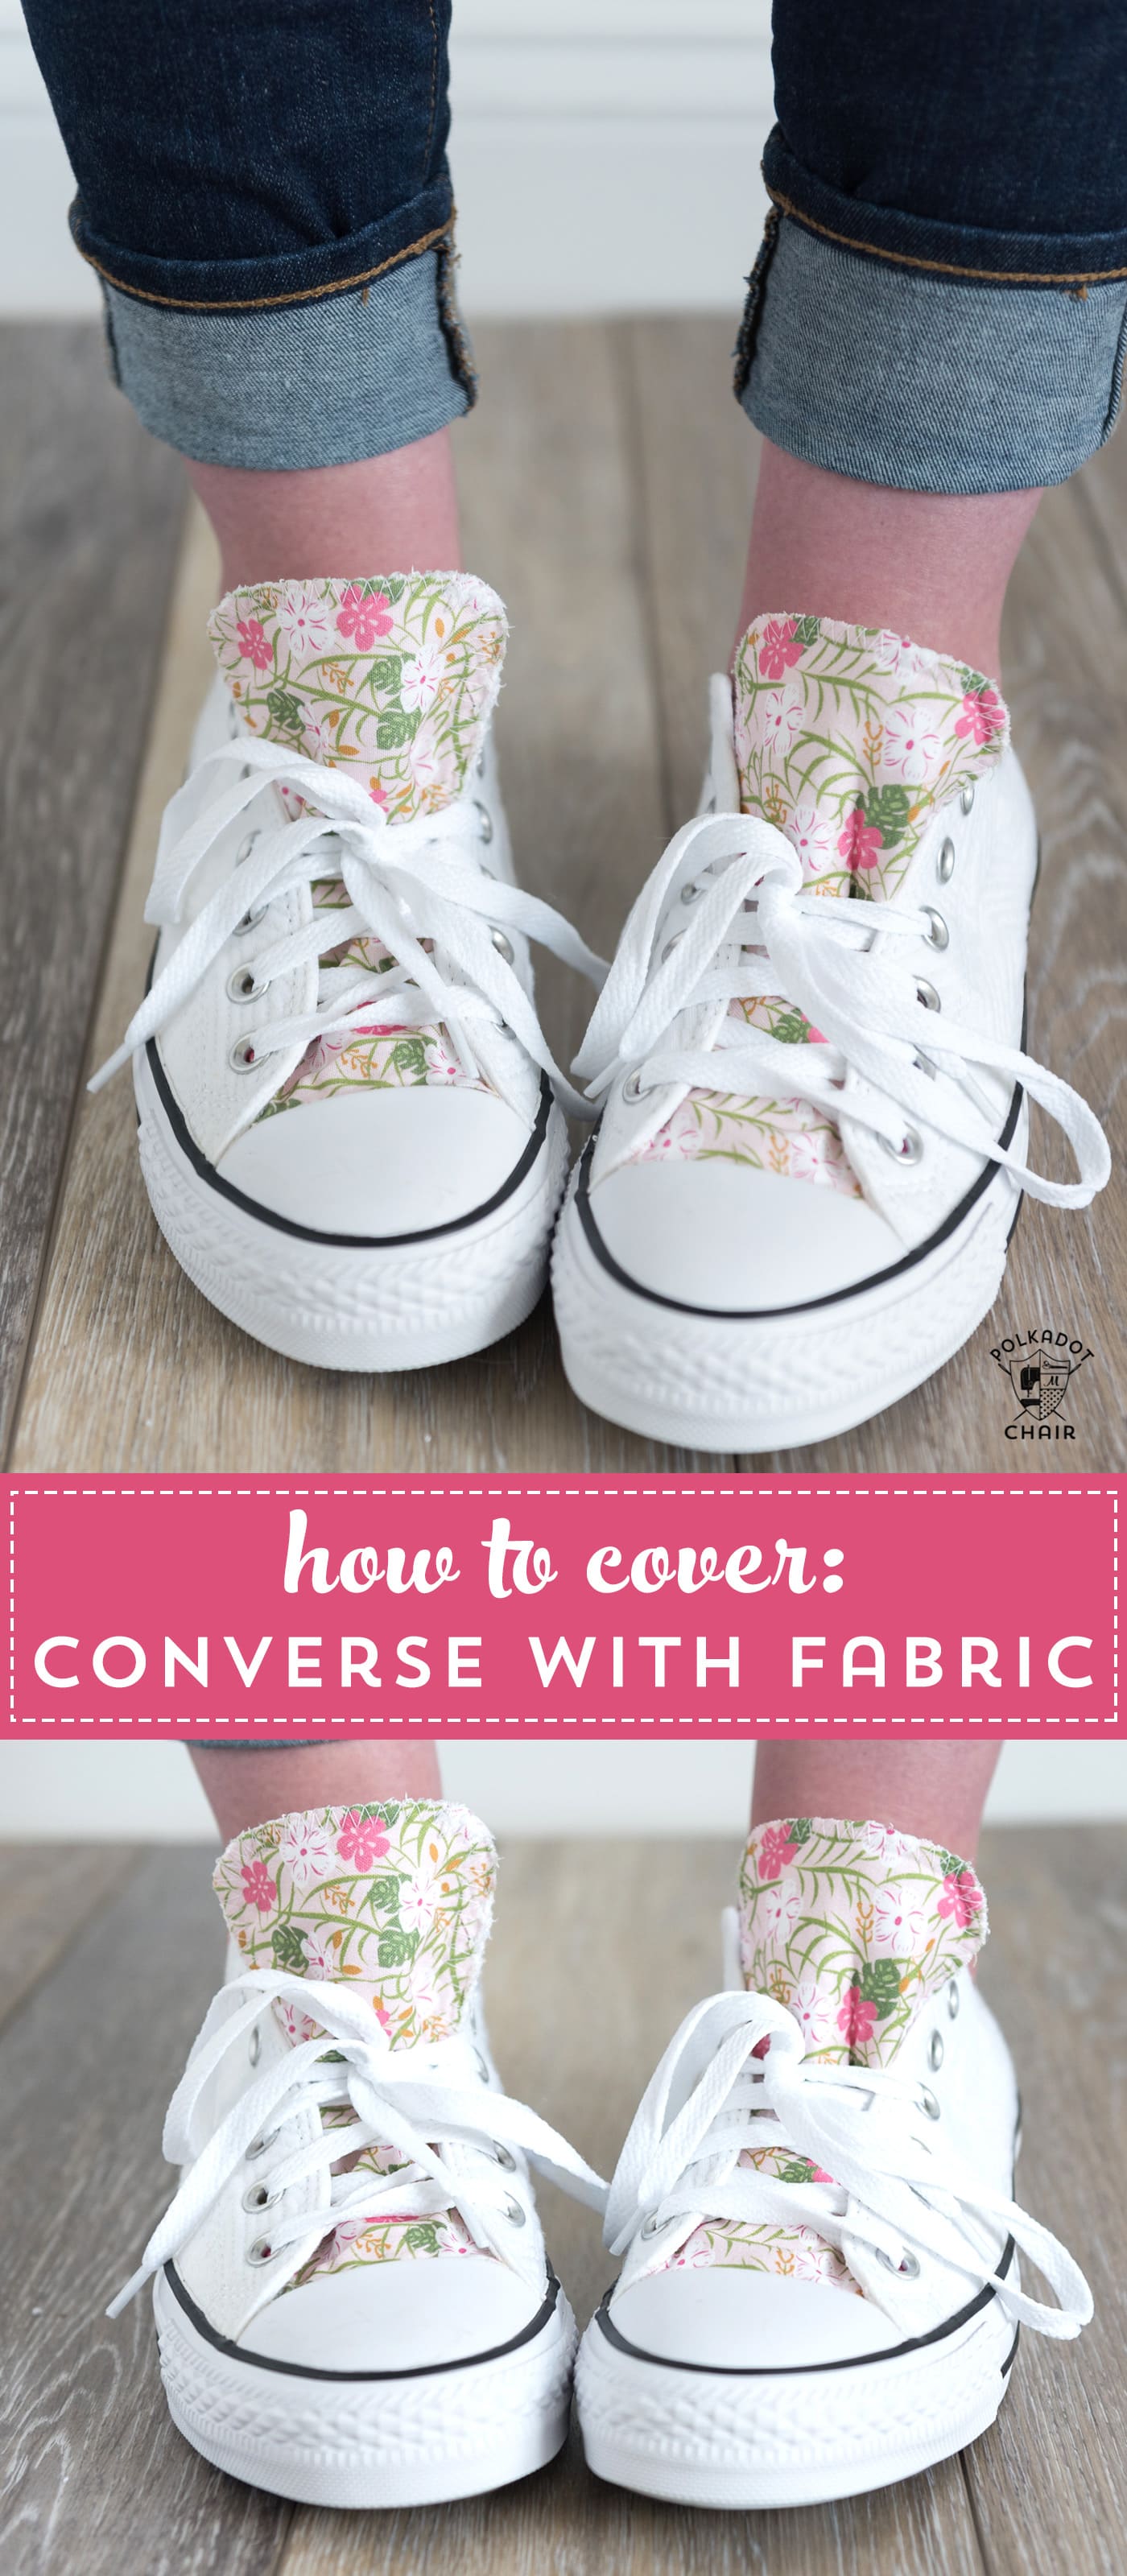
How to Customize your Converse with Fabric
Learn how to add fabric to Converse to create a pair of custom shoes! This DIY project works great for both low-top and high-top Converse shoes.
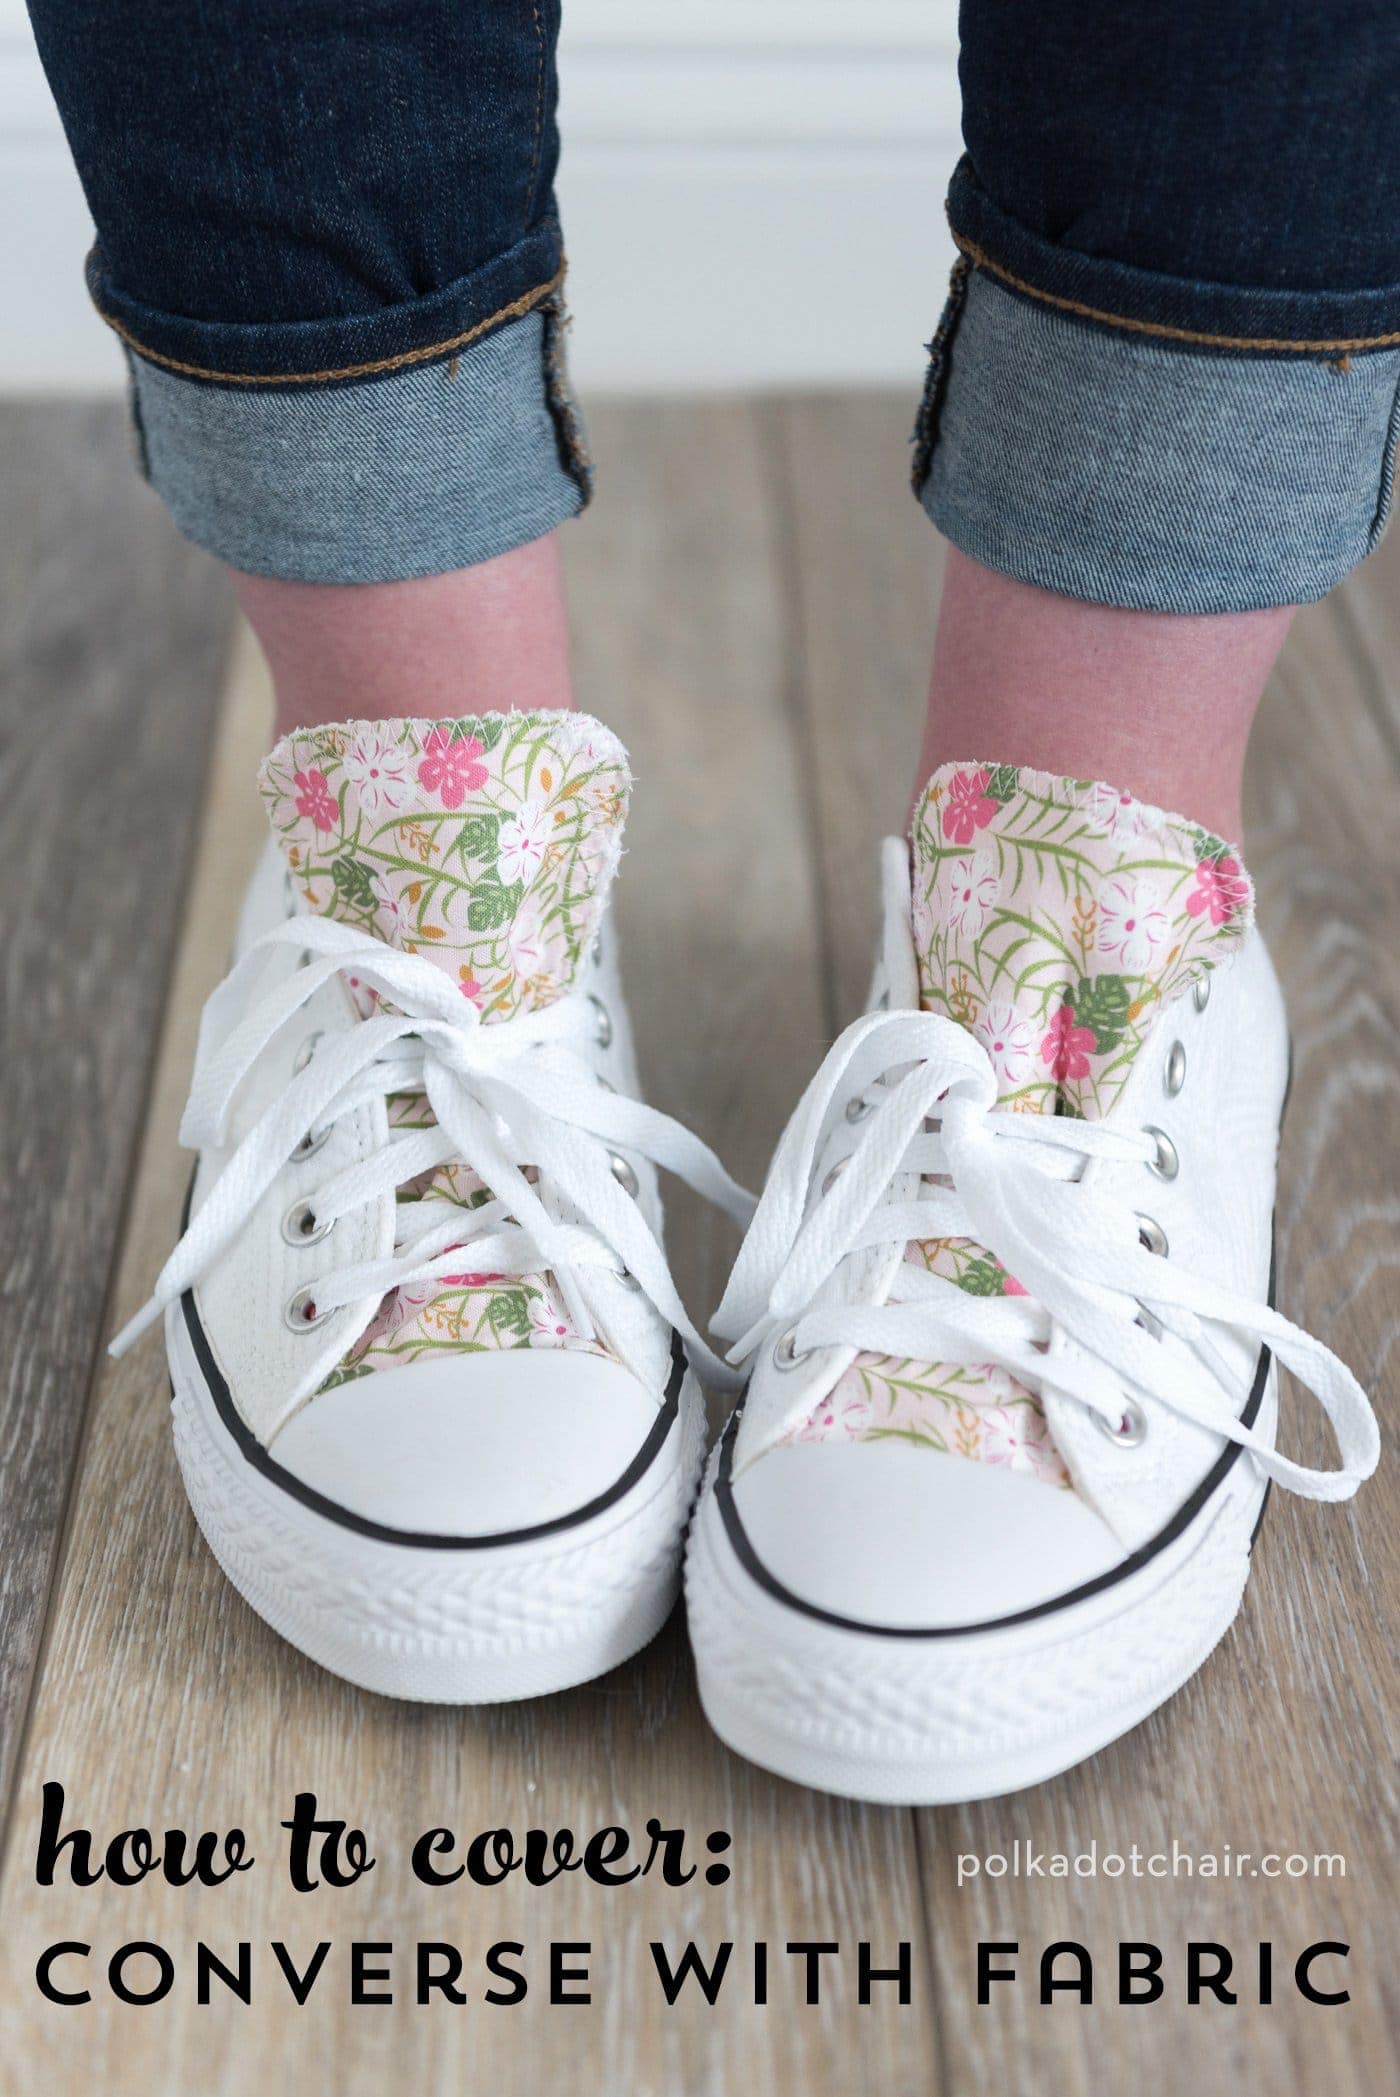
I love planning fun DIY projects with my teens. A few weeks ago, I got the idea to customize Converse Chuck Taylors with fabric. My kids and I planned the best way to cover the shoes with fabric, bought the supplies, and tested our little DIY Converse experiment.
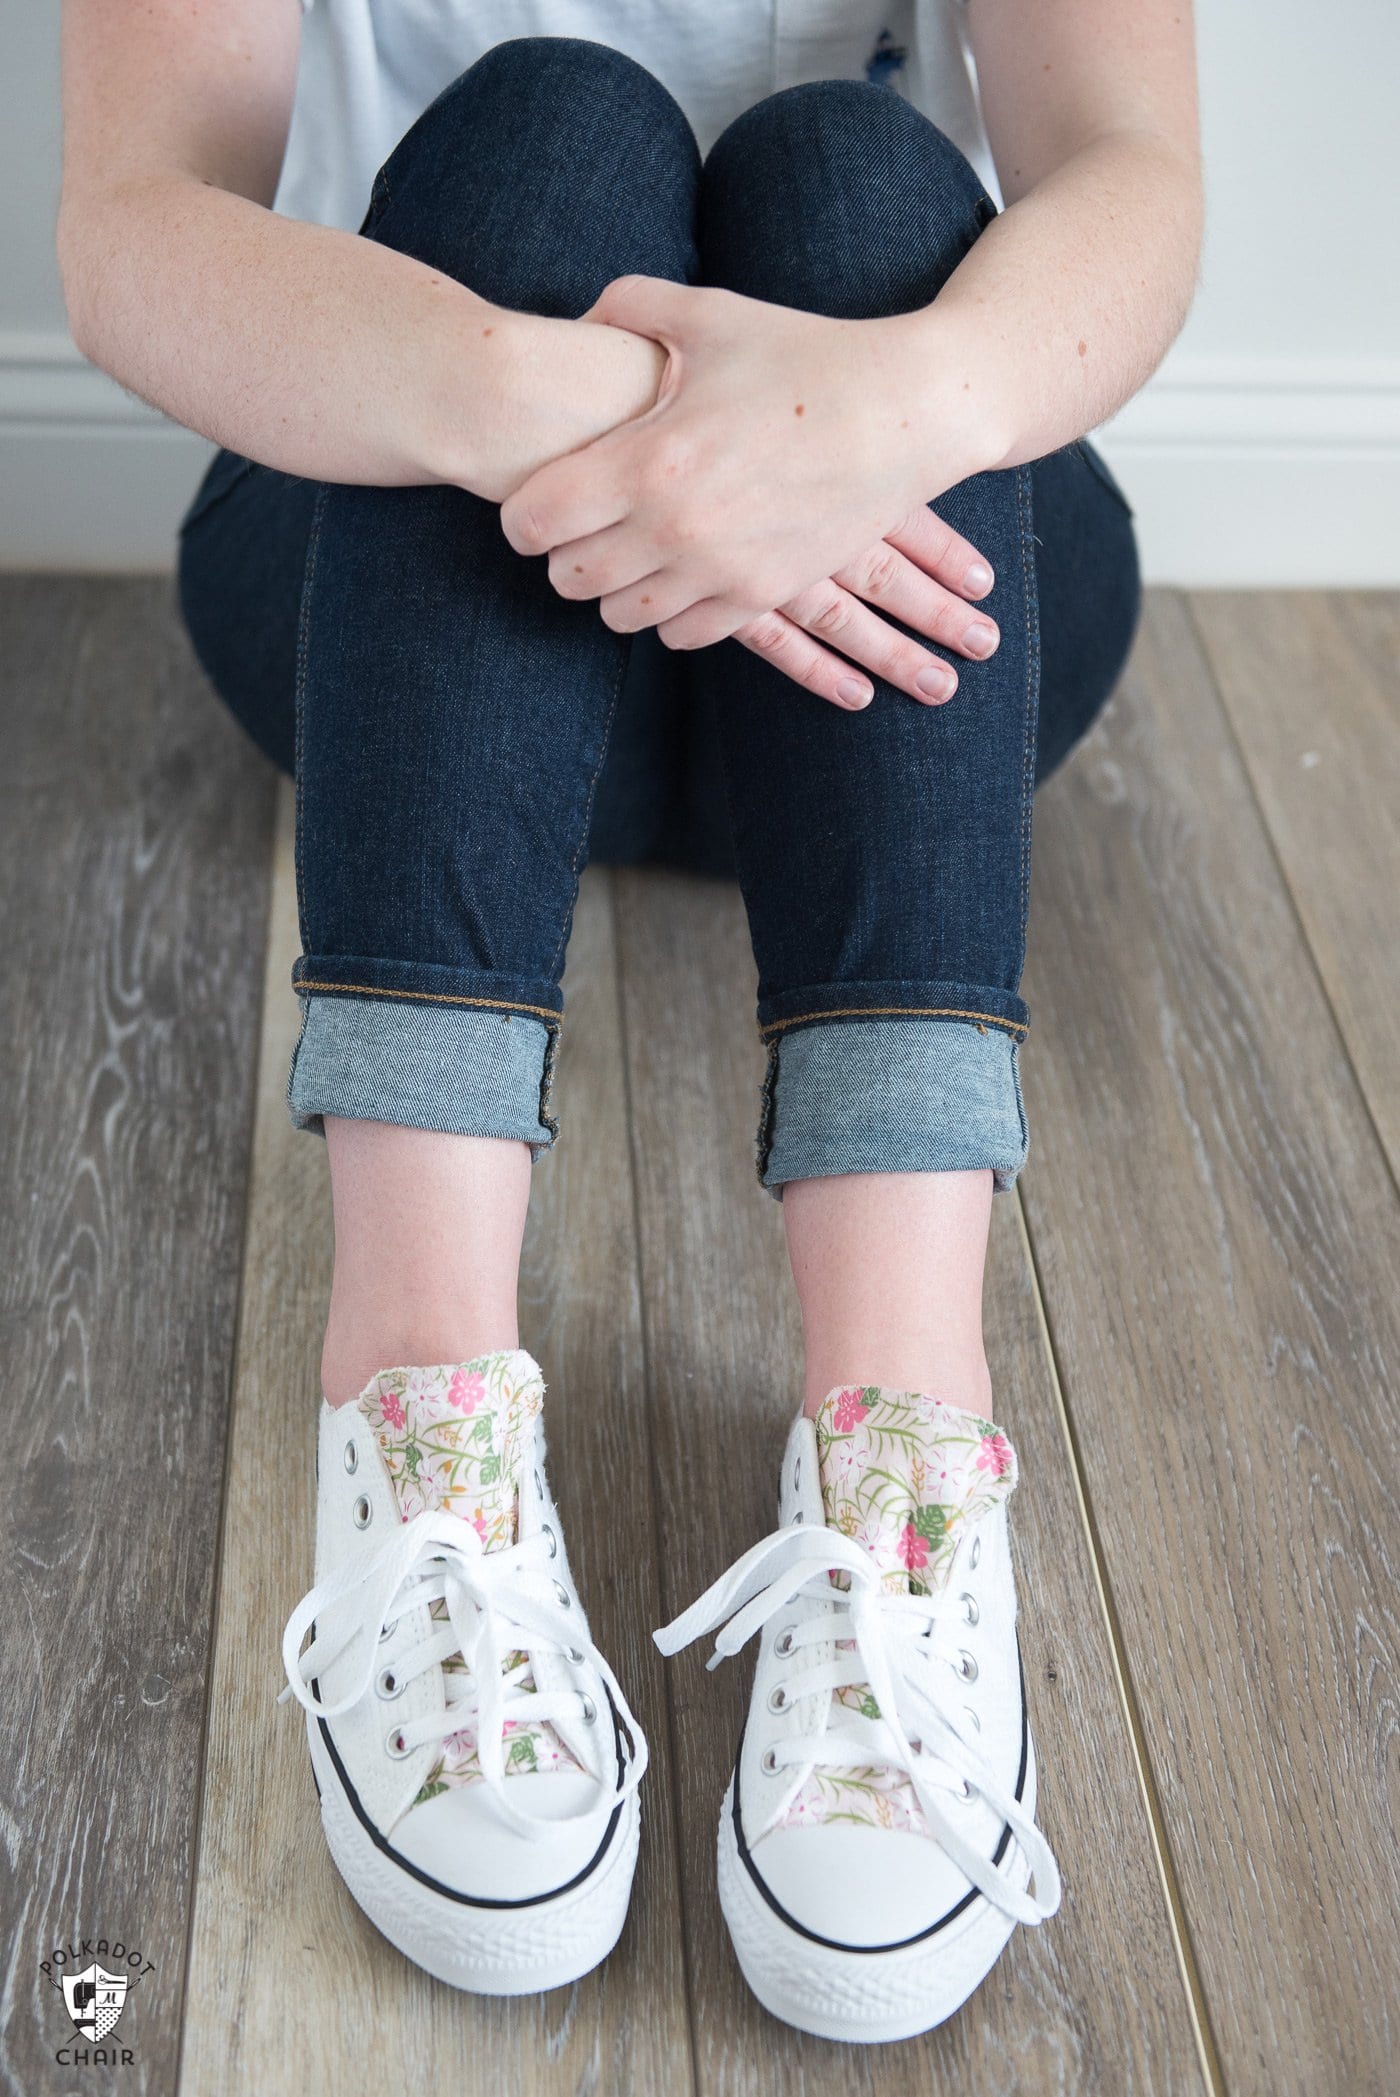
I love how these custom shoes turned out! I think I’m keeping them for myself. Read below if you’d like to learn how to DIY your shoes!
Project Inspiration
Recently, I was planning projects for a booth at the International Quilt Market showcasing my upcoming fabric line, Let’s Be Mermaids. The fabric is not due to arrive in stores until November, but I couldn’t wait to share the fun project with you.
While stitching up quilts and bags to display in my booth at the quilt market, I kept thinking that I needed just “one more” project for the display. I wanted to make something simple and maybe a little unexpected to show off some of the prints in the fabric line.
After some trial and error, I think I’ve found a fun way to customize Converse Chuck Taylors with fabric.
How to Sew Fabric to Shoes
This tutorial will teach you how to sew quilting cotton fabric to the tongue of Converse shoes. This project uses minimal glue, just enough to keep the edges of the fabric from fraying. You will also need some paper-backed fusible web.
The top edge of the tongue of the shoes is zig-zagged to keep it from fraying.
I believe that you could try this with other types of shoes. However, I think the Converse is unique and well suited for this project since the tongue comes far out of the shoe (making it easier to work with, and it’s exposed while you’re wearing them.
That way, you can see the fabric you cover the shoes with. Converse shoes also are made from canvas, have a raw edge around the tongue that is zig-zagged, so a zig-zagged finished seam around the top of the shoe doesn’t look out of place.
How to Customize Your Converse with Fabric
Equipment
- Gutterman HT2 Textile Glue
- Parchment Paper or Freezer Paper to make the pattern piece
- Glue Stick
- Sleeve Board Ironing Board
supplies
- 1 pair Converse Chuck Taylor All-Star Shoes You can use other shoes if the tongue is exposed and it is easy to move away from the shoe.
- 1 Fat Quarter Fabric The fabric shown is Let’s Be Mermaids by Riley Blake Designs.
Instructions
How to Cover Shoes with Fabric:
- Note: I created a downloadable pattern piece for you to cover the shoes. However, the size of the shoe tongue varies greatly between sizes. It was not hard to create the pattern piece, and I decided that would be a simpler way for you to complete the project. Don’t be intimidated by creating your own pattern piece. It’s totally doable!
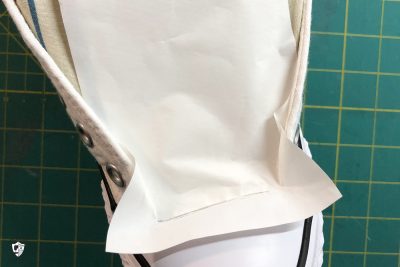
Step One: Create the Pattern Piece
- Using small scissors or an unpicker, remove the Converse labels from the tongue of the shoes. You can sew it back on later if you wish.
- Cut a piece of freezer paper (or parchment paper, and you can also use the paper backing of Heat and Bond Lite) 1/2″ wider than the tongue of your shoe and 1″ longer. I tried it with regular paper, and it didn’t work well. I liked the freezer paper because it has a coating to help it “hold up” during the pattern piece creation process.
- Remove the laces from the shoe and place the toe onto the end of the sleeve board as far as you can get the top of the sleeve board into the shoe. If necessary, you can use a few straight pins to hold the shoe in place as you work.
- Place the paper on top of the shoe, and using your fingers (waxy side down), work it into the “seam” where the rubber part of the shoe meets the tongue.
- As you do this, press the paper as hard as you can into the corners of the top of the shoe.

- Using a pencil, mark the paper to create your pattern piece. Mark the edge where the tongue meets the rubber part of the shoe and the curve under the first shoelace hole of the shoe. You don’t need to mark the edges of the tongue or end at this part. It’s just the part of the tongue that is not rectangular.
- Remove the paper from the shoe and cut it out. Place the paper back on the shoe to see how you did. If it’s close, then proceed to the next step.
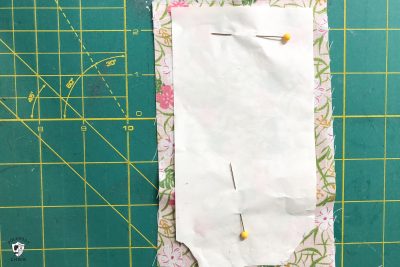
Step Two: Cut out the Fabric
- Cut out two pieces of fabric (with the fabric placed on the wrong sides facing) using your pattern piece. NOTE: at the top of the pattern piece (where the fabric will meet the rubber of the shoe), add 1/8″.
- Be careful not to overwork the fabric or “test” it in the shoe again.
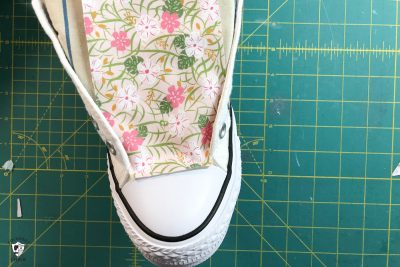
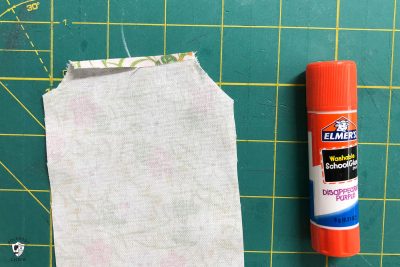
Step 3: Create the finished edge
- Fold under the top edge of the fabric 1/8″ and press in place. Use glue from your glue stick to keep the edge in place.
- Place a thin line of the Gutterman glue along the folded edge of the wrong side of the fabric and up the curves on both sides.

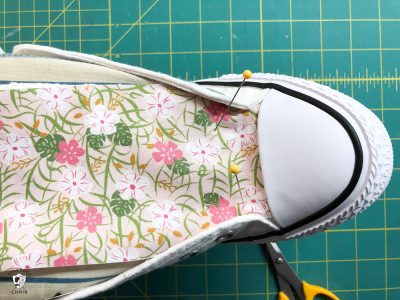
- With the shoe still firmly on the sleeve board, place the fabric on the top of the tongue, lining up the folded edge and curves of the shoe and fabric. Use an awl or straight pin to work the fabric up to the edge of the rubber part of the shoe. Ensure also that the glue goes all the way to the edge of the fabric. It dries clear, so a bit of it can show, just not too much, or it will look sloppy. Use a couple of straight pins to hold the fabric in place.
- Leave it to rest for at least 30 minutes to dry completely. DO NOT rush this step.
Step 4: Sew the Fabric
- After the glue has dried, you can proceed with the rest of the project. With the shoe still on the sleeve board, peel back the unglued portion of the fabric and cover it well with the glue from the glue stick. Be careful during this step; you don’t want to unglue the fabric you just stuck down. Don’t use the Gutterman glue for this portion; it will not dry evenly, and you’ll get bubbles.
- Note: The glue is only used to hold the fabric in place while you sew and cut it. It’s not the only way the fabric will adhere to the tongue, so don’t stress if it’s imperfect.
- Put the fabric back in place and use a hot iron to “set” the glue. To hold the fabric in place, also place a couple of pins in the tongue.
- Using sharp scissors, trim around the edge of the fabric so that it is exactly flush with the edge of the tongue.
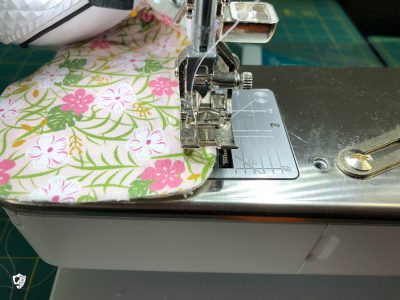
- Set your sewing machine to a wide zig-zag stitch. Beginning at one end, zig-zag around the edge of the shoe so that one of the zig-zag stops is off the tongue and the other zig-zag stitch is on the tongue. You can use a serger if you like, but I could not get my shoe under my serger presser foot without the shoe being in the way.
- Stitch as far as you can. You won’t be able to stitch all the way down. However, it doesn’t matter since that part of the tongue is hidden under the shoelace holes.
- I found I could stitch further in one direction than the other, so I stitched as far as I could, then turned the shoe over and stitched again, getting into a portion of the shoe I could not before. Ensure you lock your stitch at the start and stop of your seam.
Step 5: Finishing
- When you finish sewing, cover the raw edge of the fabric around the tongue with a fray check. This will help remove any “stray” fibers and keep the fabric from fraying as you wear the shoes.
- If desired, stitch the Converse tag back onto the shoes.
Notes
- I recommend using a small-scale print on the shoes. A small floral or novelty fabric would work well.
Don’t use fabric that stretches, is slippery, or is too thick. I recommend nice quilting cotton. - If you’re unsure what fabric to pick, find a print that matches at least some of the shoe color.
Before sewing the shoes, test the zig-zag stitch on a scrap of fabric to make sure you like how it looks. - Don’t overwork the fabric while you’re making the project. If you do, it will fray a lot before you can put the fray check on.
- In my opinion, a sleeve board is a must for this project. You need to be able to get the tongue of the shoe as flat as possible.
- Remember, you won’t see all of the shoe’s tongue when the shoes are tied, so you don’t need to stress about the edges that are covered by the shoelace holes. Just do your best.
- I have not tried it yet, but I think this process would also work well for a pair of Converse High Tops.
Frequently Asked Questions
Can I Put the Logo Back on the Shoes?
Yes, you can stitch it back onto the shoes using your sewing machine.
Can you Add Fabric to Other Parts of the Shoes?
Yes, you can, but you will want to use a product like Modge Podge, and you will likely need to hand stitch the fabric to the shoes.
Can I Hand Stitch the Shoes?
Yes, if you don’t want to mess with fitting the tongue of the shoe under the sewing machine, you can hand stitch the edge of the shoes with a blanket stitch and embroidery floss.
Can I do This with Other Shoes?
Converse shoes are best since the tongue is only attached to the shoe at the base. It is not sewn to the shoe at the sides, so you can get the tongue out of the shoe to sew it.
You May Also Like:


I would like to know how to put logo fabric pices on my converse can you give me an idea that can help me thankgou
What a great idea and so perfect to give them a personal touch. Thanks for sharing