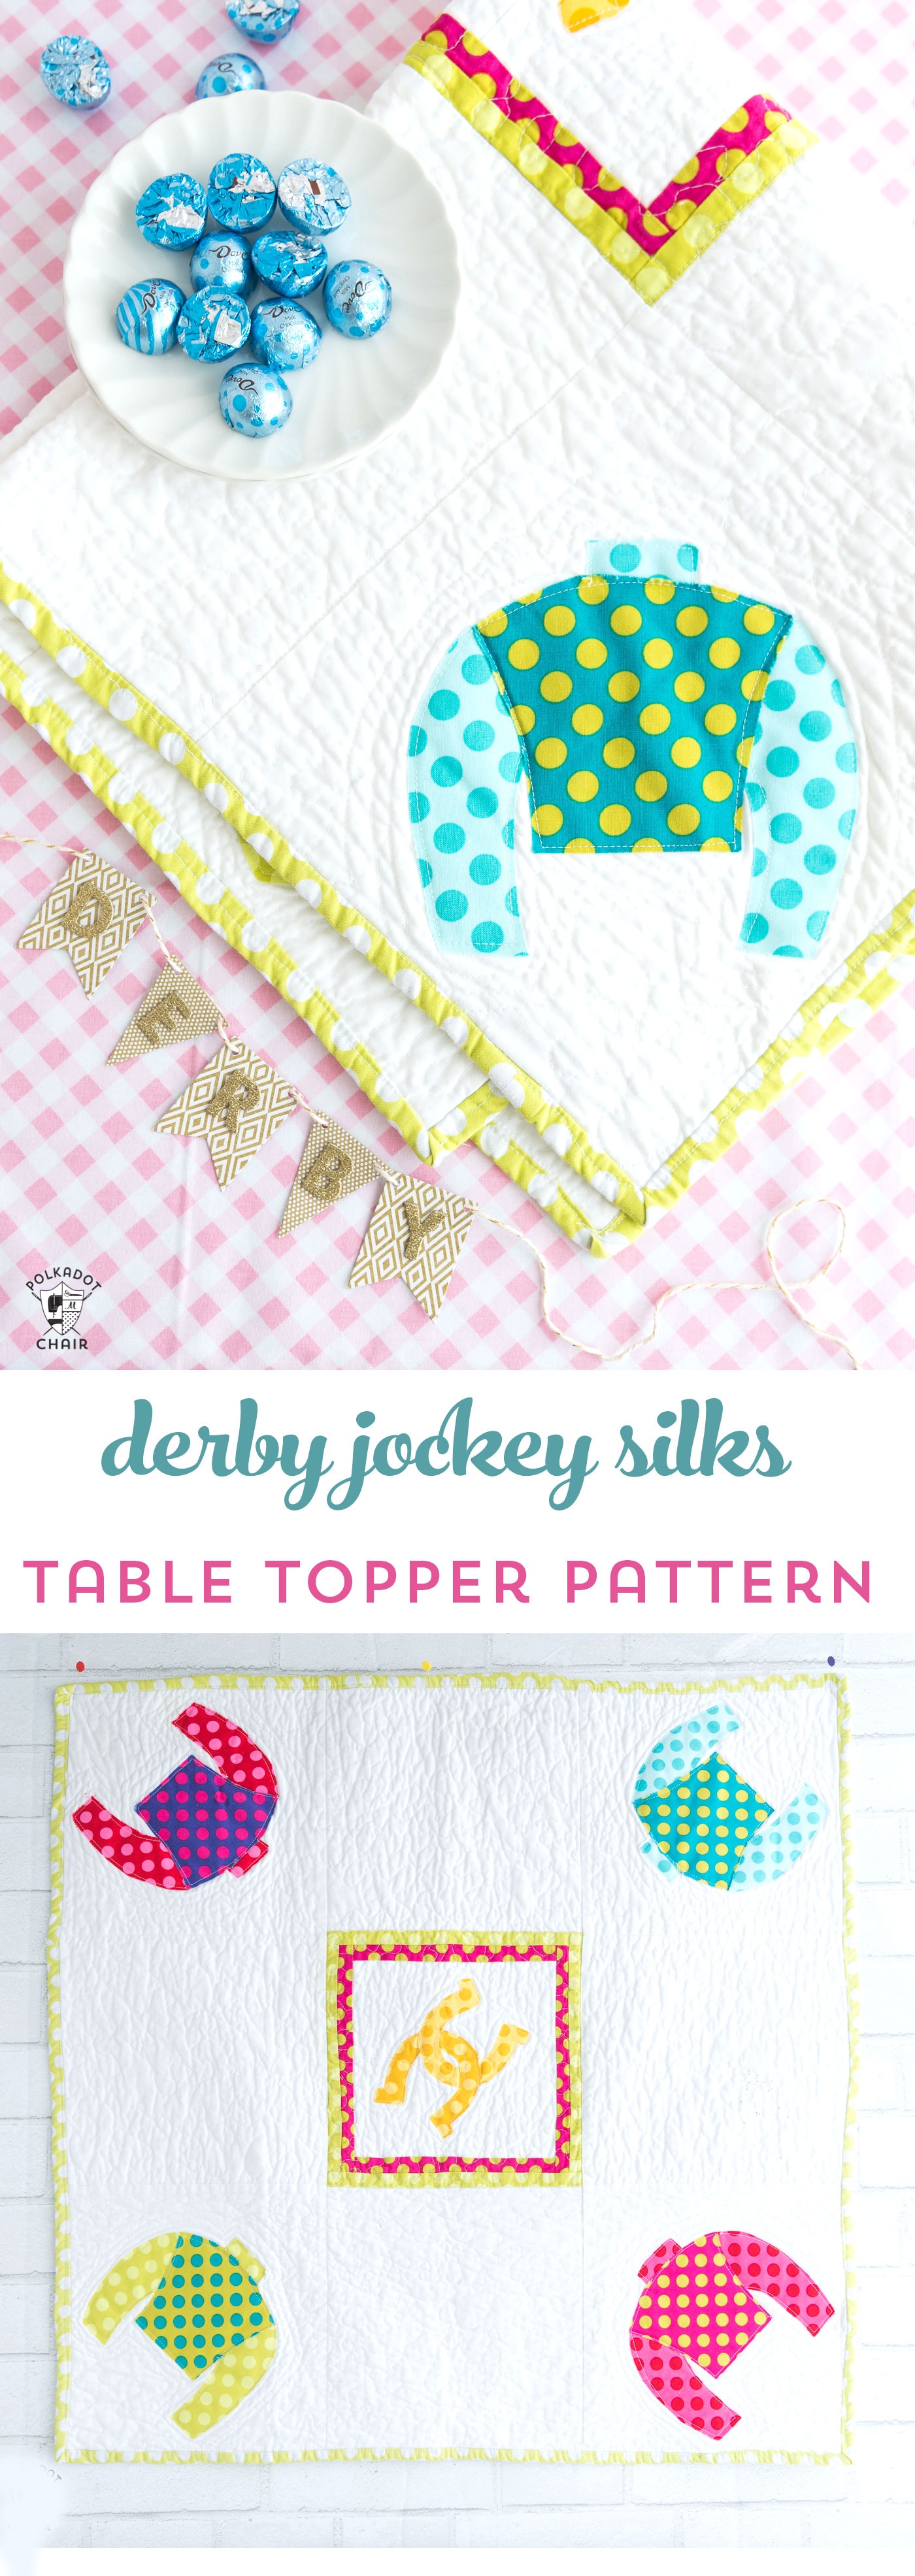
Jockey Silks Table Topper Pattern; A DIY Derby Project
If you’re looking to add a little something to your Kentucky Derby-themed decor this year, why not start by stitching up this Derby Jockey Silks Table Topper? If you like this tutorial, you may also enjoy this tutorial (along with a free Cricut cut file) for these DIY Kentucky Derby Pillow Wraps.
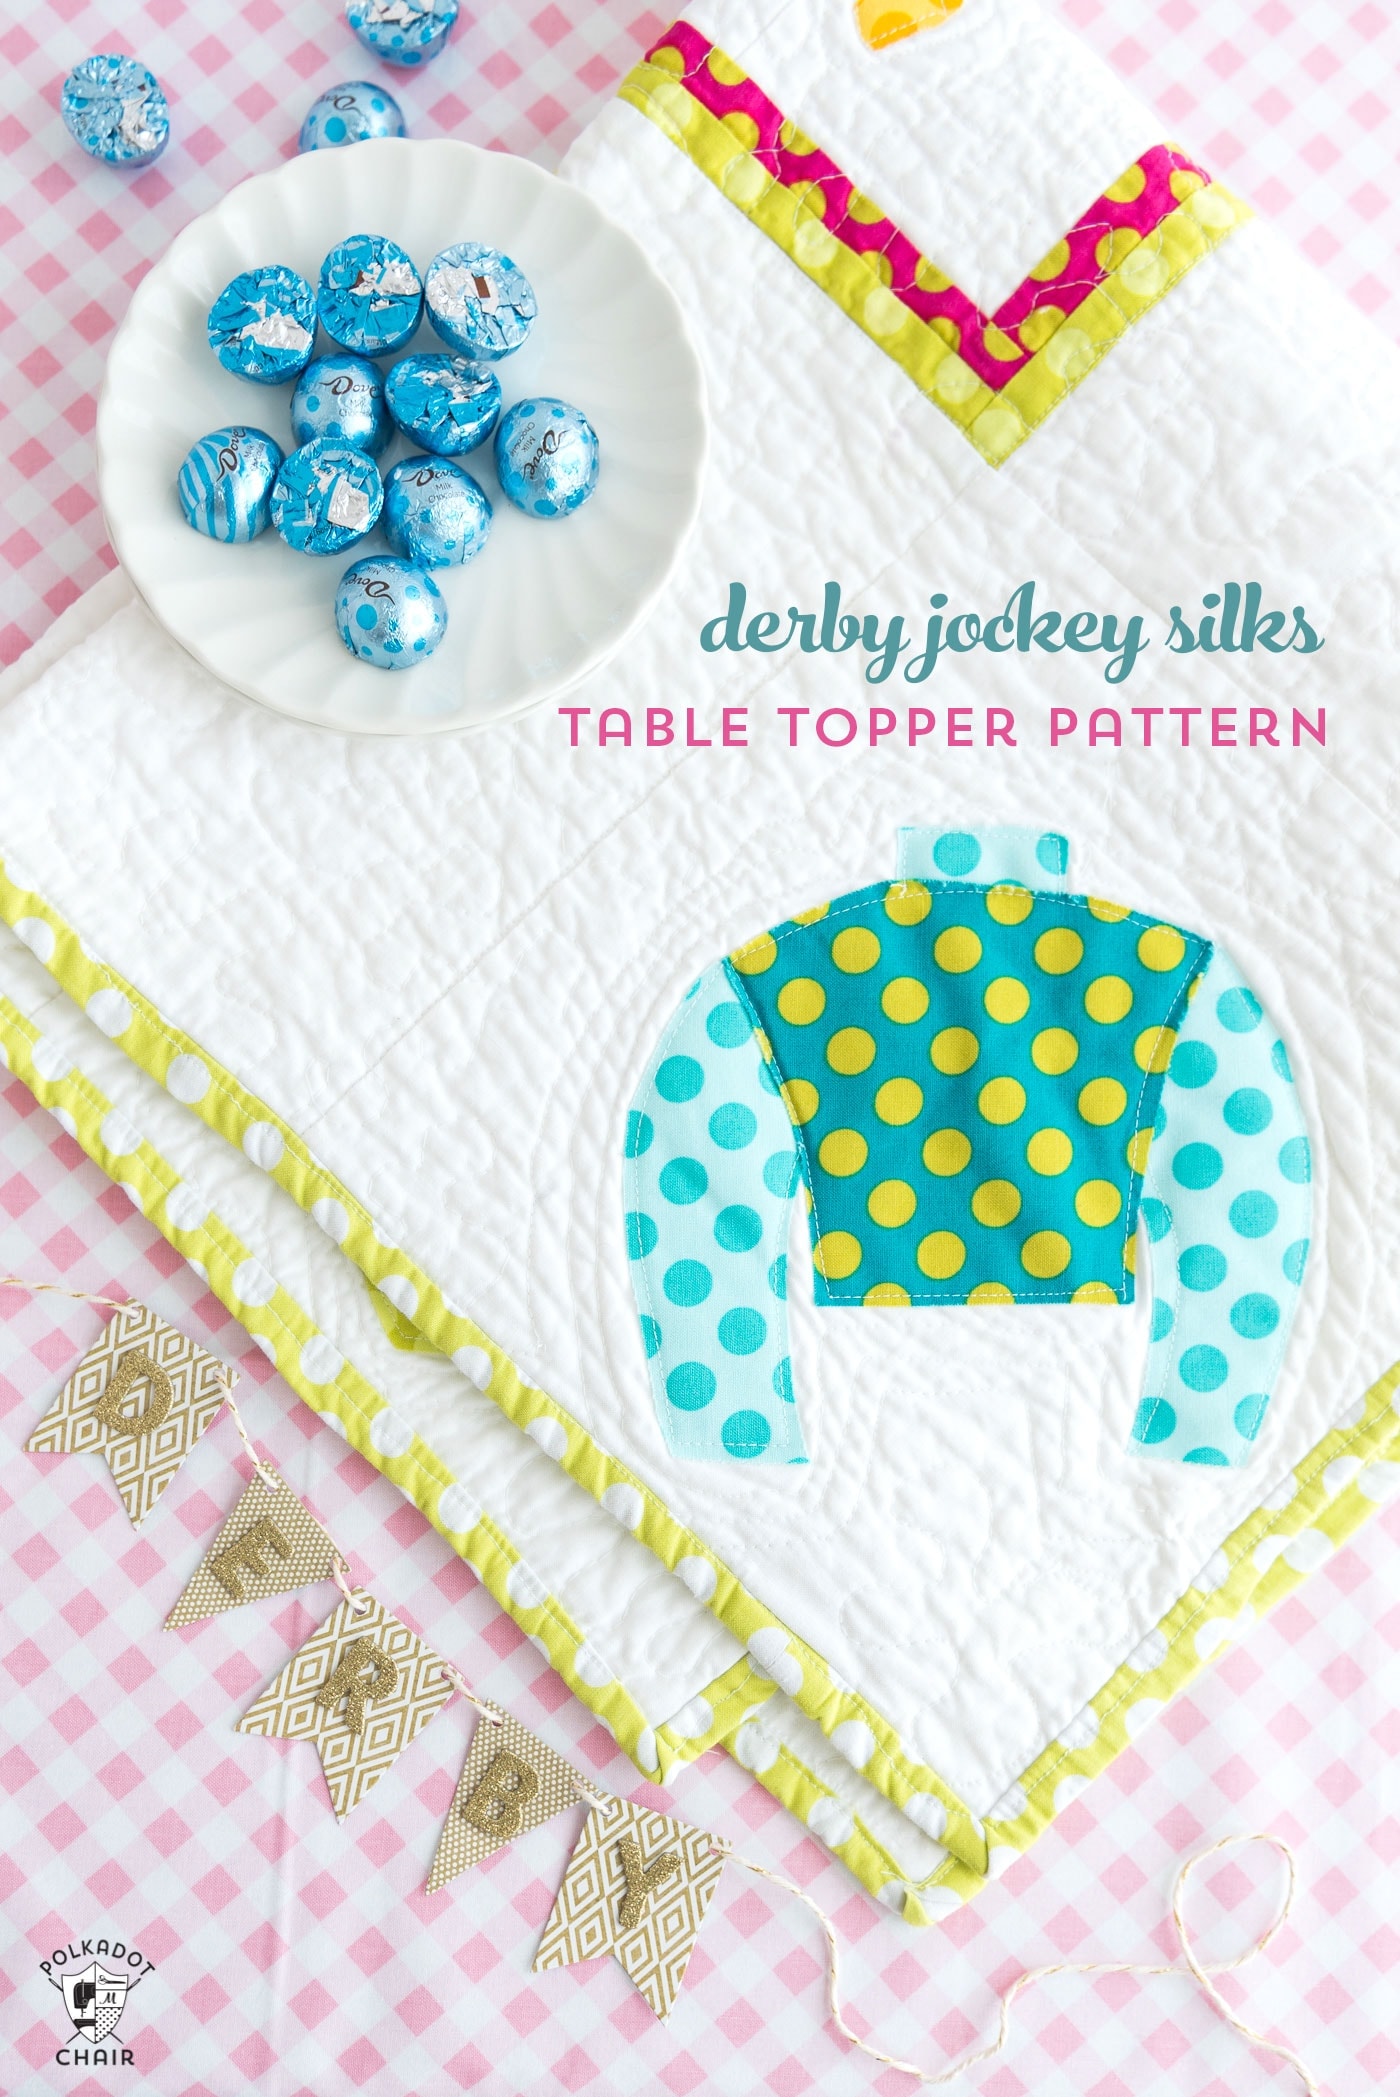
Several years ago (actually, 7 to be exact), I stitched up a Jockey Silks Table topper for Derby and posted a brief tutorial for it. It was long before my Derby Style fabric was introduced, and even longer before I knew a thing or two about how to work my camera (forgive the less-than-stellar instructional photos).
About the Table Topper Pattern
In the years since the tutorial was posted, I’ve received several emails requesting clarification on the pattern and the templates I used to create the Jockey Silks and Horse Shoe appliqué shapes.
This week, I sat down, took a few new photos of the table runner, and reviewed the directions again. I added a bit more clarification to a few steps and have turned the applique shapes into a simple PDF that you can download.

This table topper has been washed more than a few times and now possesses that yummy soft and fluffy texture that quilted items have after they are washed repeatedly. So just know that it’s not “perfect”. It’s also the very first piece that I ever tried to free-motion quilt on my home machine. I did my best, but it’s FAR from perfect. To be honest, I don’t really care; I still love it.


Okay, are you ready to make one?
Jockey Silks Table Topper Pattern: A DIY Derby Project
Equipment
supplies
- 1 yard White Fabric
- 1 Fat Quarter Fabric for Inside Border Fabric A
- 1 Fat Quarter Fabric for Inside Border Fabric B
- 8 Fat Quarters Fabric for Jockey Silks you could use some of fabric A or B if you wish
- 1 Fat Quarter Fabric Horse Shoe
- 1 Fat Quarter Fabric binding
- Fabric for backing topper measures 29″x29″
- Batting
- Heat N Bond Lite
- Jockey Pattern JUST CLICK HERE to download the applique pattern.
Instructions
Cutting Directions
- From White Fabric:
- 10″ x 10″ squares, 8
- 8″ x 8″ square, 1
- From Fabric A:
- 1″x8″ strips, 2
- 1″x9″ strips, 2
- From Fabric B:
- 1″x9″ strips, 2
- 1″ x 10″ strips, 2
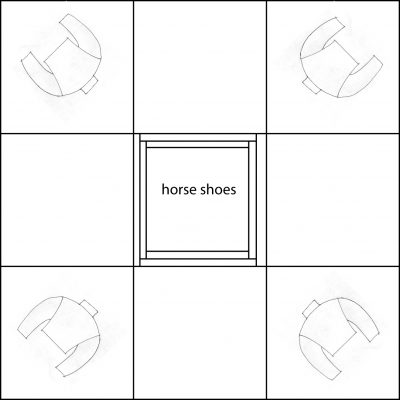
- A design note before we get started: this table topper would also look nice with a Jockey Silk in each block, not just the 4 in the corners. If you want to make it that way, just cut out four more Jockey Silks. Then place them in the 4 “empty” white squares. I recommend putting those four silks straight up and down (instead of at a 45-degree angle).

Step One:
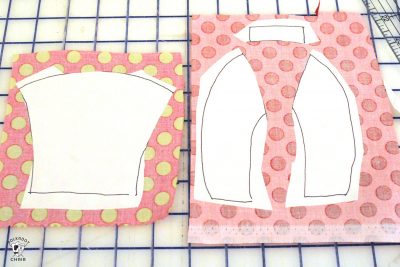
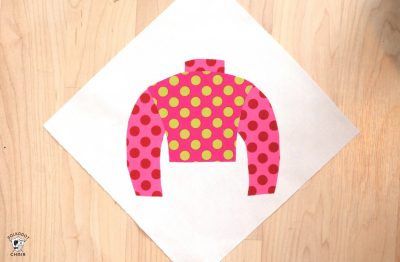
- Trace the Jockey silks pattern onto the paper side of the Heat N Bond Lite. Cut the arms and collar off the main body of the shirt. Iron the shirt to one polka dot print and the sleeves & collar to a 2nd print.
- Cut out, assemble & position at a 45-degree angle on one of your 10″ white blocks.

- Repeat with the remaining three blocks.
Step Two:
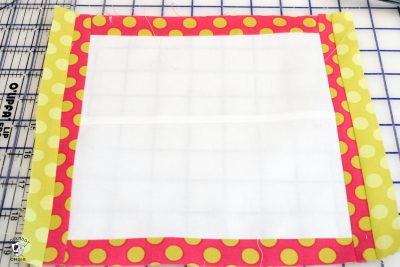
- Pick up your 8″ x 8″ center block and sew two of the 1″ x 9″ strips cut from Fabric A to the top and bottom of the block. Press. Stitch the two 1″ x 9″ strips from fabric A to the other two sides. Press.
- Repeat with fabric B.
- You end up with a double border—press and trim the block to 10″ x 10″.
- Cut out and iron your horseshoes to the center of this block, using the same method that you used to attach the jockey silks.
- Using a straight stitch, zig-zag stitch, or applique stitch (it’s your preference), stitch around the edge of all of your applique pieces.
Step Three:
- Assemble your blocks.

- Use the diagram above as a guide—press seams.
- Quilt & Bind as desired.
- That’s it, you’re done! It’s so simple, you can make one for a friend too!