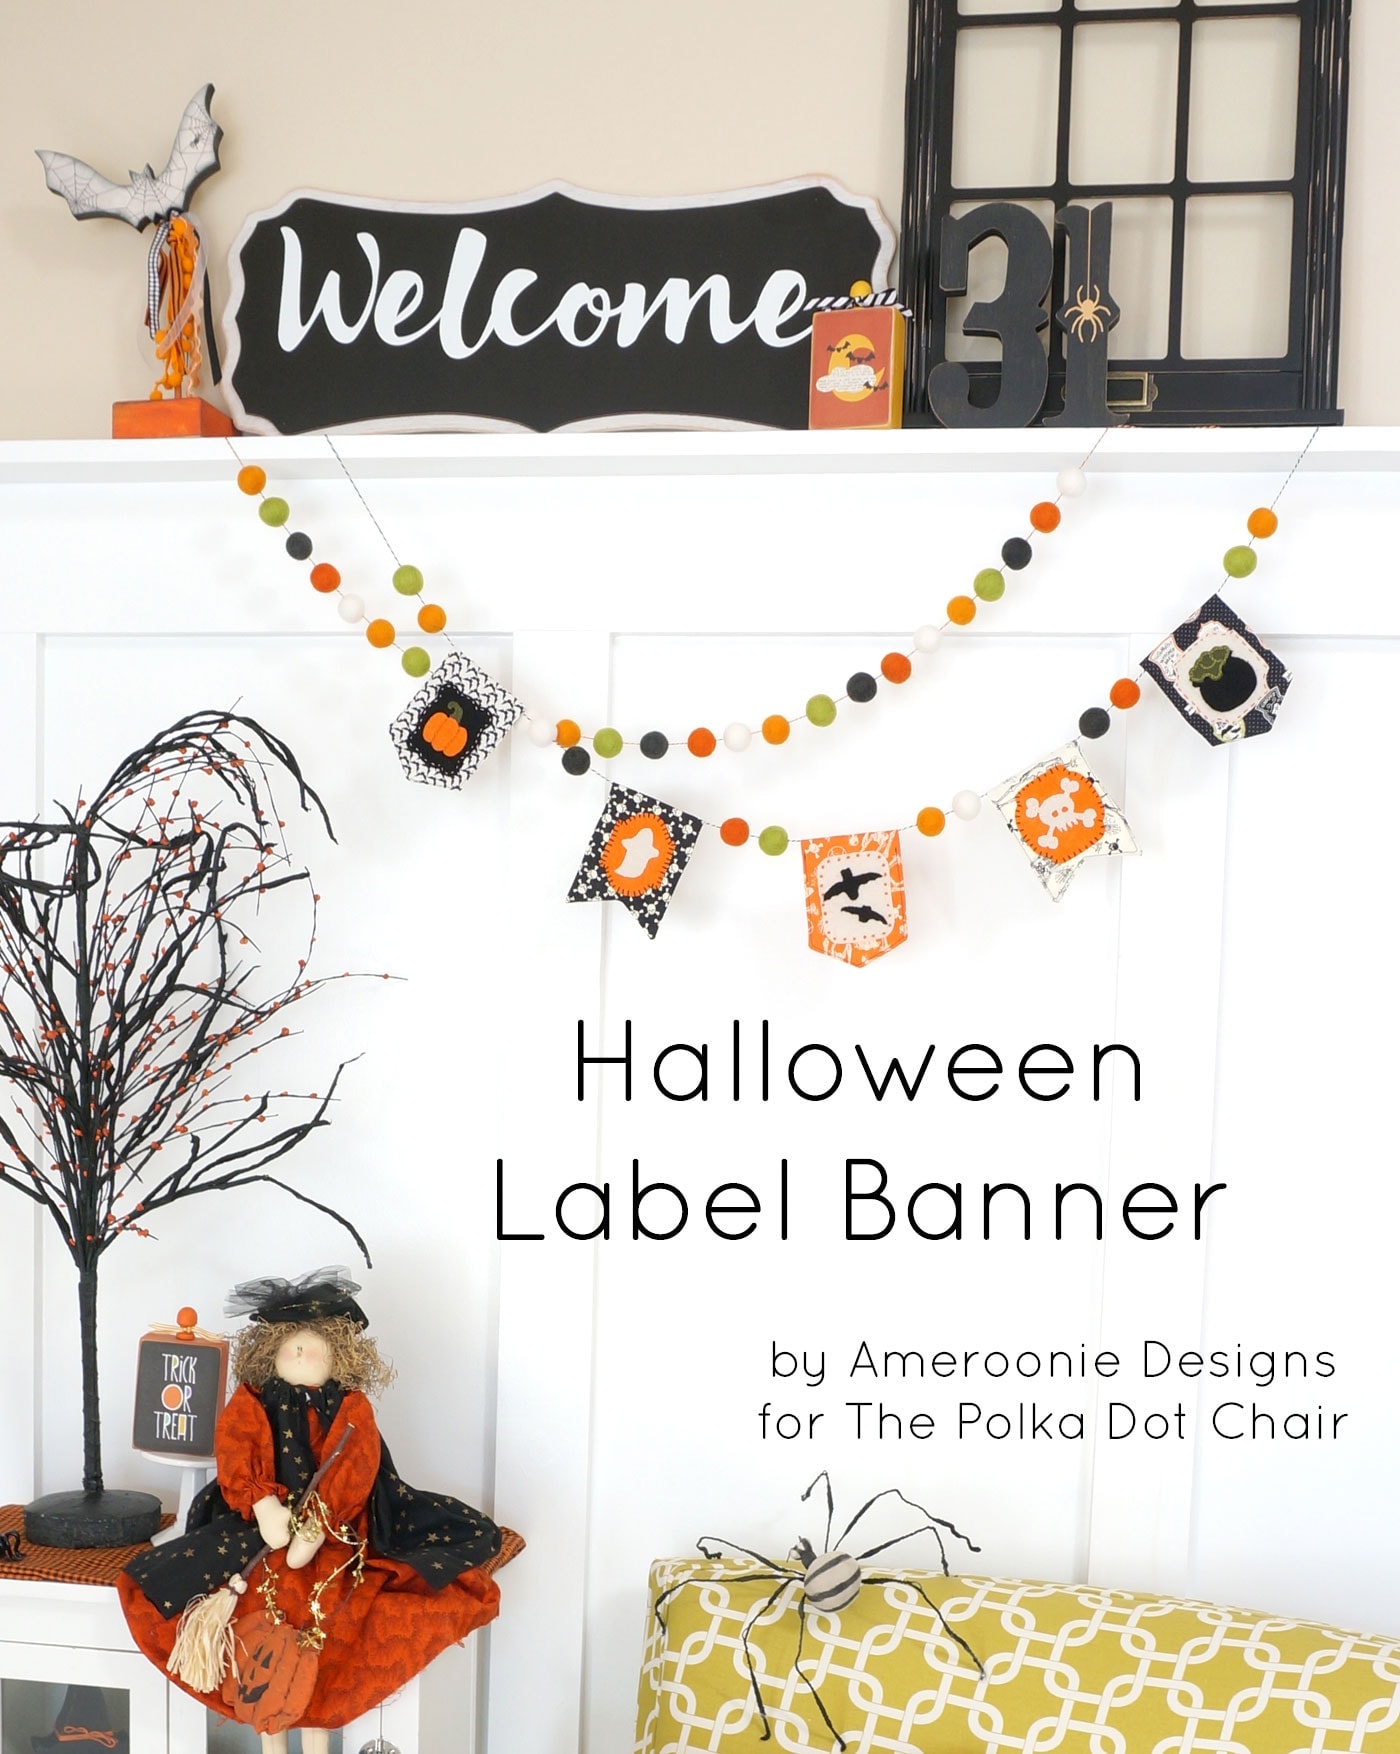
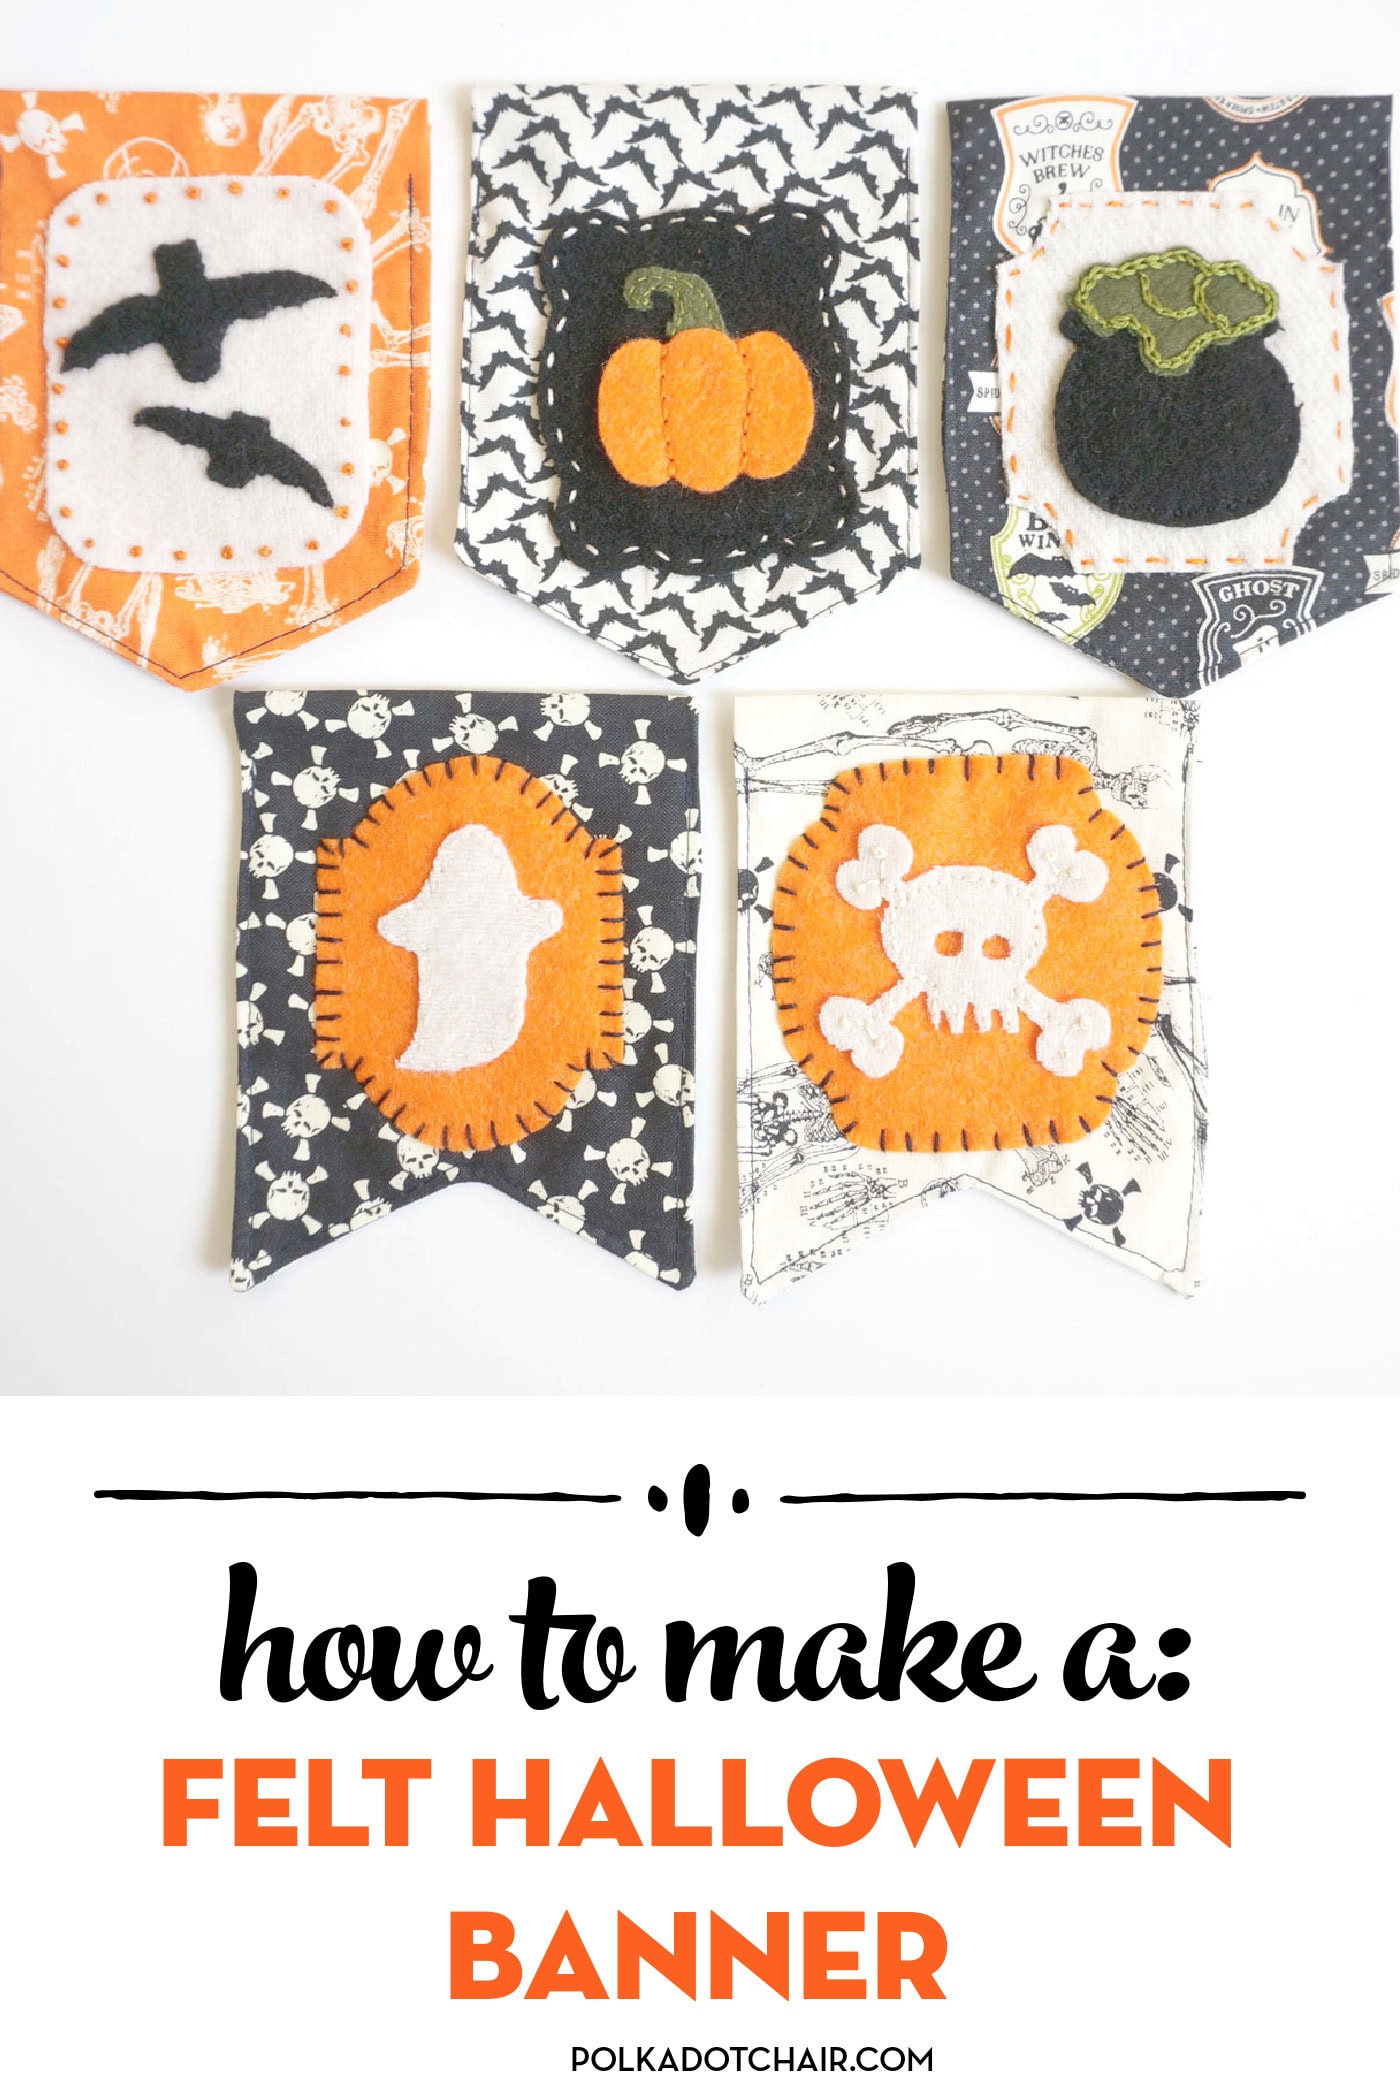
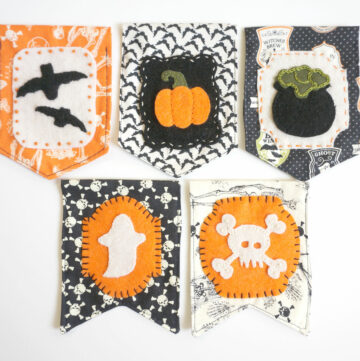
How to Make a Fabric Halloween Banner
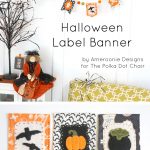
This great Halloween Craft project is made by Amy Chappell of Ameroonie Designs. She is sharing a free tutorial (with appliqué patterns) for this fun DIY Fabric Halloween Banner, which features appliqué Pumpkins, Ghosts, Bats, and skeletons! If you like this project, you may also like this Quilted Halloween Table Topper Tutorial.
Hi! I am so excited to be here with you! My name is Amy Chappell, and I blog at Ameroonie Designs. There, I share various tutorials, primarily related to sewing. I love working with fabric and being inspired by all the great designs available.
For this project, I was inspired by one of the prints in Carina Gardner’s new Halloween line, Eek! Boo! Shriek! And I decided to design some badge-looking patterns for a new mini banner.
I had a lot of fun making them up, and I hope you will too!
Felt Halloween Banner Tutorial
Fill out this form, and we will email you the appliqué pattern for the felt pieces.
How to Make a Fabric Halloween Banner
Equipment
supplies
- Felt
- Freezer Paper
- Embroidery Thread
- Applique Pattern
Instructions
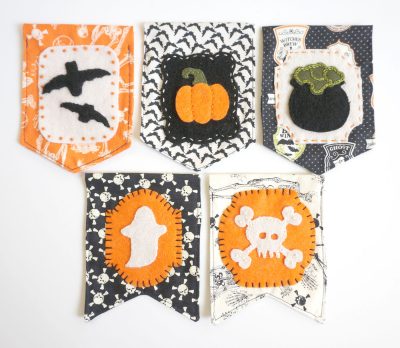
Step One: Create the Fabric Pennants
- To begin, you will need to create fabric pennants. My tutorial for them is available on my blog, or you can make your own version. You will need at least five pennants.
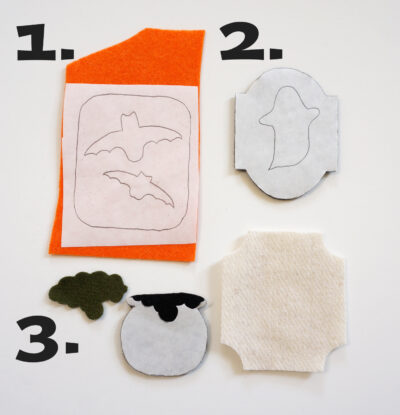
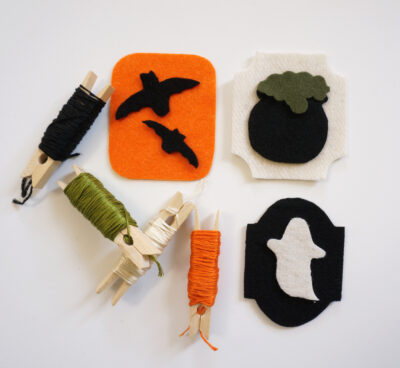
Step Two: Cut out the Felt Shapes
- Gather your felt. Then, transfer the pattern onto felt. My favorite way to do this is to trace the pattern onto freezer paper.

- Trace the pattern onto the dull side of the freezer paper. Place your pattern shiny side down on your felt and press with a warm iron.
- Cut out the label shape. Now, you can peel off the freezer paper and trim the extra paper around the next element in the design. Then, press the freezer paper onto the next color you need. In this example, I would push the ghost shape onto white felt.
- Repeat step two for any other elements you need to cut. You are working from the outside in. Continue reusing the freezer paper until you have cut out everything you need.
- **Some tips when cutting out felt- especially small, detailed shapes. **
- Use sharp scissors that will make nice, clean cuts. When cutting, move the felt, not the scissors. Last, try to keep one continuous cut going. Don’t take the scissors out; just slightly open them up again and slide the project partway out, then resume cutting. This will make sure you don’t have any divots or jagged edges in your shapes.

Step Three: Add Embroidery Details
- Now, you can take your embroidery floss and add details to your badges. Stitch down the shapes to the badges, and then use decorative stitches to add the badges to your finished project.
- Alternatively, if you prefer a no-sew project, simply use tacky glue to attach your shapes to the badges and the badges to the pennants. You can make the pennants out of felt, too, so you don’t have to sew those either if you like.

- You can see I used backstitch, running stitch, French knots, chain stitch, and a faux blanket stitch on mine. I love the extra detail the stitching adds.

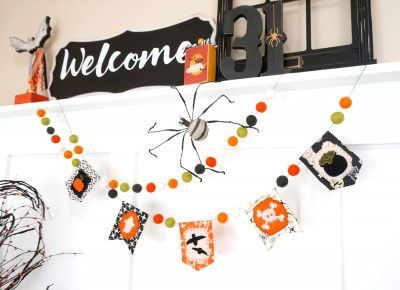
Step Four: Finishing
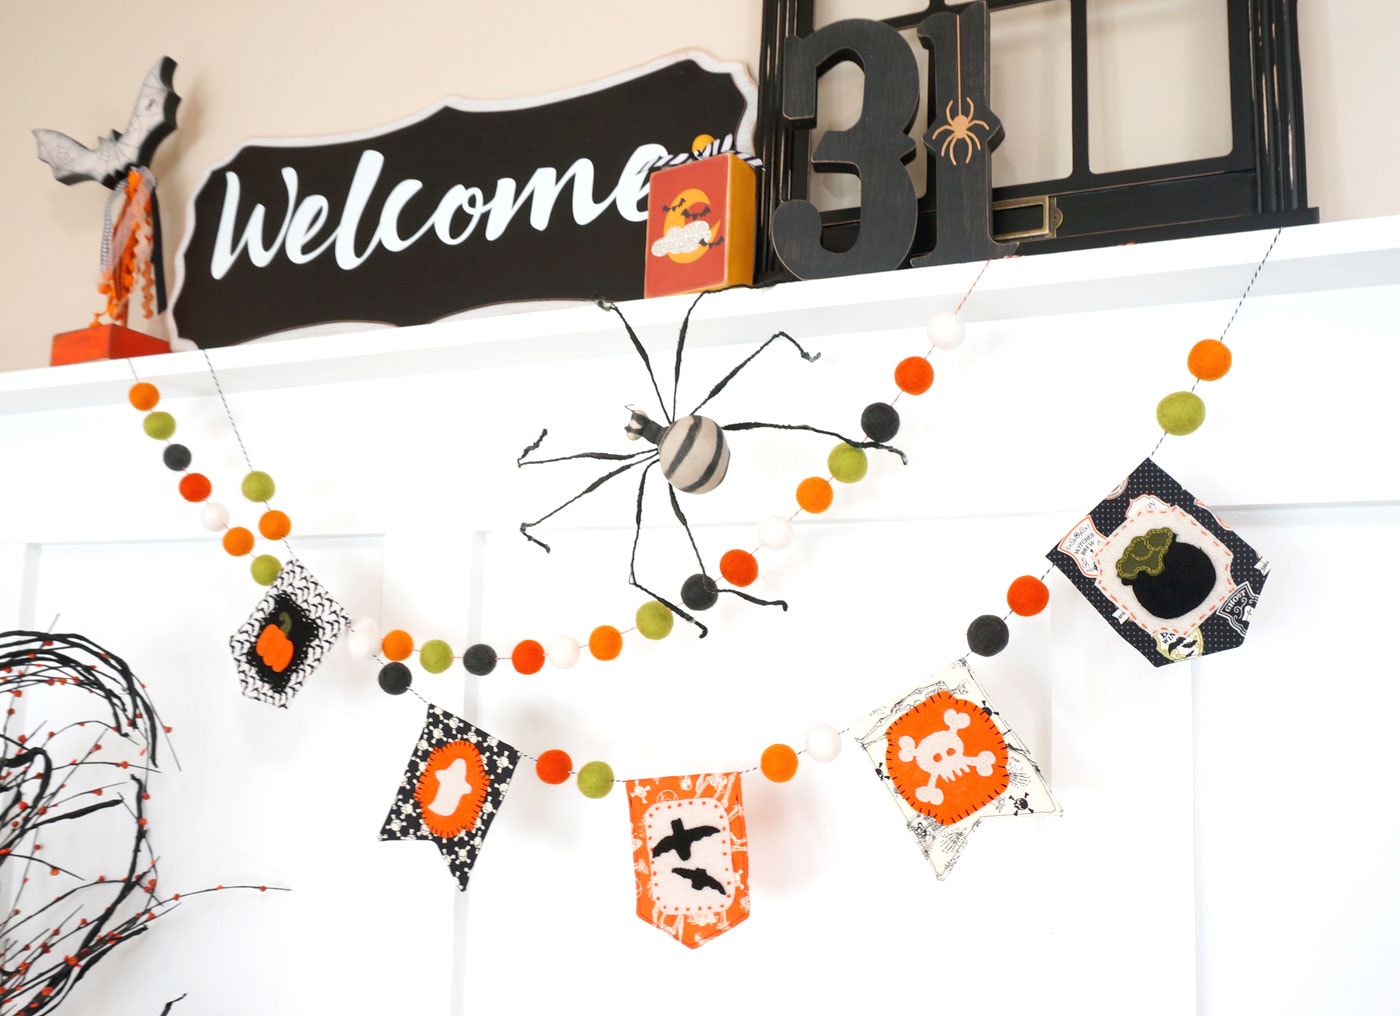
- The last thing to do is string them up. For mine, I used baker’s twine and felt balls, but you could also use yarn, ribbon, or jute. The possibilities are endless. I hope you have fun with these badges; I look forward to seeing your banners!
Other Fun Halloween Projects:
Be sure to stop by Amy’s Blog and check out some of the other fantastic Halloween Craft Ideas that she has shared!
About Amy:

Hello! I’m Amy Chappell, the person behind Ameroonie Designs. I’m a sewing and quilt pattern designer, and I’m proud to say that my work has been featured in several print publications and popular DIY websites.
I am the mom of six kids- which is a big reason I create and sew. I find that I am happiest when I am making things, and taking time to be happy makes me a better mom.
Join me in my exclusive Let’s Sew Friends membership, where you’ll find small, manageable monthly sewing patterns, live classes, and lots of video tutorials!