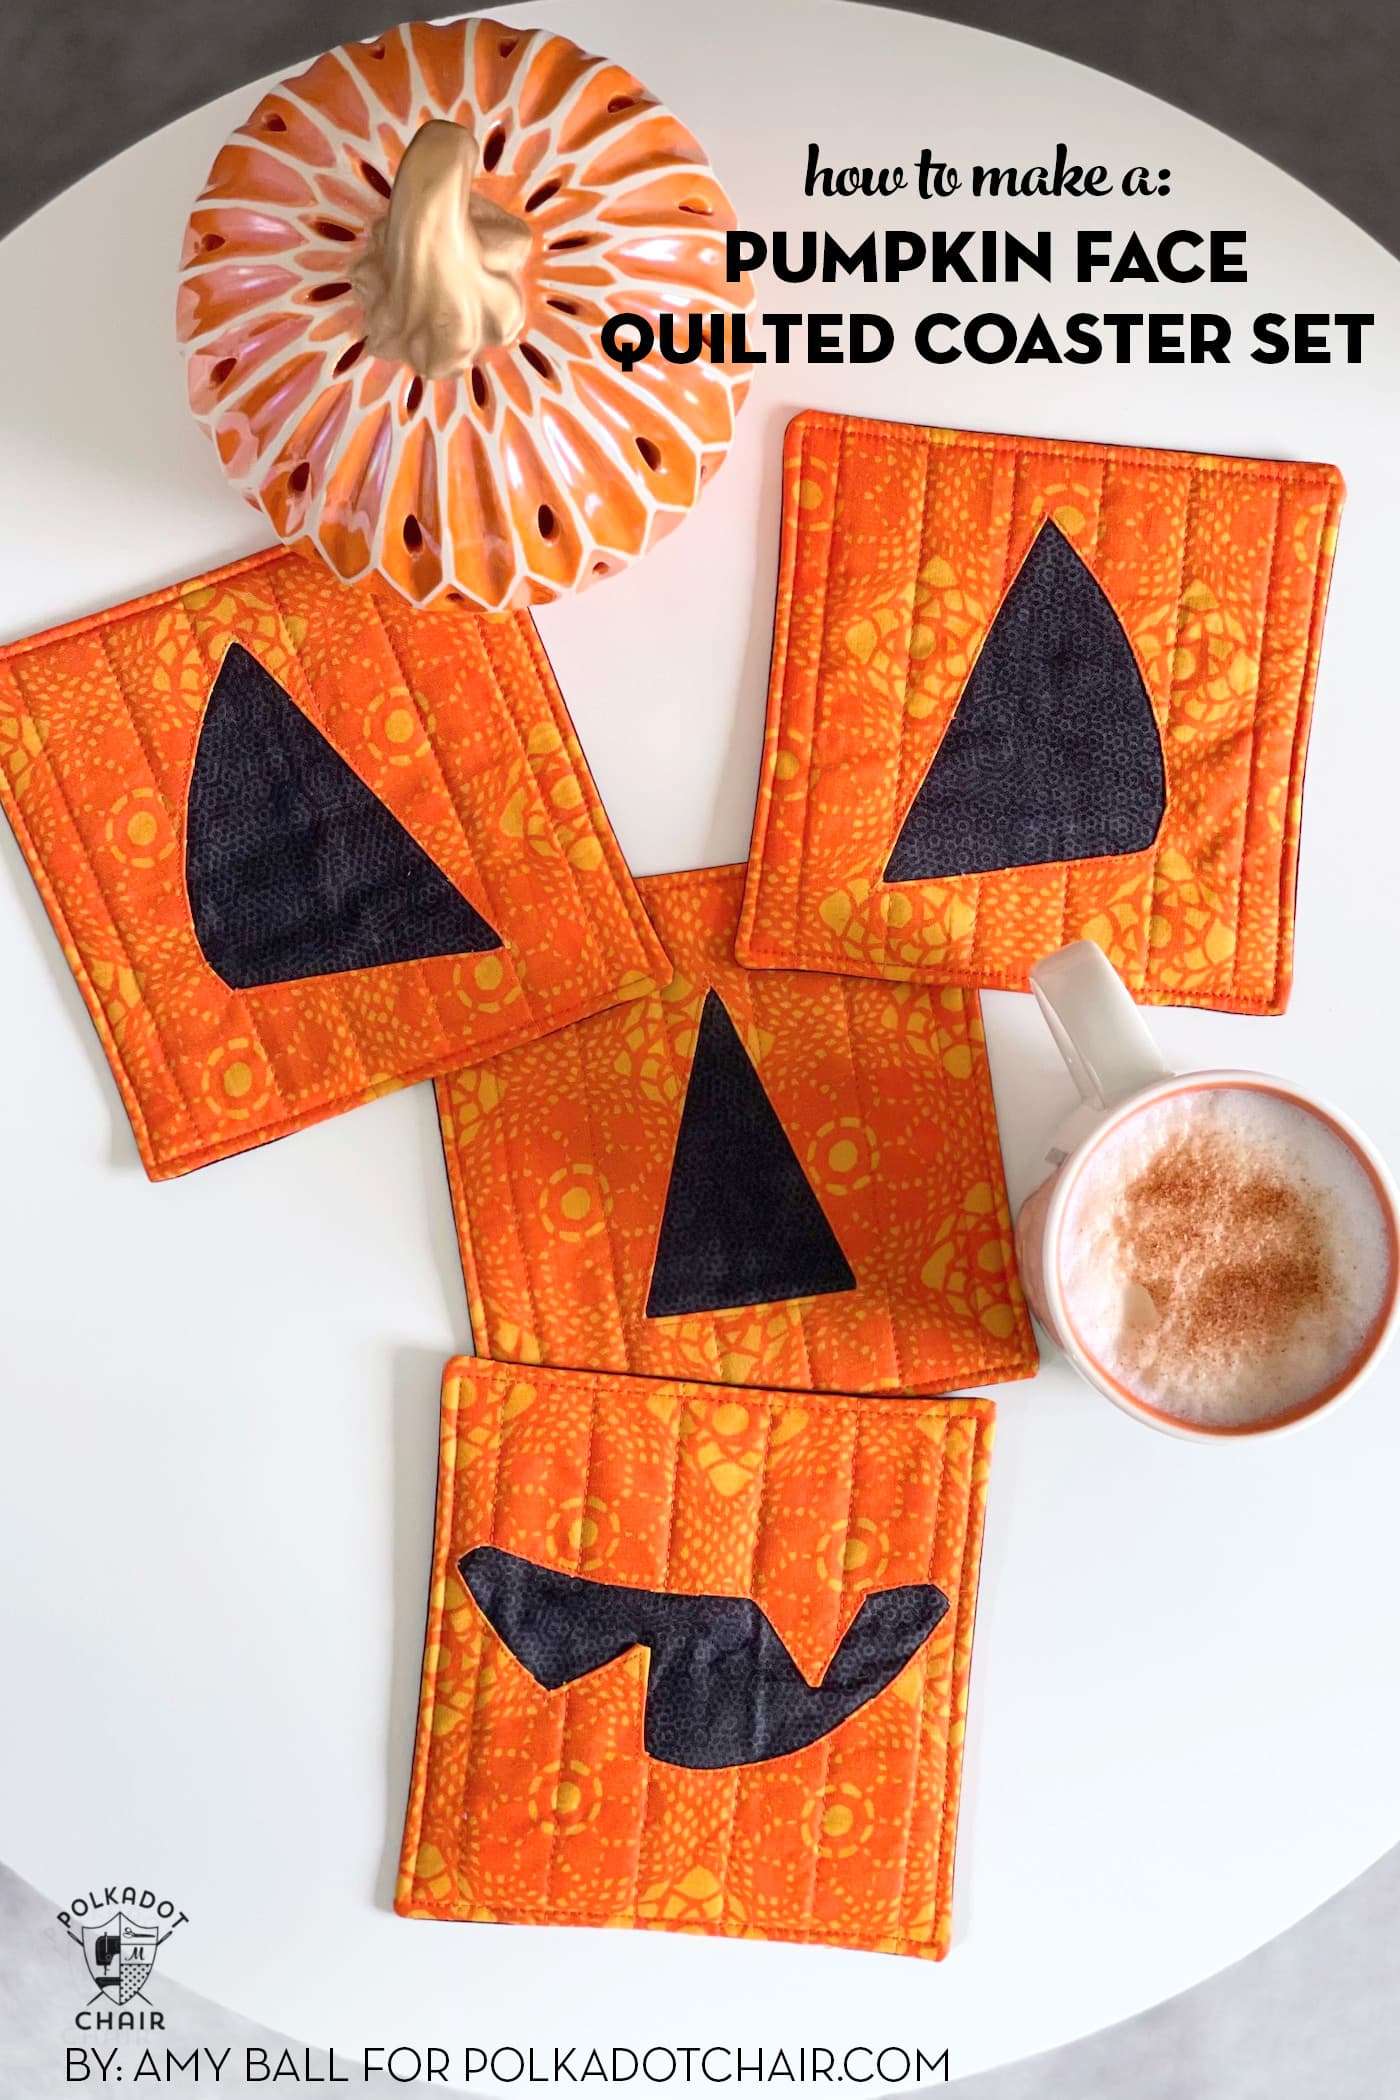
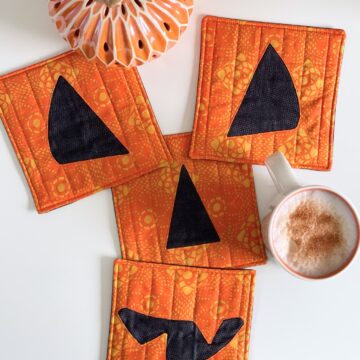
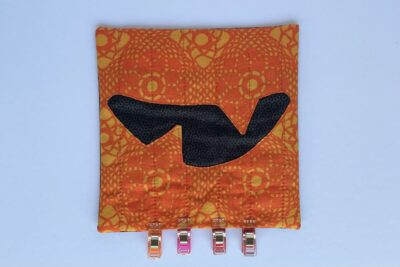
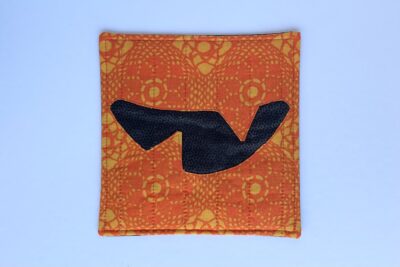
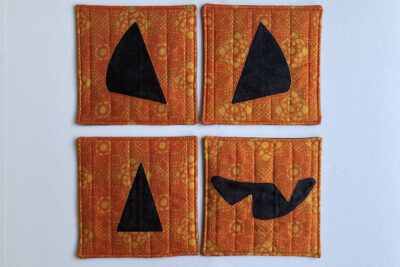
Pumpkin Face Quilted Coaster Set
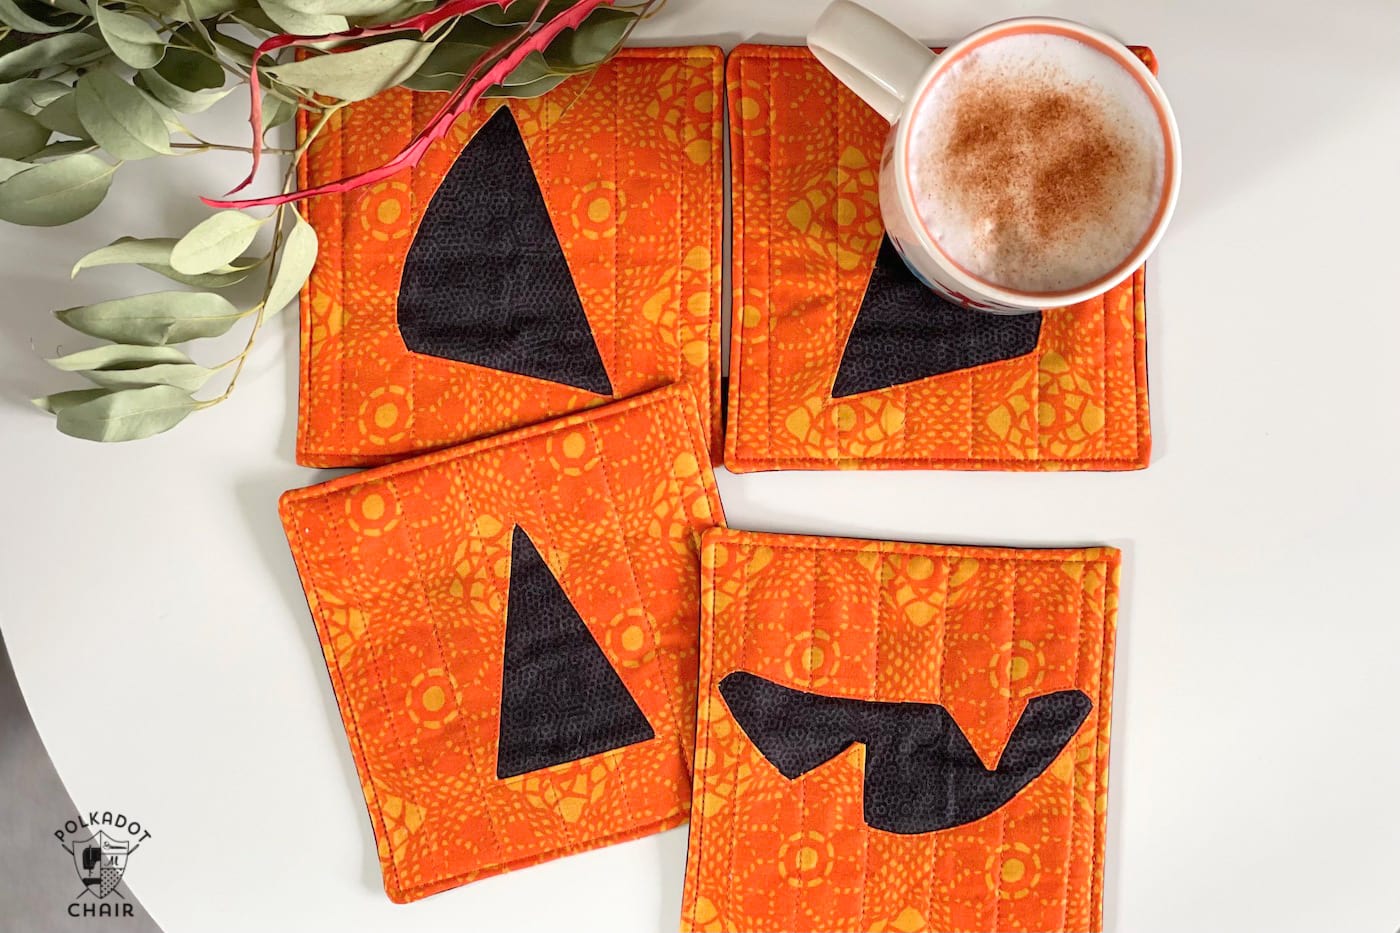
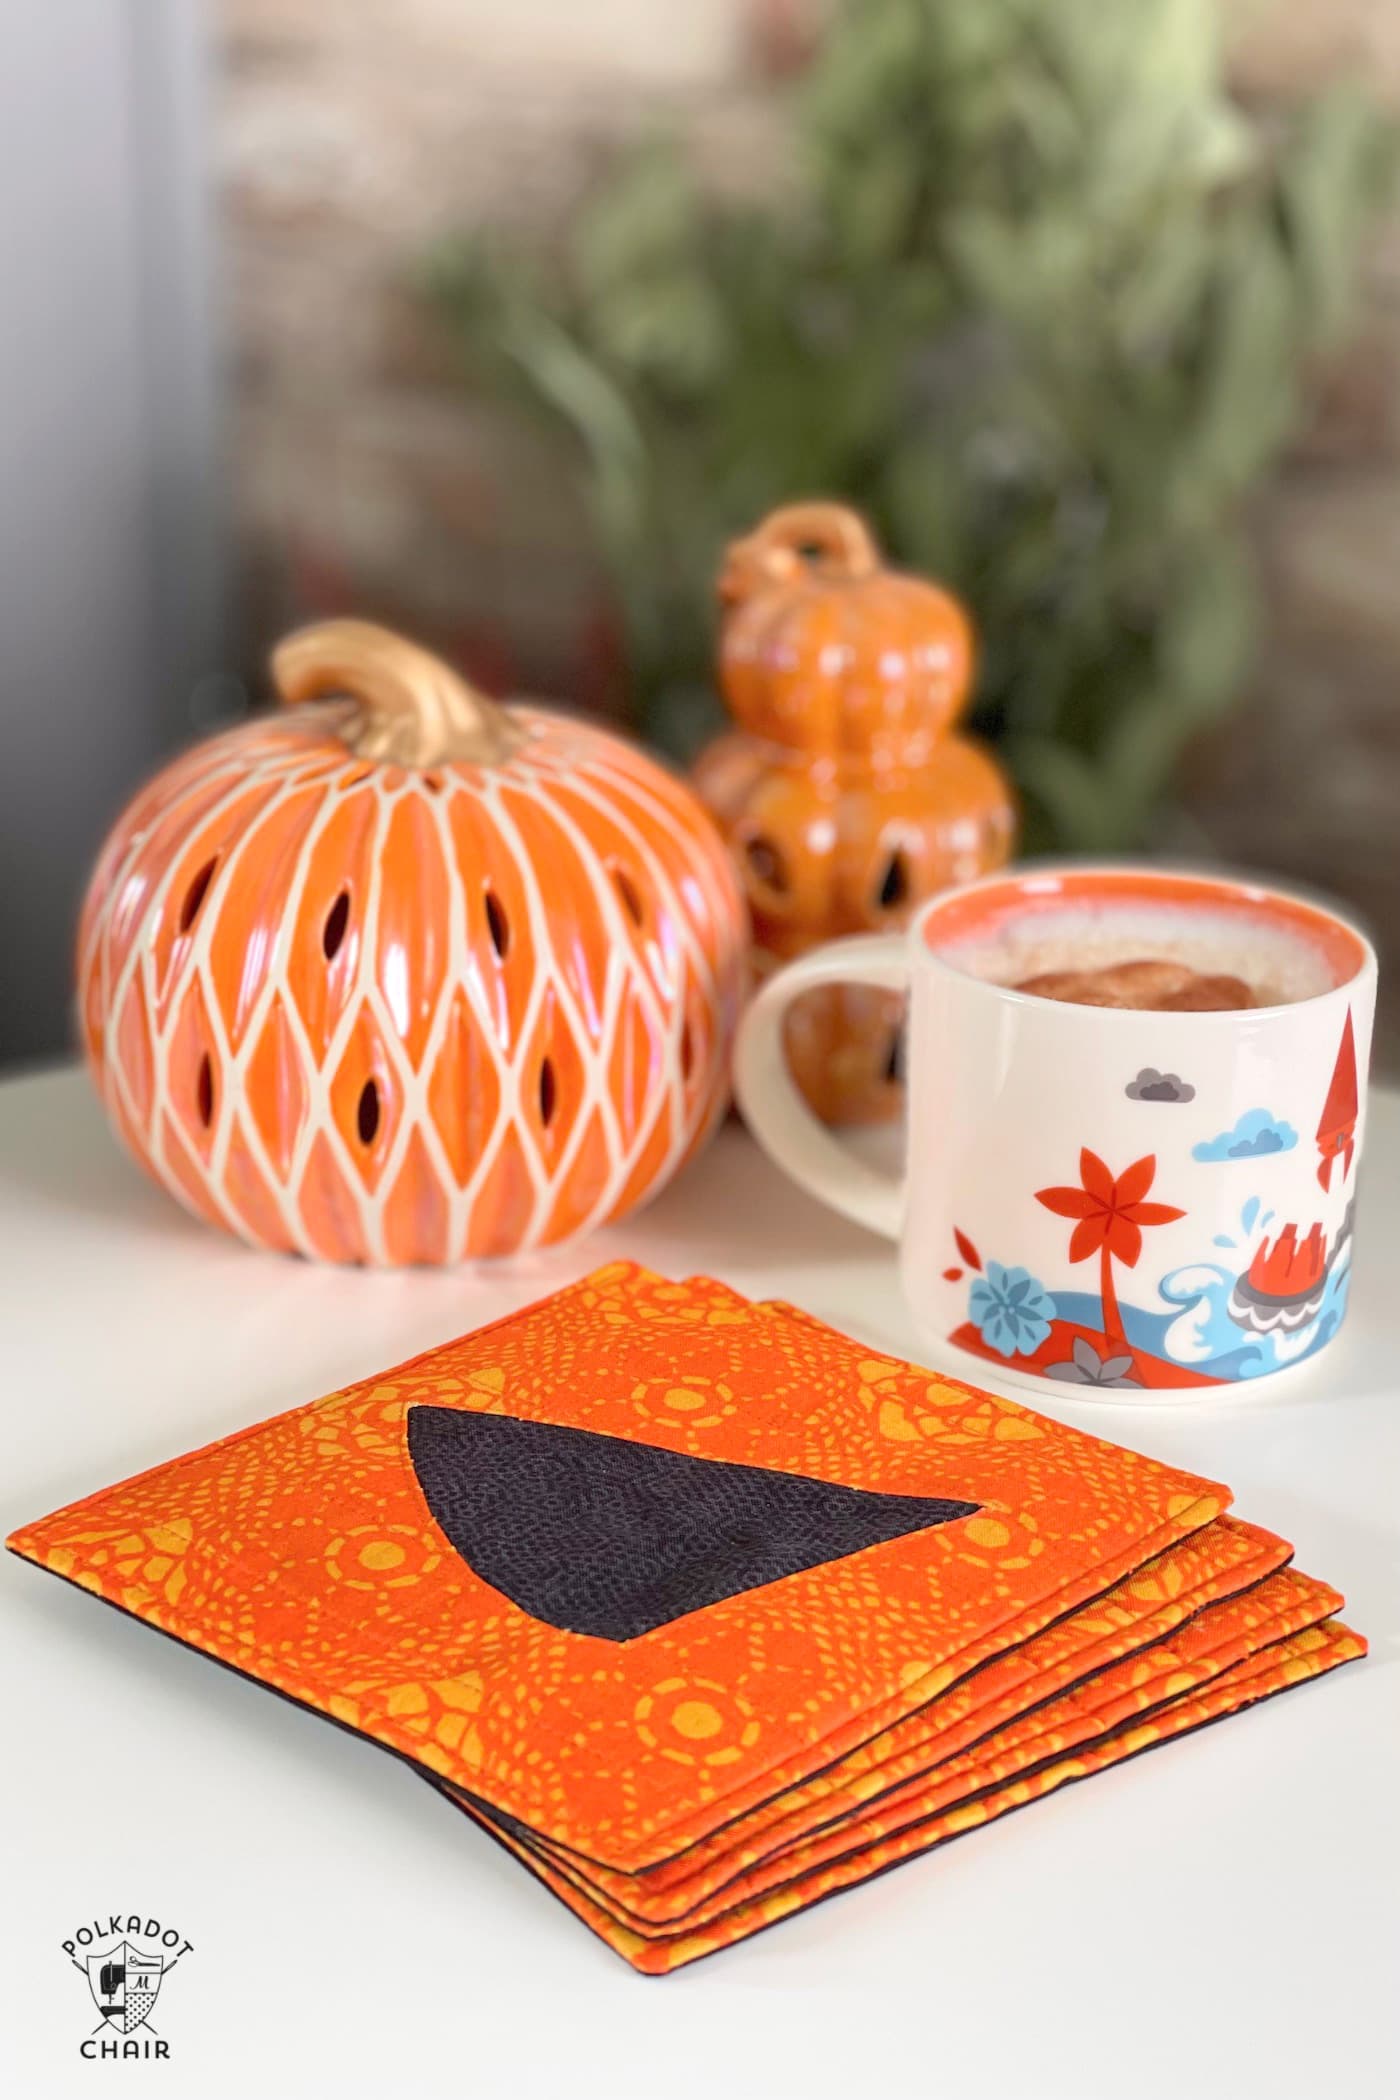
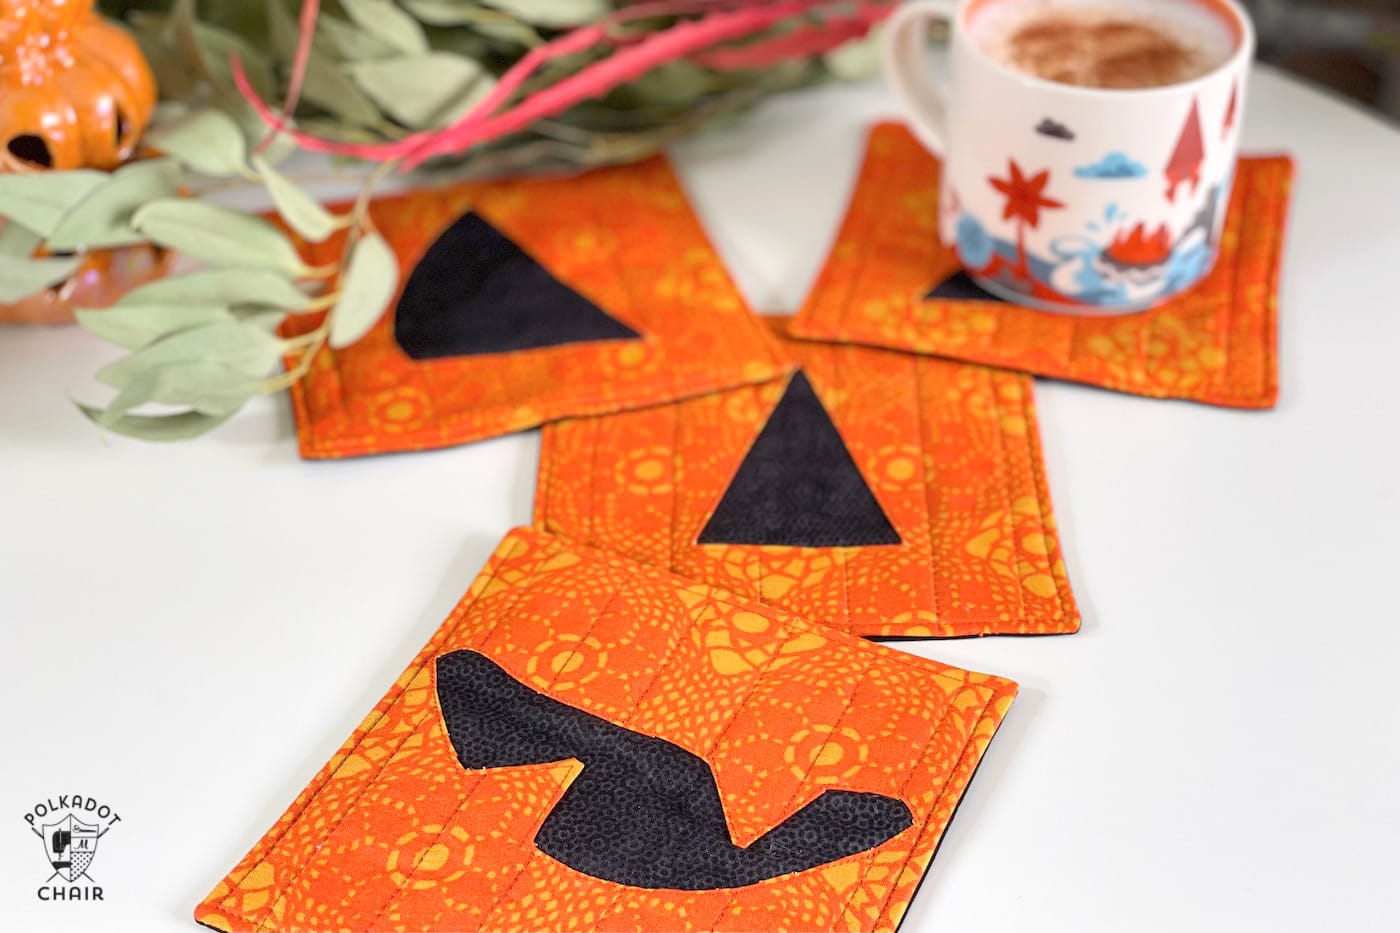
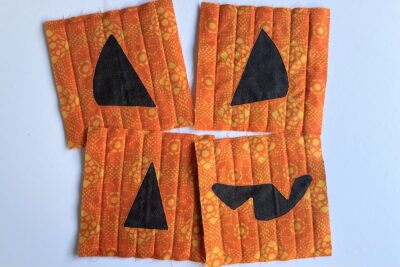
Use our fun mix-and-match pumpkin face sewing patterns to create a set of quilted mug rugs (or quilted coasters) that, when used together, create a cute jack-o-lantern!
Although it might seem a little early for a Halloween-themed mug rug, it’s really never too early to start sewing (or at least planning your sewing) for the next holiday.
Our Mug Rug pattern for September is a set of smaller mug rugs that turn into a pumpkin face and can double as a set of quilted coasters!
Pumpkin Mug Rug Pattern
I’ve designed these Pumpkin Face mug rugs as a coordinating set because I think they look like a simple Autumnal project individually, but when they’re grouped together, the “full story” of the set becomes true!
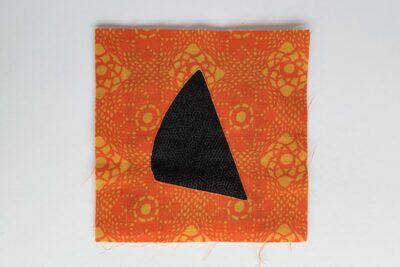
This month’s skills focus is reverse appliqué. This is a fun technique that creates the effect of your appliqué design being in the background of the mug rug rather than in the foreground.
I thought it was especially perfect for these Halloween jack-o-lantern pumpkin face shapes because usually you would be carving the face into a pumpkin, and this felt a little bit like “carving” into the main fabric and leaving a dark space.
Mug Rug Patterns & Technique Focus
- January: Fabric Flash Mug Rug – Using Selvages
- February: First Edition Mug Rug – Fussy Cutting
- March: English Bloom Mug Rug – English Paper Piecing (EPP)
- April: Coffee Cabin Mug Rug – Binding with Quilt Backing
- May: Street Party Bunting – Raw Edge Applique
- June: Big Stitch Mug Rug – Hand Quilting
- July: Summer Sun Mug Rug – Improv Piecing
- August: Heart Mug Rug – Patchwork Piecing
- September: Pumpkin Face Mug Rug – Reverse Applique
- October: Cozy Cup Mug Rug – Big Stitch Binding
- November: Christmas Tree Mug Rug – Free Motion Quilting
How to Get the Pattern Pieces
Instructions
Pumpkin Face Quilted Mug Rug Set
Equipment
supplies
Fabrics:
- 1/4 yard Main Orange Fabric not a fat quarter
- 1 fat eighth Background Black Fabric
- 1/4 yard Backing Fabric
Other:
- 4 pieces Batting 6¼” square
- 1 piece Freezer Paper
- PDF templates fill out the form on this page to have the PDF template emailed to you.
Instructions
Cutting:
- From Orange Fabric cut 7” square (4).
- From Black Fabric cut 4½” x 5½” (2), 5” x 3½” (1), and 7” x 3½” (1).
- From Backing Fabric cut 7” square (4).
- From Freezer Paper cut 5½” square (3) and 6½” square (1).
Construction:
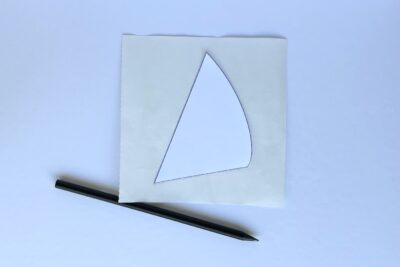
- Print the PDF templates onto heavy paper or thin card and cut them out.
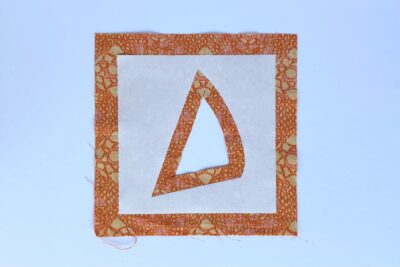
- Take the pieces of Freezer Paper and secure the templates to the center of each one (on the matt, papery side) with a little bit of tape. Draw around the templates using a pencil. The nose and eye fit onto the 5½” square pieces, and the mouth fits onto the 6½” square piece. Don’t forget to trace the eye twice, but flip the template over for the second time.

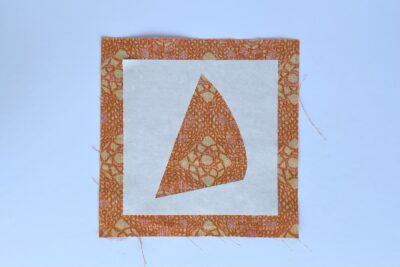
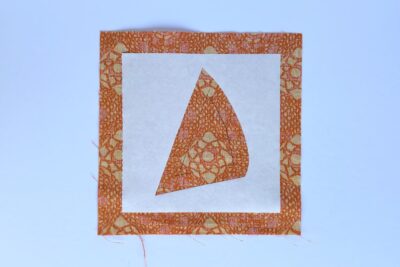
- Cut out the four traced shapes from the center to create a hole in the middle of each Freeze Paper square. Then fuse, using an iron, the four paper squares onto the wrong side of the four Orange Fabric squares, with the shiny/waxy side of the paper against the fabric. Be careful to position the paper squares in the center of the fabric.
- Using a fabric pen, draw a ⅜” (¼” for the mouth shape) seam allowance inside the cutout Freezer Paper shapes.
- Now cut along the drawn lines.
- Carefully snip into the fabric seam allowance inside the Freezer Paper shapes. This is especially important along any curved lines and into any sharp corners.
- Press out the snipped seam allowance on each shape towards the Freezer Paper.
- Remove the Freezer Paper (it should easily peel away) and carefully press again. You should now have a little window in each of the four Orange Fabric squares.
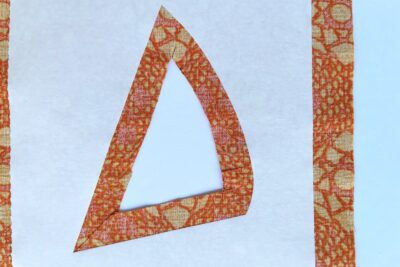
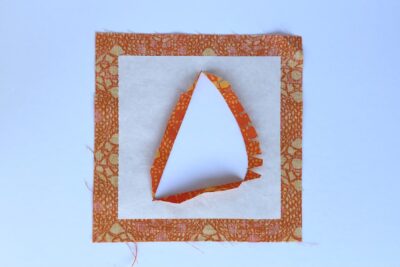
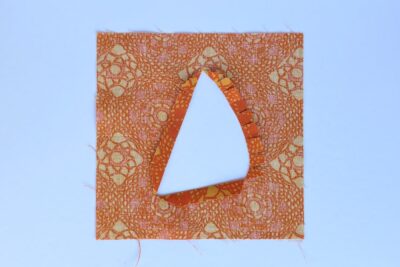
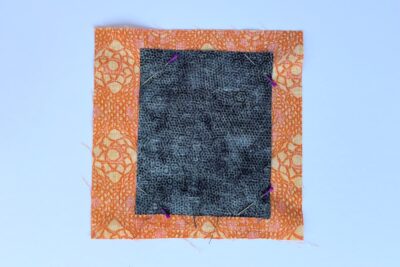
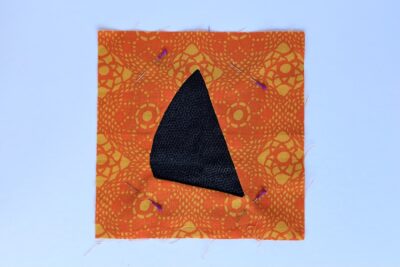
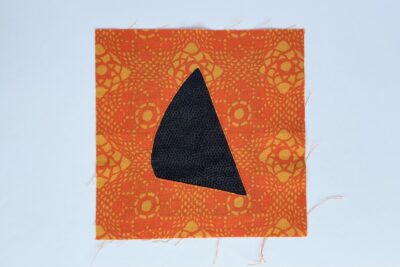
- With the Orange Fabric squares having the wrong side of the fabric facing towards you, take the Black Fabric pieces and pin them right side down to cover the little window shapes. The two 4½” x 5½” rectangles will fit on the eyes, the 5” x 3½” rectangle will fit on the nose, and the 7” x 3½” rectangle will fit on the mouth.
- Flip over the Orange Fabric squares and carefully transfer the pins from step 9 to the front. You don’t have to do this step, but I prefer to be able to remove pins as I’m sewing, and this is much easier when they are on the front.
- Using orange thread, sew close to the edge of the four shapes.
- Press well.

Finishing:
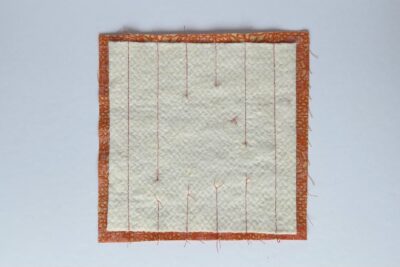
- Baste the batting squares to the wrong side of the Orange fabric squares. The batting squares are smaller than the fabric squares (this is to allow for seam allowance at a later step) so be careful to position the batting squares centrally, with an even amount of fabric showing on all four sides of each square.
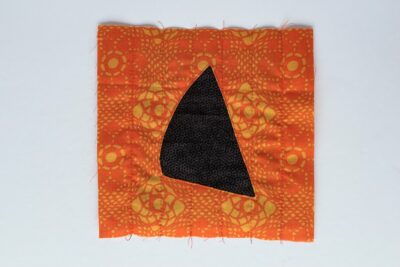
- Mark quilting guidelines onto the right side of the Orange fabric squares. I have used vertical straight-line quilting (using orange thread) spaced at 1” gaps to give the illusion of the natural grooves on a pumpkin.
- Rather than quilting right across the black shapes set into the Orange Fabric squares, I have started each quilting line at the sewn edge of the shapes and then quilted to the raw edge of the square.
- This takes longer because you have to stop and start a lot, but I think it gives a better effect to the “cut out” shapes.
- Keep going until all four pieces are done.
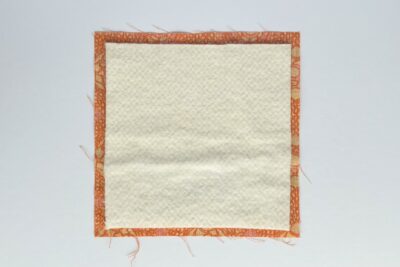
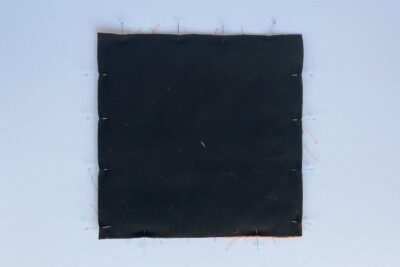
- Take the Backing Fabric squares and pin them right sides together to the quilted squares. Leave a 4” gap at the center of each of the bottom edges.
- Sew around the four edges, using the outside of the batting squares as your seam allowance guide. Backstitch at the start and end of the 4” gap. Trim off the four corners.
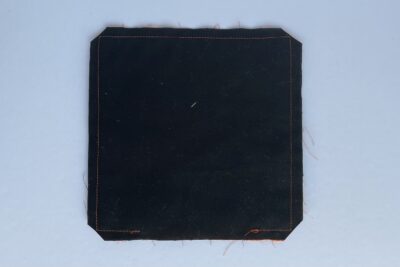
- Carefully turn the mug rugs right side out through the gap in the bottom edges. Poke out the corners and then clip in place the folded seam allowances along the bottom edges.
- Sew around the four edges of each mug rug (about ⅛” away from the edge), making sure you catch the gap along each bottom edge. Press well to finish.
- Grab a pumpkin-spiced latte and enjoy your new Pumpkin Face mug rug set.
About the Designer

Amy lives in the north of England with her husband and son. When she’s not sewing and quilting, Amy can usually be found baking or reading. You can find her on Instagram @amyatthegate
The pumpkin face coasters are adorable and perfect for autumn. Thank you for the pattern.