• Skip to primary navigation
  • Skip to main content
  • Skip to primary sidebar

The Polka Dot Chair logo

  • SEWING
    • Free Sewing Patterns
    • Bag Patterns
    • Costumes
    • Apparel
    • Learn to Sew
    • Beginner Friendly
    • Embroidery Projects
    • Tips & Techniques
    • All Sewing
  • QUILTING
    • Quilt Blocks
    • Learn to Quilt
    • Free Patterns
    • Quilt Patterns
    • All Quilting
  • CRAFTS
    • Disney
    • Cricut
    • Printables
    • All Crafts
  • HOLIDAYS
    • Seasonal Projects
    • Valentine’s Day
    • Easter
    • 4th of July
    • Halloween
    • Thanksgiving
    • Christmas
    • All Holidays
  • TUTORIALS
  • ABOUT
    • About Me
    • My Fabric Collections
    • Published Books
    • Press
    • FAQ’s
    • Contact
  • SUBSCRIBE
  • SHOP
menu icon
go to homepage
subscribe
search icon
Homepage link
  • SHOP
  • ALL PROJECTS
  • SEWING
  • QUILTING
  • CRAFTS
  • HOLIDAY PROJECTS
  • ABOUT
    • Published Books
    • My Fabric Collections
    • Facebook
    • Instagram
    • Pinterest
    • YouTube
  • ×

    Home » Sewing » Accessories

    Bow Front Clutch Sewing Tutorial

    Updated: Jun 16, 2022 by Melissa Mortenson · This post may contain affiliate links · This blog generates income via ads · 20 Comments

    Bow Front Clutch Tutorial on polkadotchair.com

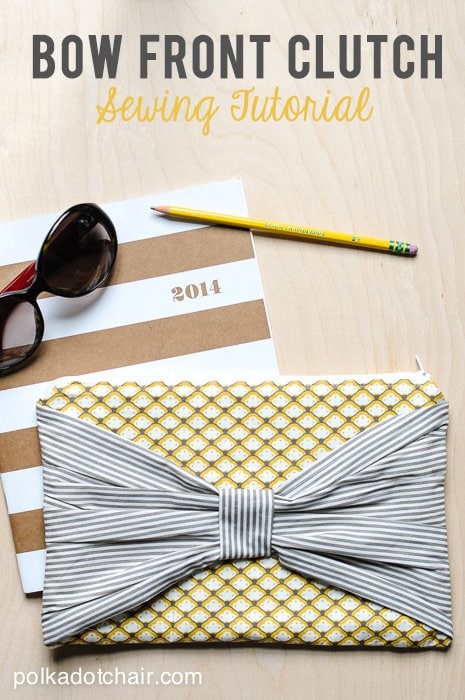
    This clutch is the project that I taught in my class at SNAP Conference last weekend.  I’m posting it here to share will all of you!   I had a great time teaching at SNAP, y’all know I love that conference.  I feel like I was able to really focus in on what I want for my blog and meet so many fabulous people.I always leave that conference on such a high, which is why I like it.  Lots of great positive energy. I’ll share more about the conference and the class I taught later this week but today I thought I’d share the sewing tutorial for the clutch with you.

    To make it you’ll need (click the links to buy the exact supplies to make the clutch, affiliate links may be included) 

    2 pieces of fabric 8” x 12” for clutch outside – Riley Blake Lost and Found 2 Shell Yellow

    2 piece of fabric 8” x 12” for clutch lining – Riley Blake Lost and Found 2 Hexagon Yellow

    1 12” or 14″ zipper – Coats & Clark Coil Separating Zipper 14″ White

    1 piece 9” x 14” for the bow – Riley Blake Lost and Found 2 Stripe Grey

    1 piece 3” x 5” for the bow center

    2 pieces of fusible fleece cut to 8” x 12” – Pellon Fusible Fleece

    2 pieces of Shape Flex interfacing cut to 8″ x 12″Pellon SF101 Shape-Flex Woven Fusible Interfacing White

    Bow Front Clutch Tutorial on polkadotchair.com


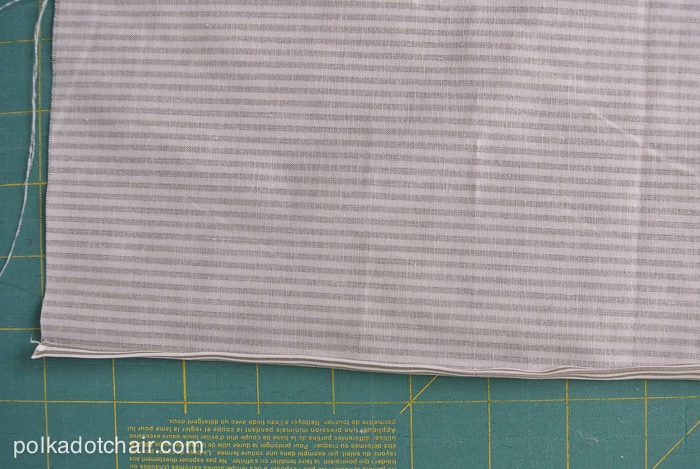
    Fold under the raw edge of the long side of the bow piece a scant ¼’’

    Fold over again. Press in place and stitch along the fold.

    Repeat for other long side of the bow piece.

    Bow Front Clutch Tutorial on polkadotchair.com


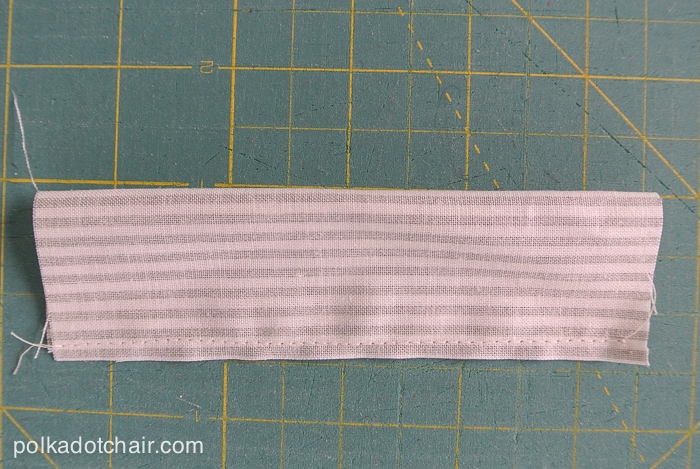
    Fold the 3’’ x 5’’ stripe piece of fabric in half lengthwise. Stitch with a ¼’’ seam.

    Turn right side out and press so that the seam is in the center.

    Bow Front Clutch Tutorial on polkadotchair.com


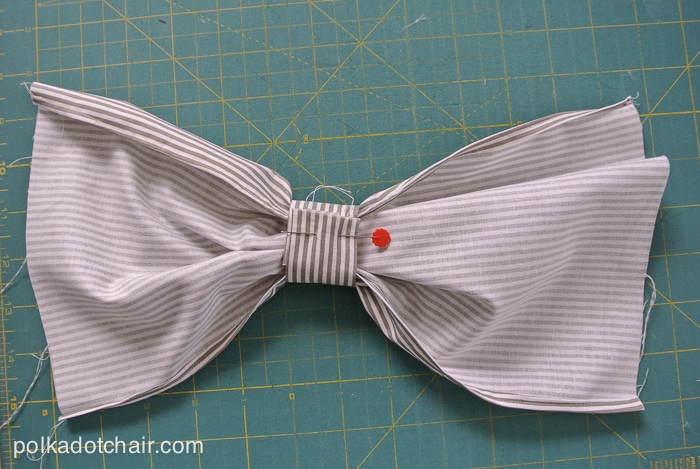
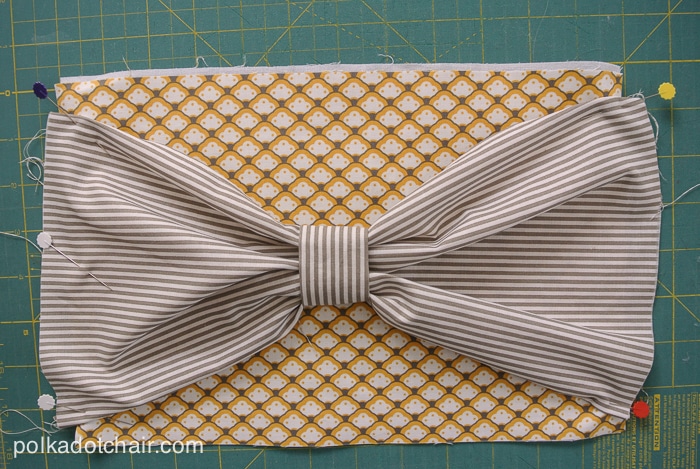
    Find the center of the bow piece. Mark it.  Gather the bow loosely and wrap the sewn bow center piece around the bow.

    Pin in the back. You’ll have an opportunity to make the bow “pretty” at the end.

    Bow Front Clutch Tutorial on polkadotchair.com

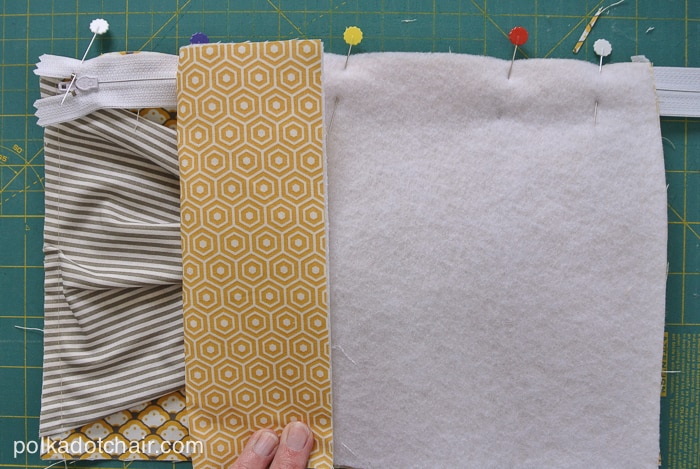
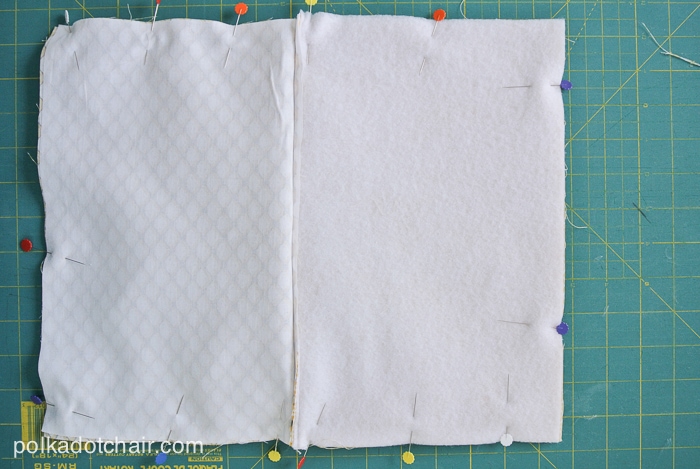
    Apply the Shape Flex Interfacing to the wrong side of the two clutch outside pieces. Apply the Fusible Fleece to the wrong side of the two clutch lining pieces.

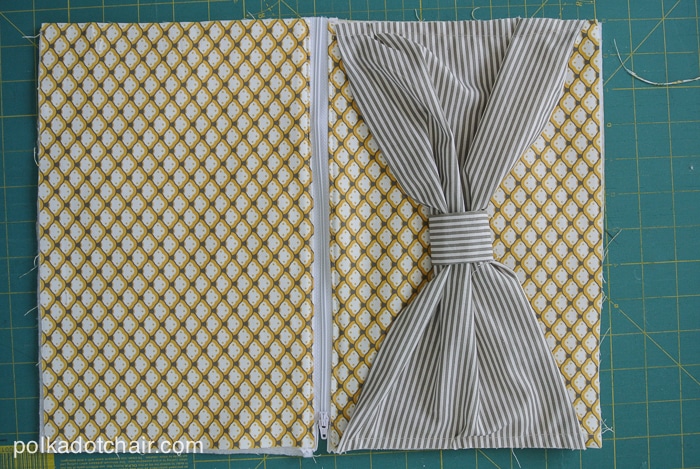
    Pin the bow to one of the clutch outside pieces. The bow corners will be folded under and ½” in from the top and bottom of the clutch piece. The bow will be bigger than the clutch at the centers.

    Bow Front Clutch Tutorial on polkadotchair.com

    Stitch with the bow facing the feed dogs of the sewing machine using a basting stitch close to the edge of the clutch piece.

    Bow Front Clutch Tutorial on polkadotchair.com


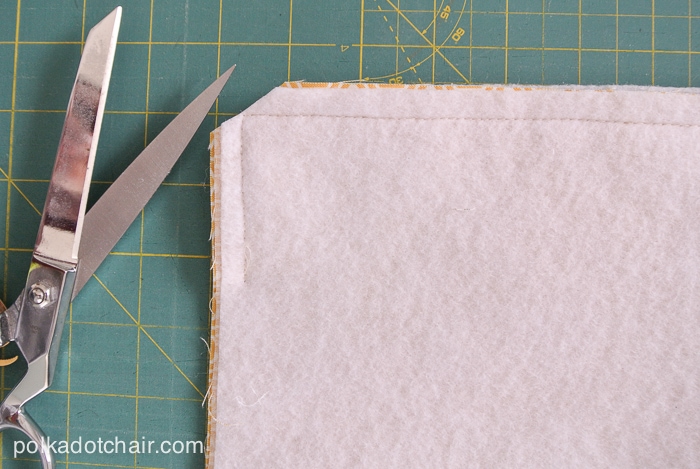
    Trim the bow flush with the edges of the clutch

    Bow Front Clutch Tutorial on polkadotchair.com


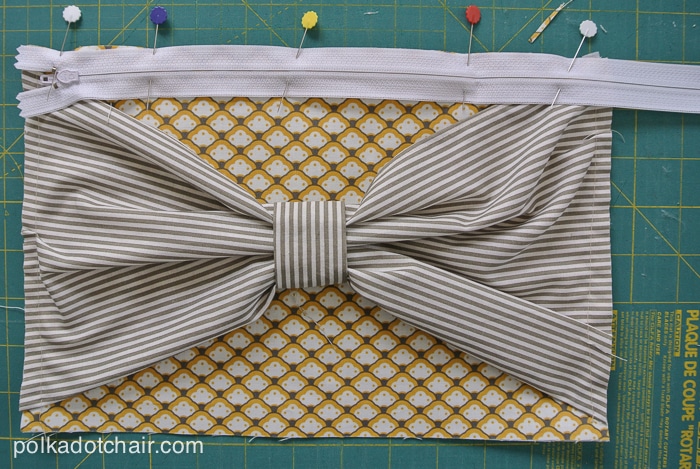
    Pin the right side of your zipper to the right side of the clutch top. The raw edge of the zipper even with the raw edge of the clutch.

    The zipper will be longer than the clutch- that’s okay.  Pin it so that the start of the zipper is even with the edge of the clutch.

    Bow Front Clutch Tutorial on polkadotchair.com


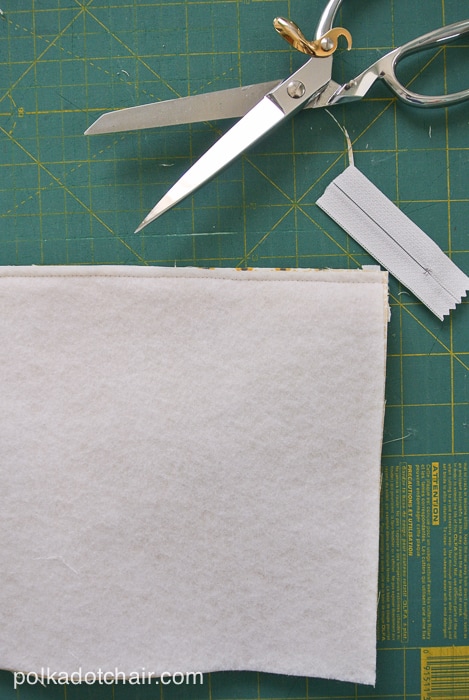
    Trim off the excess zipper.  Press the seams of the clutch away from the zipper.

    Top stitch along both sides of the zipper with your zipper foot.

    Bow Front Clutch Tutorial on polkadotchair.com


    Unzip the zipper ¾ of the way. NOT ALL THE WAY!

    Pin the clutch front pieces together right sides facing, Pin the clutch lining pieces together right sides facing.  Fold the zipper towards the clutch lining. With a ½” seam allowance stitch around the entire clutch leaving a 4’’ opening in the bottom of the lining piece.

    Bow Front Clutch Tutorial on polkadotchair.com


    Trim off all 4 corners of the clutch.

    Bow Front Clutch Tutorial on polkadotchair.com


    Trim the seam allowance of the lining sections of the clutch down to ⅛”.  Turn right side out and press.

    Hand or machine stitch the opening in the lining closed. Arrange the bow on the front so that you like how it looks and hand stitch the bow center in place.
    Connect with me:

    follow-on-pinterest-button

    logo_facebook

    Follow on Bloglovin

    More Projects You'll Love!

    • Big Bow Clutch; A DIY clutch purse pattern and free sewing tutorial. How to make an easy fabric clutch with a bow on the front. Fun sewing gift ideas.
      Big Bow Clutch; A DIY Clutch Sewing Tutorial
    • Bow Pillow Sewing Pattern by Melissa Mortenson of polkadotchair.com
      Bow Pillow Sewing Tutorial
    • Bow Tie Pillow sewing pattern featuring Wonderland Two fabrics by Melissa Mortenson for Riley Blake Designs
      Bow Tie Pillow Sewing Pattern
    • Summer Sling Bag Sewing Tutorial and Pattern by Ameroonie Designs
      Summer Sling Bag Sewing Tutorial
    « Free Printables Perfect for a Kentucky Derby Party
    3 Must-Know Tips for Beginner Quilters »

    • Share
    • Email

    About Author

    Melissa Mortenson

    Melissa Mortenson is a blogger, designer, and content creator. She is the Polka Dot Chair blog founder and has been sharing fresh and creative ideas with readers since 2008. She is the author of “Project Teen, Handmade Gifts your Teen will Actually Love.” Her work and designs have been featured on HuffPost, TODAY, Pioneer Woman, HGTV, BuzzFeed, Better Homes & Gardens, and many other established publications. Her first fabric line, “Derby Style,” debuted in January 2015 through Riley Blake Designs.  Additional fabric collections have followed it in subsequent years. A mom of 3, she considers herself lucky to be living in Kentucky.

    Reader Interactions

    Comments

    1. Kelly says

      April 28, 2014 at 3:59 pm

      This is adorable!

      Reply
    2. Melanie says

      April 28, 2014 at 5:51 pm

      This is SO cute, Melissa! Love the fabric combo.

      Reply
    3. Becca says

      April 29, 2014 at 6:34 pm

      Super cute! I made clutches for my bridesmaids with a much simpler pattern. I want to try this one though!

      Becca,
      BexBernard.com

      Reply
    4. R.M. says

      June 17, 2014 at 7:34 am

      How does the lining fit into the clutch? (I’m a visual learner and having trouble visualizing how that works.)

      Also, one of the pictures indicates that the right side of the zipper is on the right side of the clutch and the wrong side of the zipper is on the right side of the lining. However, I see nothing in the instructions regarding this.

      Thanks for your help!

      Reply
      • Melissa Mortenson says

        June 19, 2014 at 4:52 pm

        It works… it’s one of those things that is really hard to visualize.. I had a hard time the first few zip clutches I made- the lining just gets sewn in as you go… just go slowly one step at a time and you’ll be fine..

        Reply
    5. Amanda says

      June 29, 2014 at 7:09 pm

      Made this today using black satin for the boday and a rose print for the bow. Loving it! I also made a pocket inside with slots for my lipstick and lip gloss. No more digging for my stuff in the dark!

      Reply
    6. amanda says

      August 08, 2014 at 10:37 pm

      Are you supposed to sew the lining pieces to the zipper before pinning and sewing the sides?

      Reply
      • Melissa Mortenson says

        August 12, 2014 at 11:31 am

        You sew the lining at the same time you sew the outside fabric to the zipper- it’s behind the zipper

        Reply
    7. Alicia says

      December 26, 2014 at 11:37 am

      This tutorial was great! I made 6 of these for christmas presents this year. I adapted the measurements and made 2 smaller ones for cell phone and a few things.

      Thank You!

      Reply
    8. Caity says

      July 29, 2015 at 11:42 pm

      I’m 17 years old & sewing is one of my many hobbies. This clutch is so easy to make & it looks gorgeous. I’m so happy with it. And honestly, I stopped following the instructions about halfway through & started to do my own thing… But it still worked out & I couldn’t be happier. Many thanks.

      Reply
    9. Nikki Metzger says

      August 18, 2019 at 5:15 pm

      Hi! I’m so excited to make this! Can you explain the purpose of using two different types of interfacing?

      Reply
      • Melissa Mortenson says

        August 26, 2019 at 10:36 am

        One is light and one is heavier. It’s for balance.

        Reply

    Leave a Reply Cancel reply

    Your email address will not be published. Required fields are marked *

    This site uses Akismet to reduce spam. Learn how your comment data is processed.

    Primary Sidebar

    Hello! It’s nice to meet you.

    I’m Melissa. I like to design things, like fabric, printables, and projects.

    I’m also a Mom and a Maker. I am like most of you, just trying to do my best every day. Some days I succeed, many days I fail.  I find joy in creating, if you do too, then I hope that you find something here bring a little “happy” to your life.  Find out more about me here.

    COPYRIGHT POLICY

    All my images and text are copyrighted. You may NOT use any images from this site in any kind of Video (this includes YouTube). If you would like to feature my work, you may use ONE (1) NON-COLLAGED image and must “follow” link back to my original blog post. You may NOT edit, crop, or change my images in any way without written permission. You MAY NOT print out or copy and distribute any text, images or patterns from this site. All patterns, content, instructions, and templates are for personal use ONLY! Thank you! Violators will be reported.

    Footer

    ↑ back to top

    About

    • Privacy Policy
    • Disclaimers
    • About Melissa

    Newsletter

    • Sign Up! for emails and updates

    Contact

    • Contact
    • FAQ
    • Press
    • Fabric Collections

    Welcome to the Polka Dot Chair! Here you’ll find easy, step-by-step, sewing, quilting, and crafting projects. We design projects for Makers of all skill levels. Beginners are welcome!

    DISCLAIMER:

    While every effort has been made to ensure the accuracy of the content on this website, the information is made available without warranty of any kind. The Polka Dot Chair accepts no responsibility or liability, whether direct or indirect, as to the currency or accuracy of the information, nor any consequence of its uses. This website is not intended to substitute the advice of a professional.

    Copyright © 2020 Polka Dot Chair

    [ Placeholder content for popup link ] WordPress Download Manager - Best Download Management Plugin