Log Cabin Quilted Christmas Pillow Pattern
Learn how to turn a Log Cabin quilt block into a festive quilted Christmas Pillow with our free sewing pattern.
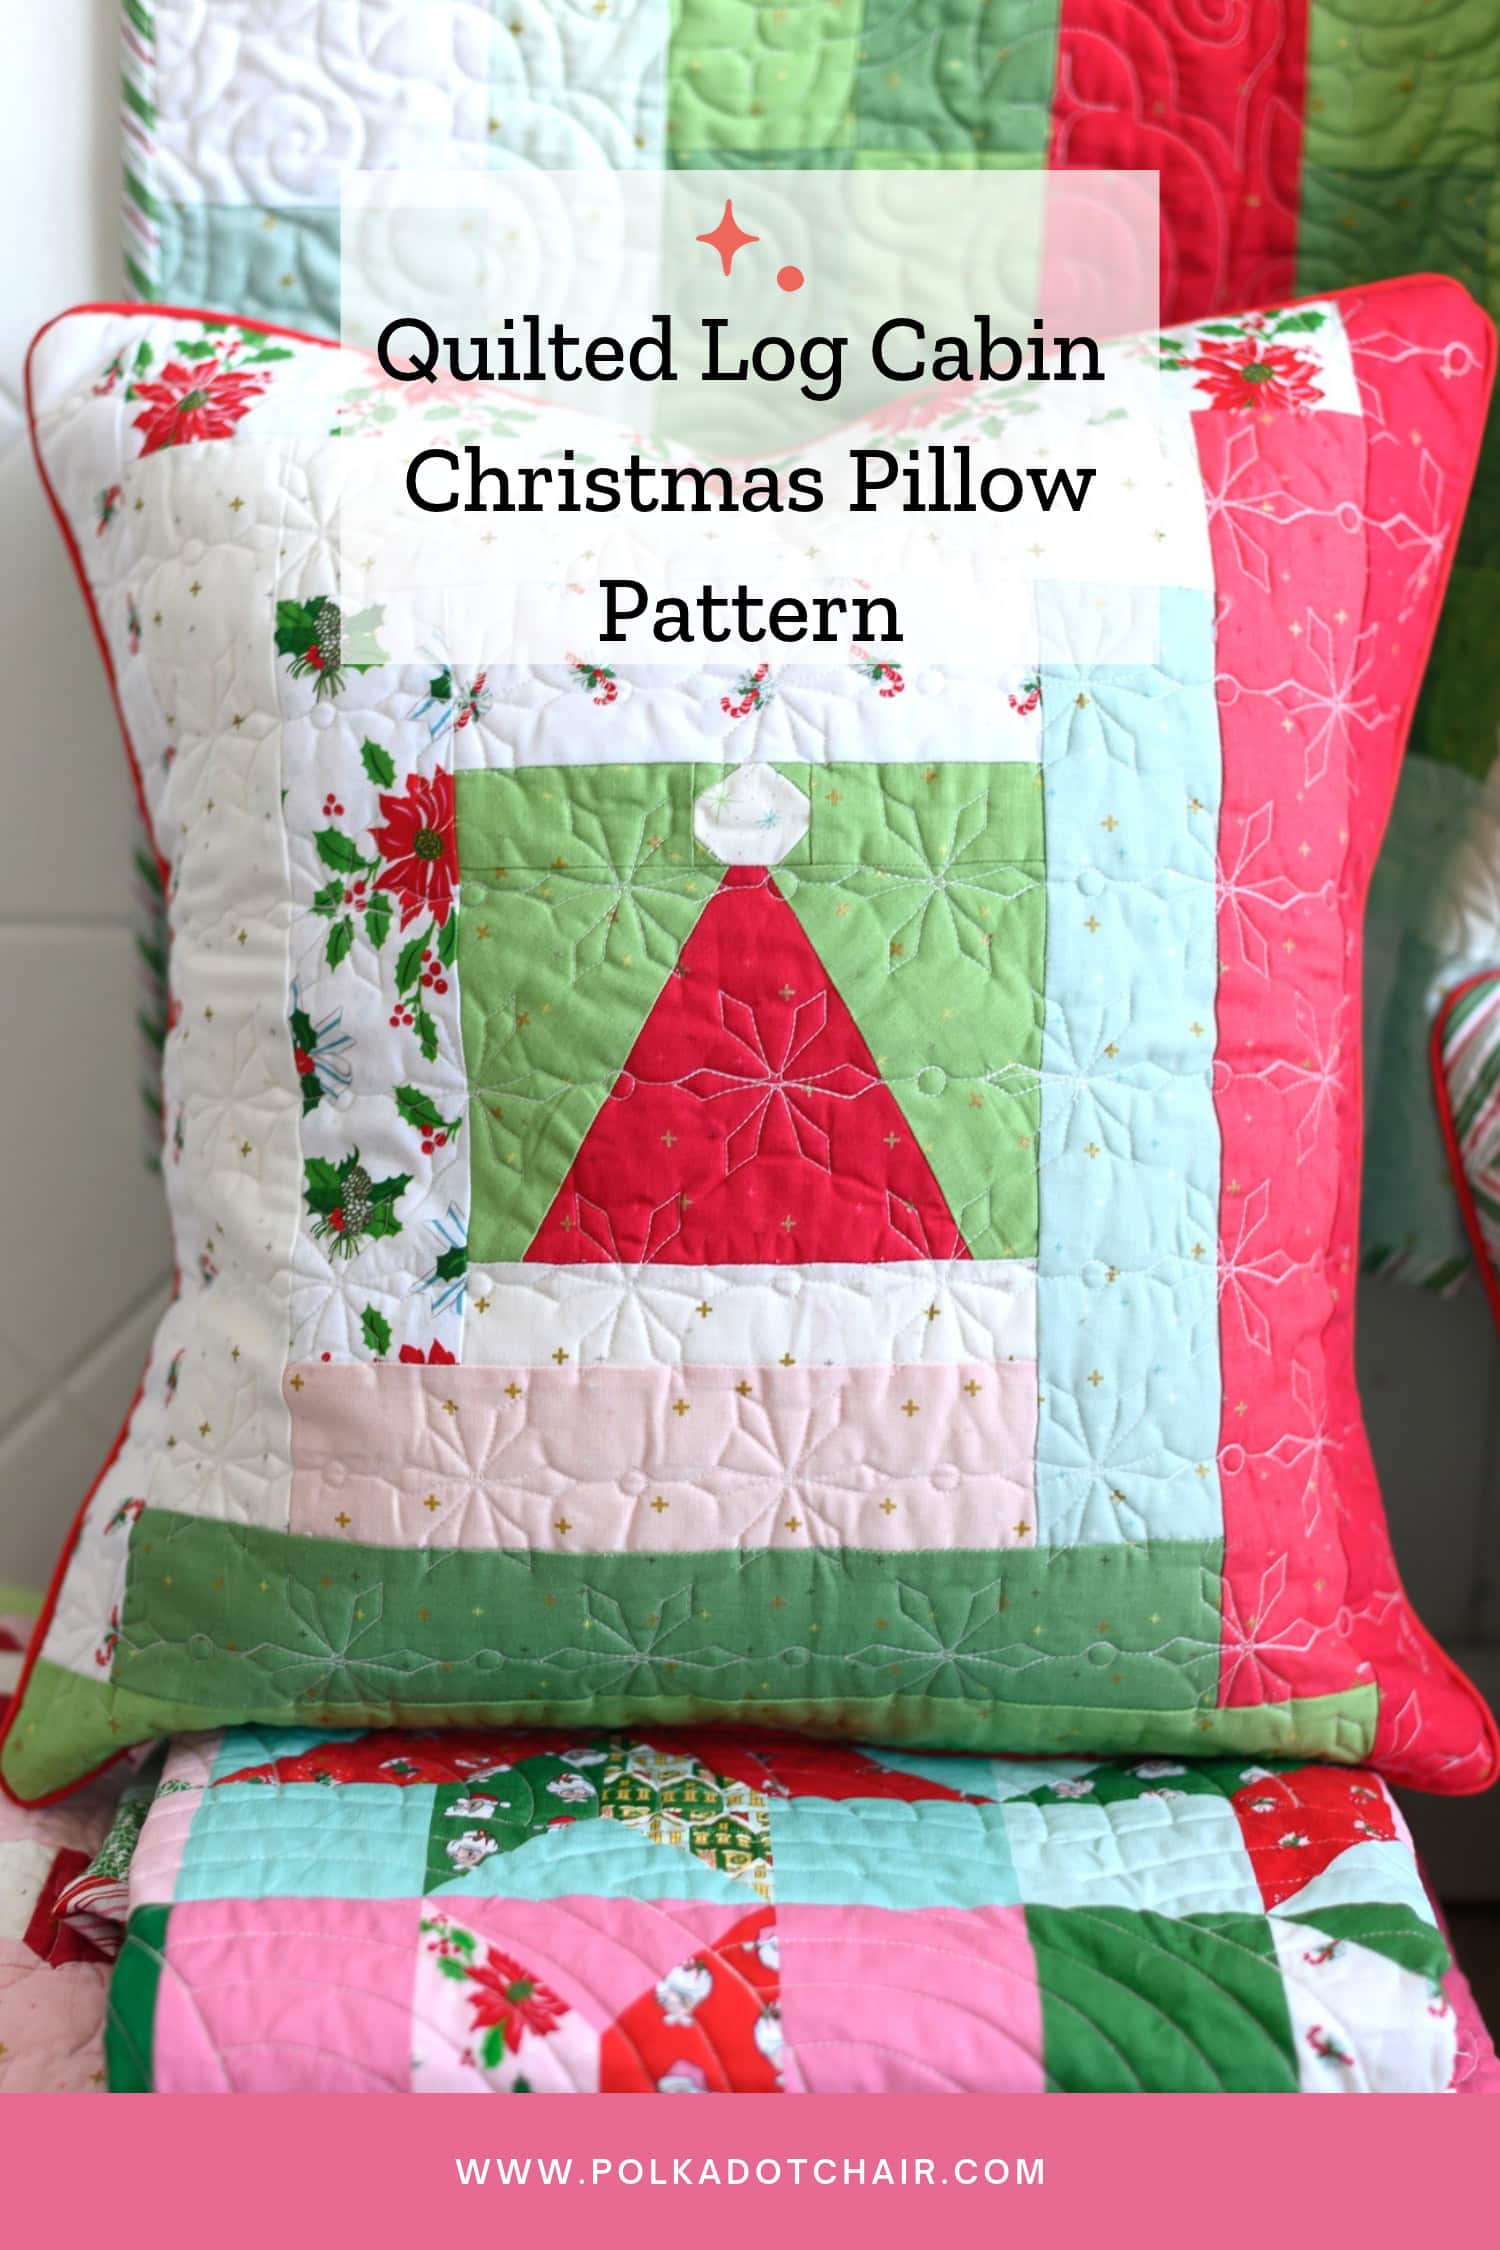
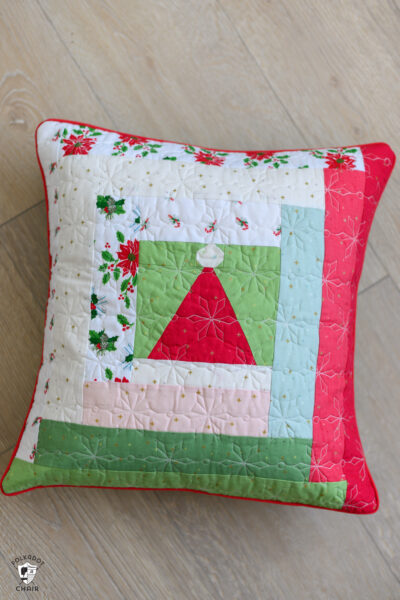
A little Santa hat and a classic Log Cabin block make a cute pair on this quilted Christmas pillow.
I love how the strips in the Log Cabin block give you room to mix in a few favorite holiday prints, even if you only have a small piece of each one left. I’d pick one red print for both blocks to tie them together, then add a white or cream fabric for the Santa hat brim and pom-pom.
This is a fun way to use two quilt blocks from your stash or try out a new block before committing to a whole quilt.
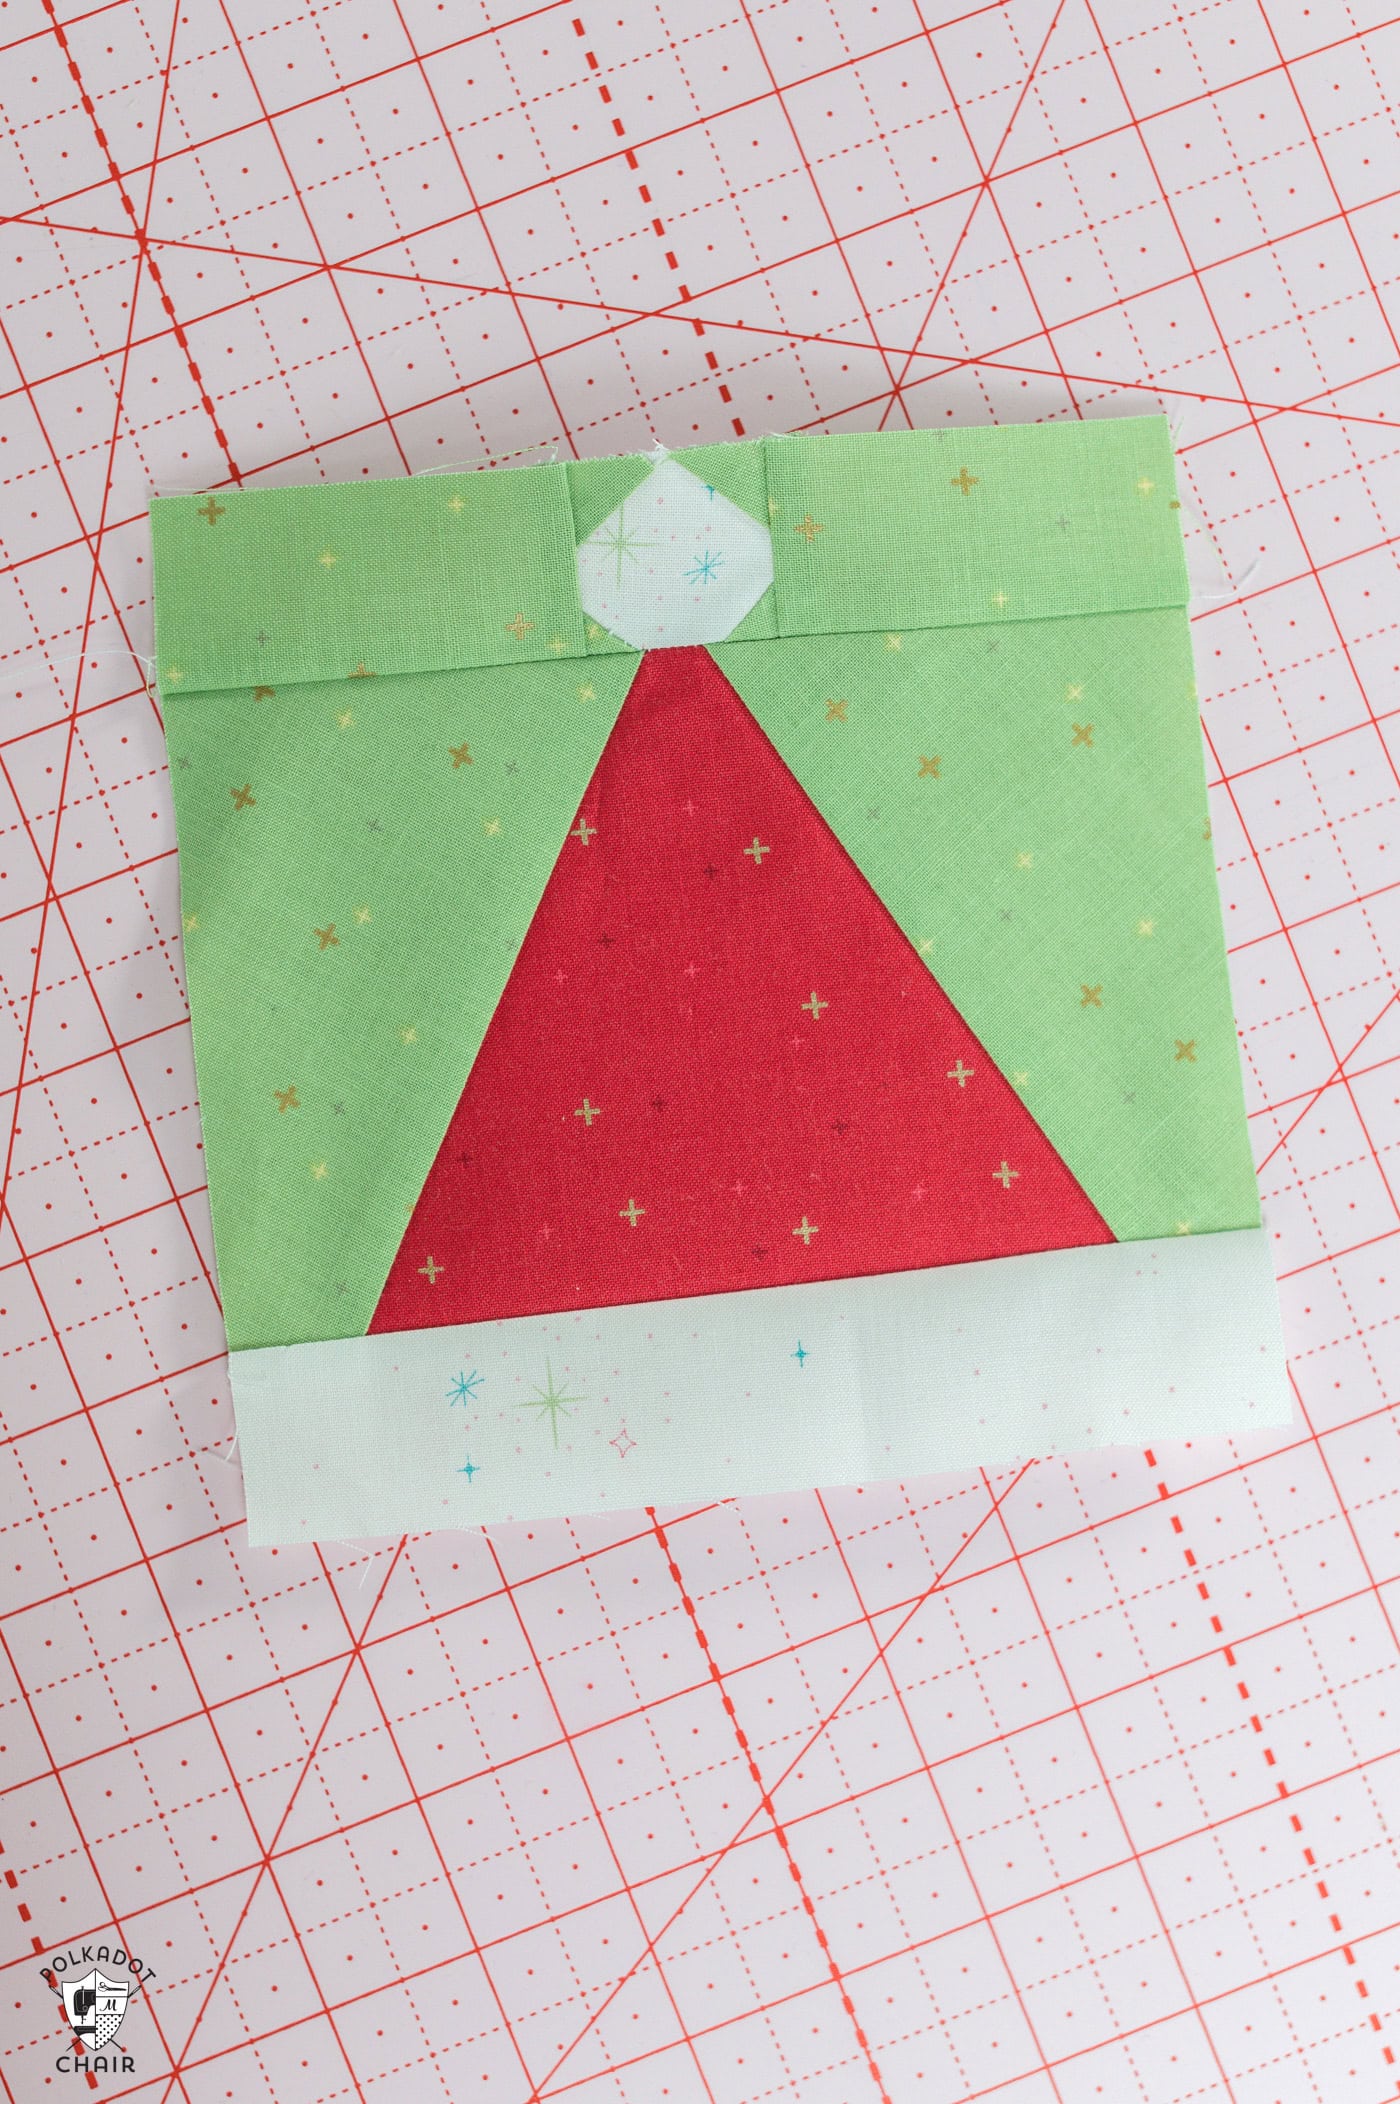
You can use any 6” finished-size quilt block for the center of the pillow. I chose the FPP Mini Santa Hat pattern I designed a couple of years ago!
You can still get it on our site; if you prefer, you can use any block pattern you like or even a 6 1/2” x 6 1/2” piece of a novelty Christmas fabric!
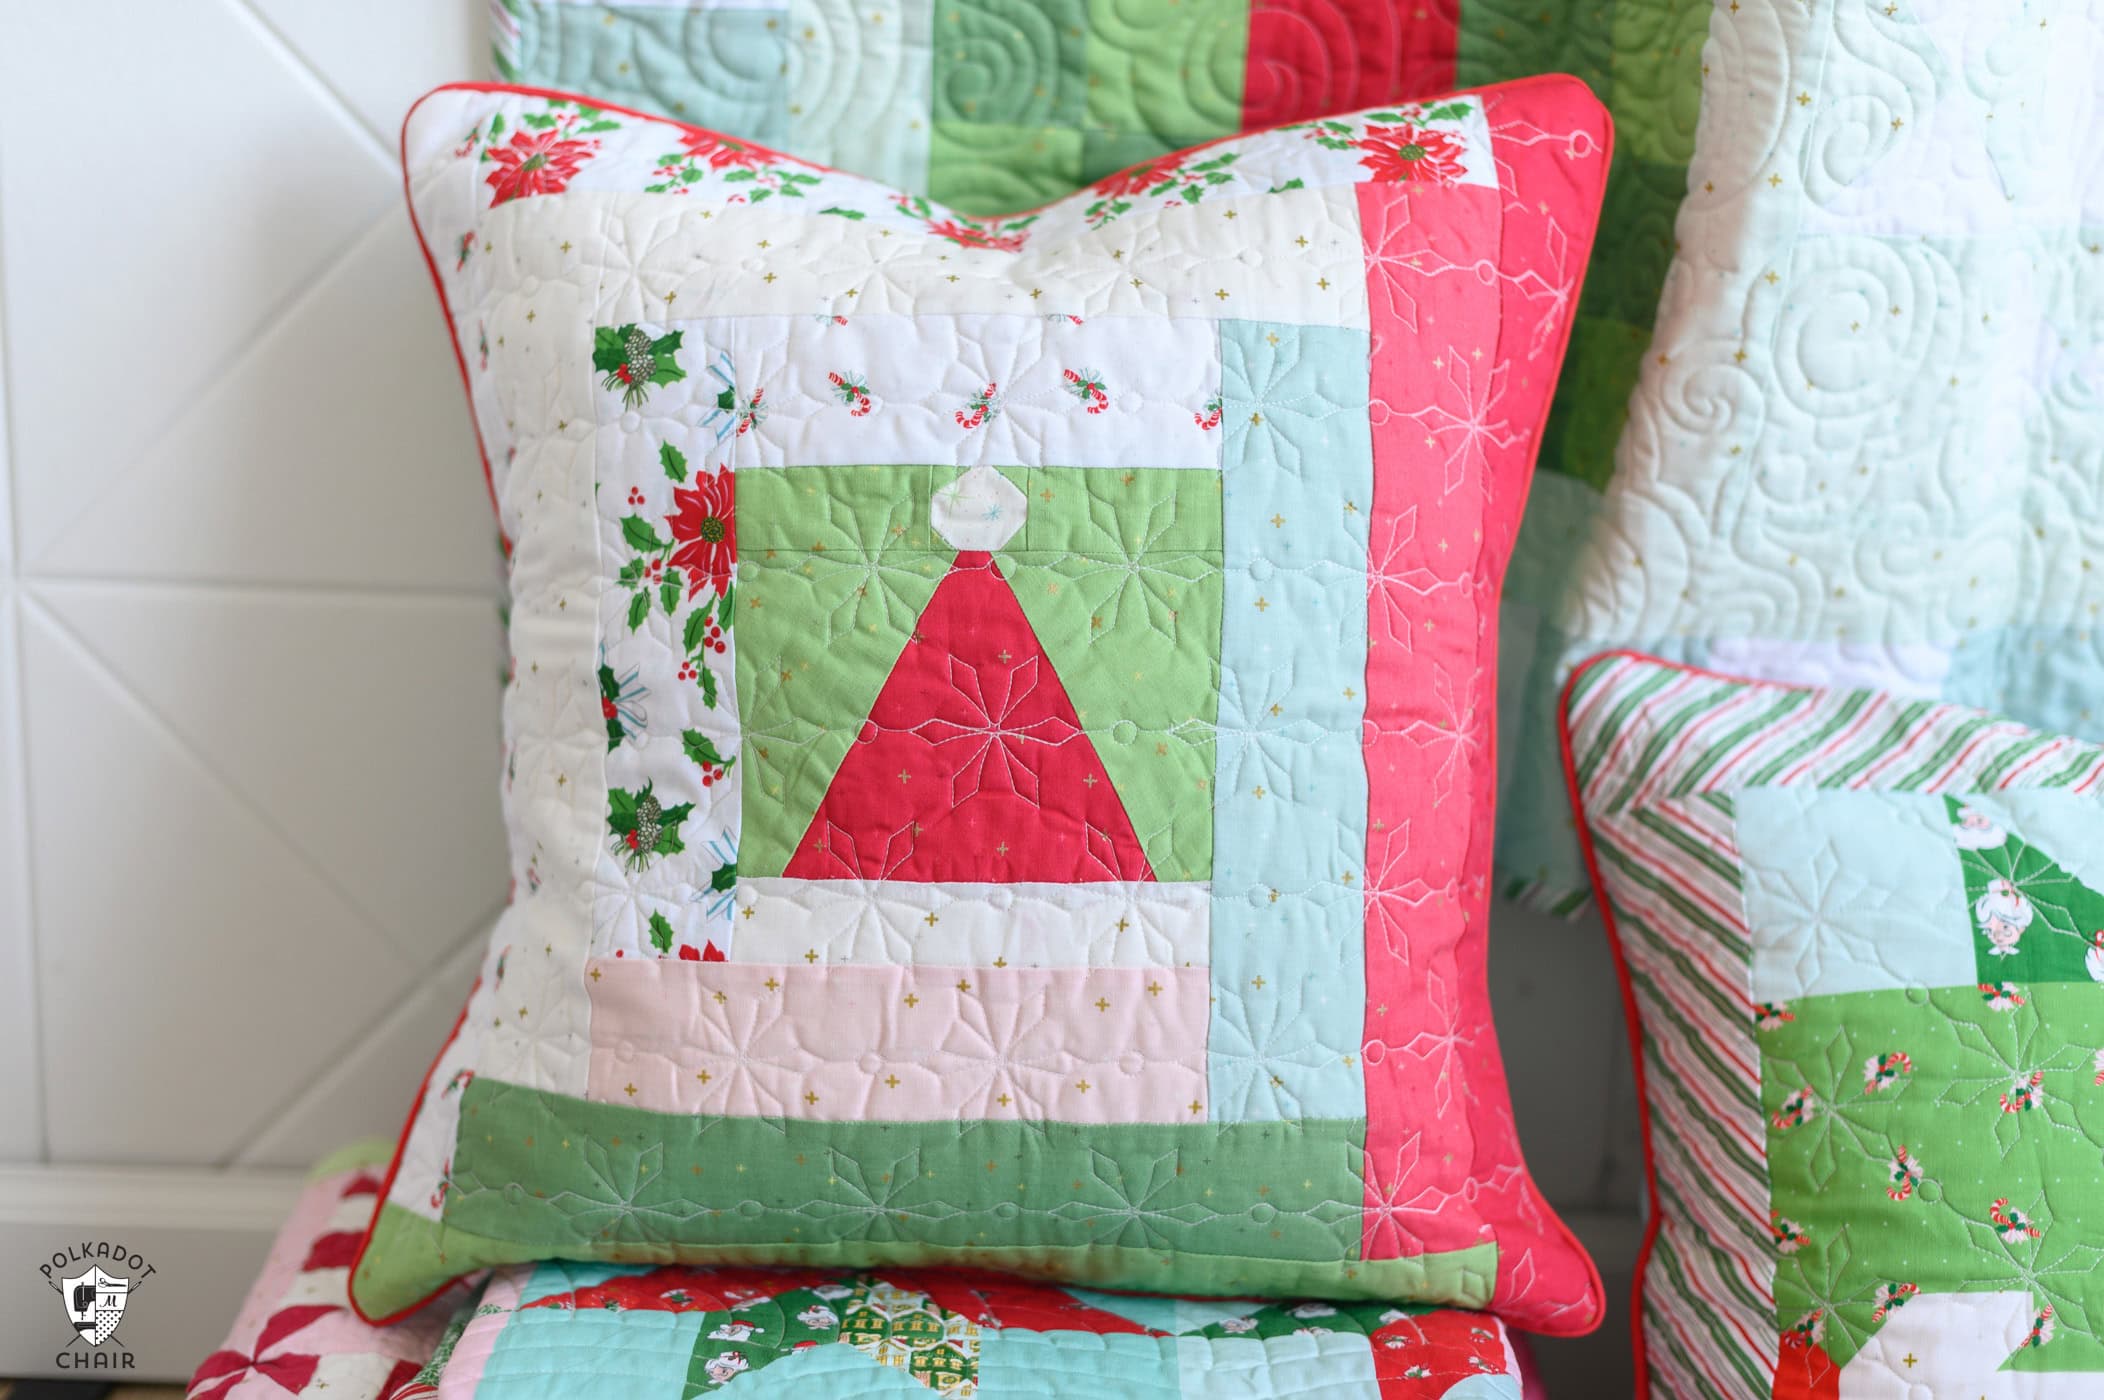
Pillow Details:
- 18″ x 18″ Finished Size Pillow – use an 18″ pillow insert
- Quilt Block in Center: Santa Hat FPP Pattern (free on our site)
- Features a Zippered Back
- Quilt Pantograph: Sweater Weather
- Edge finished with Piping – check out our piping tutorial!
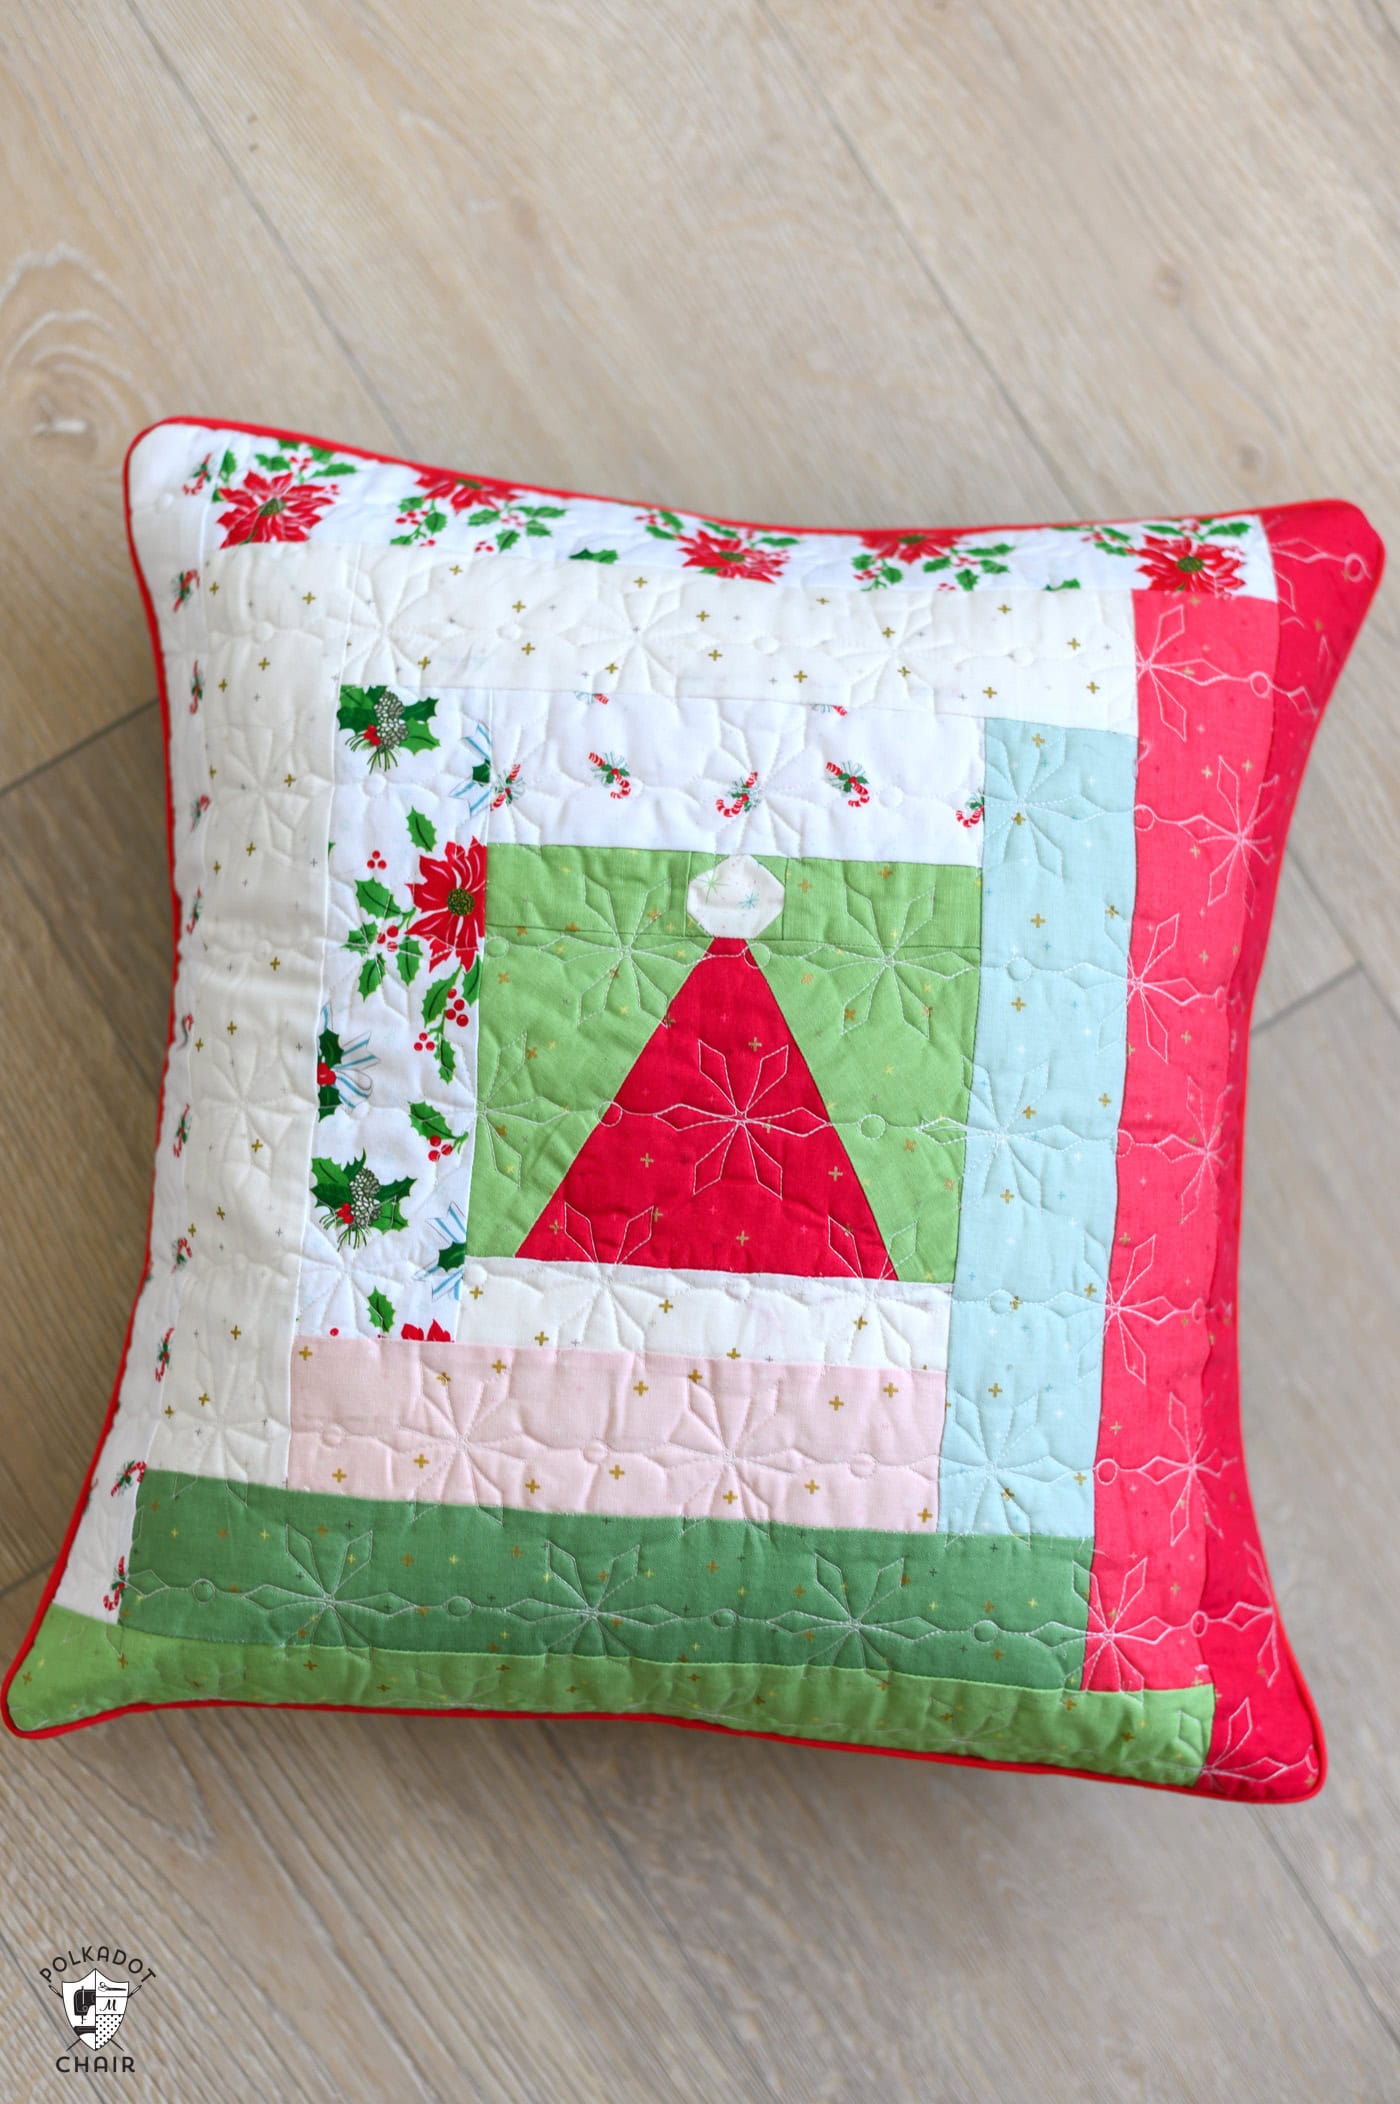
Fabrics Used:
Light Fabrics: Prints from Claus & Co Fabric Collection & Sparkler in White
Santa Hat Block: Sparkler Fabrics by Riley Blake in Red, Riley Green & White
Dark Fabrics: Sparkler Fabrics by Riley Blake in Songbird, Baby Pink, Raspberry, Clover, Riley Green, and Red.
If you’re new to Foundation Paper Piecing, be sure to check out:
If you need help finishing your pillow, be sure to check out:
- 4 Ways to Finish the Edge of a Quilted Pillow
- How to add a Zipper to the Back of a Pillow
- How to Machine Quilt on a Home Sewing Machine
Log Cabin Quilted Pillow Pattern
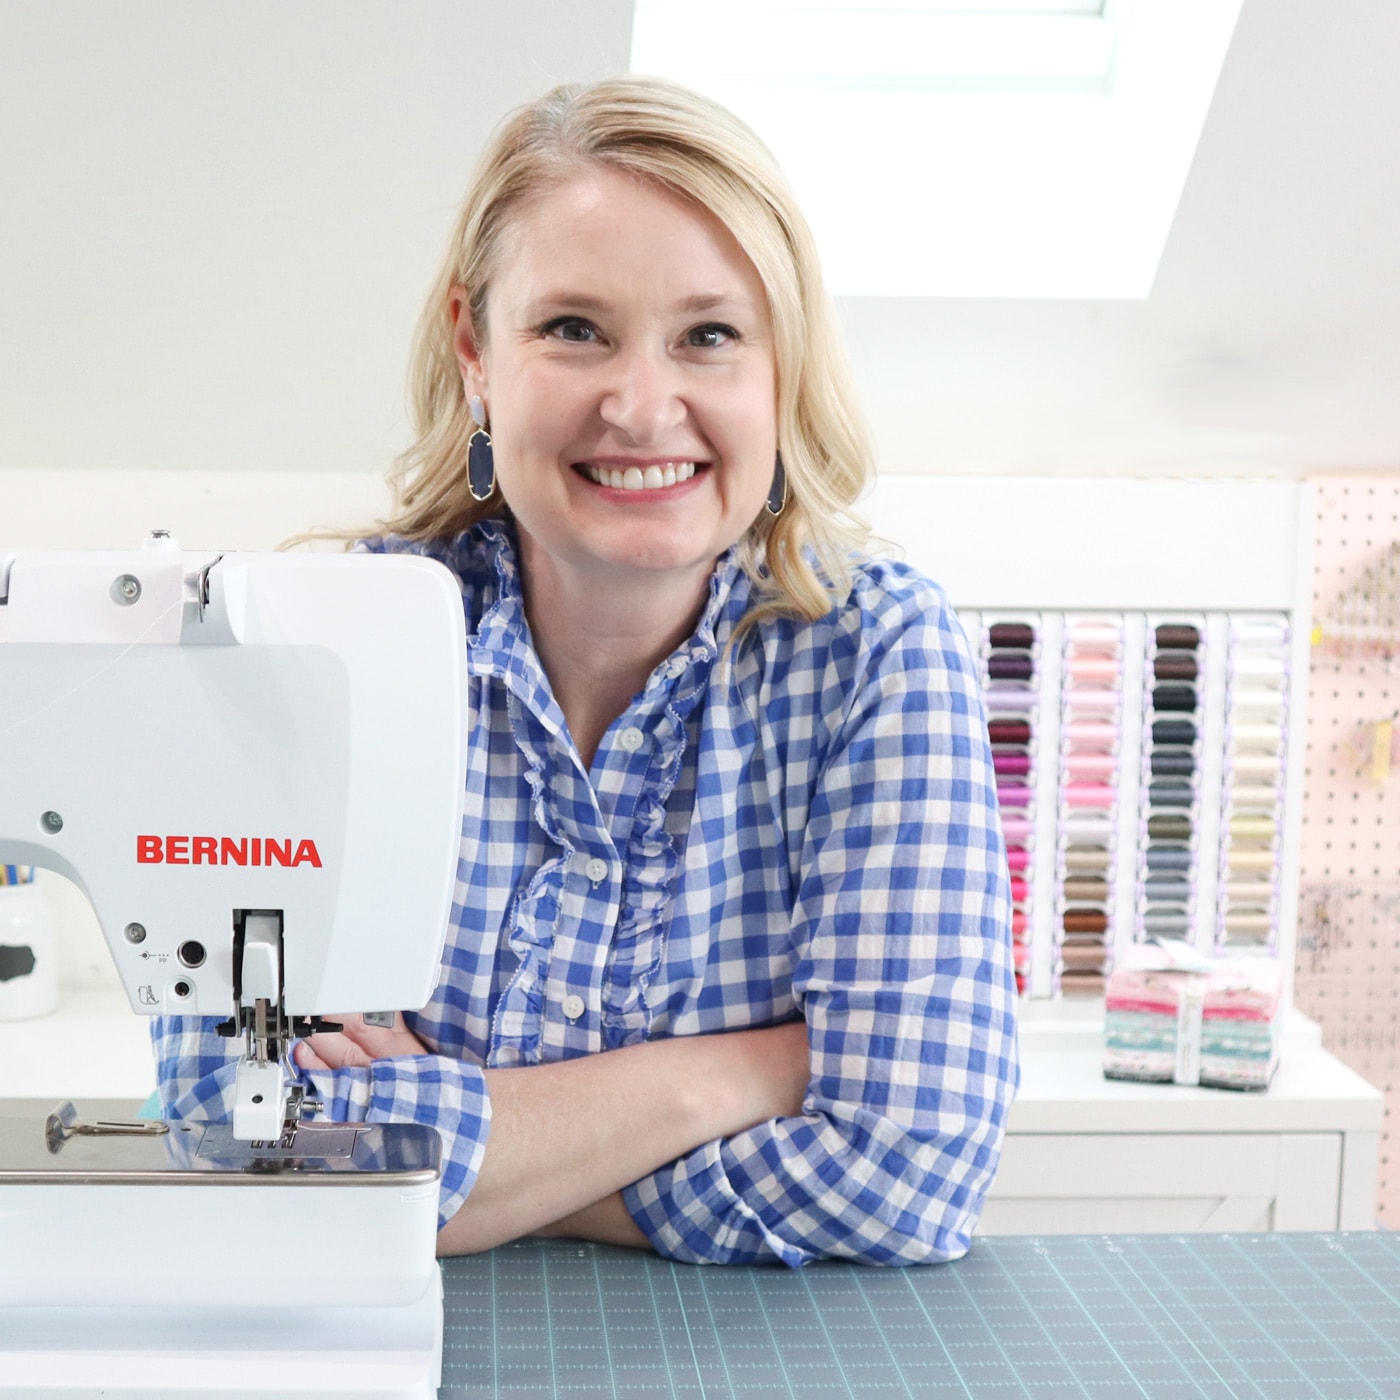
Equipment
supplies
- 6 pieces Light Fabric in a variety of prints each at least 2 1/2" x wide by 18 1/2"
- 6 pieces Darker Fabric in a variety of prints each at least 2 1/2" x wide by 18 1/2"
- 1 Quilt Block For Center of Block 6 1/2" x 6 1/2" before finishing – I used my Santa Hat FPP Pattern –
- 1 1/2 Fabric For pillow back
- 1 package Piping if desired for pillow trim
Instructions
Cutting:
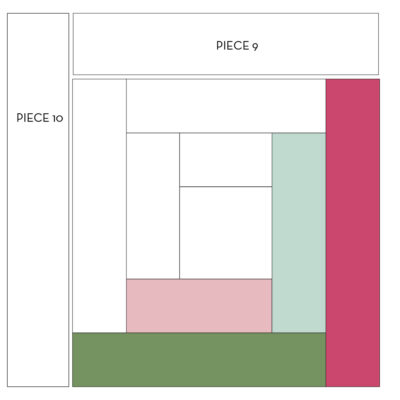
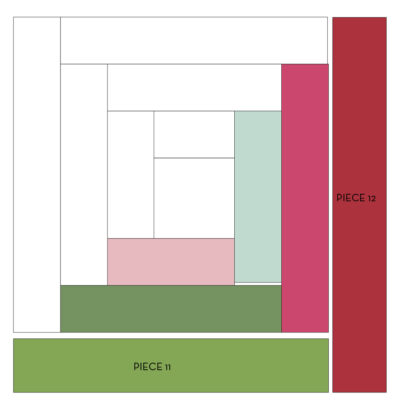
- Light Fabric:PIECE 1: 2 1/2" x 6 1/2"PIECE 2: 2 1/2" x 8 1/2"PIECE 5: 2 1/2" x 10 1/2"PIECE 6: 2 1/2" x 12 1/2"PIECE 9: 2 1/2" x 14 1/2"PIECE 10: 2 1/2" x 16 1/2"Dark Fabric:PIECE 3: 2 1/2" x 8 1/2"PIECE 4: 2 1/2" x 10 1/2"PIECE 7: 2 1/2" x 12 1/2"PIECE 8: 2 1/2" x 14 1/2”PIECE 11: 2 1/2" x 16 1/2"PIECE 12: 2 1/2" x 18 1/2"
Sewing the First Strip:
- Place Piece 1, right side up, along one edge of the central square. Align the edges sew it in place using a 1/4-inch seam allowance, and add Piece 2.

- Press the seam open or towards the strip.

Add Strips Counter Clockwise:
- Sew the strips to the center square, working counterclockwise.
- Next, sew two dark strips, pieces 3 & 4
- Sew pieces 5 & 6
- Sew pieces 7 & 8
- Sew pieces 9 & 10
- Sew pieces 11 & 12

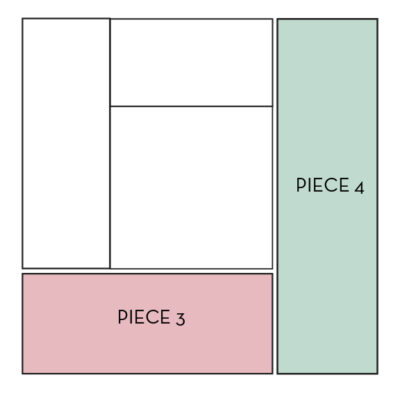
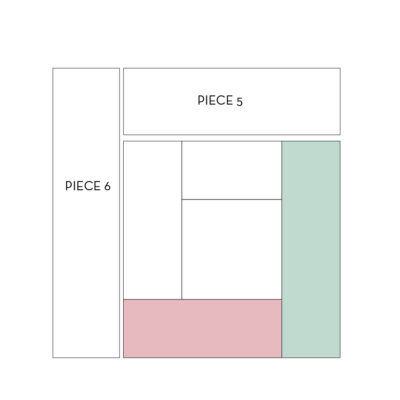
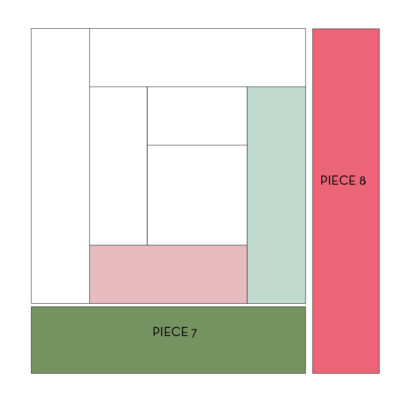
Trimming (Optional):
- Once you've completed the block, you may want to trim it to ensure it's exactly 18 1/2" x 18 1/2". Be careful to maintain the center square's position while trimming.
Finishing:
- After trimming, quilt your block as desired and sew into a pillow. Linked below are a few methods to turn a quilt block into a throw pillow.