Ruffle Edge Doll Quilt Tutorial
Amy from Ameroonie Designs is back with us today, sharing another adorable sewing project! This Ruffle Edge Doll Quilt Tutorial is easy to follow and would be a great sewing project for a beginning quilter (or even a fun project for kids to try to sew themselves). It would also make a great gift. Every baby doll deserves its own quilt or blanket, right?
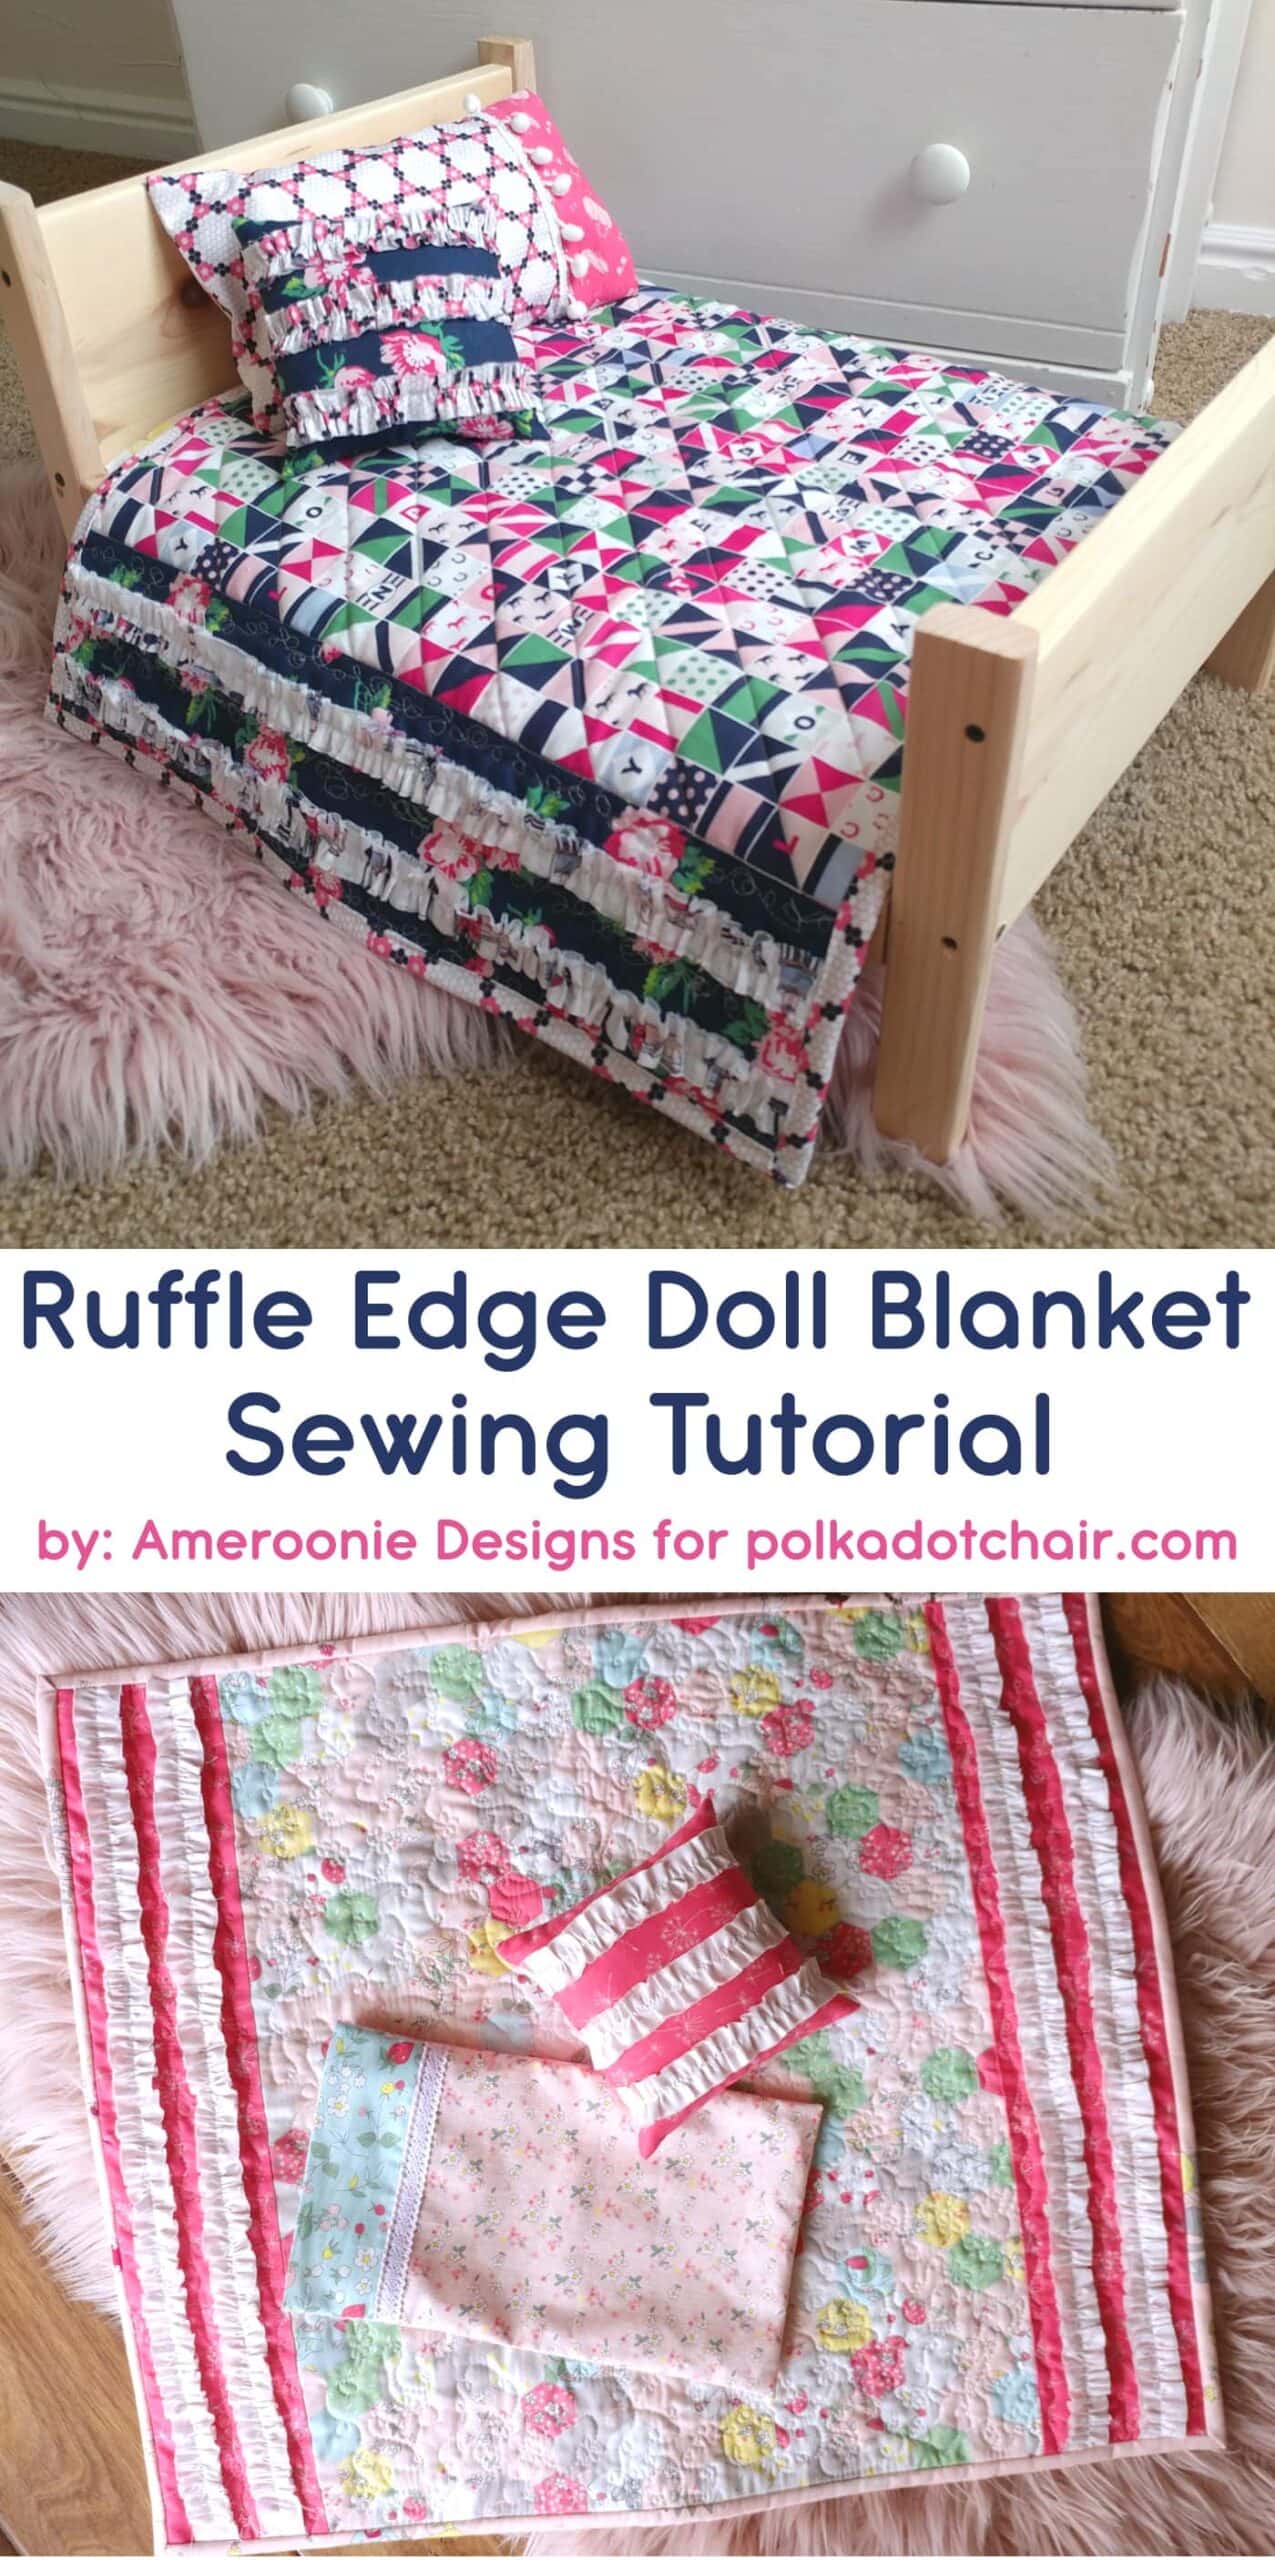
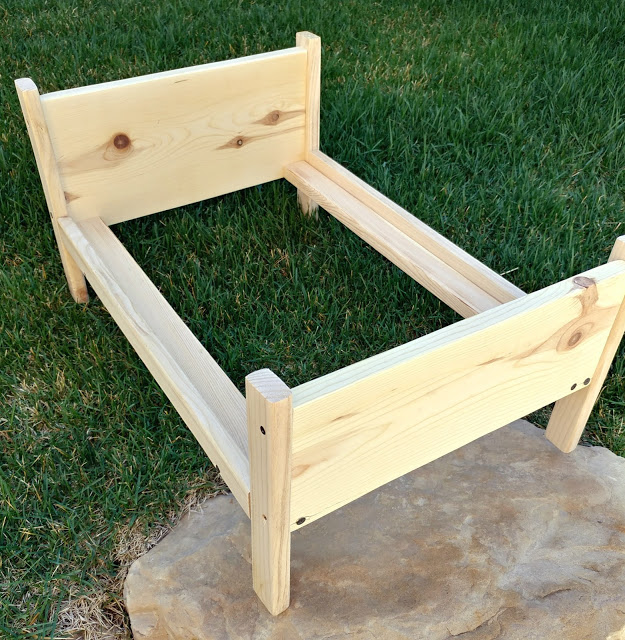
This quick project is a great way to show off your favorite fabrics, practice your quilting techniques, and make a little girl happy- all at the same time! The ruffle edge trim sets this sweet quilt apart, making it playful and fun. The measurements I am including fit this bed (which I will share the directions for on my blog), and it has measurements similar to the doll beds at Ikea. But, it would be simple to customize to the size of whatever doll bed you have.

Ruffle Edge Doll Quilt Tutorial

Ruffle Edge Doll Quilt Tutorial
Equipment
- quilting ruler
supplies
- 1/2 yard main print if the print is directional, get 2/3 yard I used Serendipity by Minki Kim and Derby Day by Melissa Mortenson
- 1 fat quarter fabric for side accents
- 2/3 yard backing
- 1/4 yard binding
- 1/8 yard ruffle fabric
- batting I used sew-in fleece by Thermoweb
Instructions
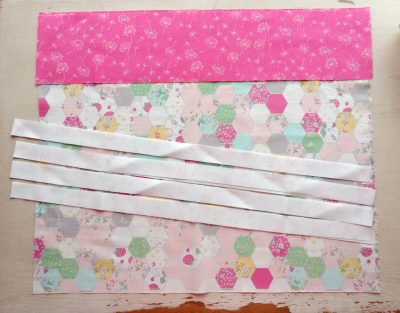
Cutting Instructions:
- *if your doll bed is a different size, measure how wide it is across the top and cut your main print that width + 1/2″; if your bed is taller than 4 1/2″ from the top of the mattress to the floor, you can add that difference to either the main print or adjust the side panels. Still, you may need to place your ruffles differently.

- from main print: 20″ X 17″
- from side accent fabric: 2- 5″ X 21″
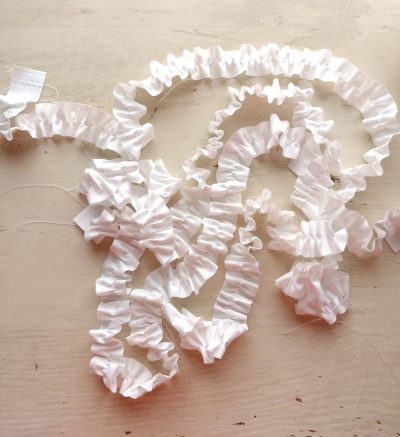
- from ruffle fabric: 4- 1″ X WOF (width of fabric)
- from backing: 20″ X 26″
Instructions to make Doll Blanket:
- Use your favorite method to gather your four ruffle strips down the center.

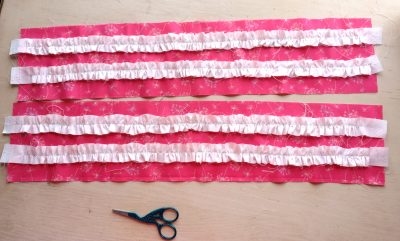
- Pin the ruffles 1″ in from both sides of accent fabric pieces, and sew along the gathering line. Trim side accent pieces down to 20″ wide.

- Sew the two accent pieces on either side of the main accent fabric.
- Your quilt top is done!! Can you believe it?? This would be a fantastic project for beginning sewists; replace the ruffles (which can be tricky to pin and sew) with glue on the ribbon, ricrac, or pom trim and have them piece the top.
- Finish your mini quilt as desired.

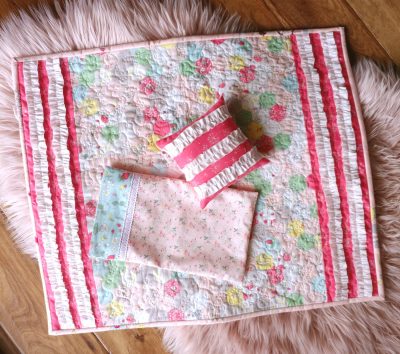
To Make the Doll Pillow:
- I followed this tutorial by My Childhood Treasures to make the pillow and pillowcase. It’s a clever and quick project, another excellent beginner sewist project!
- For the accent pillow, cut 2- 6 1/2″ squares and 3- 1″ X 13″ strips. Gather the strips as you did for the quilt, and sew them on one of your squares 1″ in from each side and centered in the middle (there should be 3/4″ between the strips). Sew around all four sides, leaving a 2″ opening for turning. Turn the right side out, fill it with fiberfill, and stitch it shut.

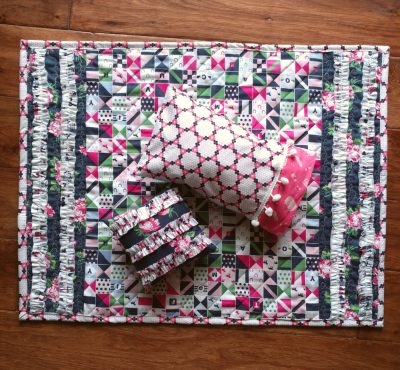
This fun quilt can be finished in an afternoon, which is always satisfying! As always, if you have any questions, please don’t hesitate to ask! I hope you have fun sewing these up and that the lucky little girls who get them have fun playing with them!
About the Maker:

Hello! I’m Amy Chappell, the person behind Ameroonie Designs. I’m a sewing and quilt pattern designer, and I’m proud to say that my work has been featured in several print publications and popular DIY websites.
I am the mom of six kids- which is a big reason I create and sew. I find that I am happiest when I am making things, and taking time to be happy makes me a better mom.
Join me in my exclusive Let’s Sew Friends membership, where you’ll find small, manageable monthly sewing patterns, live classes, and lots of video tutorials!
Other Fun Sewing Tutorials by Ameroonie Designs:
Teacher Appreciation Gift: DIY Lunch Bags
Other Tutorials you may love:
How to make a Fabric Scallop Banner
Patchwork Star Baby Quilt Tutorial