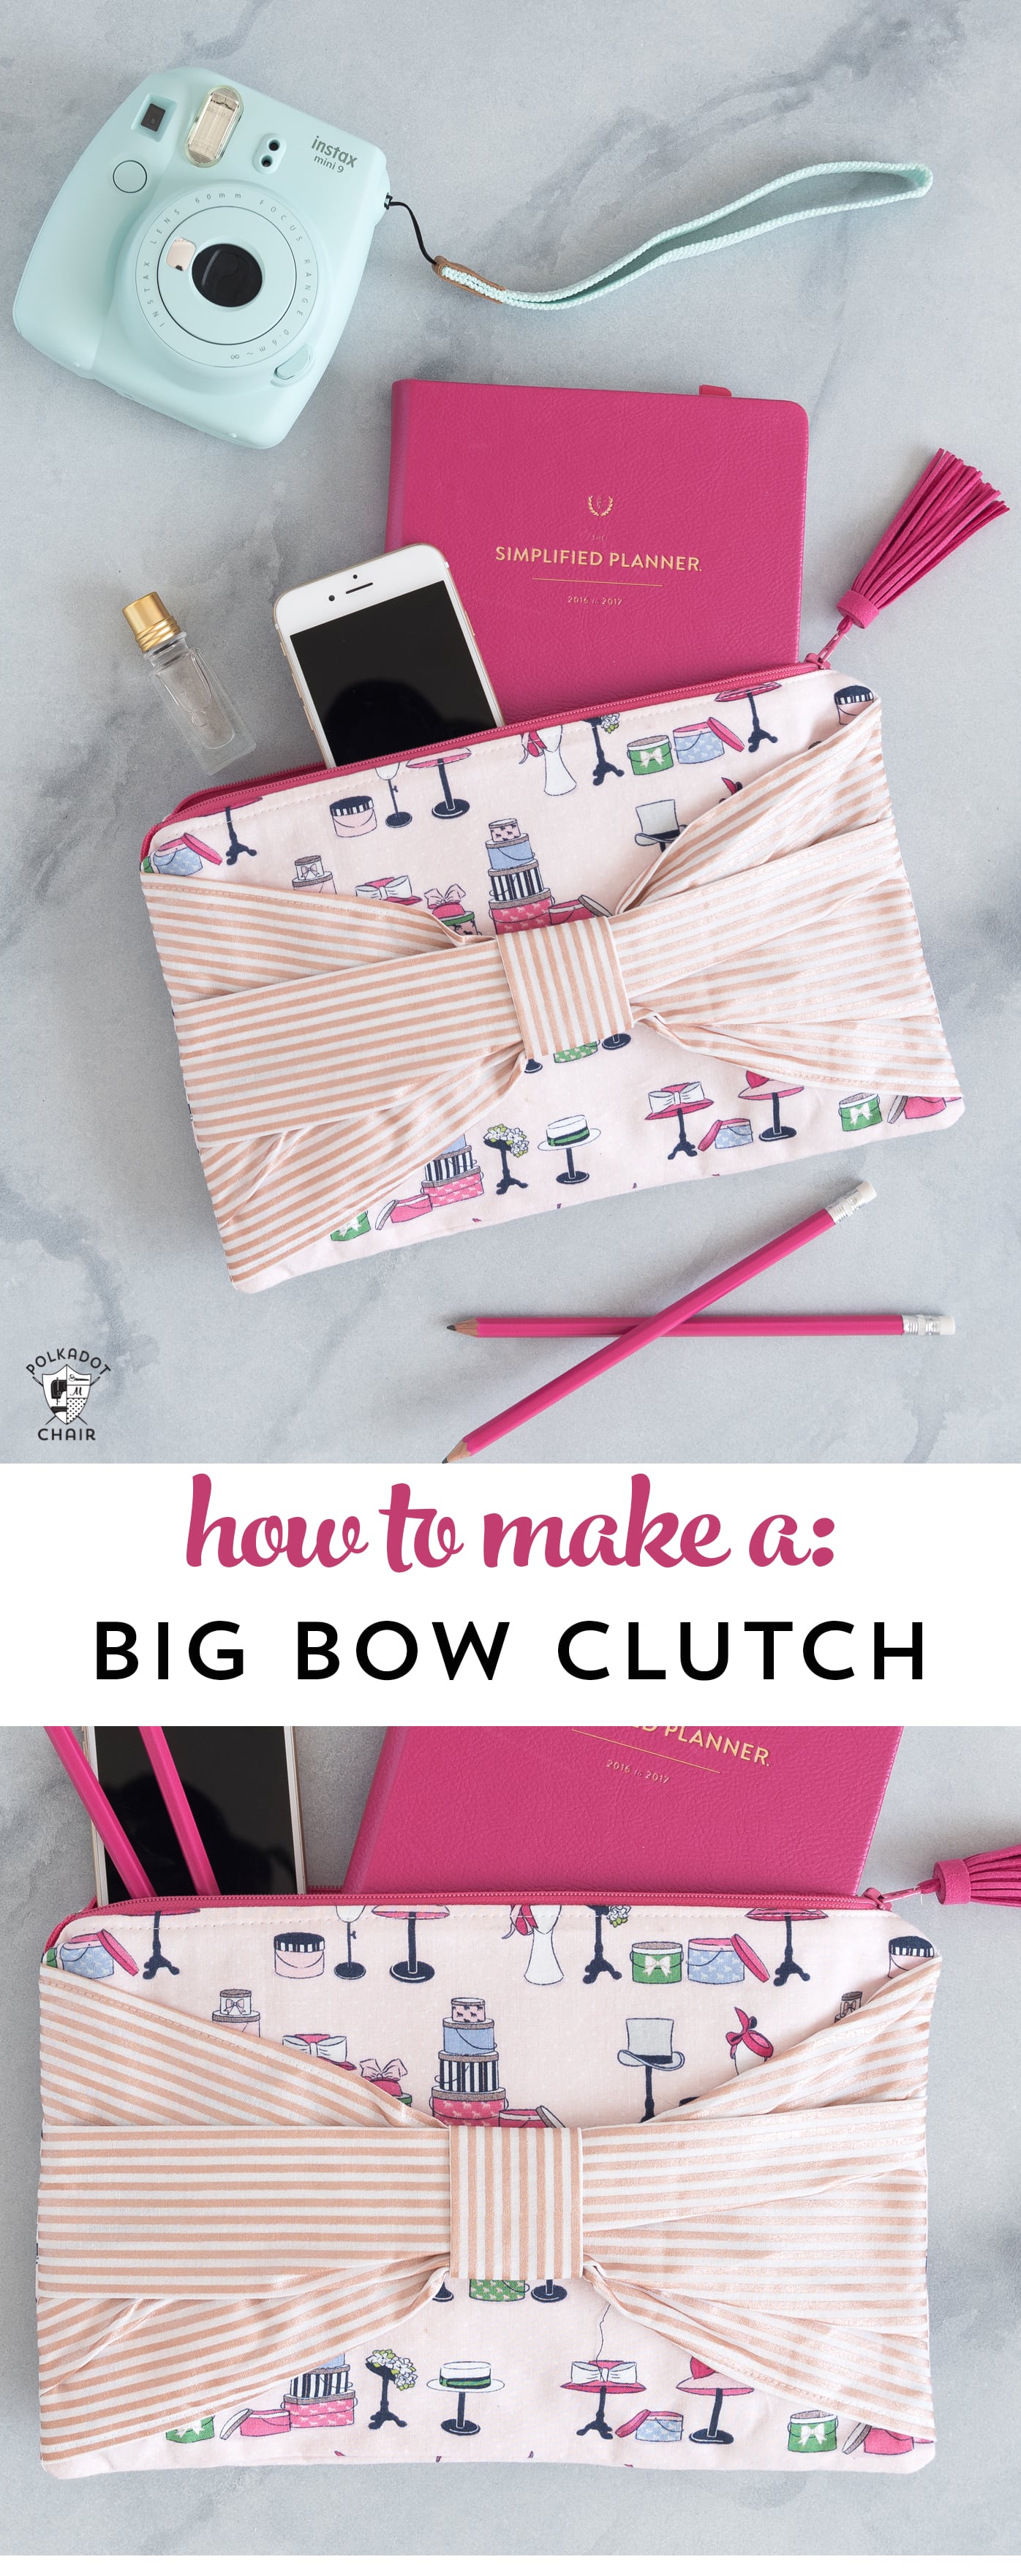
Giant Bow Zip Pouch; A DIY Zip Bag Sewing Tutorial
Learn how to sew a zip pouch with a giant bow on the front with our free bow zip pouch sewing pattern. If you like this project, you may also like this Fat Quarter Zip Pouch Sewing Tutorial.
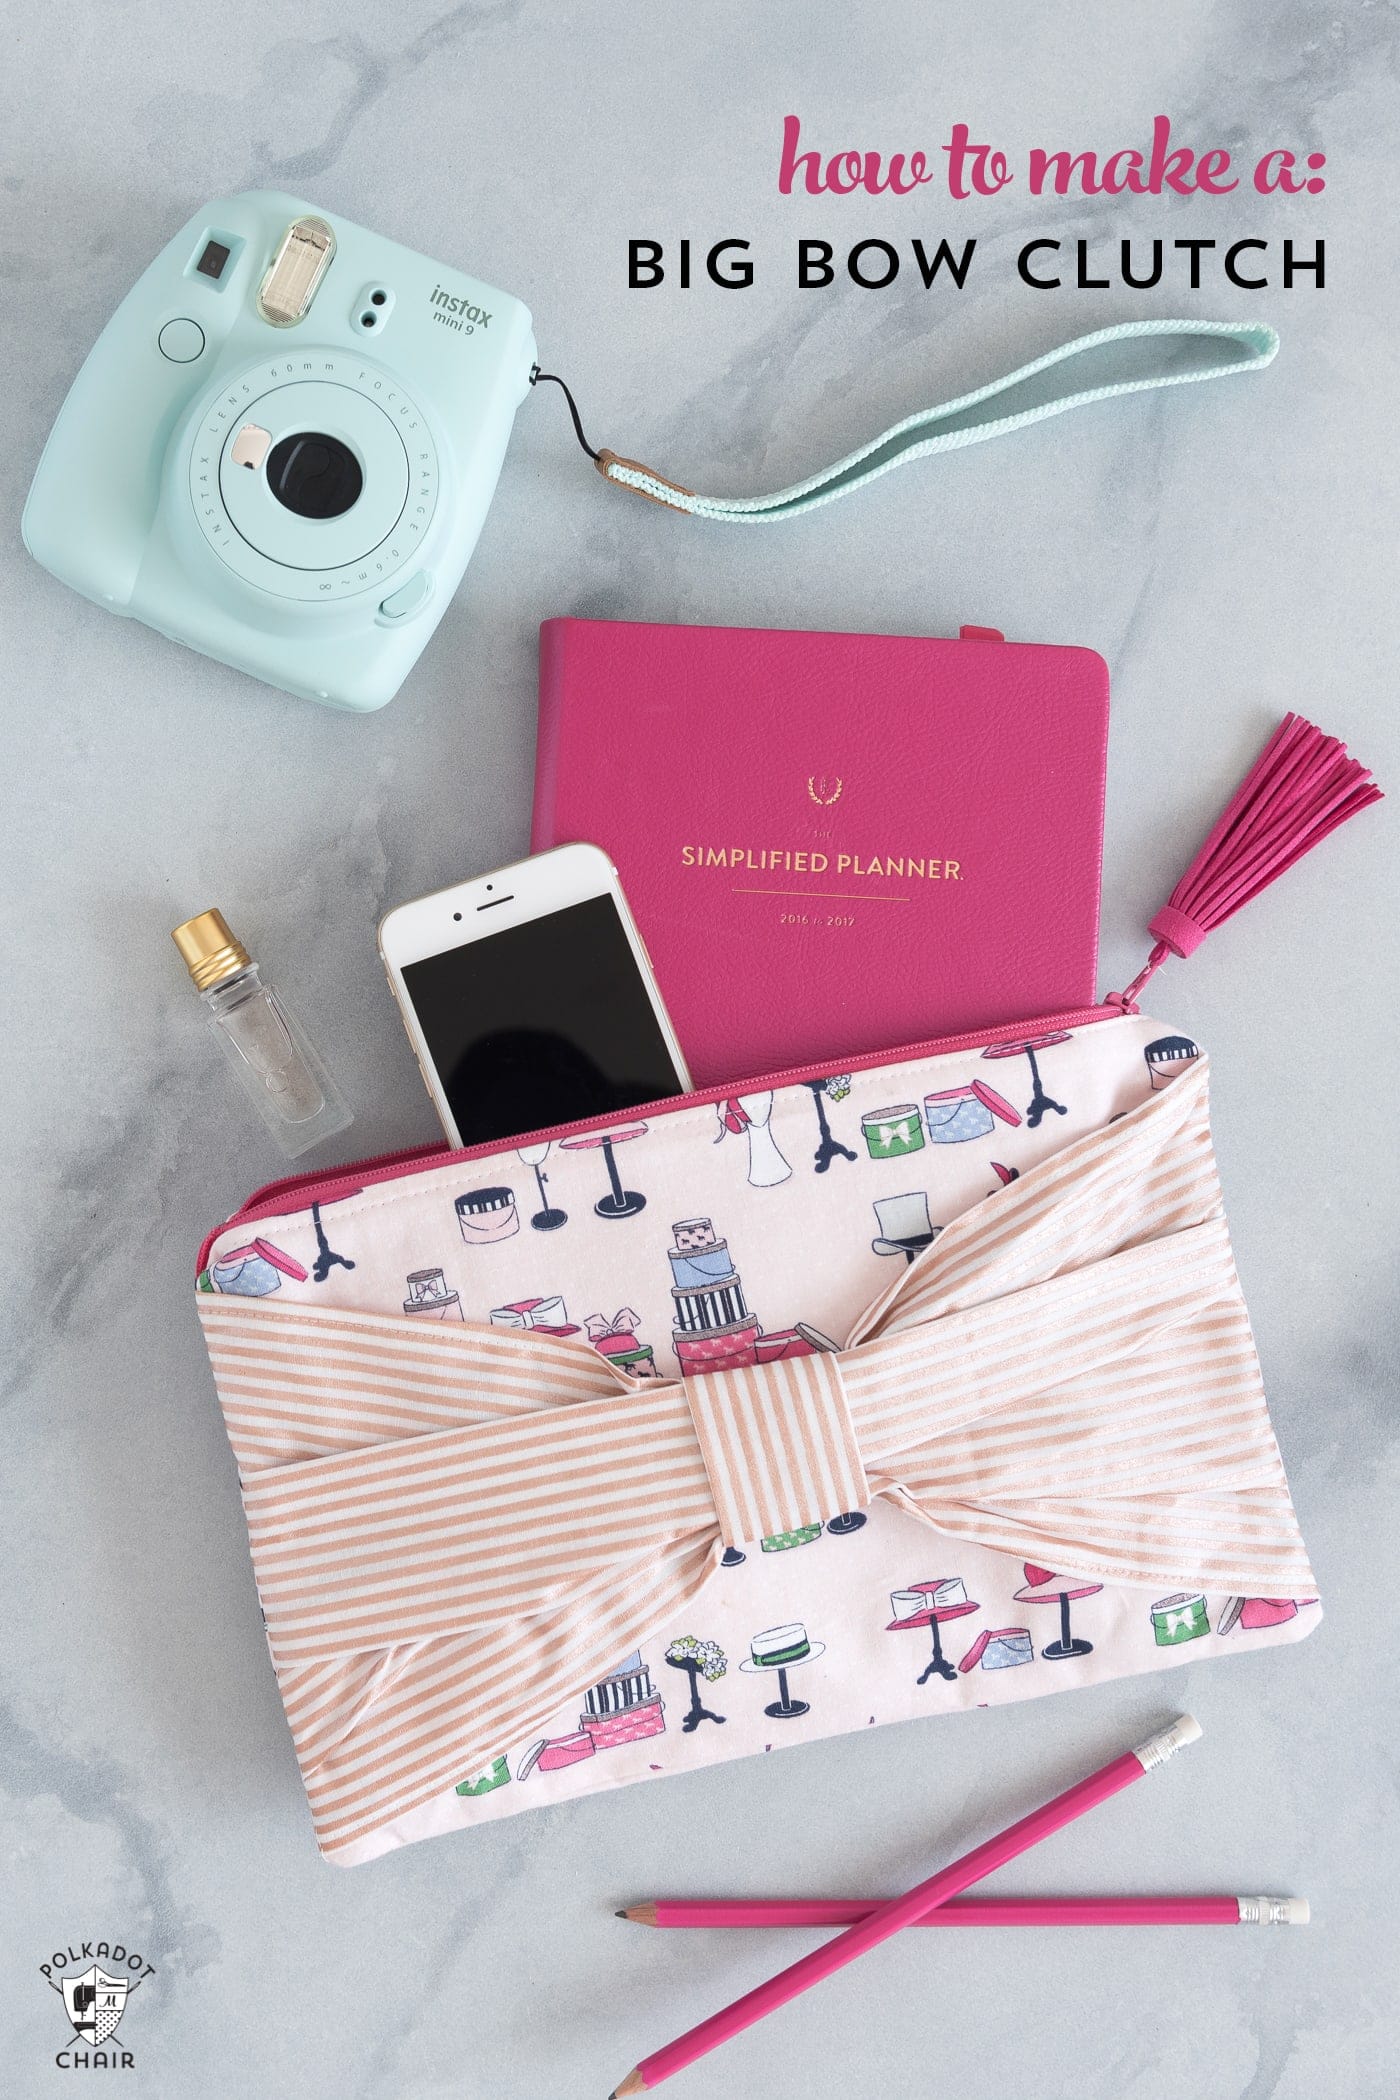
Are you looking for a fun and practical sewing project perfect for beginners and experienced sewists? A zip pouch with a giant bow on the front is the ideal combination of practicality and cuteness!
This pouch is excellent to use to organize your bag, and it makes an adorable gift.
This tutorial will guide you through making a zip pouch with a bow detail.
You’ll learn essential sewing techniques, including inserting a zipper, shaping your pouch, working with interfacings, and, most importantly, how to make the bow look so cute!
Grab your favorite fabrics and sewing machine, and let’s begin!
This clutch is the project I taught in my class at the SNAP Conference several years ago, and I’m excited to share the tutorial with you today.
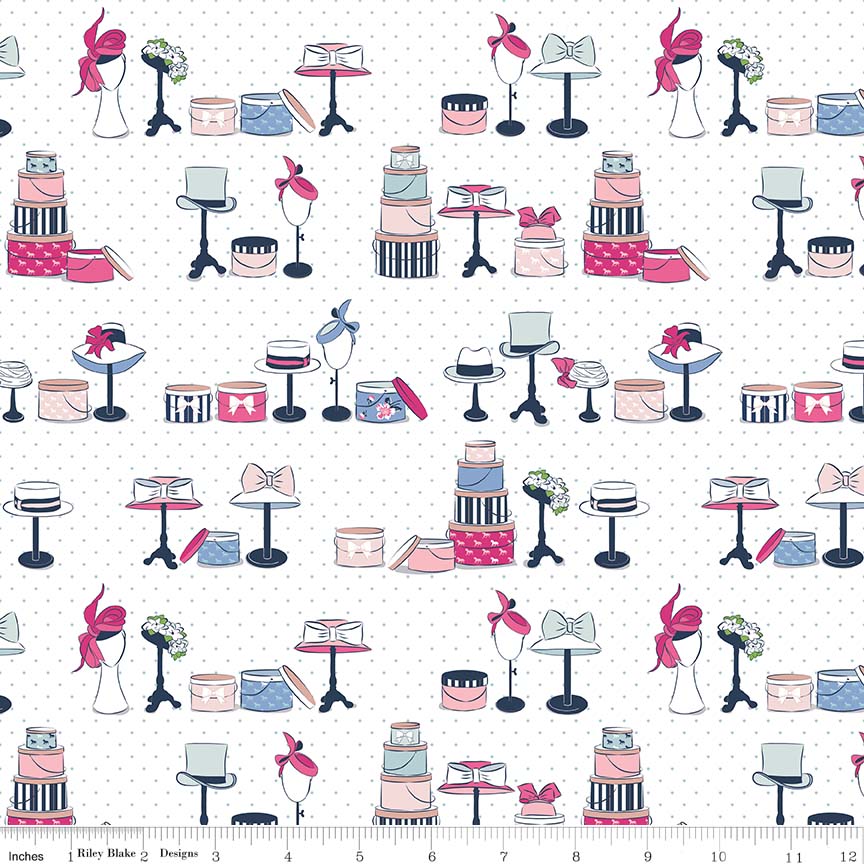
I created this clutch for my booth at the quilt market to showcase my Derby Day fabrics. My grandma’s collection of hats inspired the fabric print on the clutch. She was so stylish and always wore a fabulous hat!
If you’re looking for a simple DIY clutch to take to services on Easter Sunday, then you might love today’s project.
Big Bow DIY Clutch Pattern Tutorial:
Giant Bow Zip Pouch: A DIY Zip Bag Sewing Tutorial
Equipment
- quilting ruler
supplies
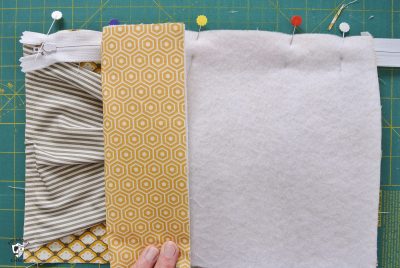
- 2 pieces of fabric 8” x 12” for clutch outside – Riley Blake Derby Day Fabrics- Haberdashery Print in Pink
- 2 piece of fabric 8” x 12” for clutch lining
- 1 12” or 14″ zipper – Hot Pink – from ZipIt on Etsy
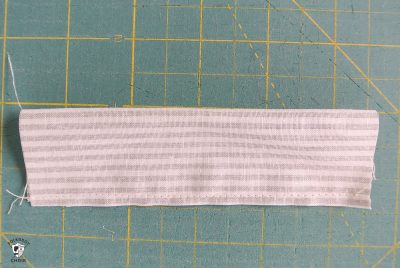
- 1 piece 9” x 14” Fabric for the bow –Riley Blake Rose Gold Stripe
- 1 3” x 5” Fabric Piece for the bow center
- 2 pieces fusible fleece cut to 8” x 12” – Pellon Fusible Fleece
- 2 pieces Shape Flex interfacing cut to 8″ x 12″ Pellon SF101 Shape-Flex Woven Fusible Interfacing White
Instructions
Step 1:
- Fold under the raw edge of the long side of the bow piece a scant ¼’’
- Fold over again. Press in place and stitch along the fold.
- Repeat for another long side of the bow piece.

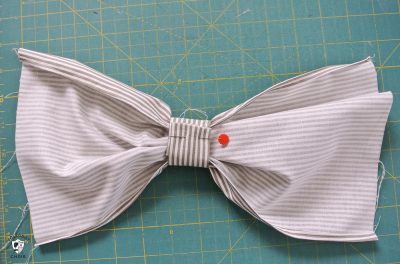
- Fold the 3’’ x 5’’ stripe piece of fabric half lengthwise. Stitch with a ¼’’ seam.
- Turn right side out and press so the seam is in the center.

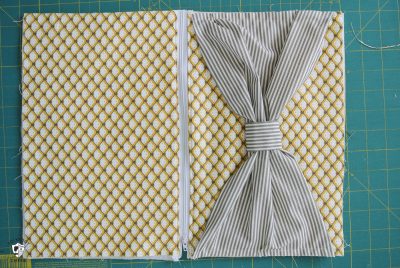
- Find the center of the bow piece. Mark it. Gather the bow loosely and wrap the sewn bow centerpiece around the bow.
- Pin in the back. You can make the bow “pretty” at the end.
Step 2:
- Apply the Shape Flex Interfacing to the wrong side of the two clutch outside pieces. Apply the Fusible Fleece to the wrong side of the two clutch lining pieces.
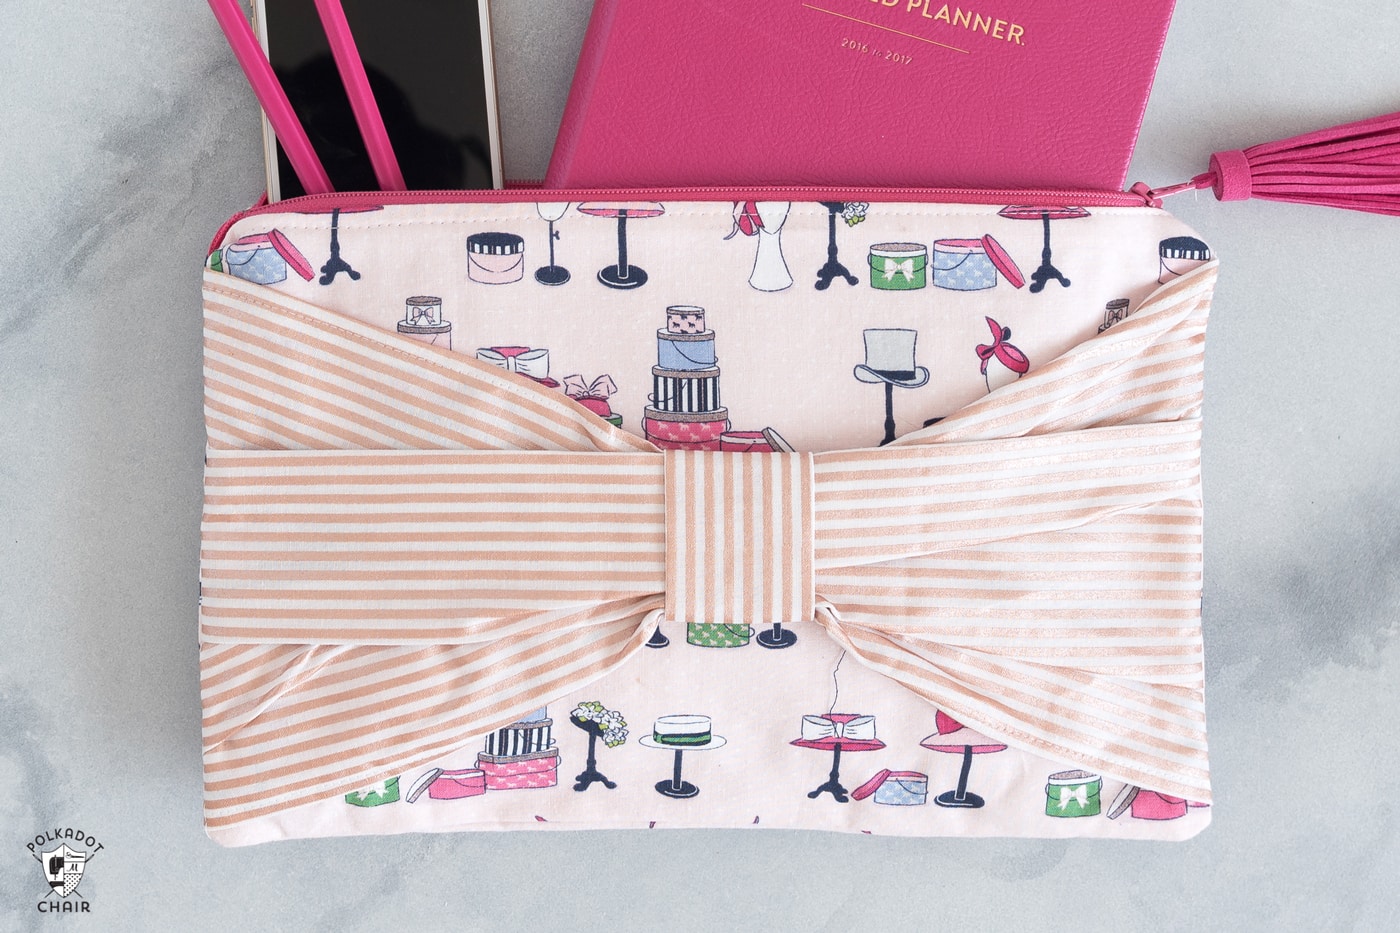
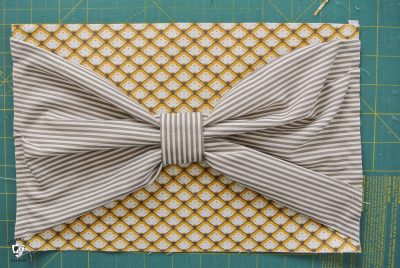
- Pin the bow to one of the clutch outside pieces. The bow corners will be folded under and ½” in from the top and bottom of the clutch piece. The bow will be bigger than the clutch at the centers.
- Stitch with the bow facing the sewing machine’s feed dogs using a basting stitch close to the edge of the clutch piece.
- Trim the bow flush with the edges of the clutch
Step 3:
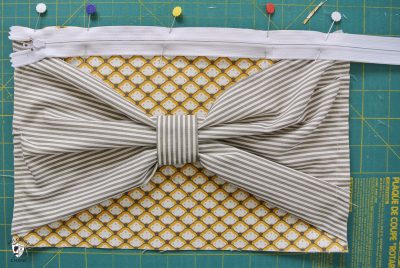
- Pin your zipper’s right side to the clutch top’s right side. The raw edge of the zipper is even with the raw edge of the clutch.
- The zipper will be longer than the clutch- that’s okay. Pin it so that the zipper starts at the edge of the clutch.
- Trim off the excess zipper. Press the seams of the clutch away from the zipper.

- Top stitch along both sides of the zipper with your zipper foot.
- Unzip the zipper ¾ of the way. NOT ALL THE WAY!
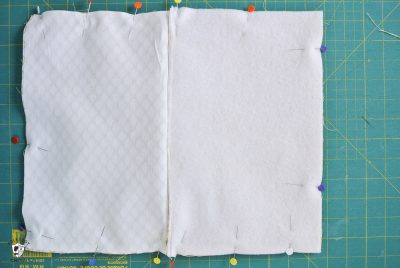
- Pin the clutch front pieces together right sides facing; pin the clutch lining pieces together right sides facing. Fold the zipper towards the clutch lining. With a ½” seam allowance, stitch around the entire clutch, leaving a 4’’ opening in the bottom of the lining piece.

Finishing:
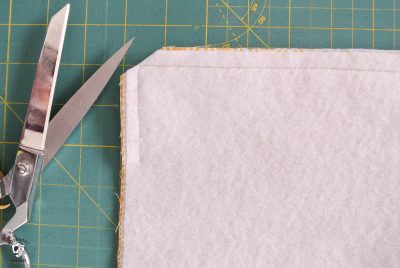
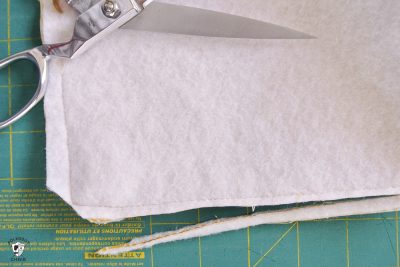
- Trim off all four corners of the clutch.
- Trim the seam allowance of the lining sections of the clutch down to 1/8”. Turn right side out and press.

- Hand or machine stitch the opening in the lining closed. Arrange the bow on the front so that you like how it looks, and hand stitch the bow center in place.

I love this!!!! Thank you for sharing!!!!
This is looked fab for the occasion! I will make one for my sister right now.
I’m making one for Easter ? love it.
I’m so glad you like it!!