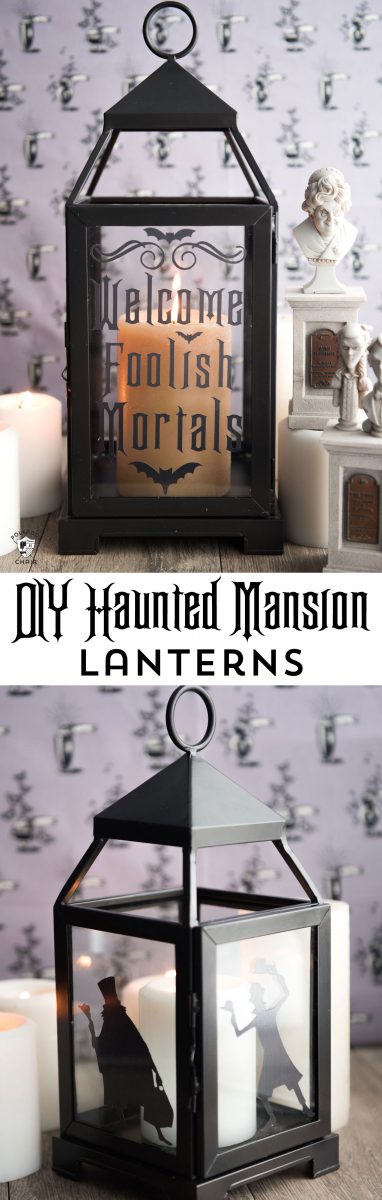
DIY Halloween Lanterns & Free Haunted Mansion SVG Files
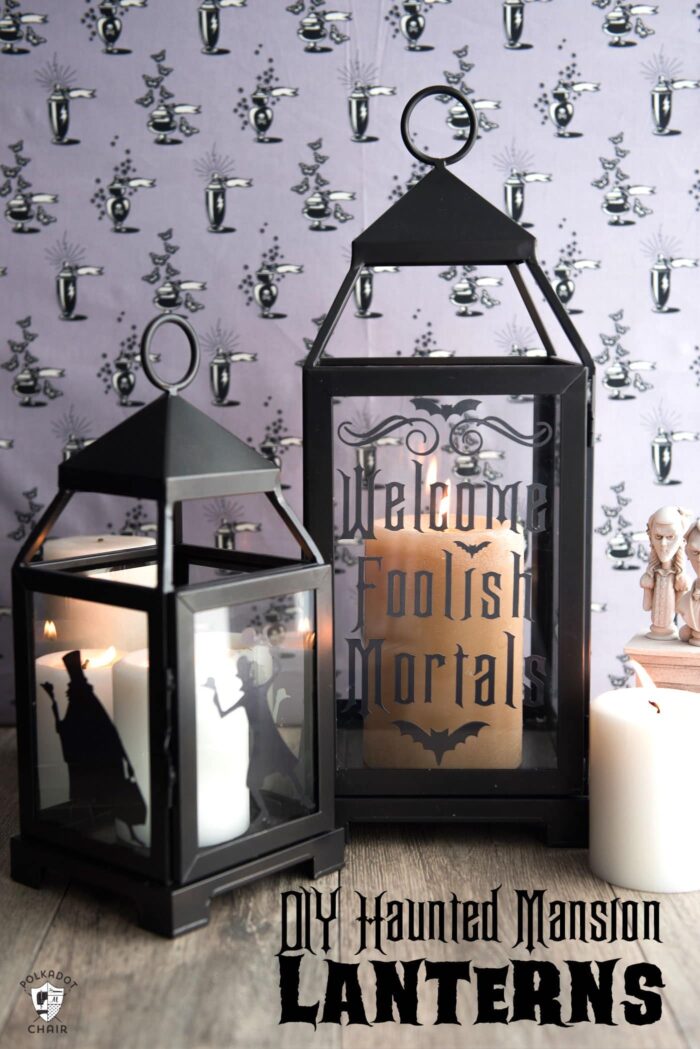
I’m a huge fan of the Haunted Mansion ride at Disney World. So, Halloween is the perfect time to deck my house out in Haunted Mansion decorations! Last year I made this “Beware of Hitchhiking Ghosts” over the door sign, and this year, I’ve created these fun lanterns. Keep reading to find out how to make them yourself and how to grab a free Cricut cut file for the designs.
Today, I will share a craft inspired by the Haunted Mansion ride at Disney World. My kids like to tease me that I like the Haunted Mansion ride a little “too much.” It’s true, I love it. I love the creepy caretaker, the silly singing ghosts, and the wallpaper with the eyes staring back at you. I dream of a dinner party as fun as the one with the dancing ghosts in the ride.

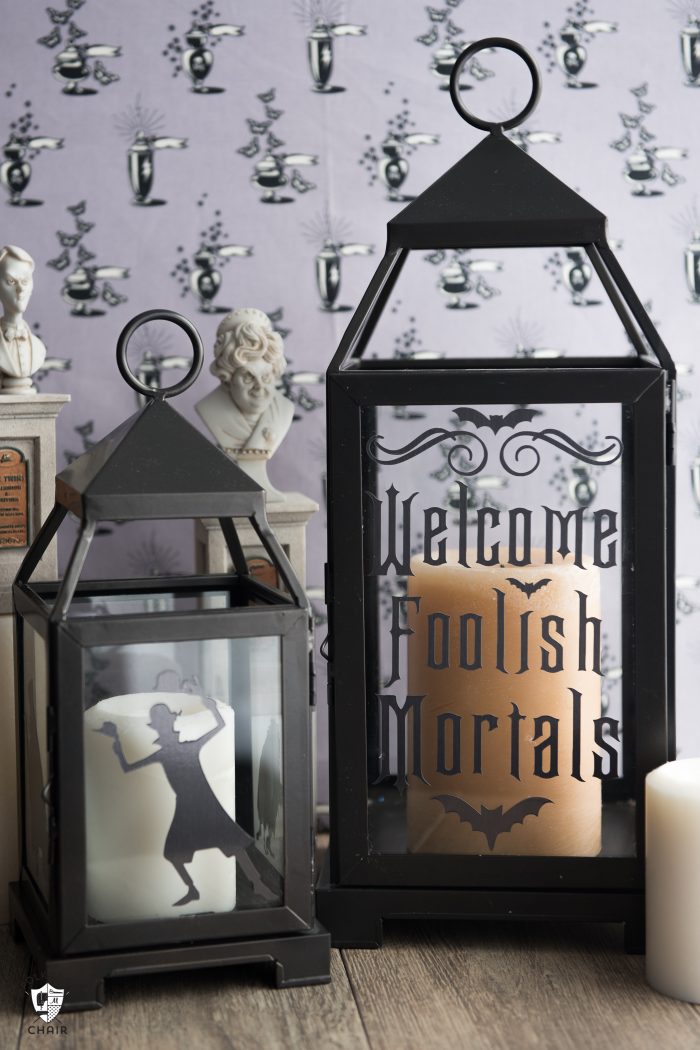
I’m going to show you how to turn some plain black lanterns into Haunted Mansion lanterns very simply. You’ll need an “e” cutting machine for this. I’ve provided two free cut files for you to download. The best part about this project is that after Halloween, you peel the images off the lantern, and you can reuse them for other occasions.
About the Haunted Mansion Lanterns
Supplies Required
- Cricut Machine – I used the Maker machine. You can also use the Explore Series Machines.
- Cricut Adhesive Foil. Which is kinda of like really thick aluminum foil. It gives the lanterns a great texture, and I love how the light bounces off of the foil.
- Black Lanterns with Glass – You can also find similar ones HERE. Make sure they have glass or plastic panels; not all lanterns do.
- Recommended: Cricut BrightPad
Haunted Mansion Lanterns Directions
Step One:
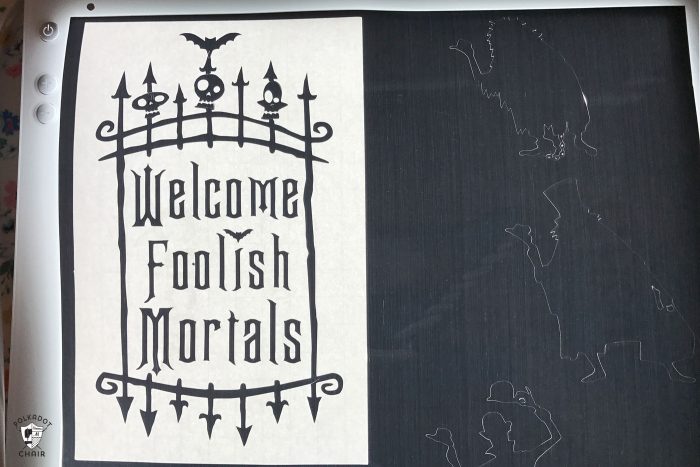
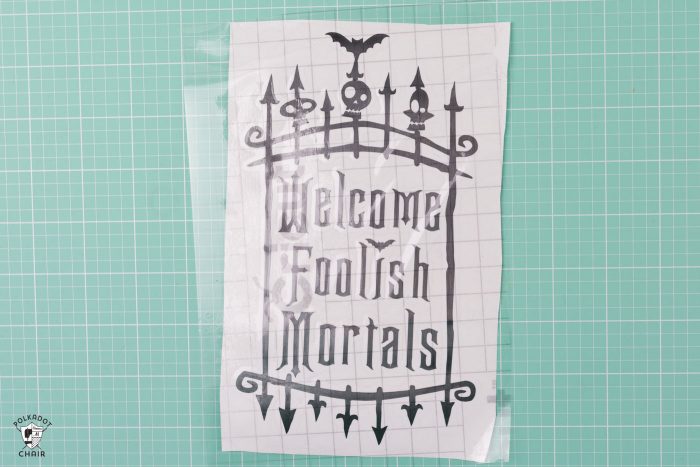
Begin by downloading the two free SVG Cricut files from my site. The “WELCOME FOOLISH MORTALS” text and the Hitchhiking Ghosts silhouette are included in the SVG bundle.
Step Two:
After you “design” your image the way you want it, make sure you click on all of your layers and click “Attach” in the Design Space so they all cut as one cohesive image.
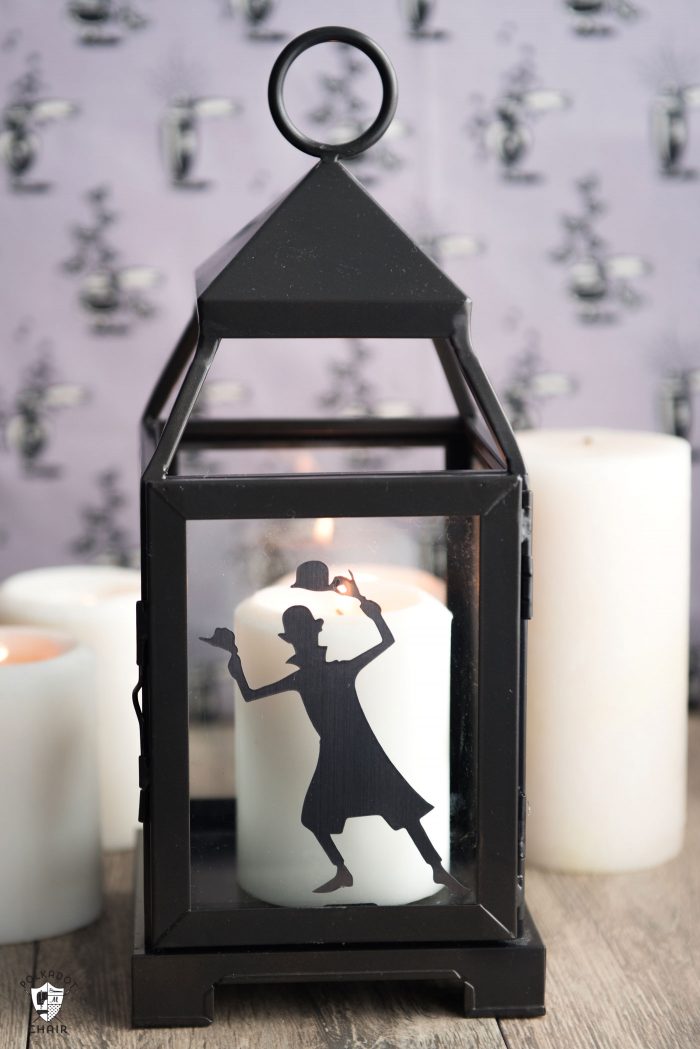
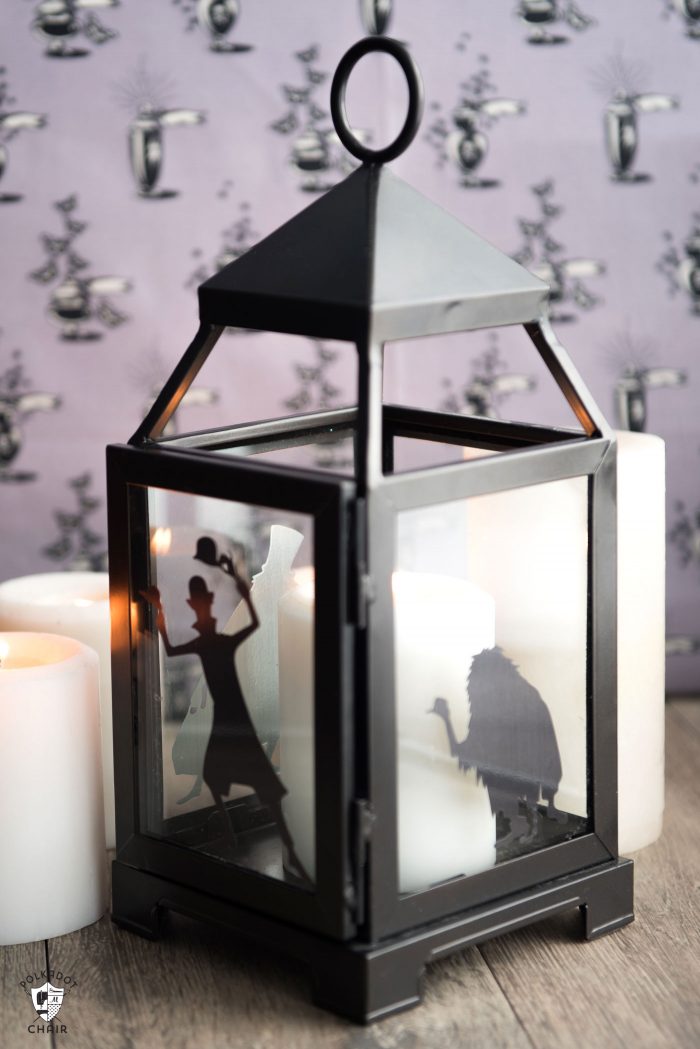
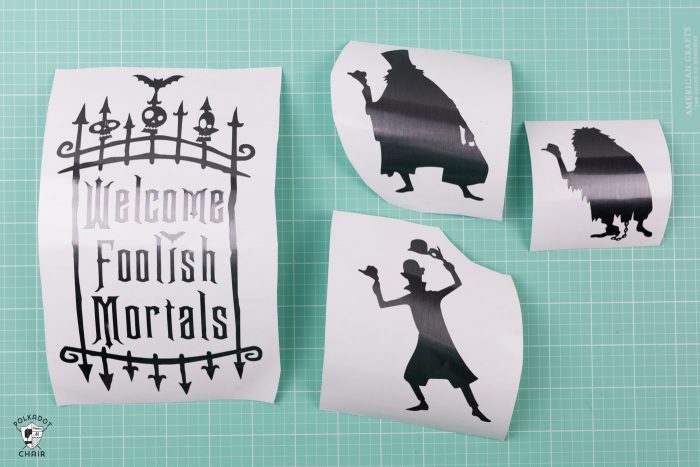
I made two lanterns. The Foolish Mortals version and Hitchhiking Ghosts.
I divided up the hitchhiking ghosts and put one on each side of my smaller lantern.
(note: After I made this cut out, I realized that the text was not big enough, so I changed it to the larger text you see on the lanterns above; the free cut file on my site is for the larger letters)

Step Three:
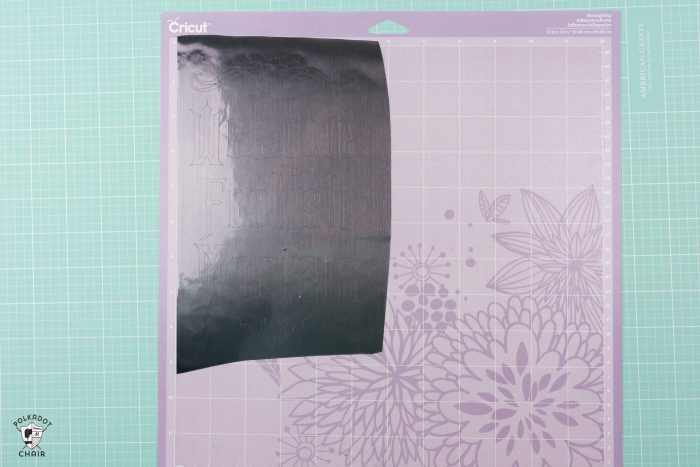
After you have your design set up the way you like, cut out your image with your machine onto your adhesive foil. I used the strong grip mat to cut out my image.
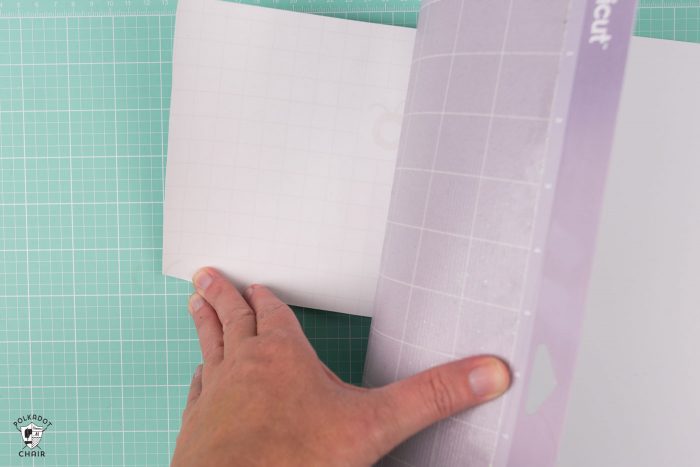
Here’s a tip: When you’re peeling off your cut, instead of peeling the cutting material, peel the mat. That way, your cut material will not wrinkle or curl.
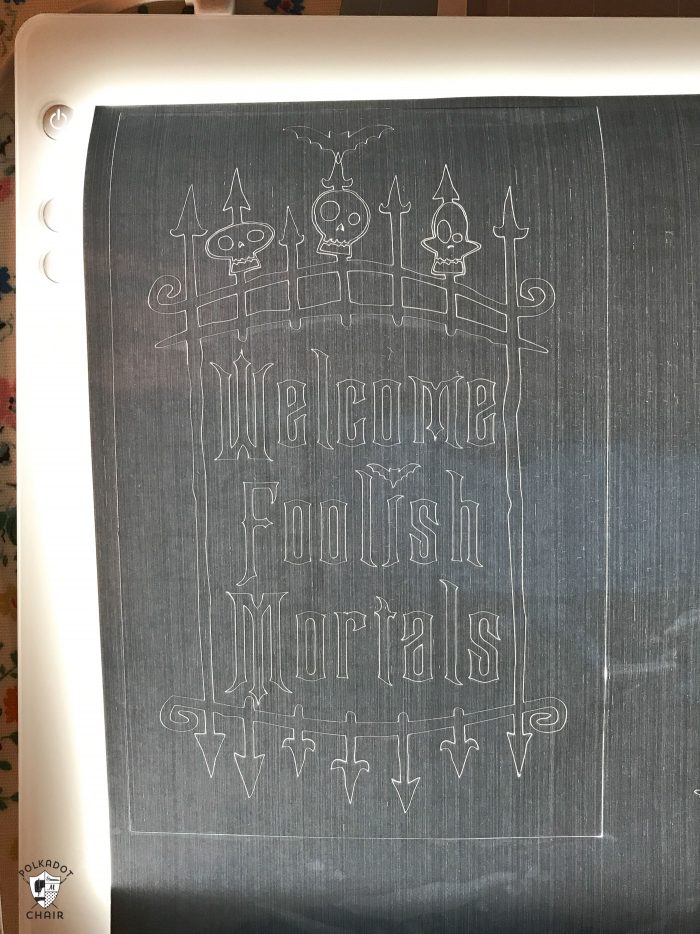
I then used my BrightPad to help me weed the extra vinyl. When you’re working with dark colors like this, it’s especially helpful!
**reminder, the files in the bundle are the ones on the finished lanterns, not the one pictured below.
Step Four:
Remove the excess from around your image and apply a piece of transfer tape to the front.

Then, apply the image to the lantern. Use a credit card or plastic scraper to get it to stick well, then peel away the transfer tape.
That’s it!
Easy peasy!!
More Halloween Craft Projects;
Free Printable Halloween Treat Bags


Nice use of the Tula Pink fabric in the background.
Lanterns, luminaries, all things lights are my favorites!! This idea is so awesome, I gotta try it!
The lanterns are super cute but what I really want to know is where you got those graveyard busts that are in the pictures???? They are awesome!!
I LOVE The Haunted Mansion!!!! I had the big record and the big book that came with it back in the late 60s or very early 70s then my cousin stole it from me! I would like to know how you made the sign of the 3 hitchhiking ghosts last year!
Love your blog!!
have a wonderful day!
Teresa